Change the style of shapes
Customise how a shape or groups of on the drawing canvas look using the Style and Text tabs of the format panel on the right. The draw.io editor will automatically switch to the shape style panels when you select one or more shapes.
The original shape style uses a black outline and a solid white fill colour. å
Before you can style anything, you must select it. Click on a shape to select it, or hold Shift down and click on multiple shapes to select many.
The style options that you see will depend on the shape or shapes you have selected. For example, there are no corners on a circle or ellipse shape, so the Rounded option will not be available.
Context-sensitive shape styles: Once you have styled a shape, to add and connect a new one to that shape in the same style, hover over the existing shape and click on one of the direction arrows.
Style several shapes at once
To re-style several shapes at once, drag a selection box around them, or hold down the Shift or Alt key as you click on them. Now, when you click on a style in the format panel, they will all update at the same time. Only style options that apply to all the selected shapes and connectors will be visible.
Use the style palette to change colours
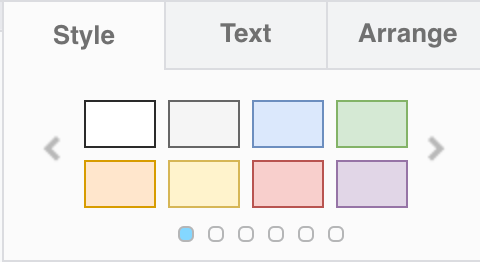
The style palette at the top of the Style tab changes both the fill and outline colour.
Click the left or right arrows or click on the page dots underneath the palette to view more styles.
If you are diagramming in dark mode, you'll see both a triangle for the light mode colour in the bottom right and the adapted colour for dark mode on top. By default, the editor automatically adapts the colours when you change to light or dark mode.

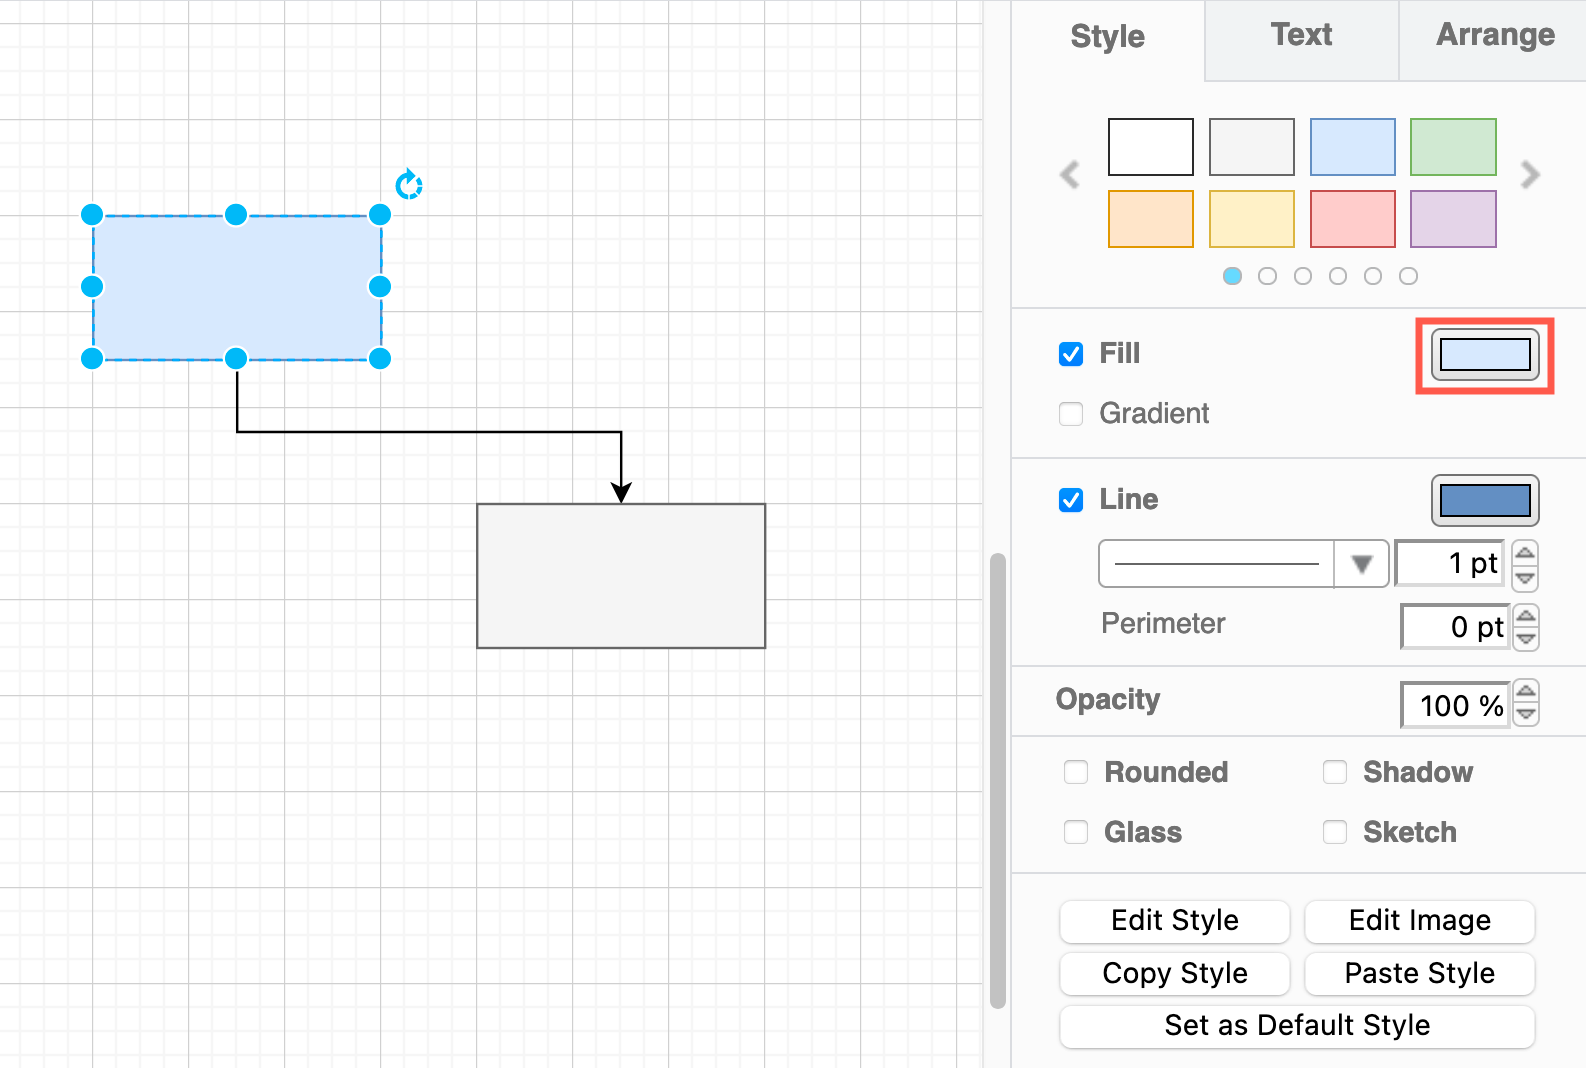
Change the fill colour or add a gradient
- Click on the colour button next to Fill to see the colour palette.
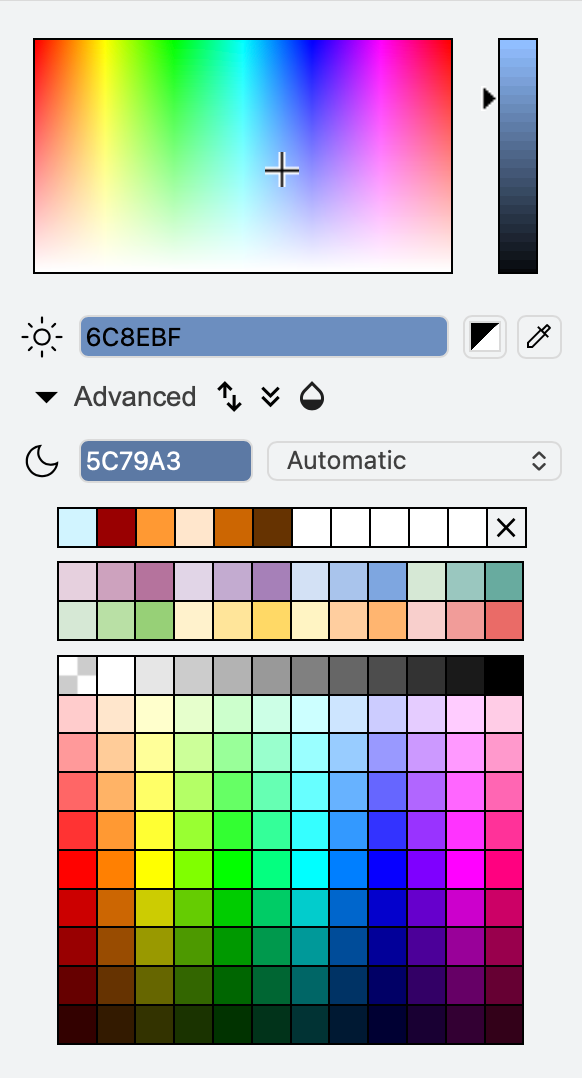
- Choose a new colour from the palette, or enter a colour's precise hex code in the text box (without the leading
#), then click Apply.
Additional fill options and effects
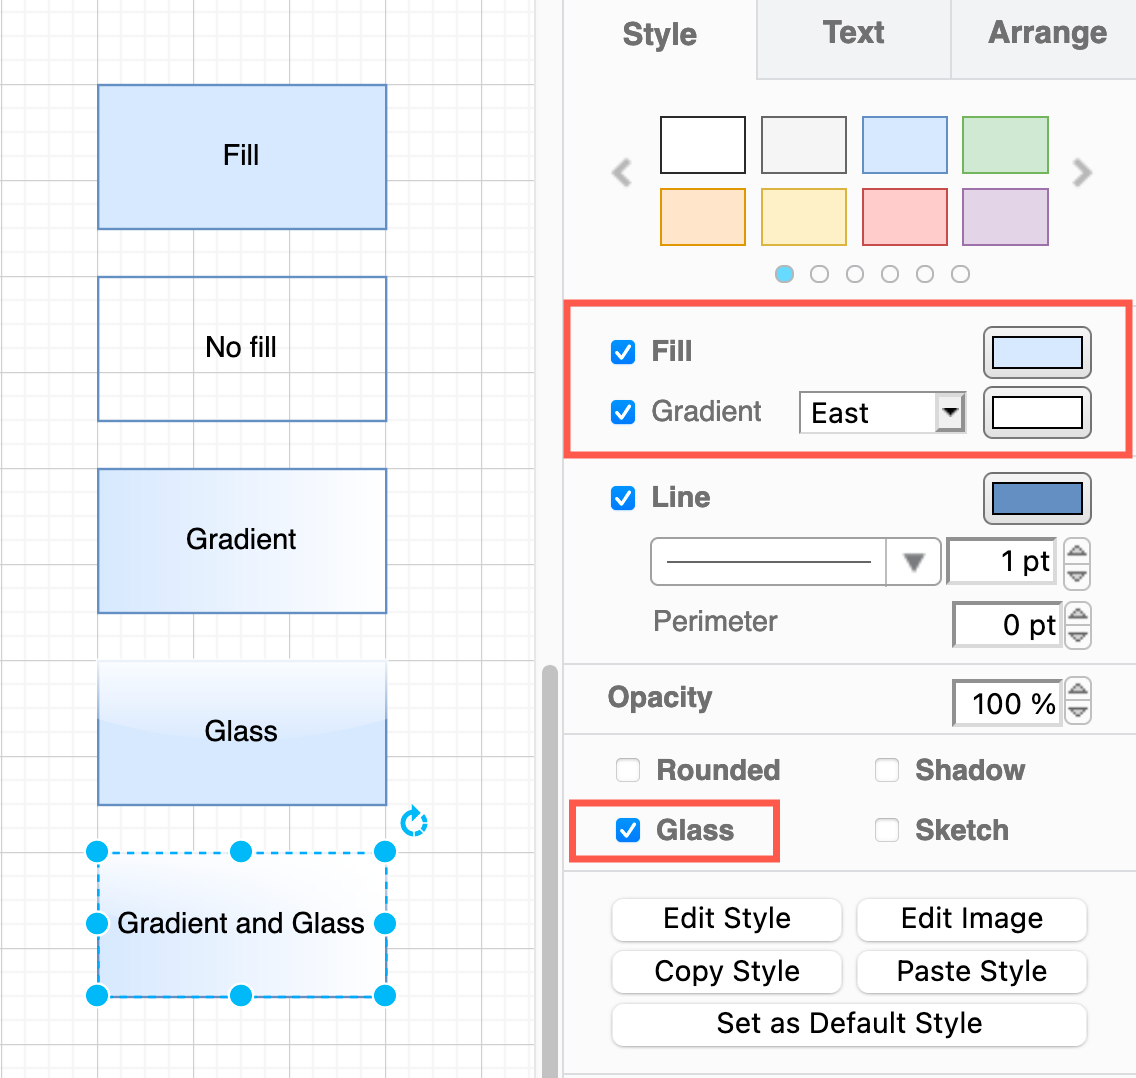
Gradient: Click the Gradient checkbox, select the direction in which you want the fill colour to change from the drop-down, and click on the colour button to select a new gradient colour from the colour palette.
Transparent: Deselect the Fill checkbox to remove the fill colour and make the background of the shape transparent.
Glass effect: Select the Glass checkbox to add a gradient to the fill and outline so that it looks like a reflective surface. You can have both a gradient and the glass effect enabled at the same time.
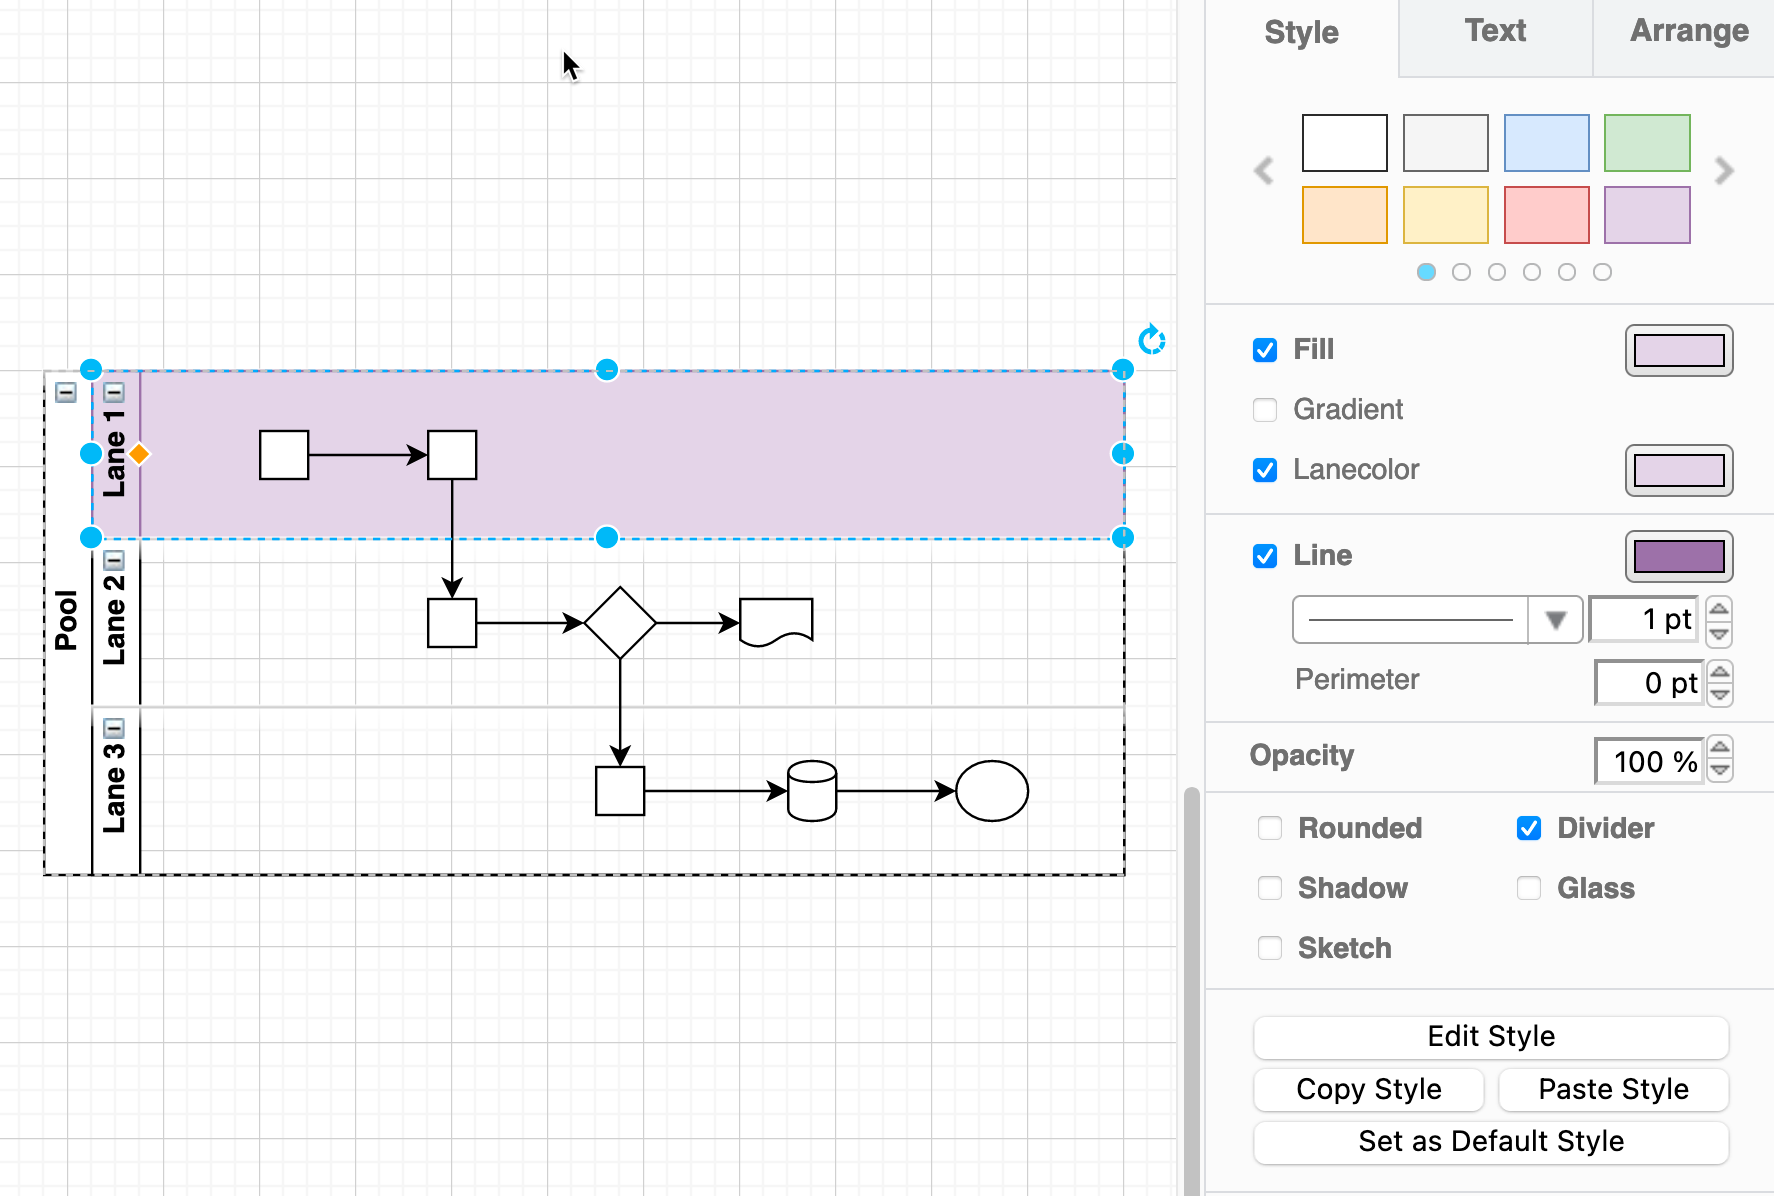
Lane colour: To add a fill colour to background of swimlanes, select the lane, then enable the Lanecolour checkbox. You can apply both a gradient and the glass effect to the swimlane background too.
Change the shape outline
- Click on the Line colour button, and select a new colour from the palette.
- Select a new line style for the outline of a shape from the drop down list. Choose between solid, dashed, and three patterns of dotted.
- Enter a new value in the textbox next to the outline pattern to make the line thicker. The default is
1pt.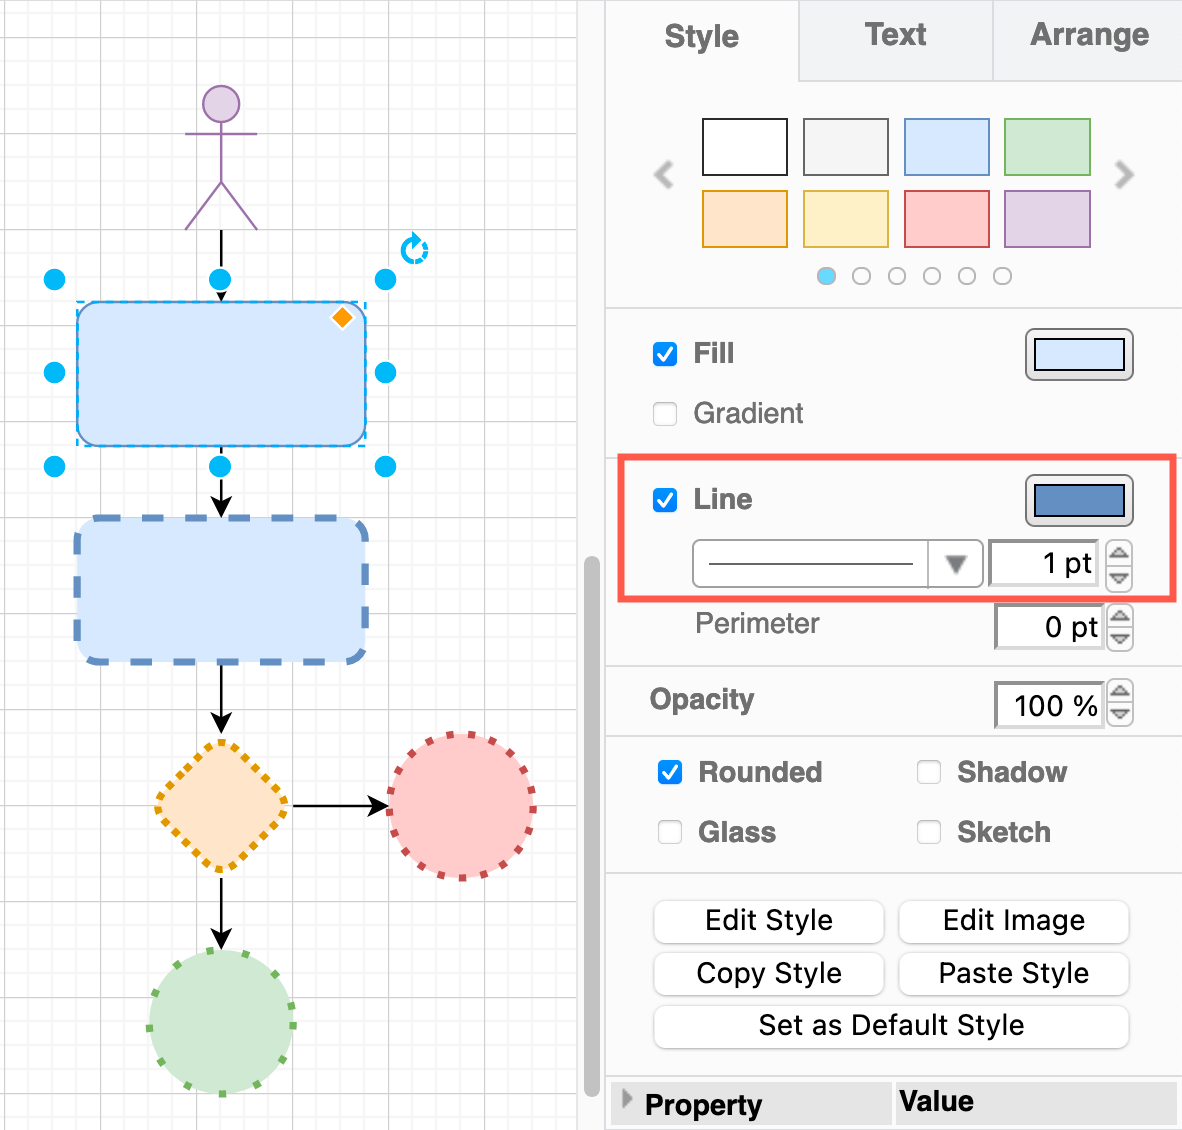
No outline: Click on the Line checkbox and disable the outline.
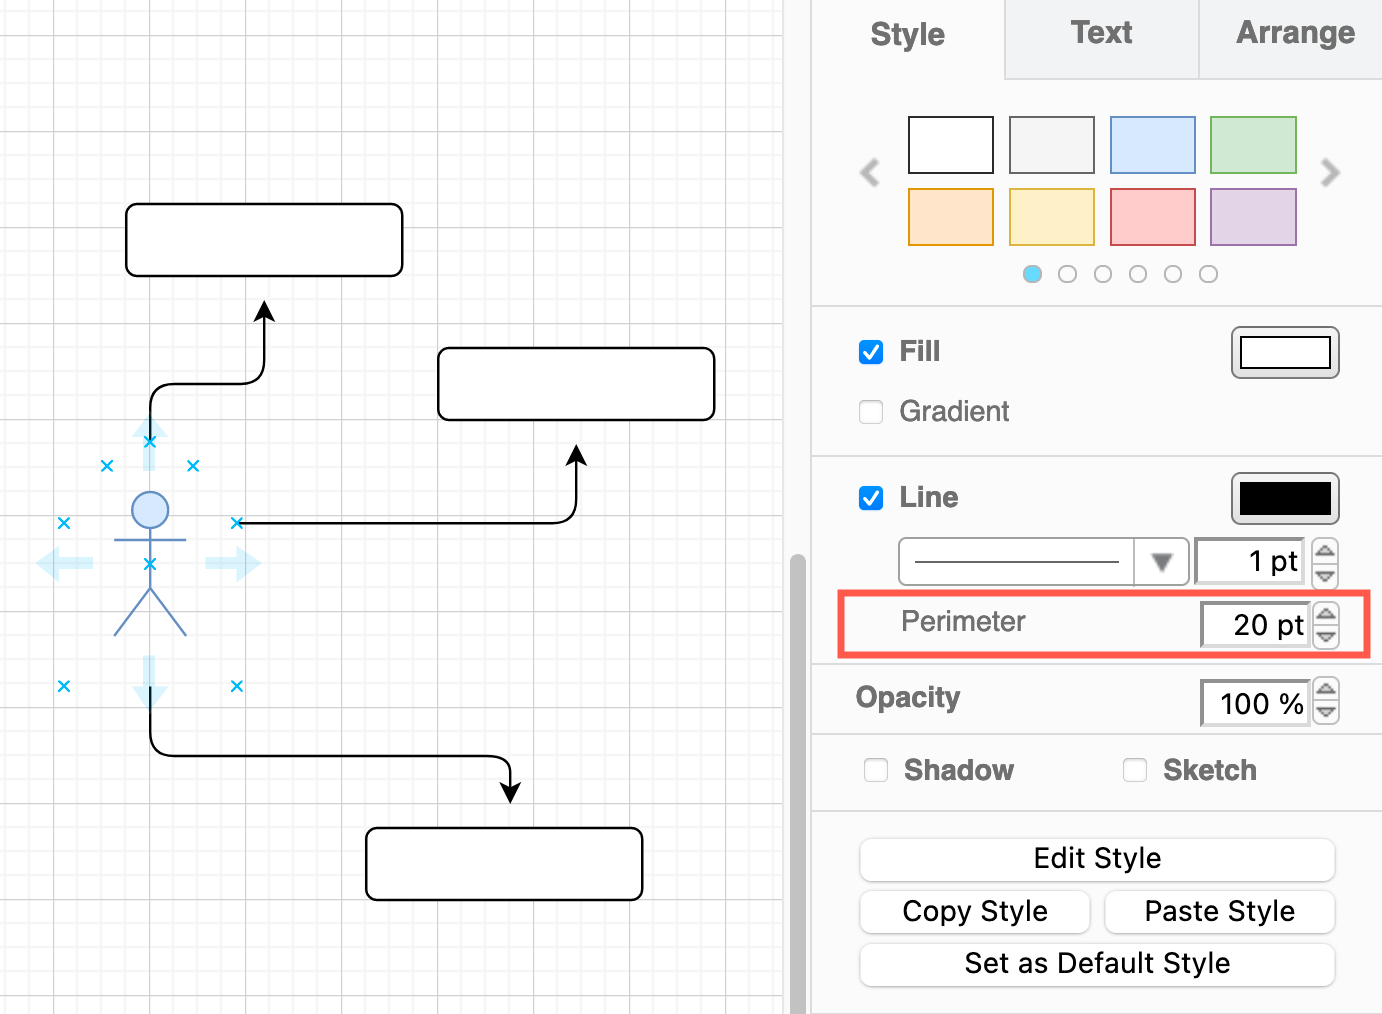
Add space around the shape: Enter a new value in the Perimeter checkbox to add space between the outline of the shape, and it's actual size. This will move the connection points and the outer edge that connectors connect to outwards, away from the outline of the shape.
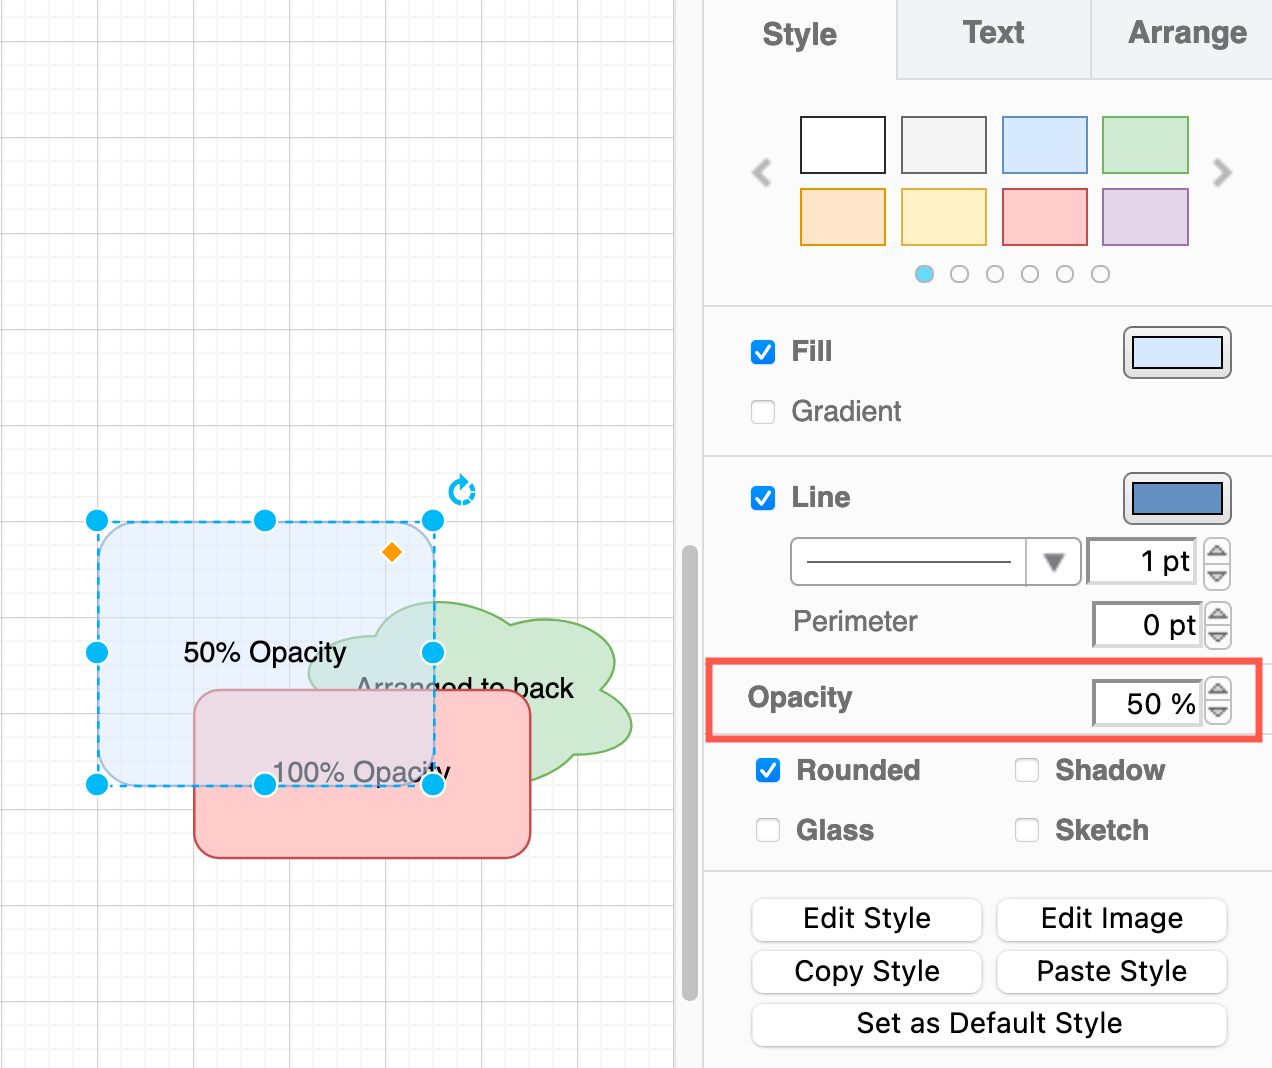
Change the opacity of the shape
You can make the shape more transparent, so that any shapes under it show through.
Enter a new value in the Opacity text field, or use the up/down arrows to change its value.
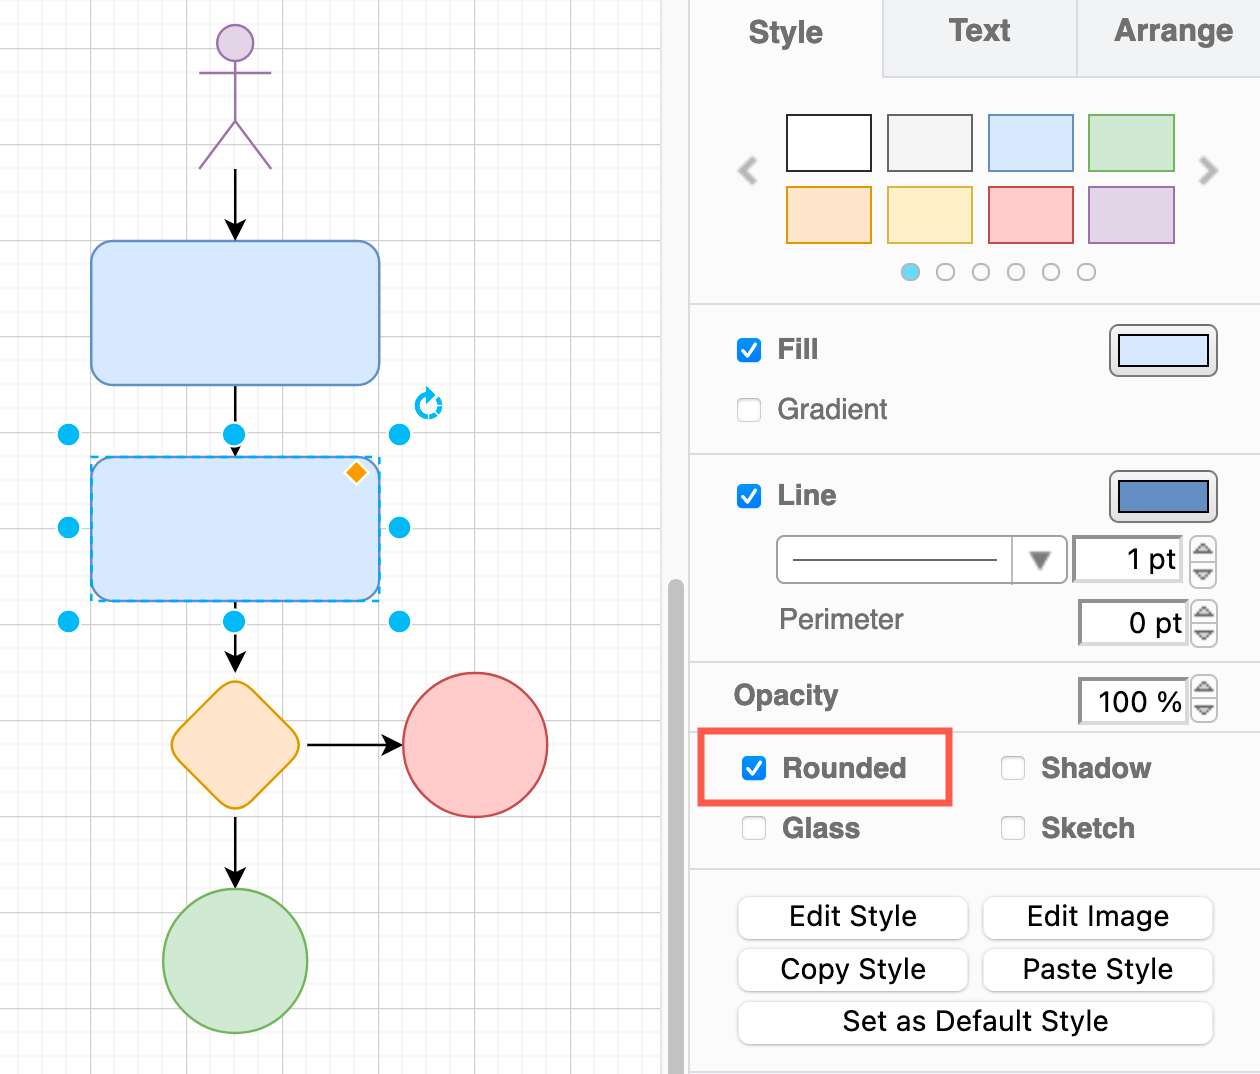
Apply effects to shapes
Round sharp corners: Click on the Rounded checkbox to round all the corners of any sharp-cornered basic shape.
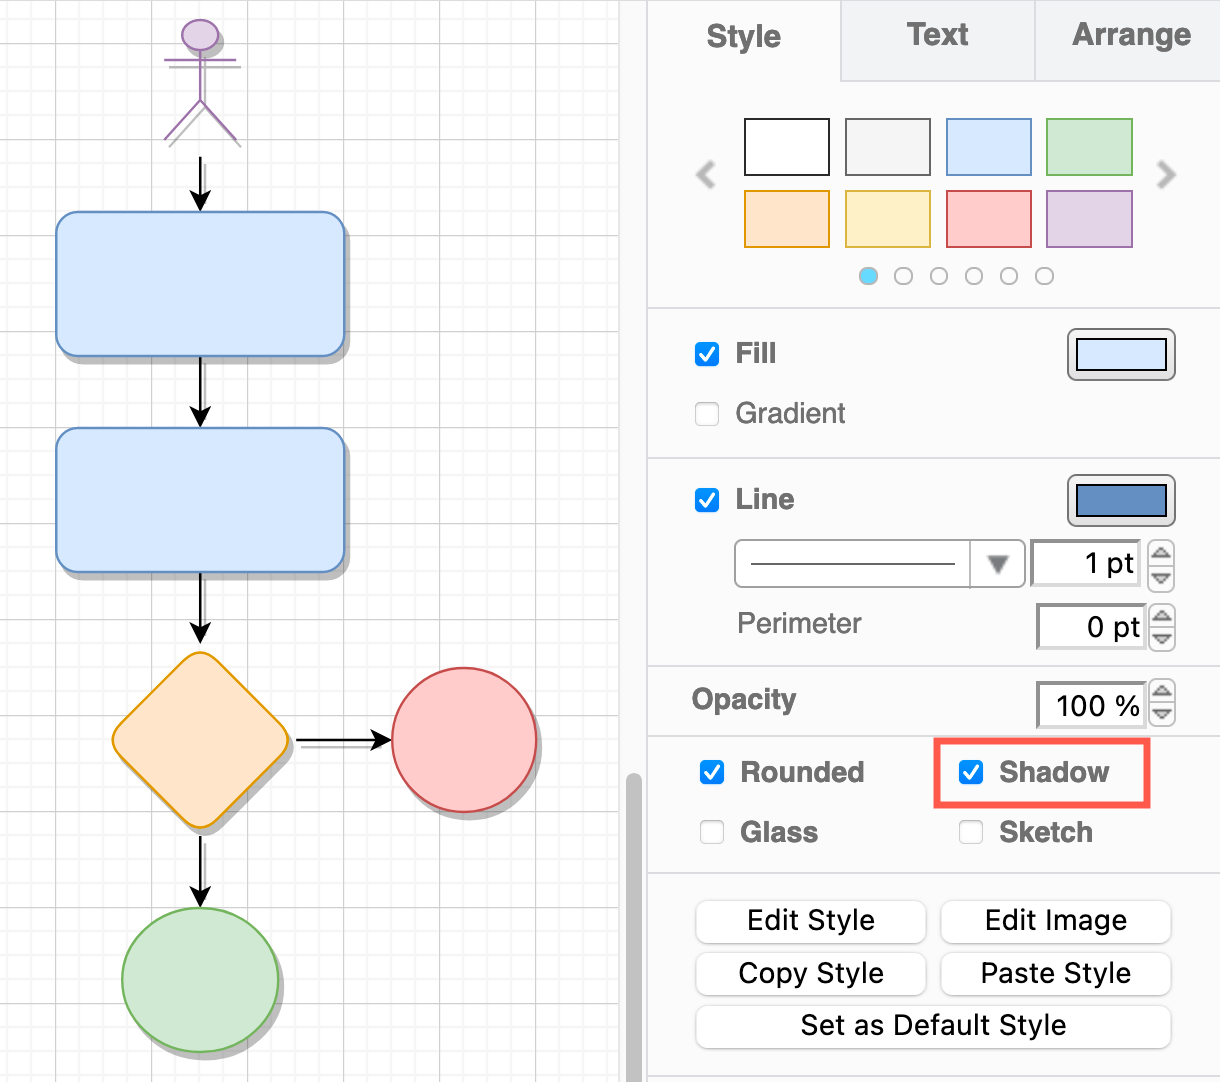
Add a shadow: Click on the Shadow checkbox to add a drop shadow to all shapes. Shadows can also be applied to connectors.
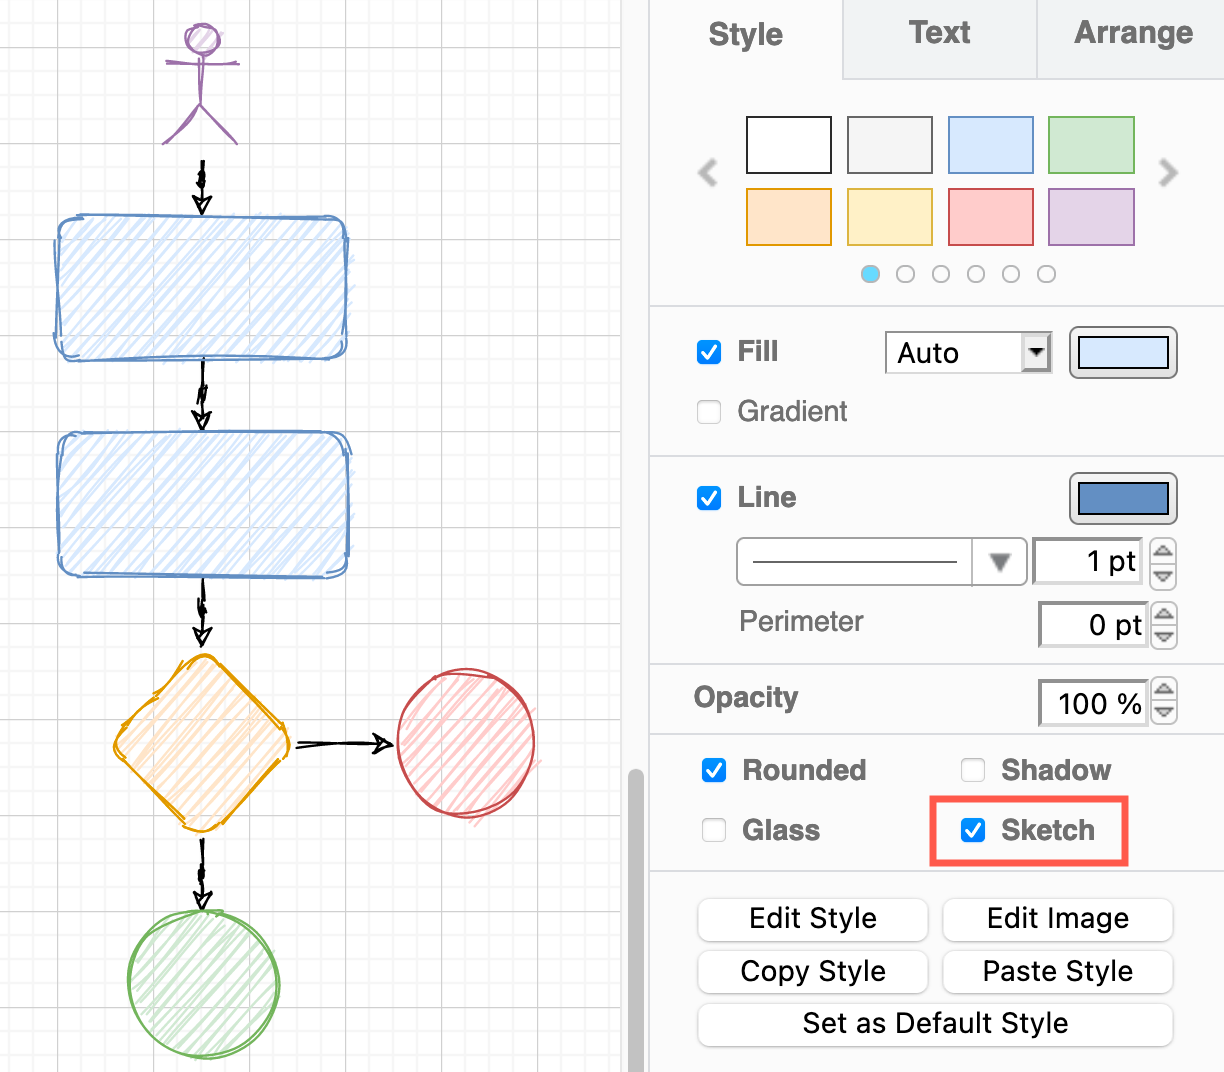
Apply the rough sketch style: To make the shapes appear as if they are hand drawn, click the Sketch checkbox. Additional style options for the rough style are available in the style Properties.
Copy and paste styles
Select the shape that has the style you want to copy, in the Style tab of the format panel, click Copy Style, then select the target shapes and click Paste Style.
Set a default style
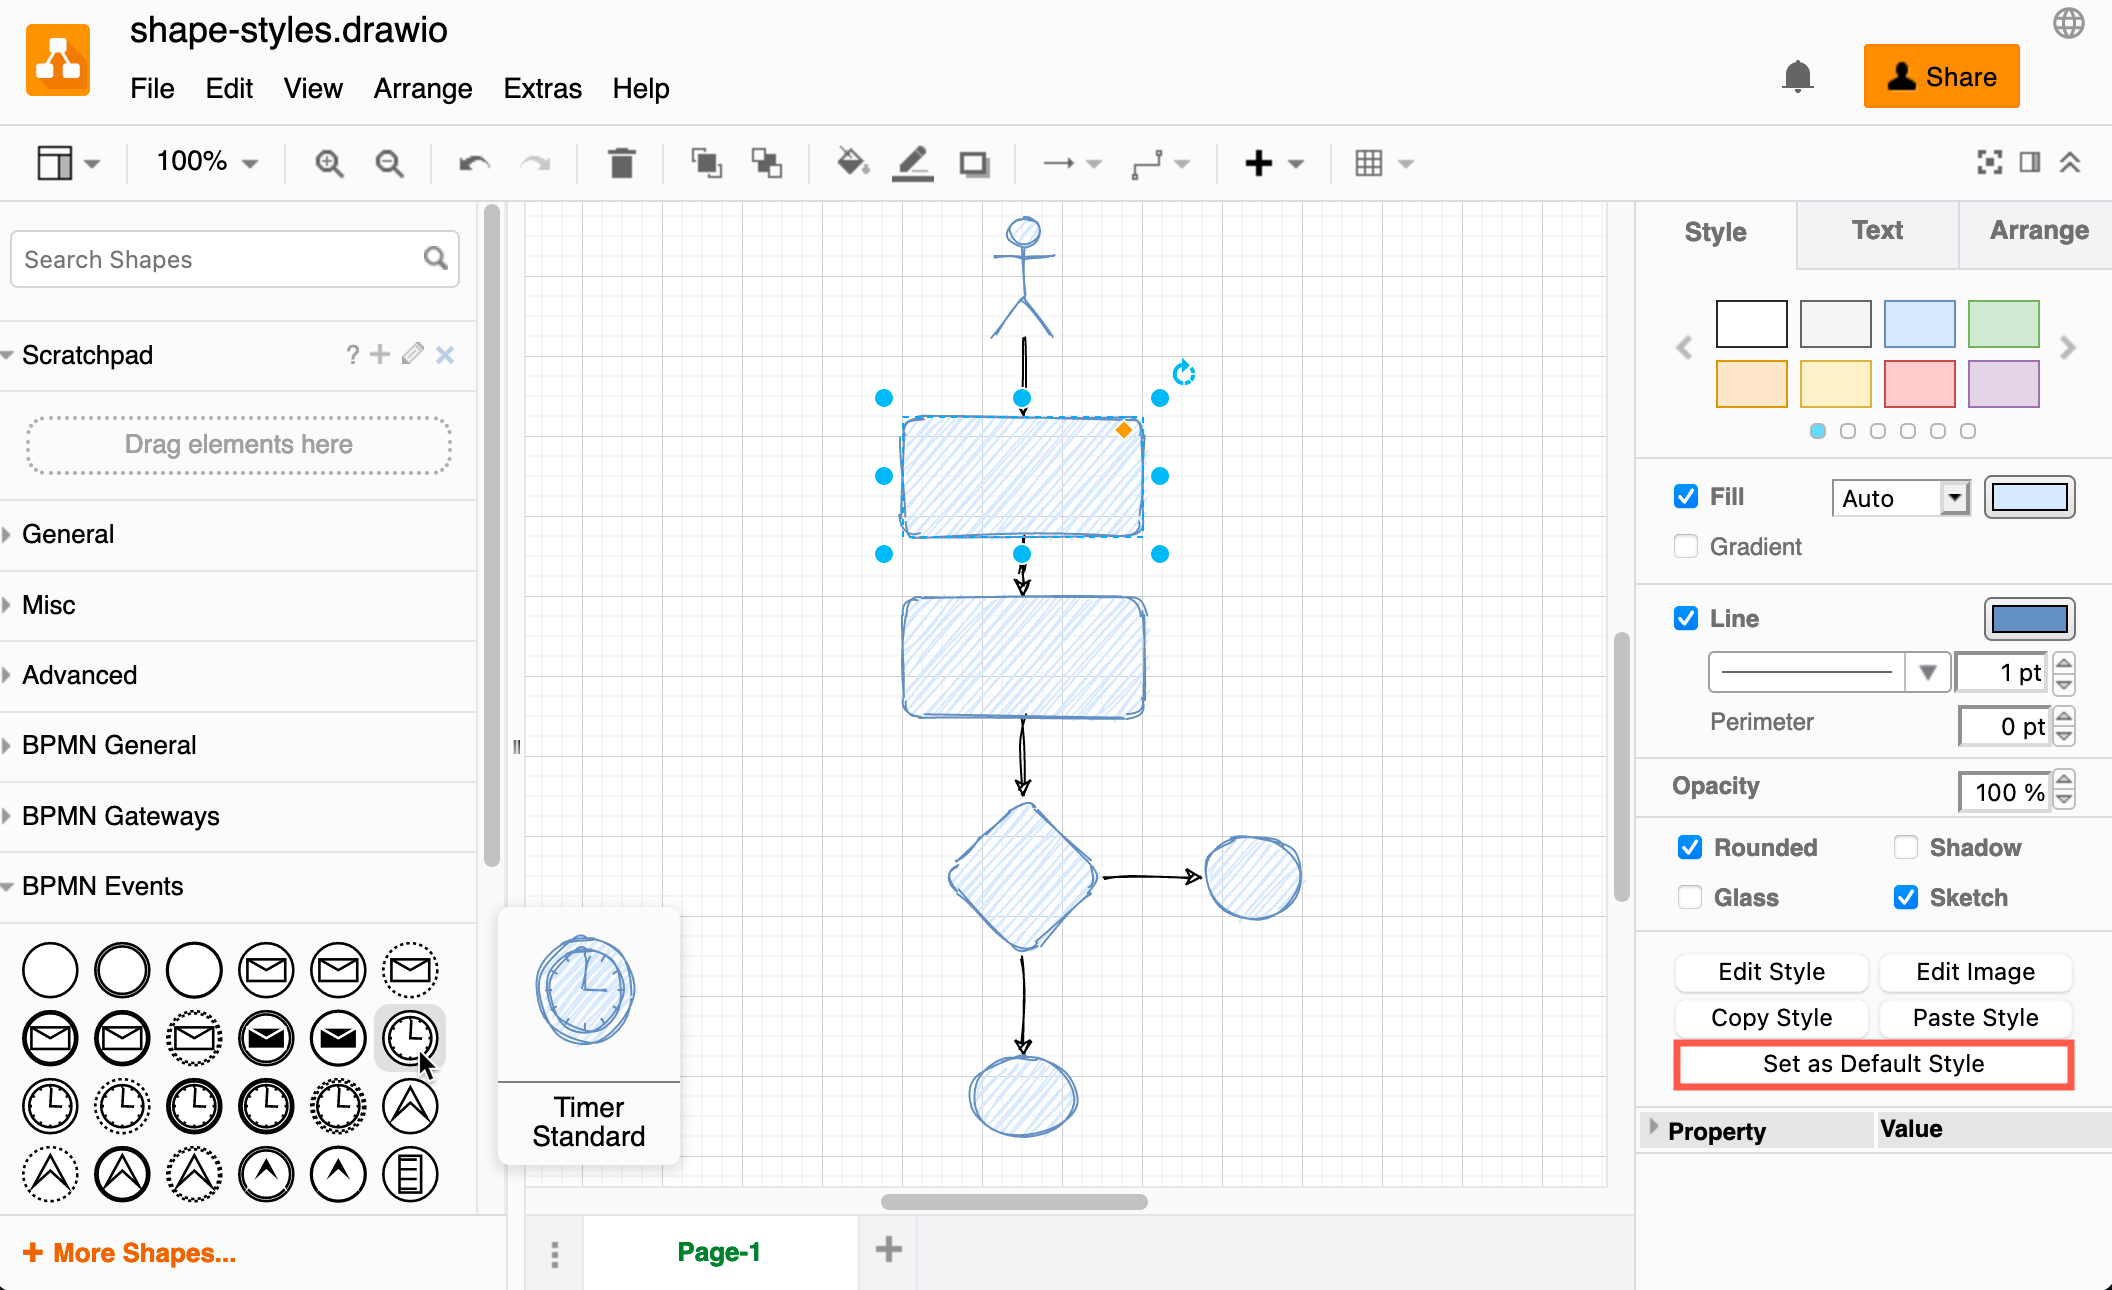
When you set a new default style, any new shape you place on the drawing canvas from the shape libraries, the toolbar (in modern mode) and the double-click shape selection box will use the new default style.
- Select the shape that has the style you want to use as the new default.
- Click Set as Default Style in the Style tab of the format panel.
- Hover over shapes in the shape libraries on the left to see a preview of them using the new default style.
Clear the default style: Make sure nothing is selected so you can see the Diagram tab in the format panel, then click Clear Default Style.
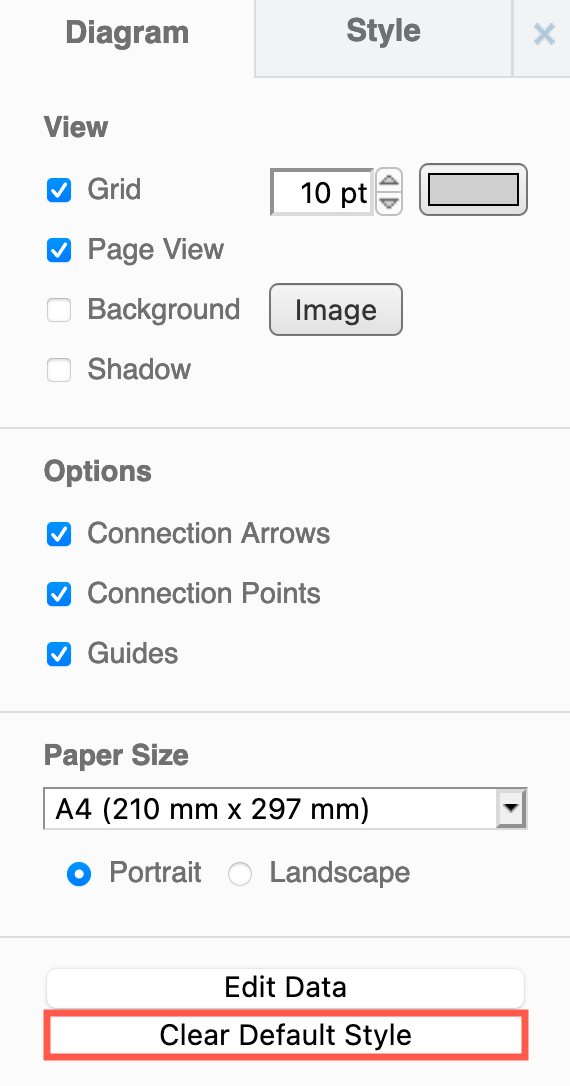
This will clear the default styles for both shapes and connectors.
Learn more about the global diagram options
Edit the shape style and behaviour
Other than using the basic options in the Style tab, you can edit a shape's style properties in two ways.
Edit shape properties
- With a shape selected, expand the Property section at the bottom of the Style tab in the format panel.
- Change the Value of the shape properties to change additional style options and how the shape behaves.
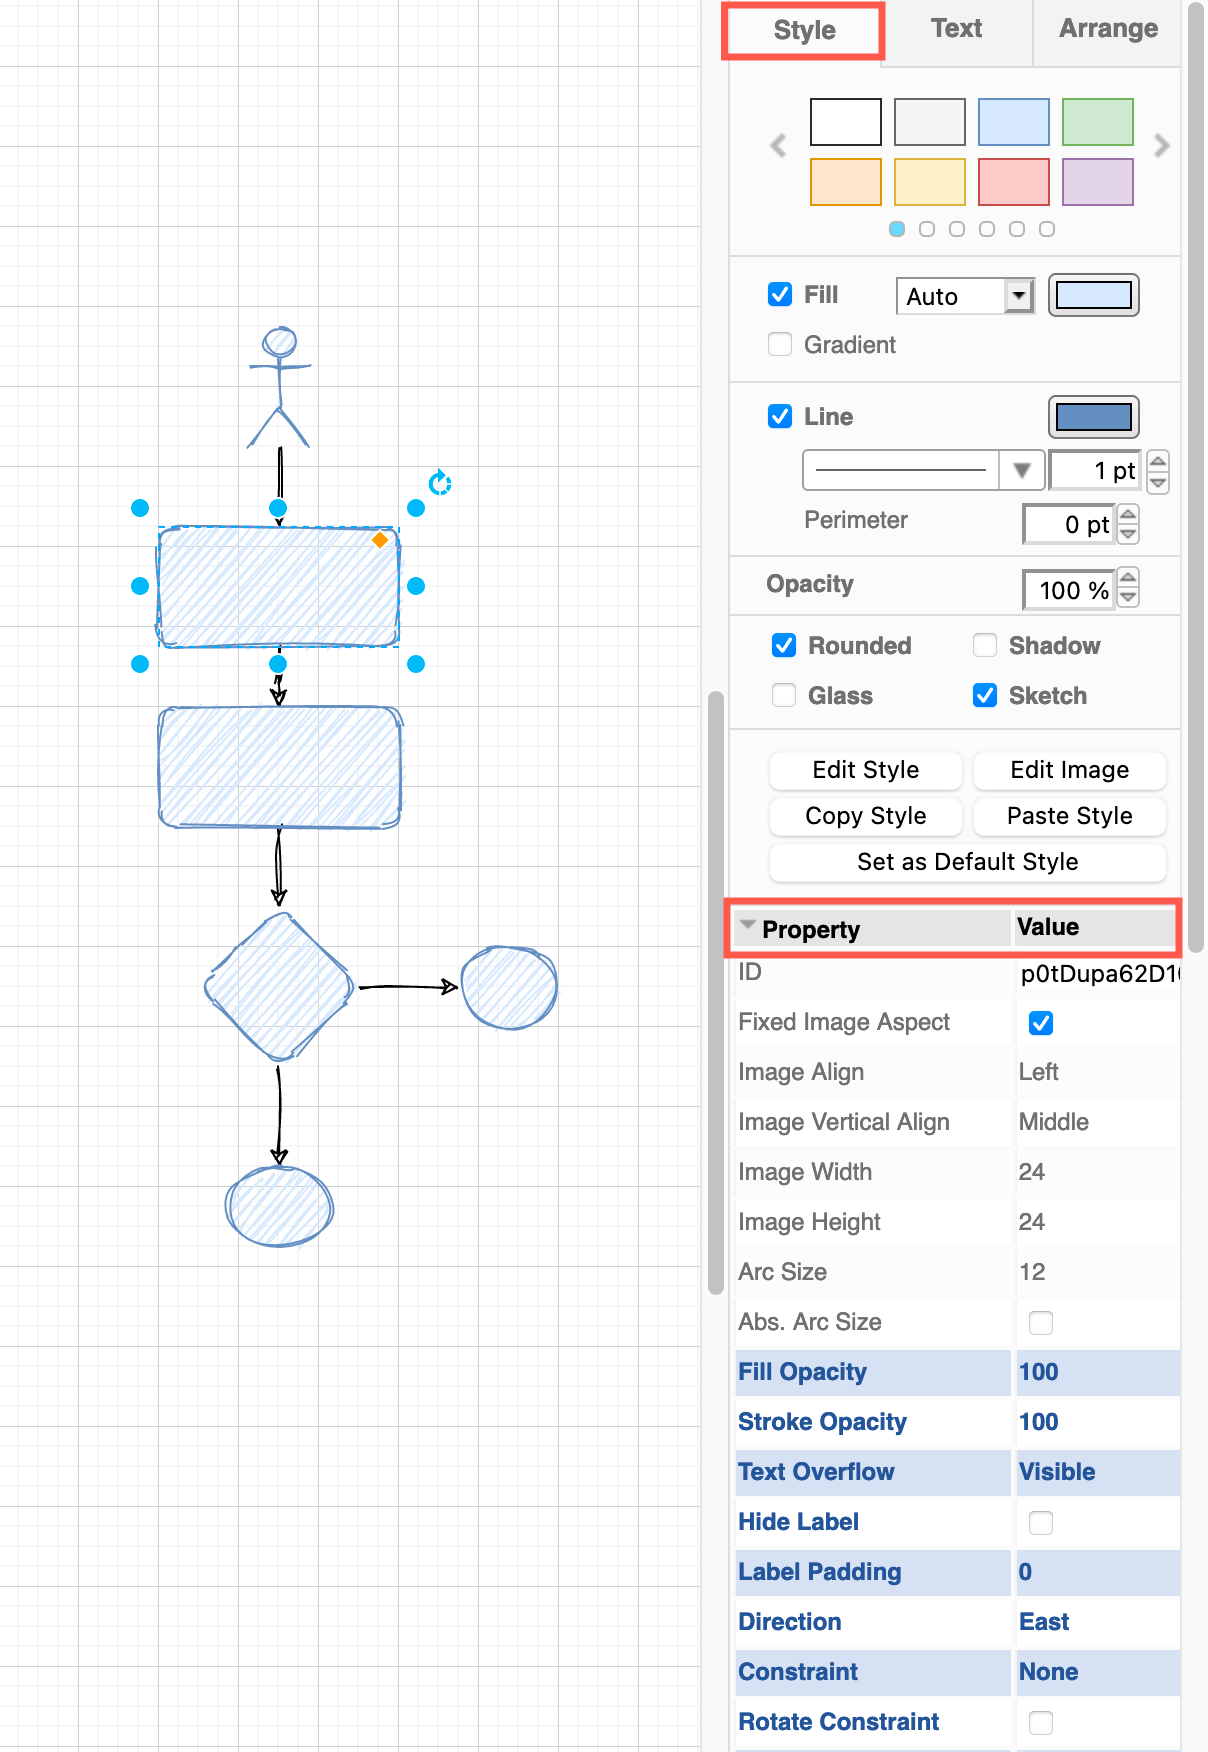
Note: Only the shape properties that can be applied to the selected shape will be available in this property list.
Edit the XML that defines the shape properties
If you know the shape properties names and values that you want to set, it may be faster to simply edit the shape's XML description in text.
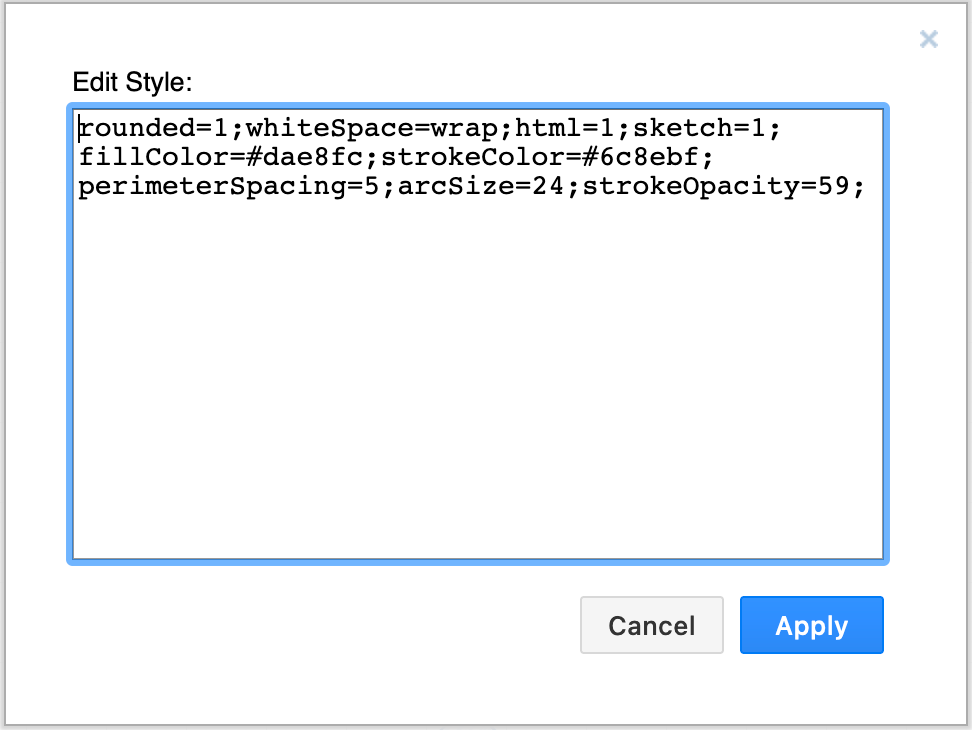
For example, a rectangle with the rough sketch style, which uses a custom arc-size for its rounded corners, a custom perimeter size, and an outline that is not opaque, would have a shape style that looks like:
rounded=1;whiteSpace=wrap;html=1;sketch=1;fillColor=#dae8fc;
strokeColor=#6c8ebf;perimeterSpacing=5;arcSize=24;
strokeOpacity=59;
Edit the shape style
- Right-click on a shape, and select Edit Style from the context menu. Alternatively, with a shape selected, press
Ctrl+Eon Windows orCmd+Eon macOS. - Edit the XML description with property=value pairs to describe the shape style you want that shape to use, then click Apply.