AWS architecture diagrams
Draw your Amazon Web Services (AWS) infrastructure with draw.io for free. You don't need to register or sign-up, and you can store your diagrams in your favourite cloud storage platforms, like Google Drive, One Drive, and Dropbox.
draw.io provides you with several years worth of AWS icon (shape) libraries as well as Amazon's 3D or isometric shapes.
Enable an AWS shape library
- In the left panel, at the bottom, click on More Shapes to open the shape library selection dialog.
- Scroll down to the Networking section, make sure the checkbox next to the AWS library you want to use is selected, then click Apply.
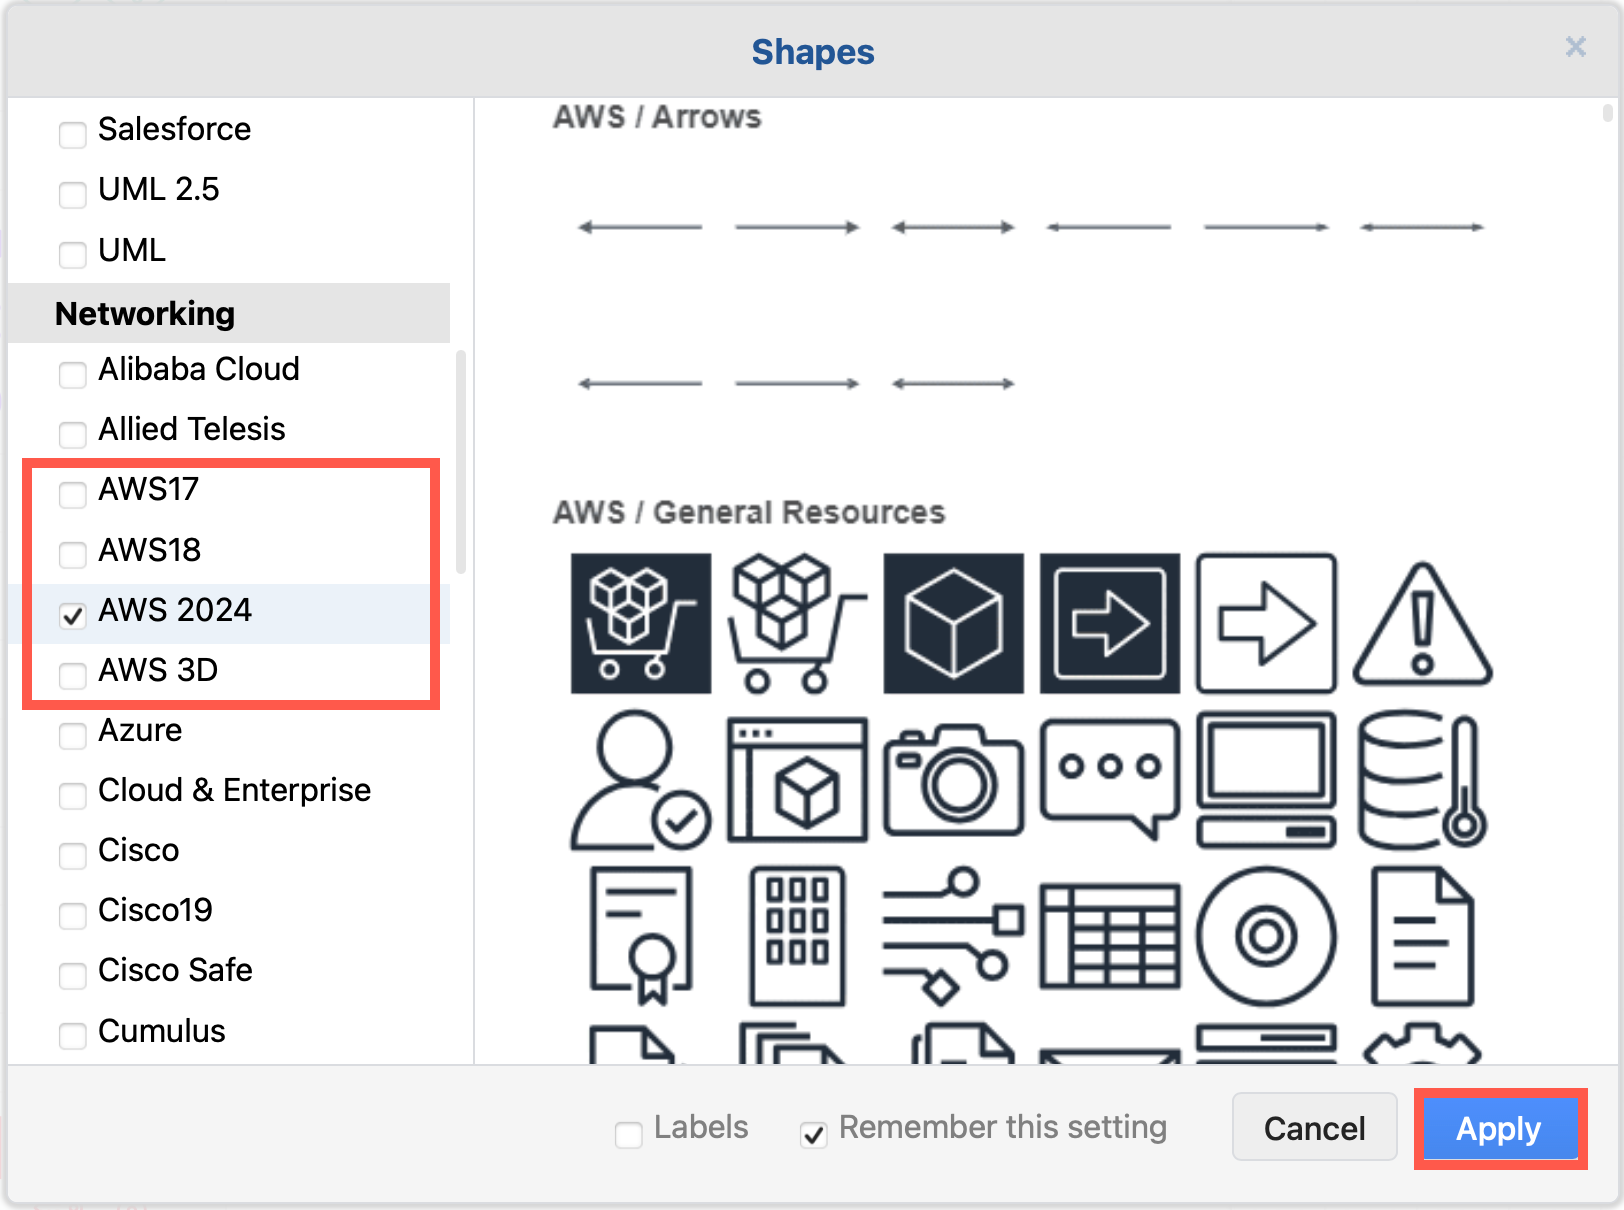
Open draw.io with the 2019 AWS shape library enabled
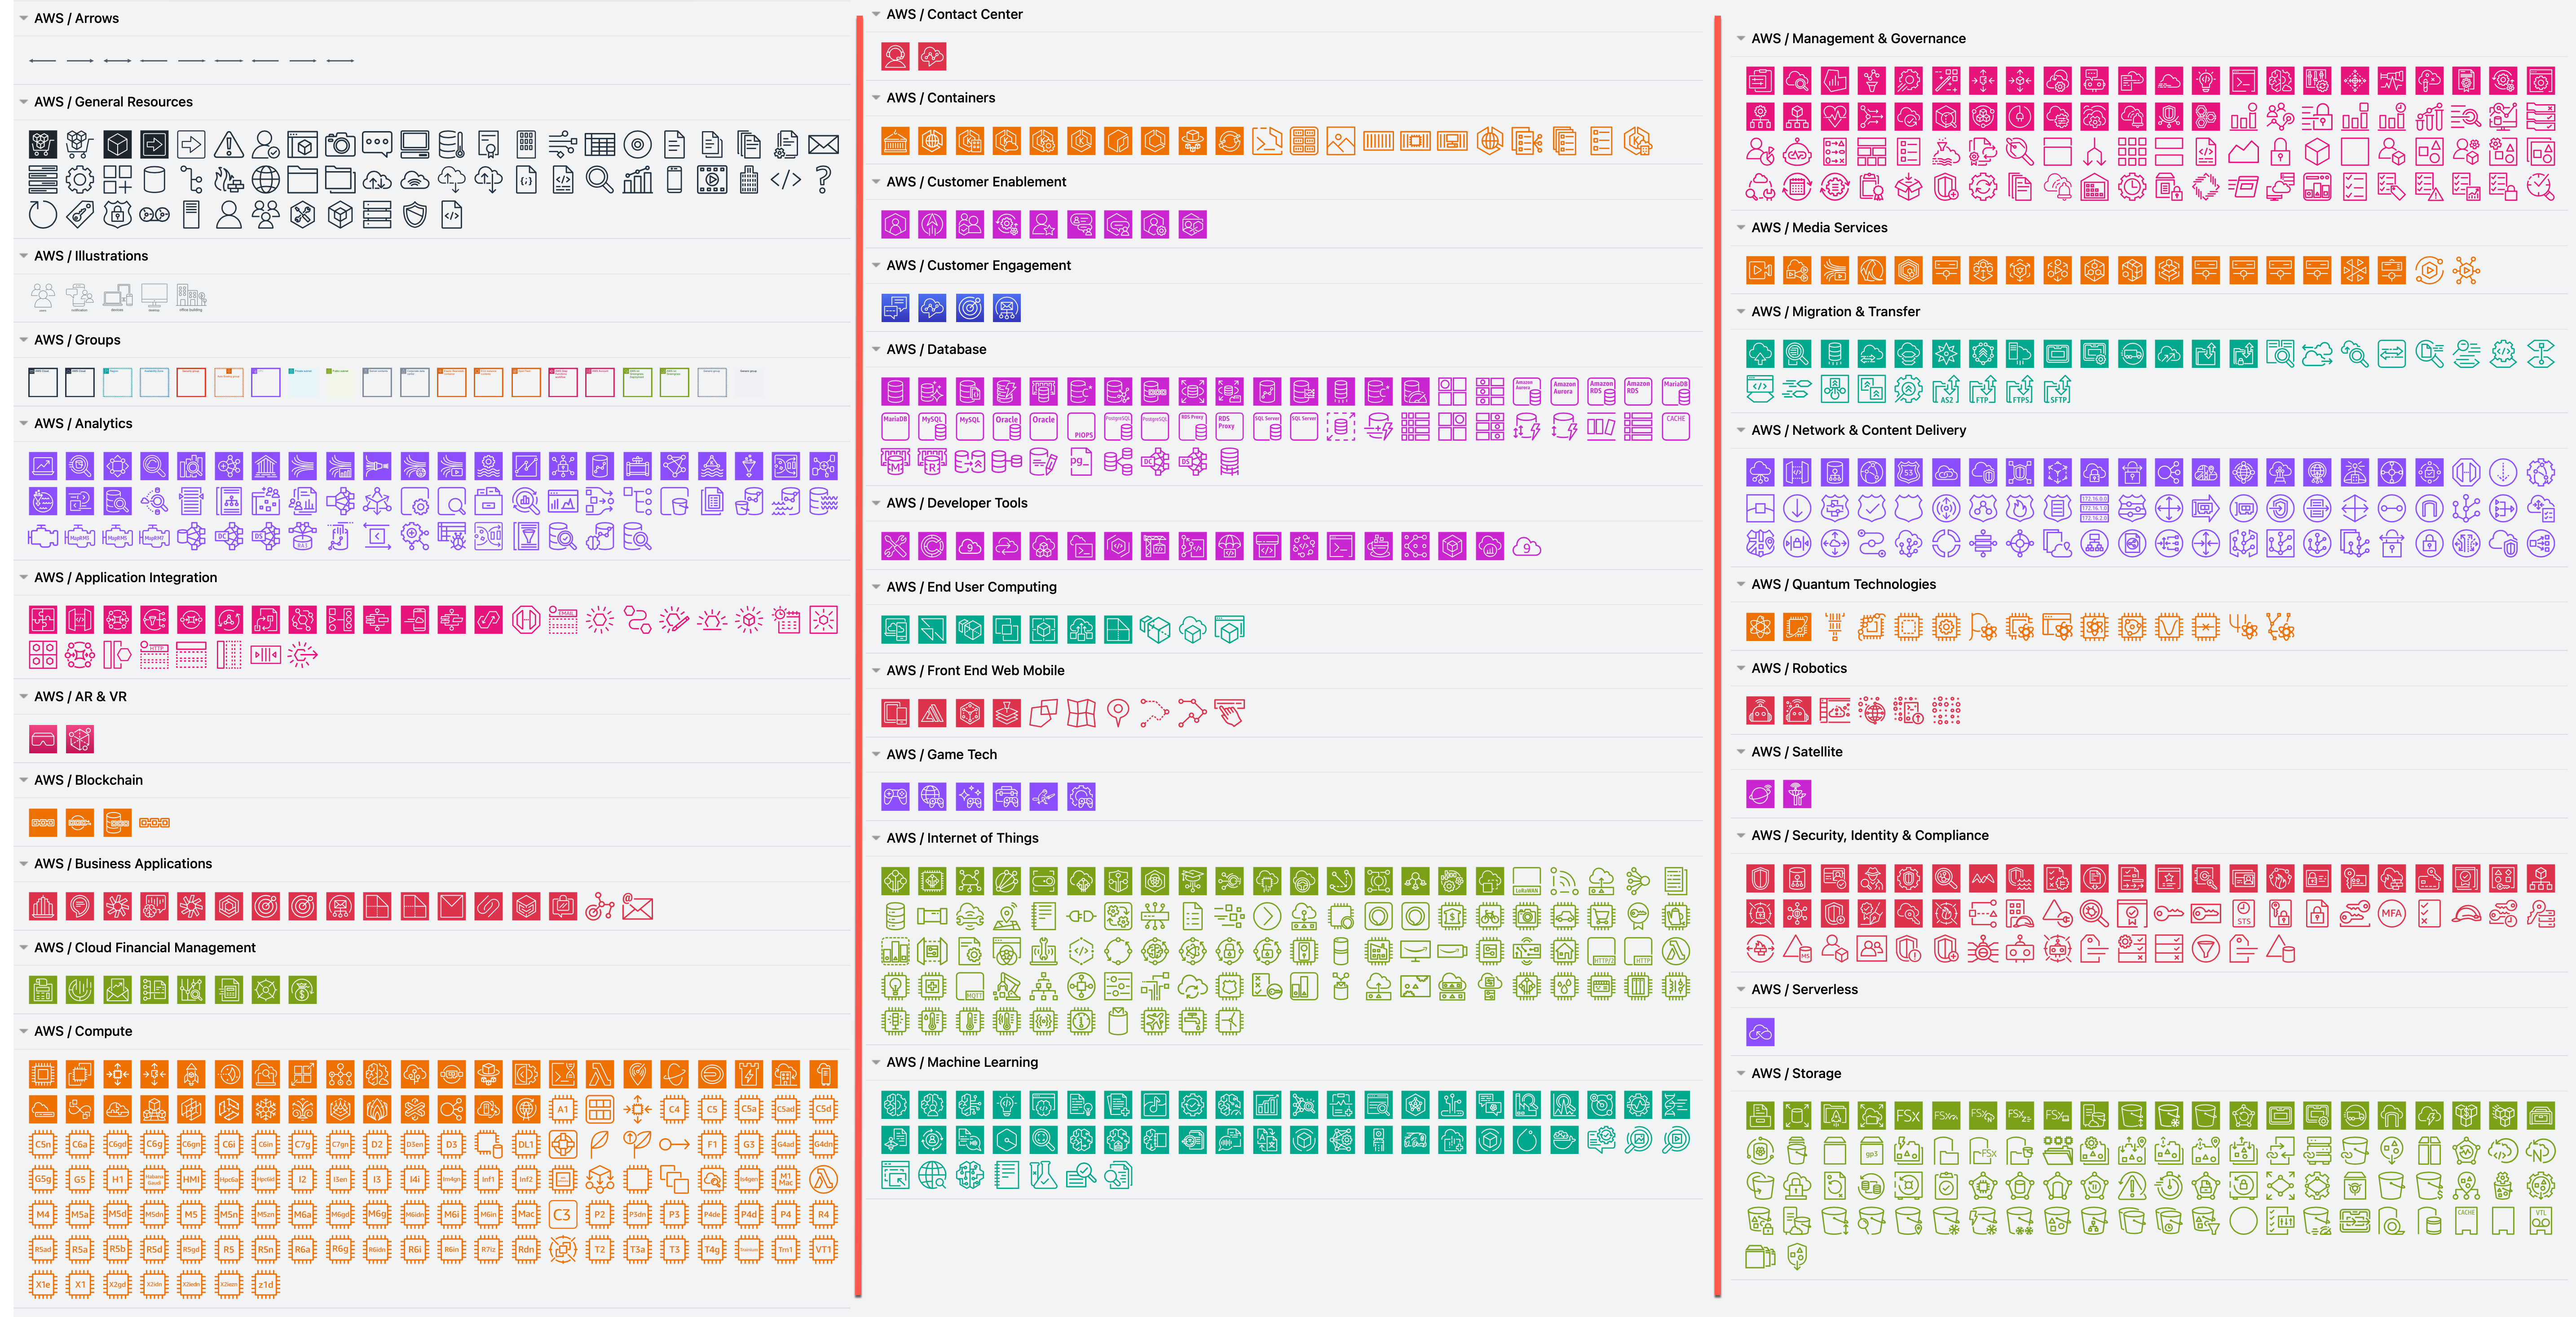
There are many AWS shapes available to visualise your infrastructure. When you enable just one of the AWS shape libraries, you'll see a number of sub-categories in the left panel.
Use an AWS template
If you don't want to start with a blank canvas, you can use one of a number of different example AWS infrastructure templates.
- Click Arrange > Insert > Template to open the template library.
- Expand the Cloud category on the left, then select AWS. Click on the magnifying glass in the top right to see a larger preview of the template diagram.
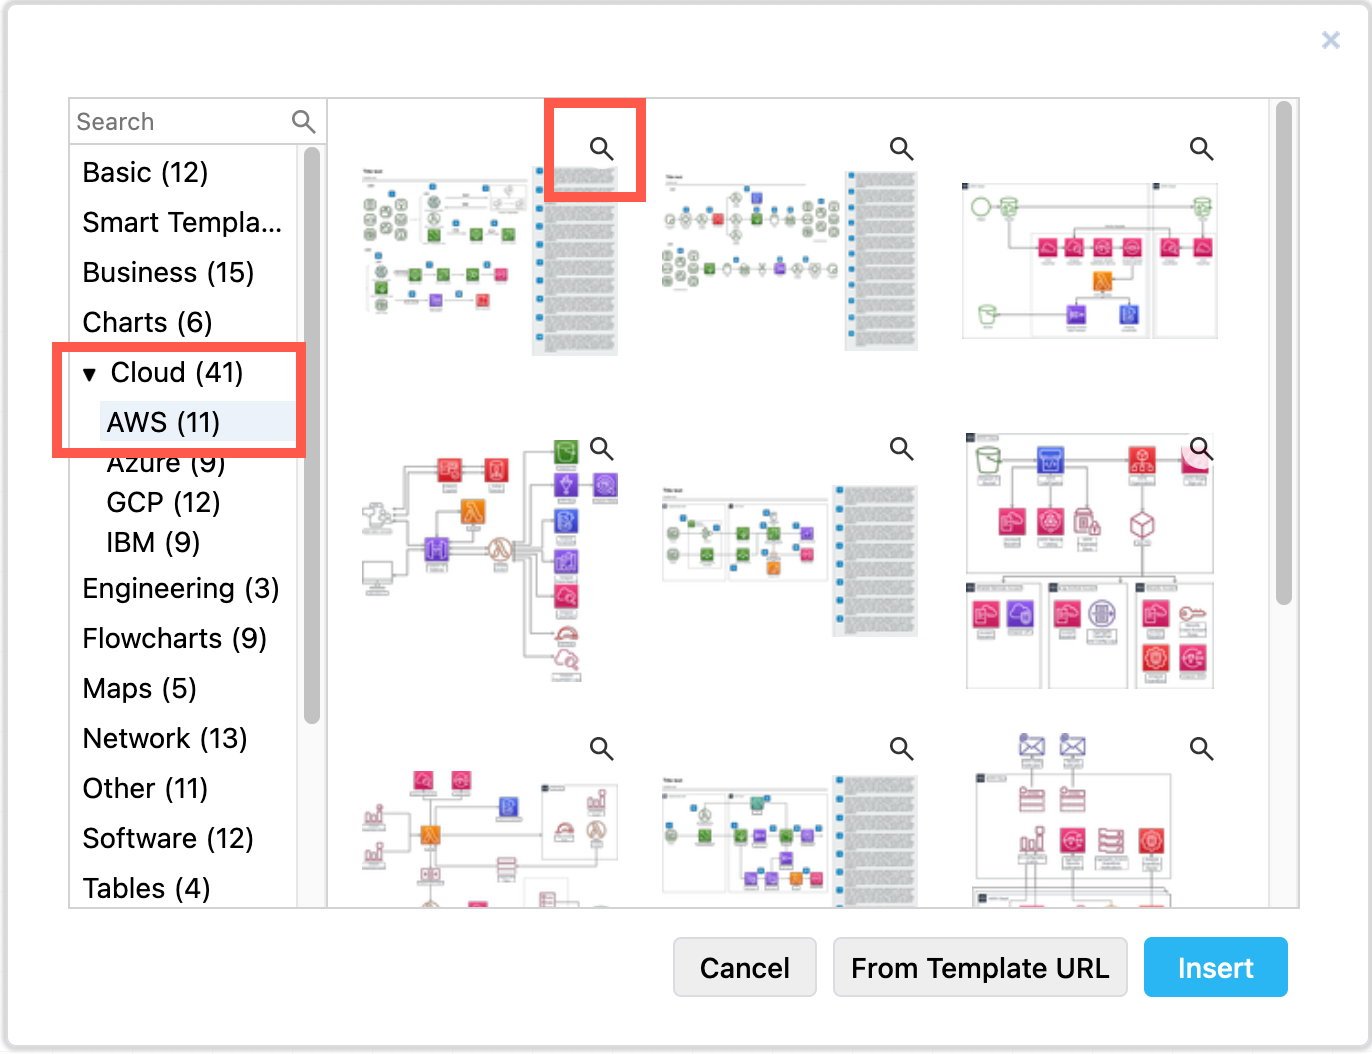
- Click Insert to add this template to the drawing canvas. You can replace, move and add more shapes, text and connectors as you need.
Tip: Some AWS automatic monitoring services export to the .drawio file format, including Cloudockit and Cloudcraft.
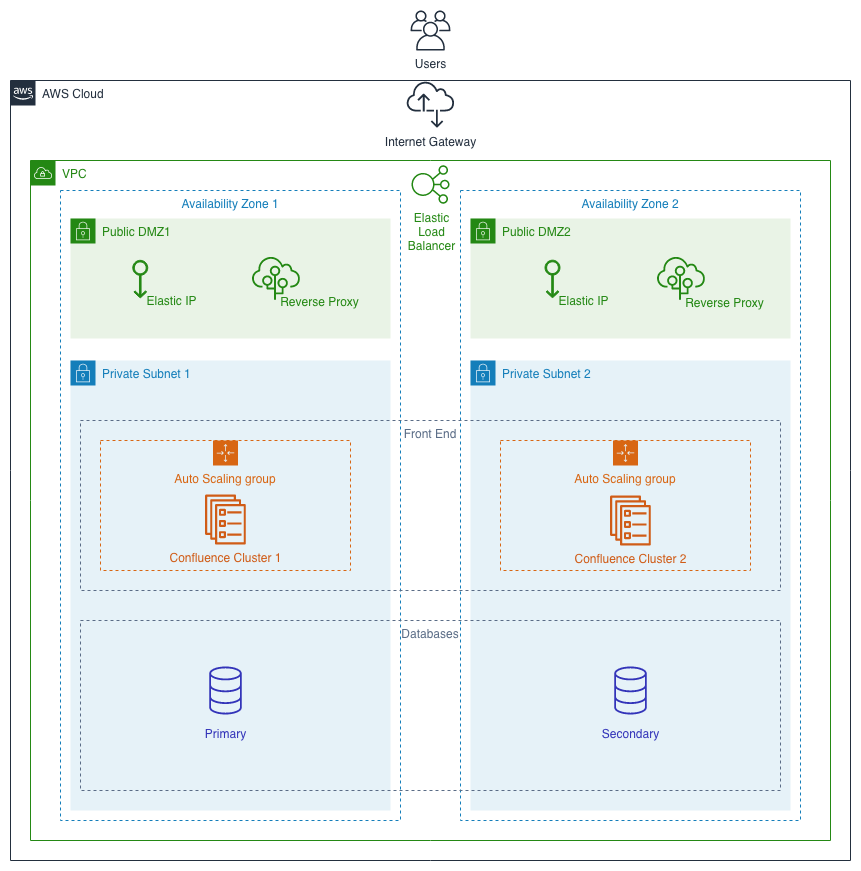
Build your own AWS architecture diagram
Let's visualise a simple architecture in an AWS diagram.
As the AWS shapes are stacked on top of each other, with various rectangles to show the grouping of elements in your architecture, you may need to modify the (depth) order in which the shapes are rendered.
When you add a new shape to the drawing canvas, it is dropped at the front of the stack of shapes.
Reorder shapes: Select a shape, then click To Front or To Back in the Arrange tab of the format panel on the right. Alternatively right-click on a shape and select
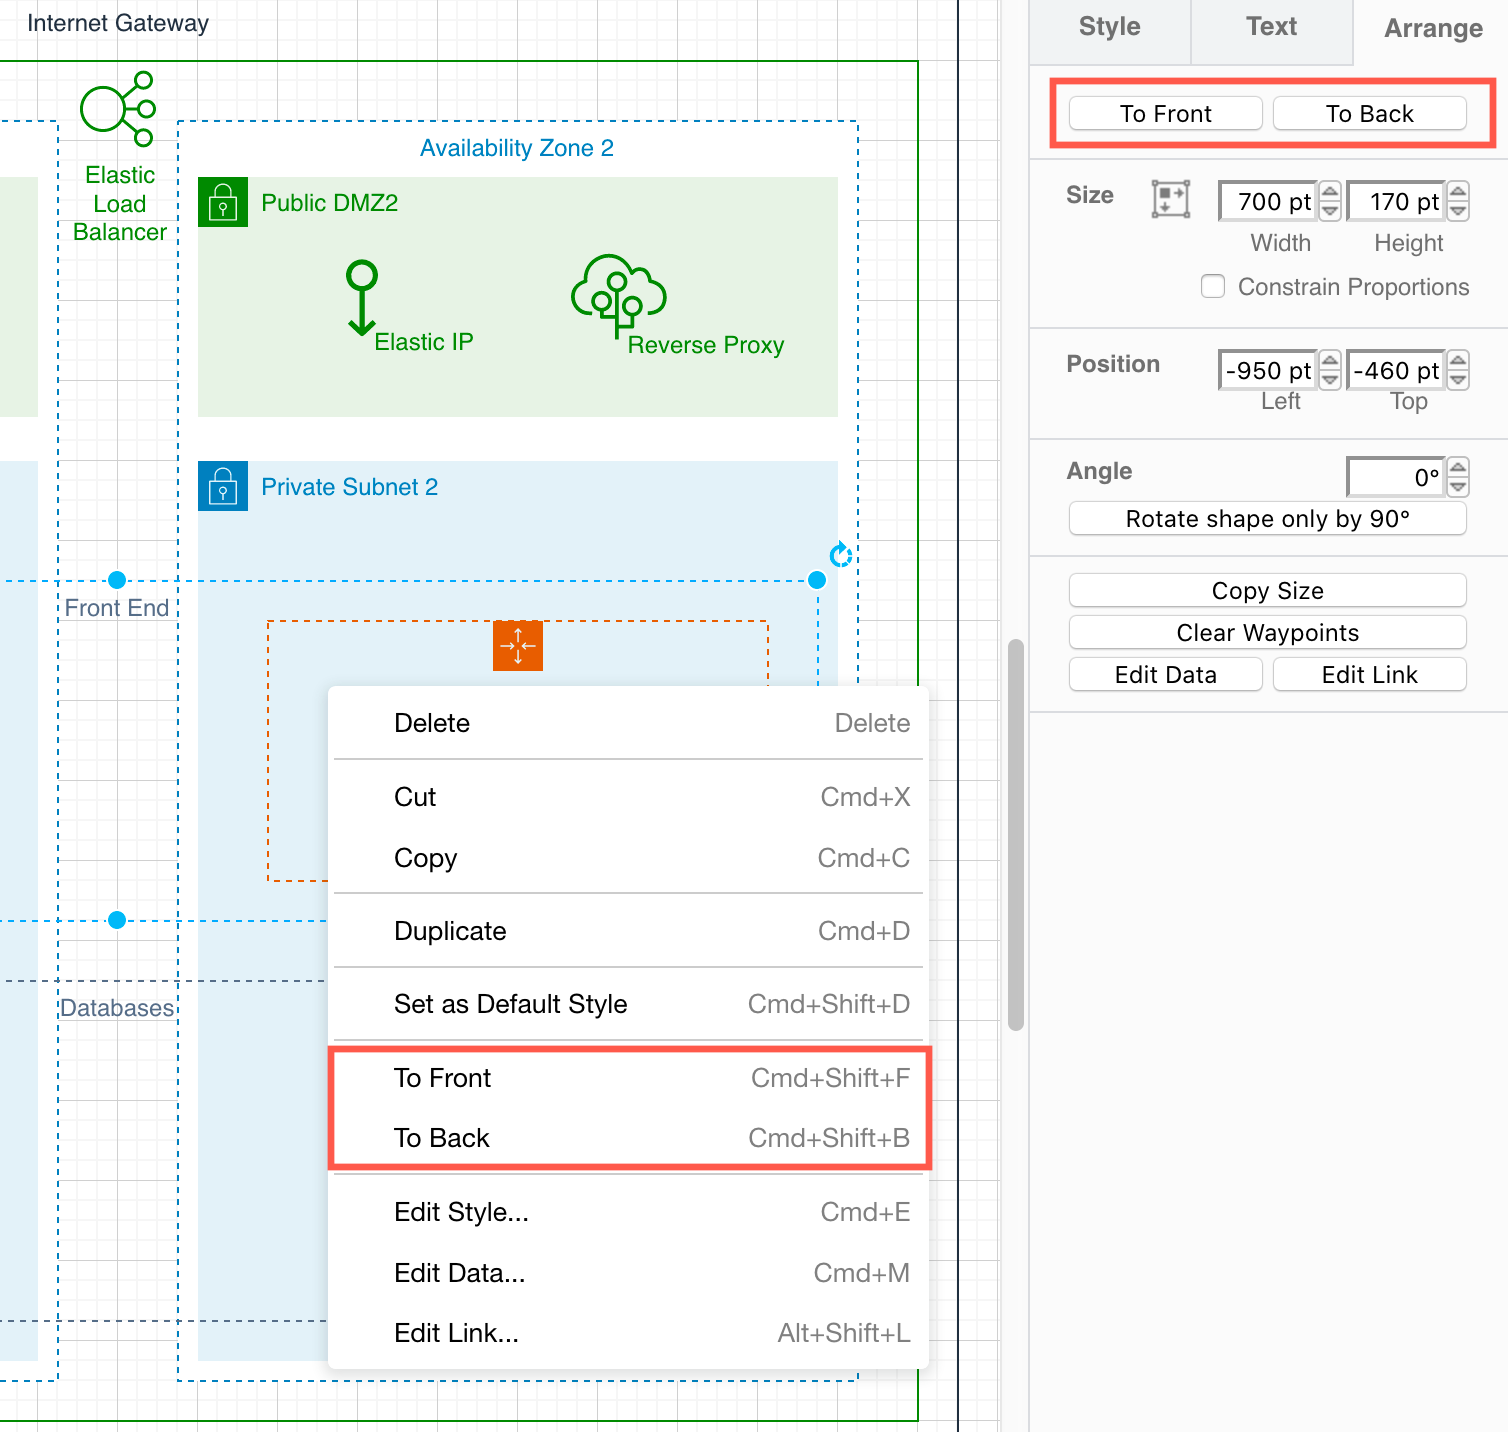
Tip: Open the context menu on a touch screen: touch, pause, then touch again.
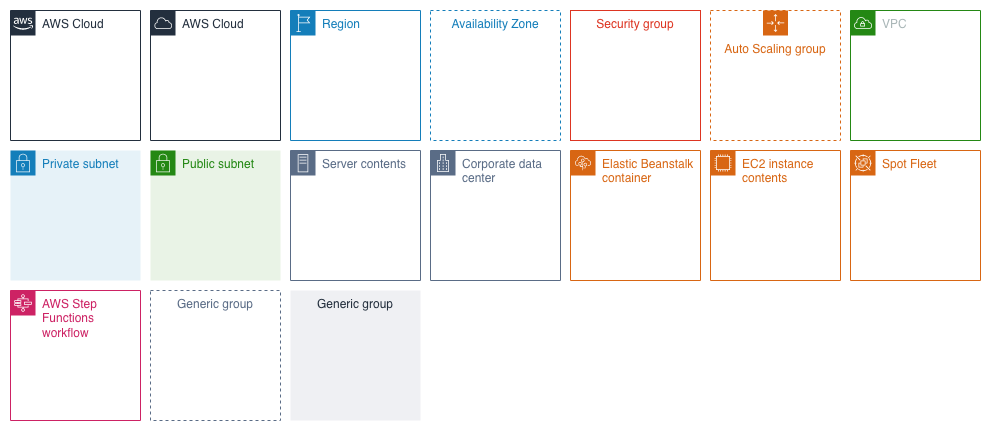
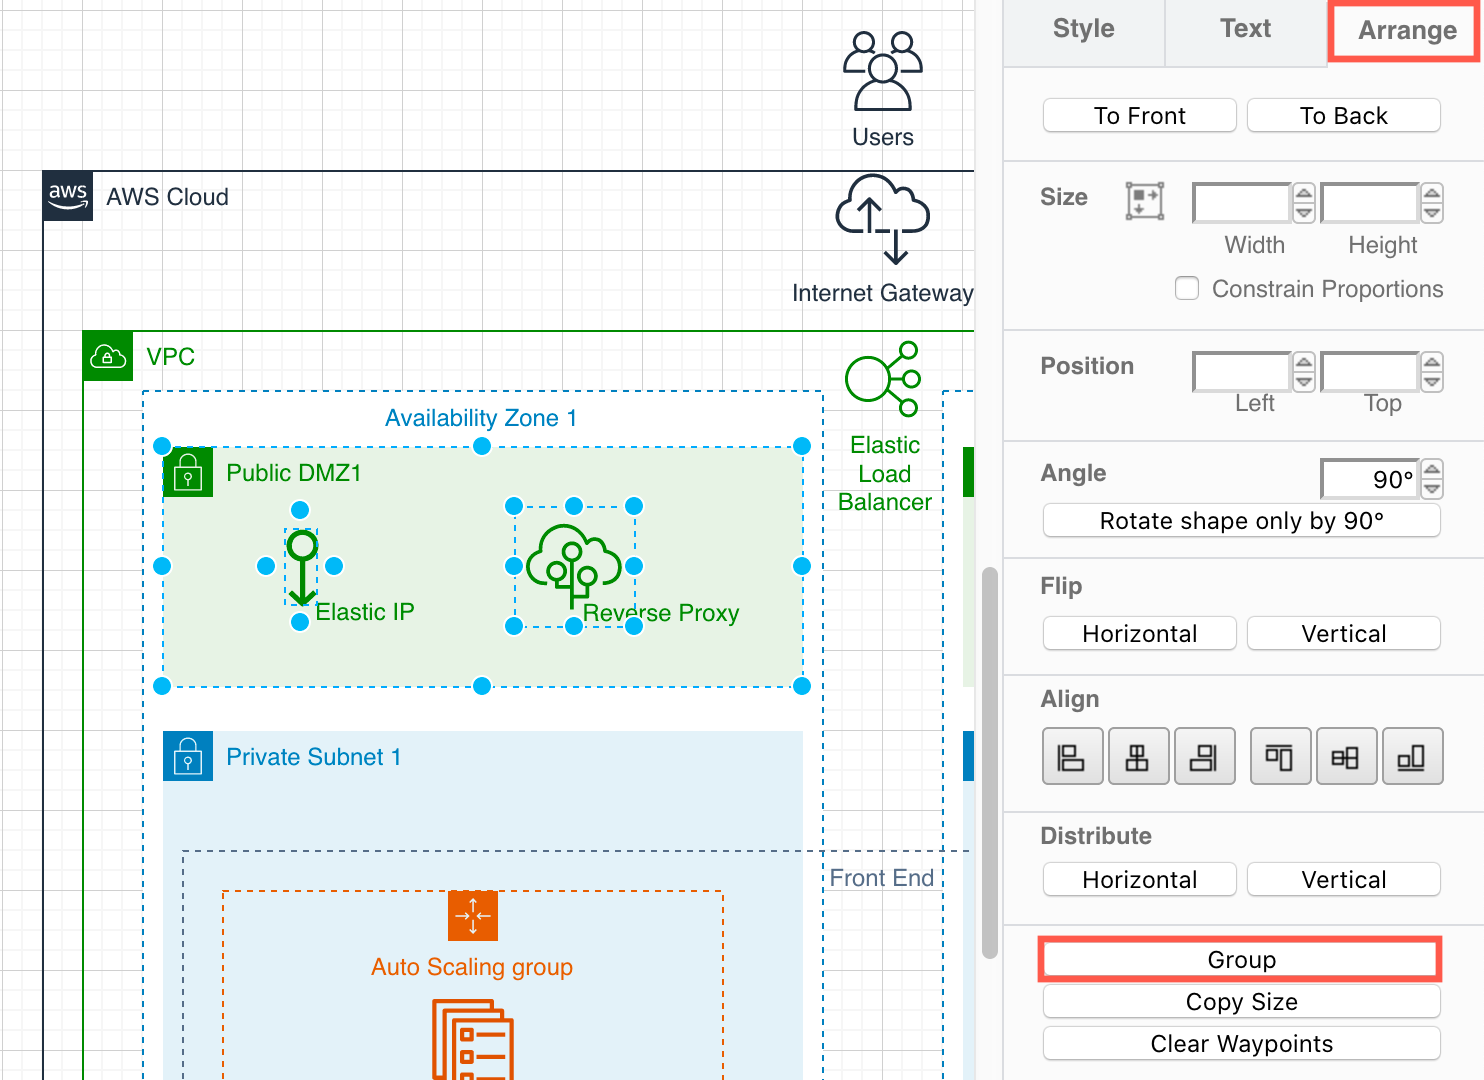
AWS groups
Indicate groupings of elements with the shapes from the AWS / Groups shape library.
Work with shapes
Drag and drop shapes from the shape libraries to the drawing canvas. Click on shapes in the shape library to quickly add them, then reposition them.
Hover over a shape in the shape library to see a tooltip that tells you what it represents in AWS notation.

Reposition: Click and drag a shape into a new position on the drawing canvas.
Resize: Select a shape and you will see it outlined with grab handles in the corners and the middle of each straight side. Drag these grab handles to resize a shape.
Rotate: Select a shape, then drag the little round circular arrow in the top right to rotate it.
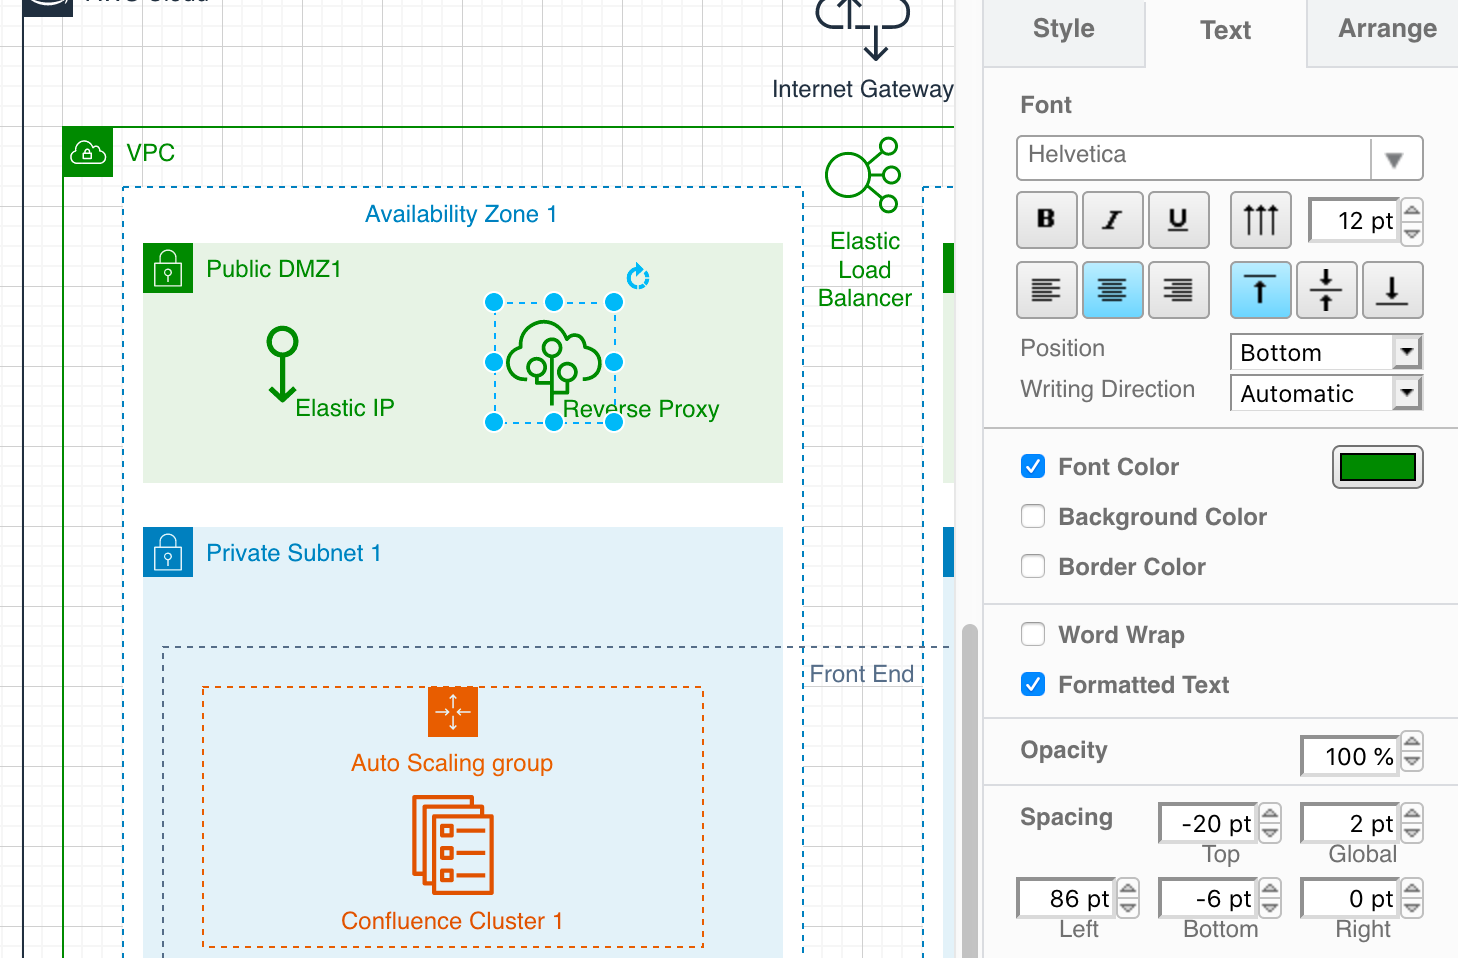
Labels
- Double click on a shape and start typing to change its label text.
- Press
Shift+Enterto add a line break in a label. - Change the position of the label text via the Text tab of the format panel, using either the Position drop down list, or the buttons directly above it.
- Switch between horizontal and vertical text with the button that has three upward-pointing arrows.
- Add spacing by modifying the Spacing values at the bottom of the Text tab.
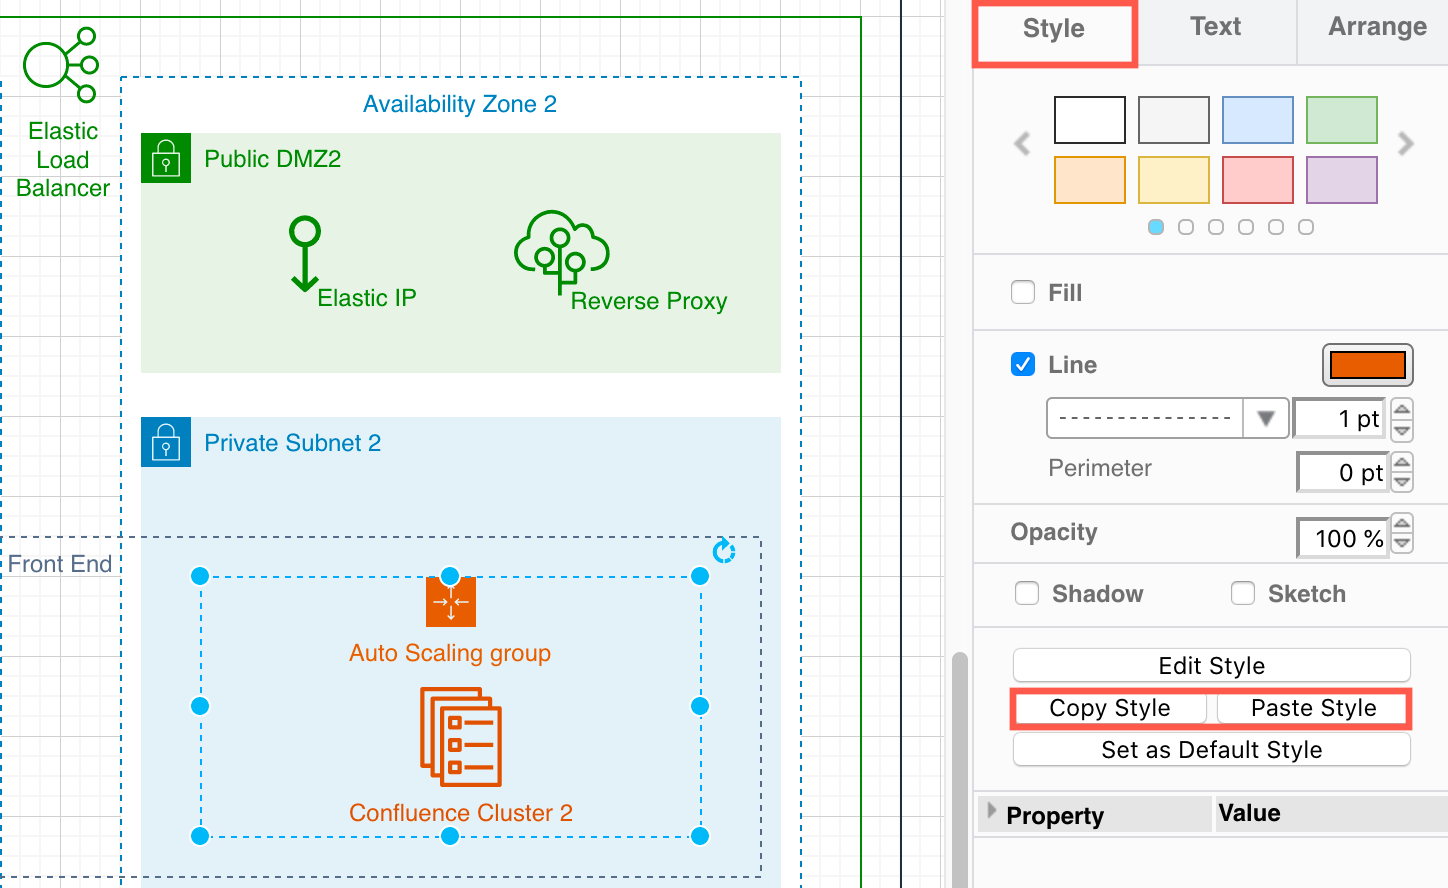
Styles
- Select a shape then change its colours, background or outline style using the palettes in the Style tab in the format panel on the right.
- Set the fill colour of a shape to transparent by removing the fill colour: Select the shape, then deselect the Fill check box in the Style tab.
- Copy the style of one shape to another: Select the first shape, then click Copy Style in the Style tab. Select the second shape or multiple shapes, then click Paste Style.
Group multiple shapes
If you want to keep multiple shapes together as a group, so they all move or resize as one, you can group them together.
- Select multiple shapes, then group them via the Arrange tab or the right-click context menu.
Connectors
While many AWS diagrams do not use connectors, you may want to indicate the flow of information or control in your diagram.
You can use the connector shapes available in the AWS / Arrows library, but it is often faster to draw connections and then later style them as you need, similar to how you can style shapes, described above.
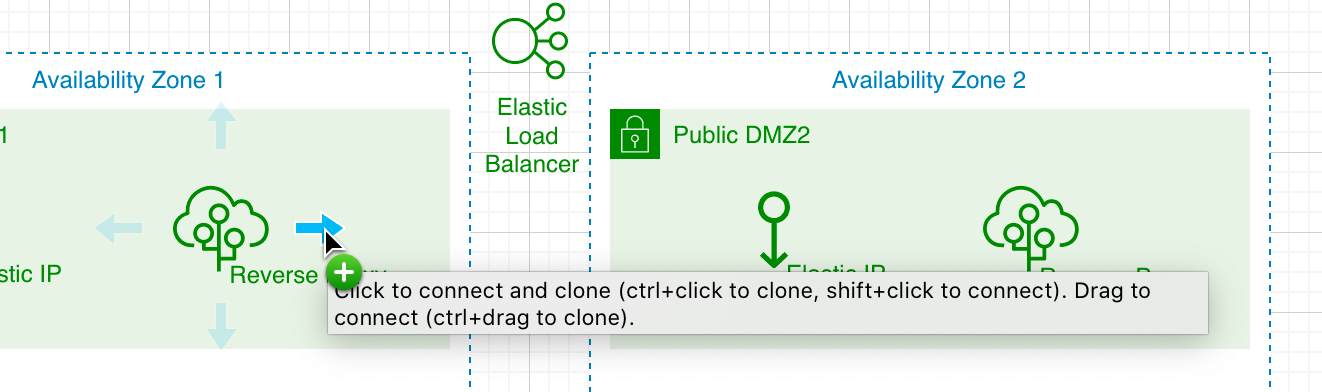
Floating connectors: Floating connectors move around the perimeter of the shape intelligently as you reposition it on the drawing canvas.
- Hover over a shape on the drawing canvas to see a light arrow in each direction.
- Click and drag a connector from that arrow and drop it on your target shape.
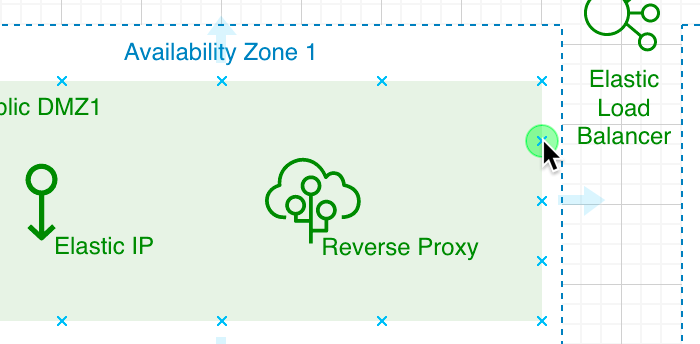
Fixed connectors: Instead of dragging the connector from one of the four arrows, you can use fixed connection points. This type of connector will remain connected to that particular point on that shape when you reposition it on the drawing canvas.
- Hover over an unselected shape, then click and drag a connector from one of the little crosses around the outside of the shape.
- If you want it to be fixed at the other end, drop it on a similar cross on your target shape.
Learn more about working with connectors in draw.io
Note: Most of the AWS shapes that aren't used for indicating groups do not have fixed connection points enabled. You can add your own fixed connection points.
- Right click on a shape, then select Edit Style.
- Add the an array of points to the style description. For example:
points=[[0,1],[0.5,0.5]].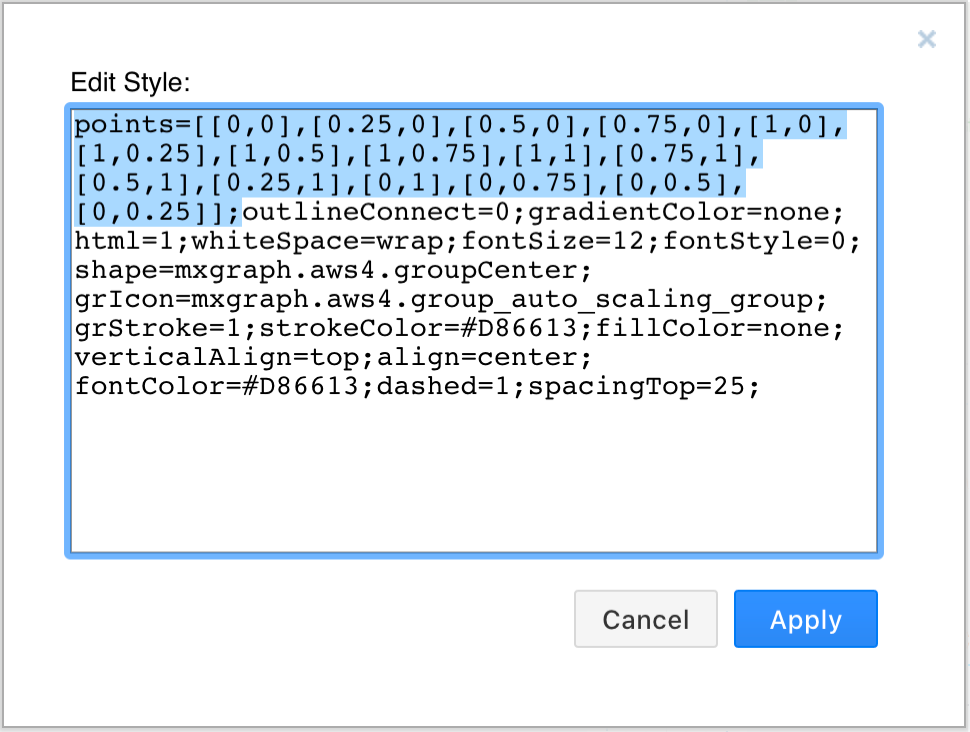
Using waypoints on connectors: You can reroute connectors easily. Select the connector, and you'll see a grab handle in each straight section. Grab and drag this to a new position. Additional waypoints will be added automatically.
See how to work with waypoints on connectors
Use an AWS diagram in documentation
Now that you have completed your AWS architecture diagram, you can share it with colleagues, export it in a variety of formats or embed it in your documentation on several platforms.
Open this AWS diagram in the free diagram viewer
Share your AWS diagram with your colleagues
You can also share a copy your diagram with colleagues without having to share the file itself. Select File > Publish > Link and draw.io will encode your diagram in a long generated link.
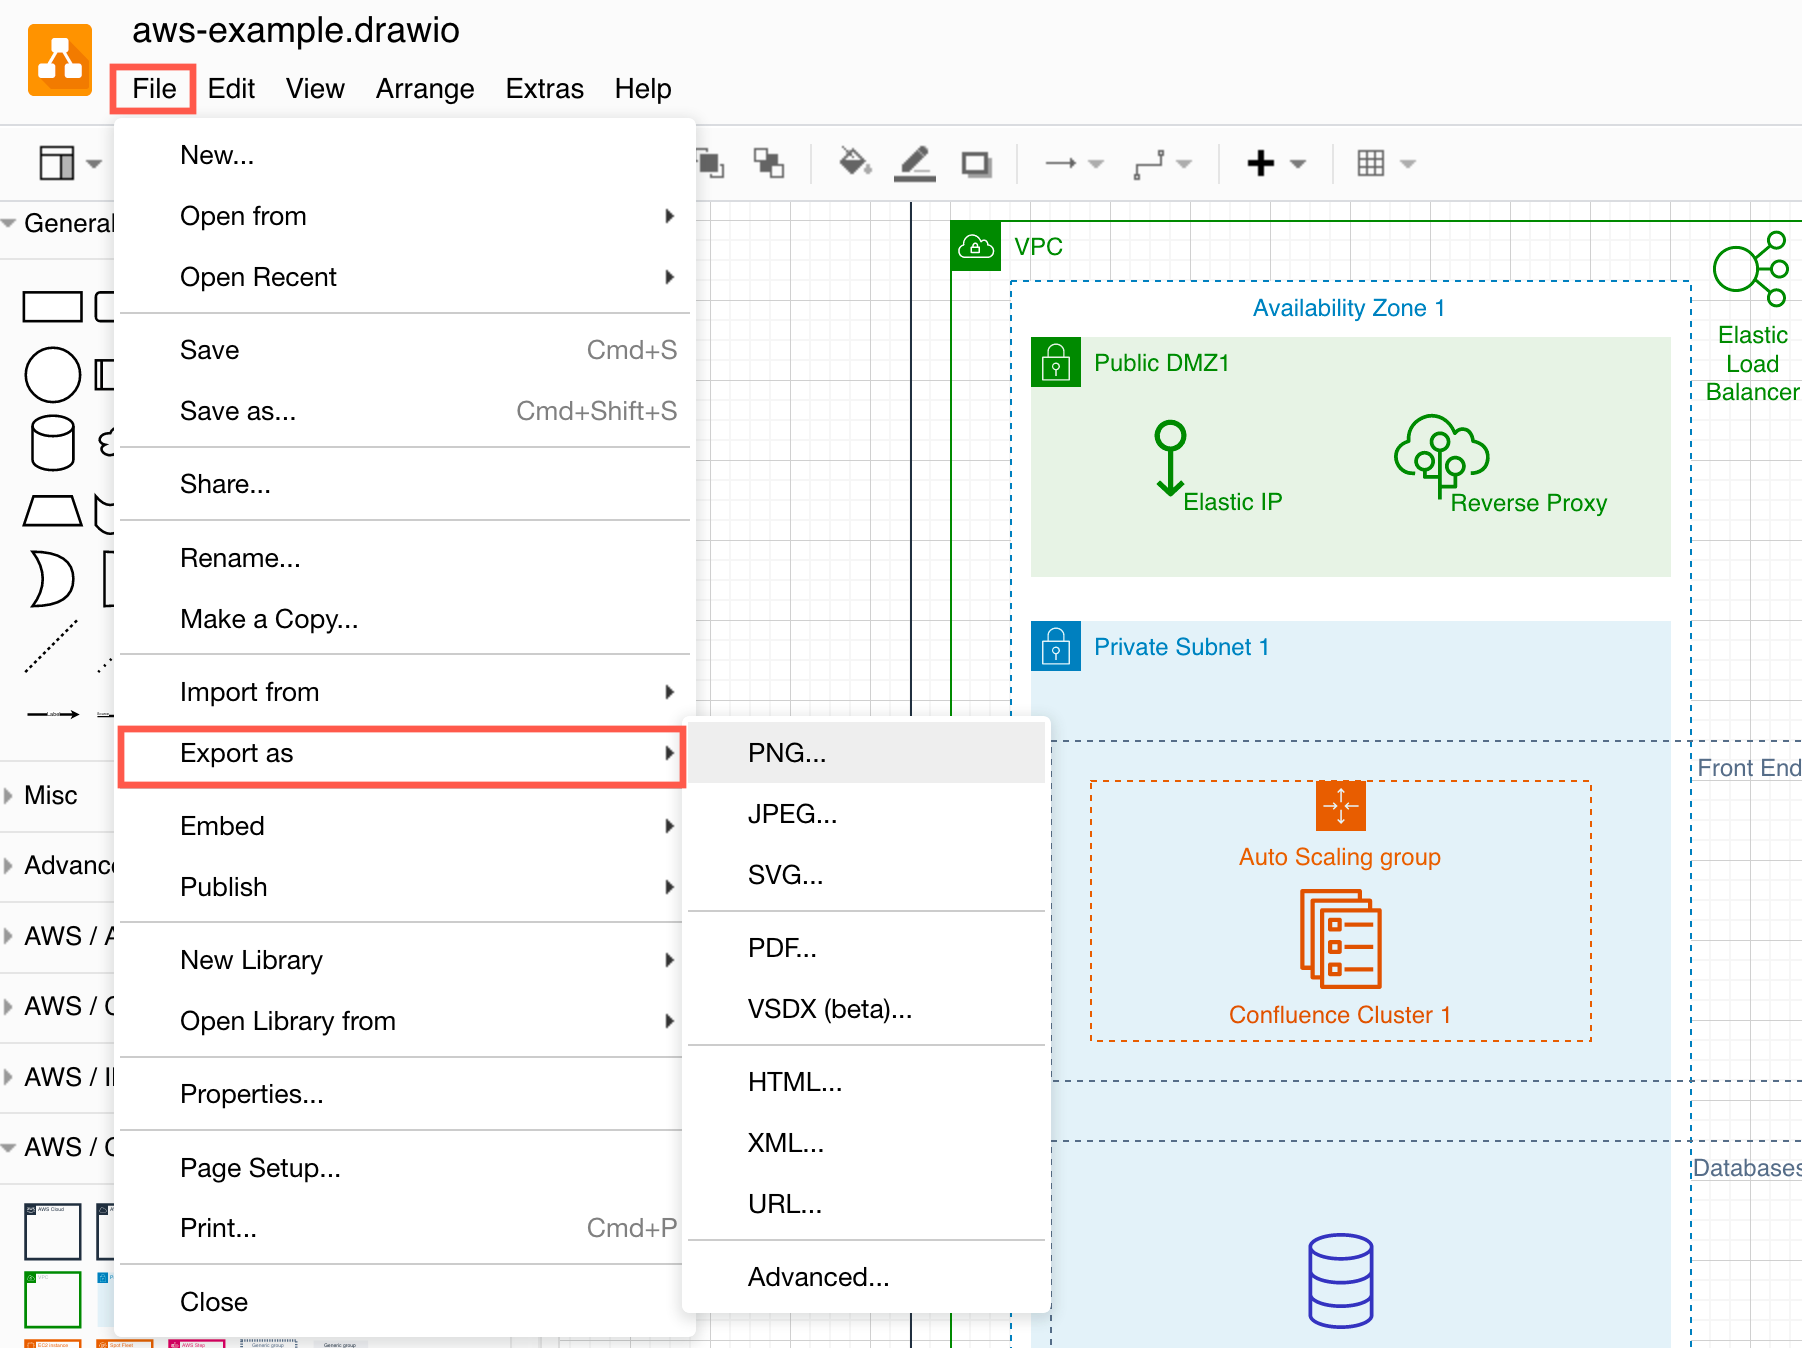
Export your AWS diagram
Once you have completed your AWS diagram, you can export it to a number of different formats to include in your company's documentation.
Select File > Export as from the menu. The most common formats for re-using in documentation are image and PDF formats.
- Image formats: Select one of
PNG,SVG, orJPEG. - PDF: You can also crop the PDF export to the diagram size.
Tip: If you want people you share your exported diagram with to be able to edit it, make sure you select the Include a copy of my diagram in the Image export options dialog.
Embed your AWS diagram
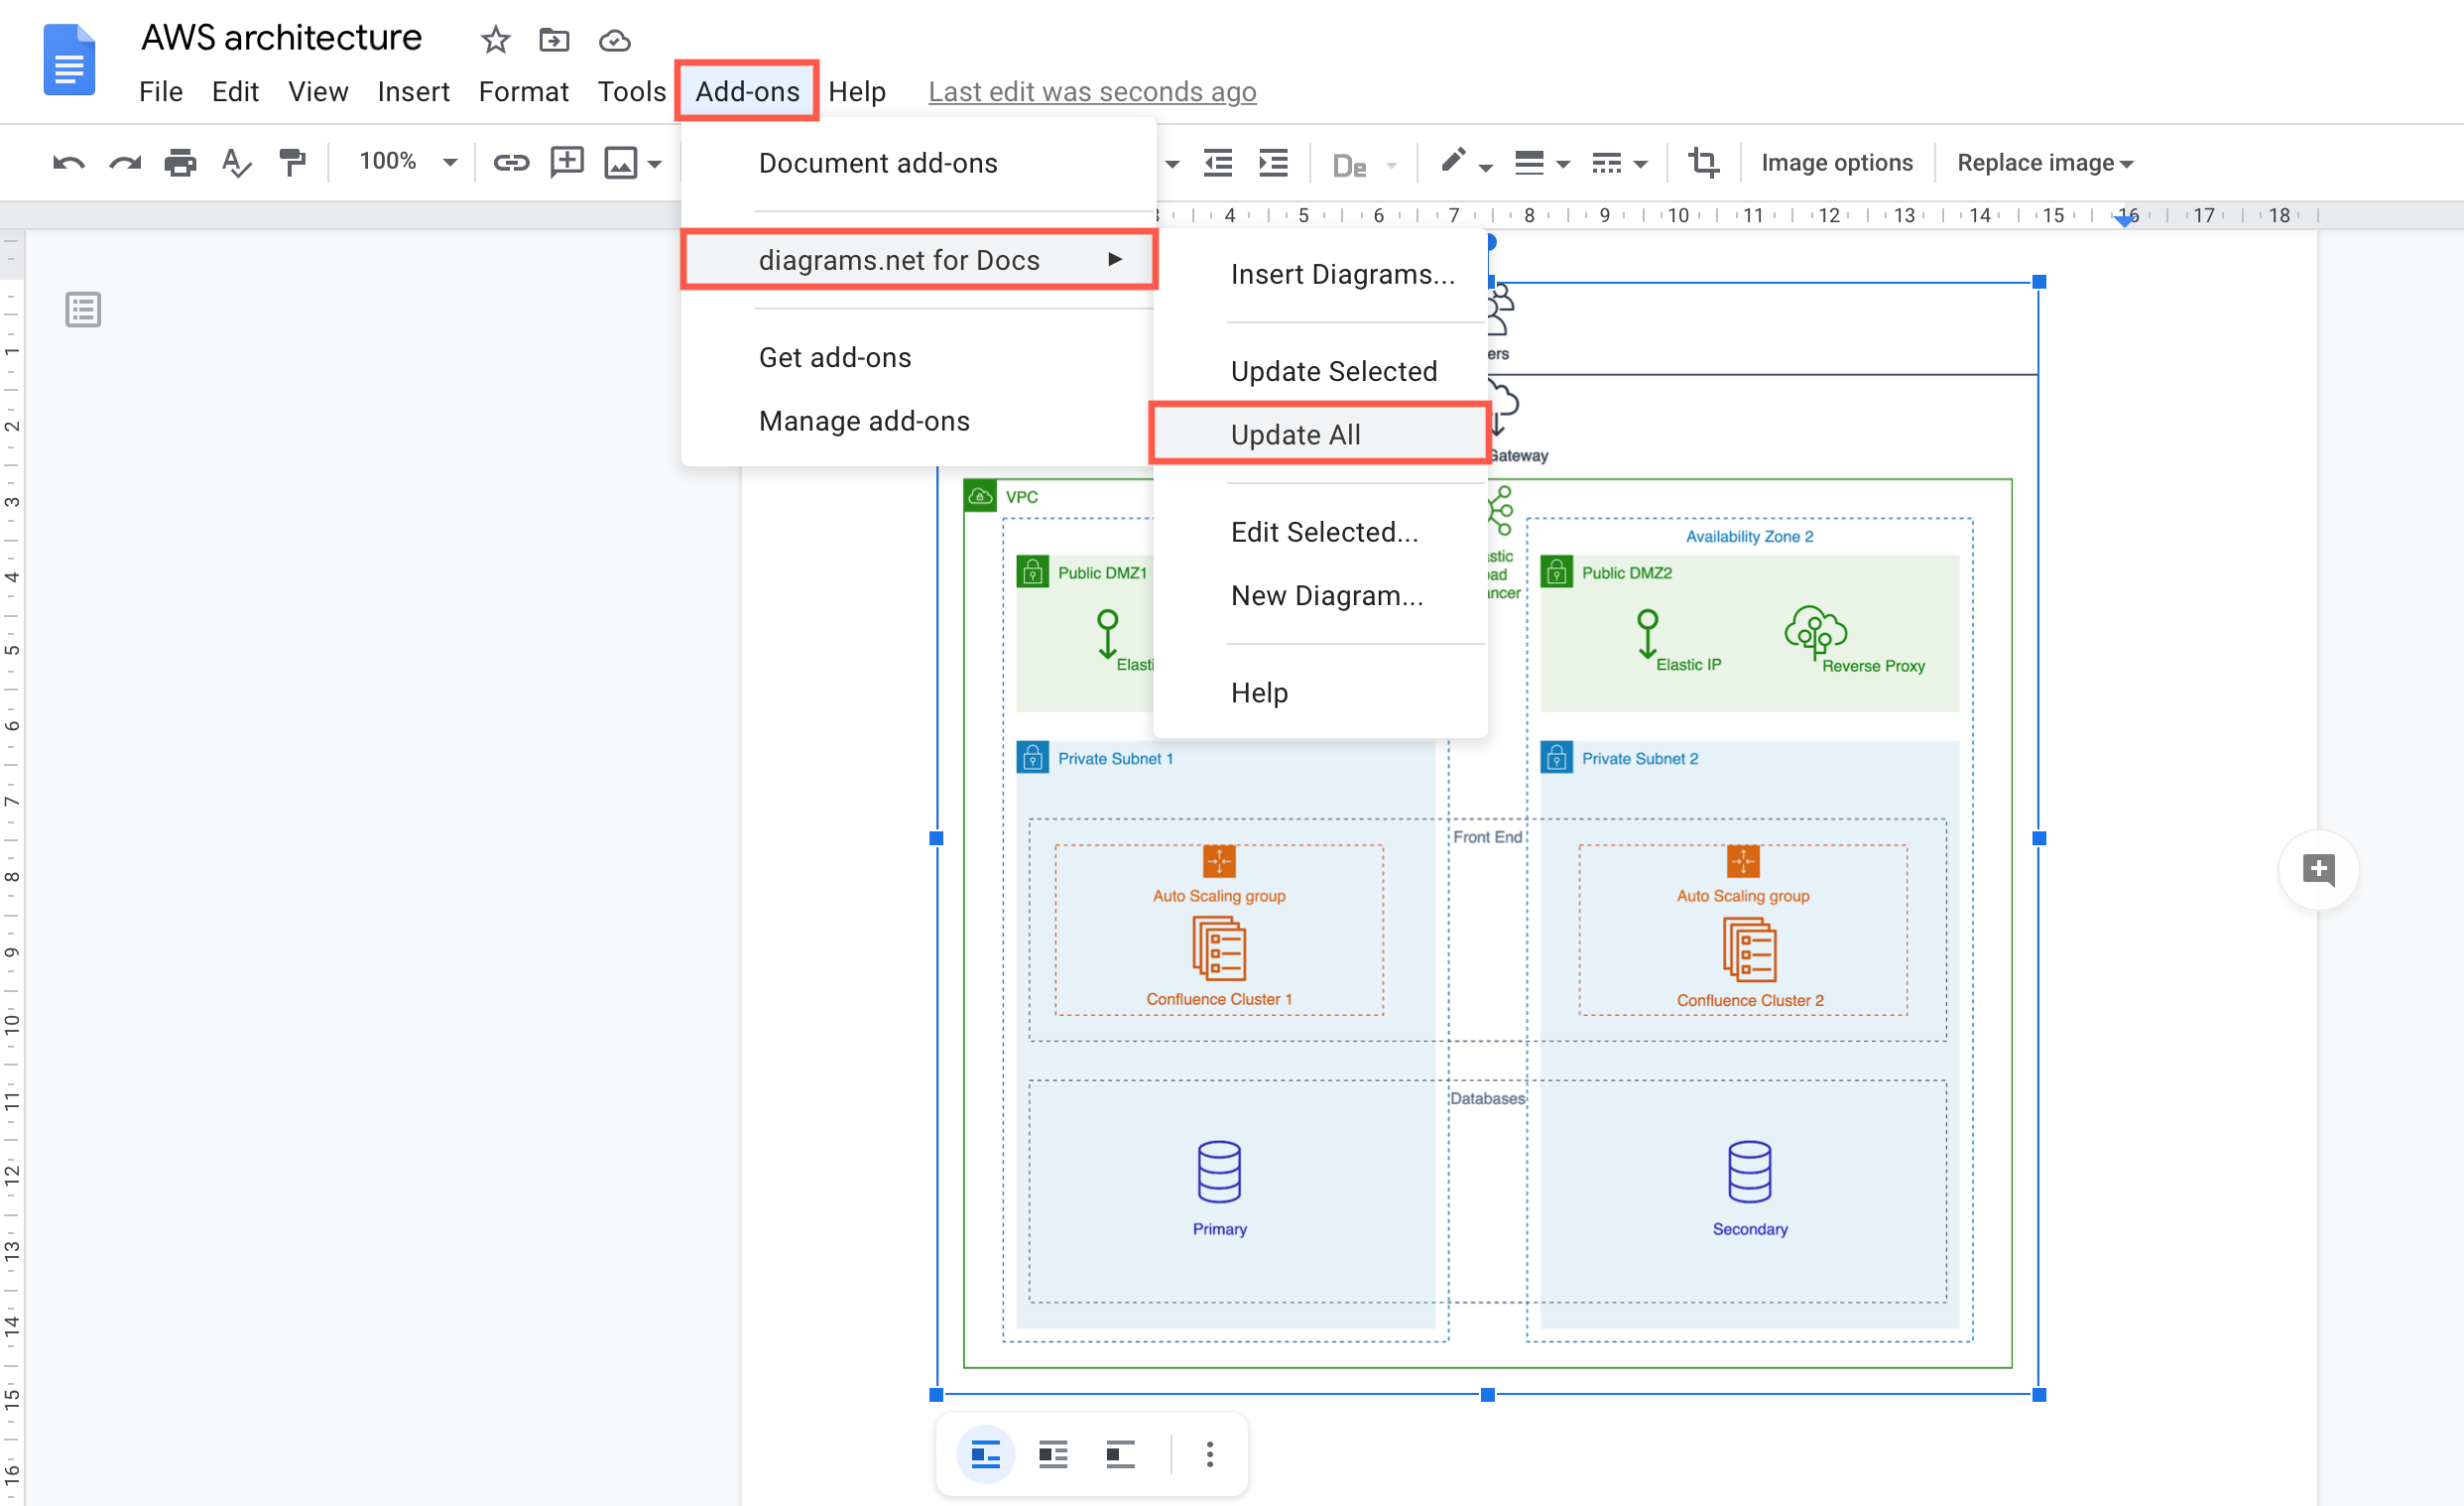
Save the time you'd normally spend exporting your diagram to an image format, then importing that to your document and instead embed your AWS diagram stored in the cloud in your document. When you edit the diagram file on your cloud platform, all you need to do is update the diagram in your document.
- Confluence Cloud
- Jira Cloud
- Google Docs
- Microsoft Word, Excel and Powerpoint
- Google Sites
- GitHub markdown pages
- Notion