Drawing floorplans and layouts in draw.io
Floorplans aren't only useful for real-estate agents and people who are moving to a new apartment. You can also plan new office spaces, show emergency routes, create a seating chart, document piping or electrical wiring, plan a conference or trade show layout - anything where you need to arrange and document a space.

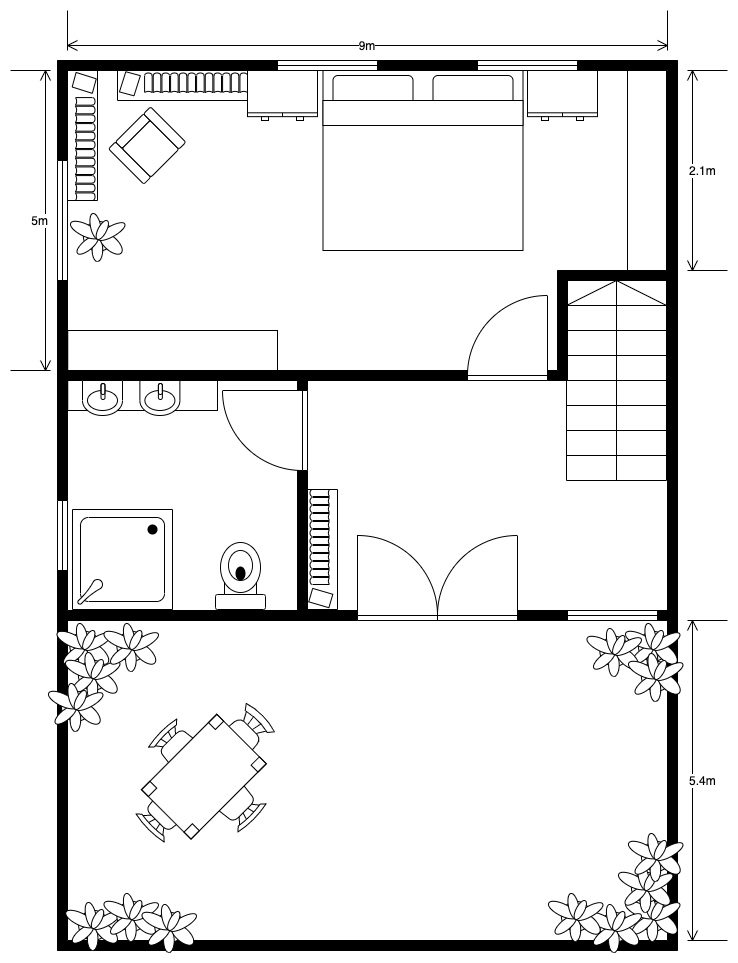
Explore this floorplan in our diagram viewer. Use the viewer toolbar to see both pages and display hidden layers. Click on the staircase to go to the other floor.
What are floorplans?
Imagine you are looking at the room from directly above - you can see all the walls, windows, doors, and furniture. Each part of a floorplan is normally drawn to scale, and shows how everything in the room is positioned relative to the rest of the room. Floorplans may incorporate measurements or additional useful information like electrical outlets and light fixtures.
To avoid bottlenecks and make sure that people can move easily around a space, floorplans are essential tools. Even landscape designers use floorplans, where their 'furniture' is actually a variety of plants and garden features. If you've ever moved house, you probably will have drawn a rough floorplan to make sure your furniture will fit your new space.
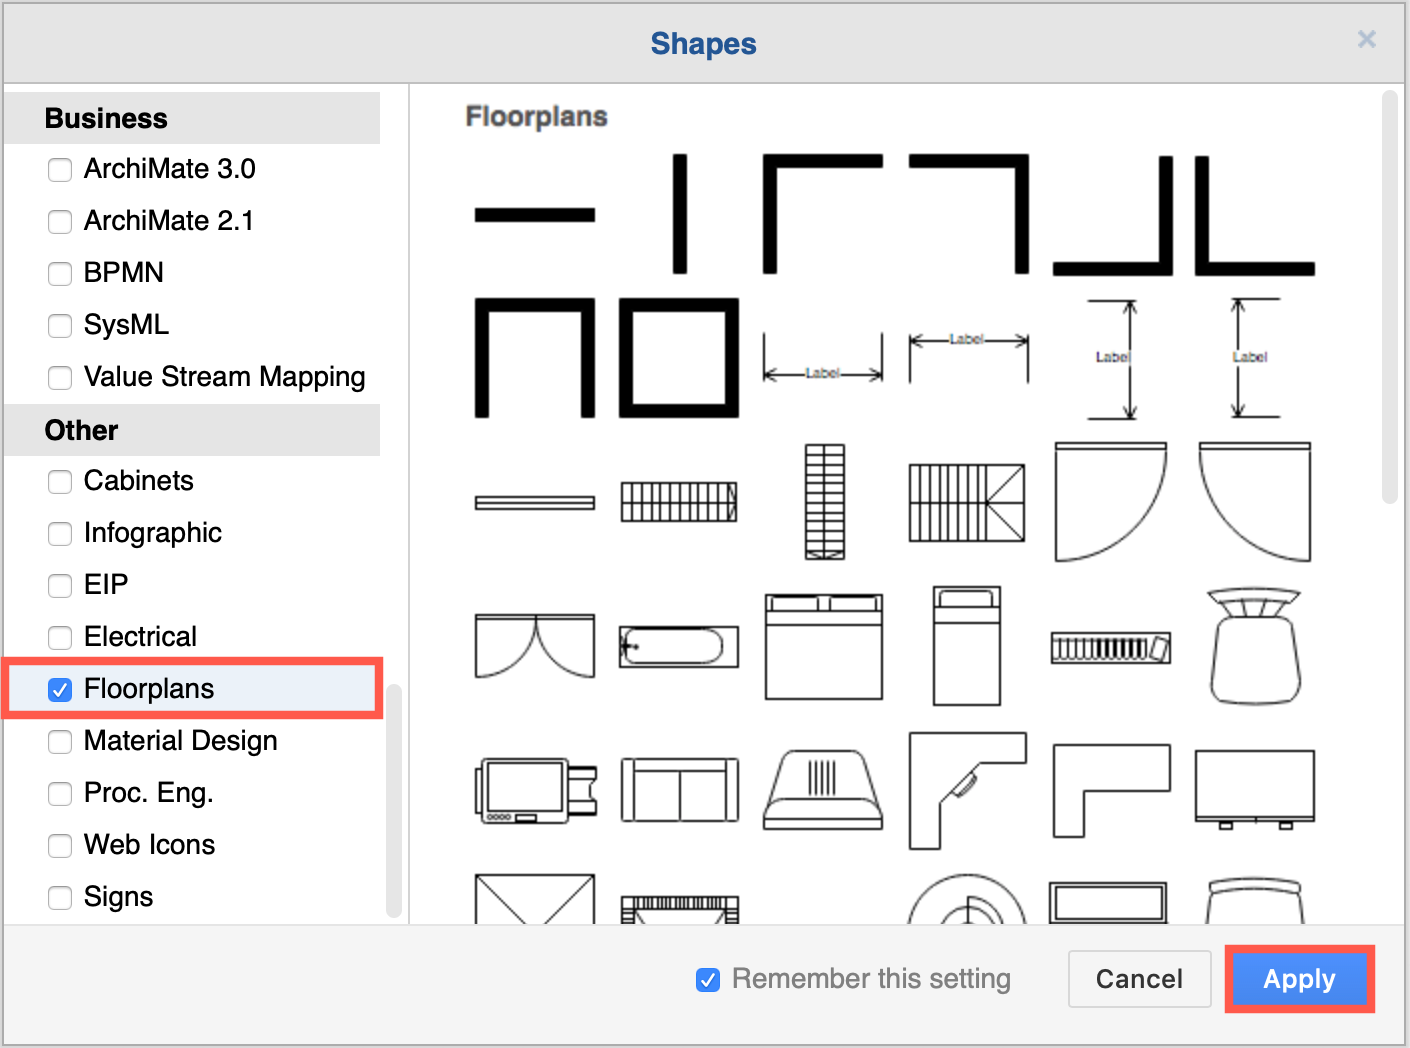
Enable the Floorplan shape library
- At the bottom of the left panel, click More Shapes.
- Scroll down to the Other section in the Shapes dialog, and click on the checkbox next to the Floorplans shape library to enable it, then click Apply
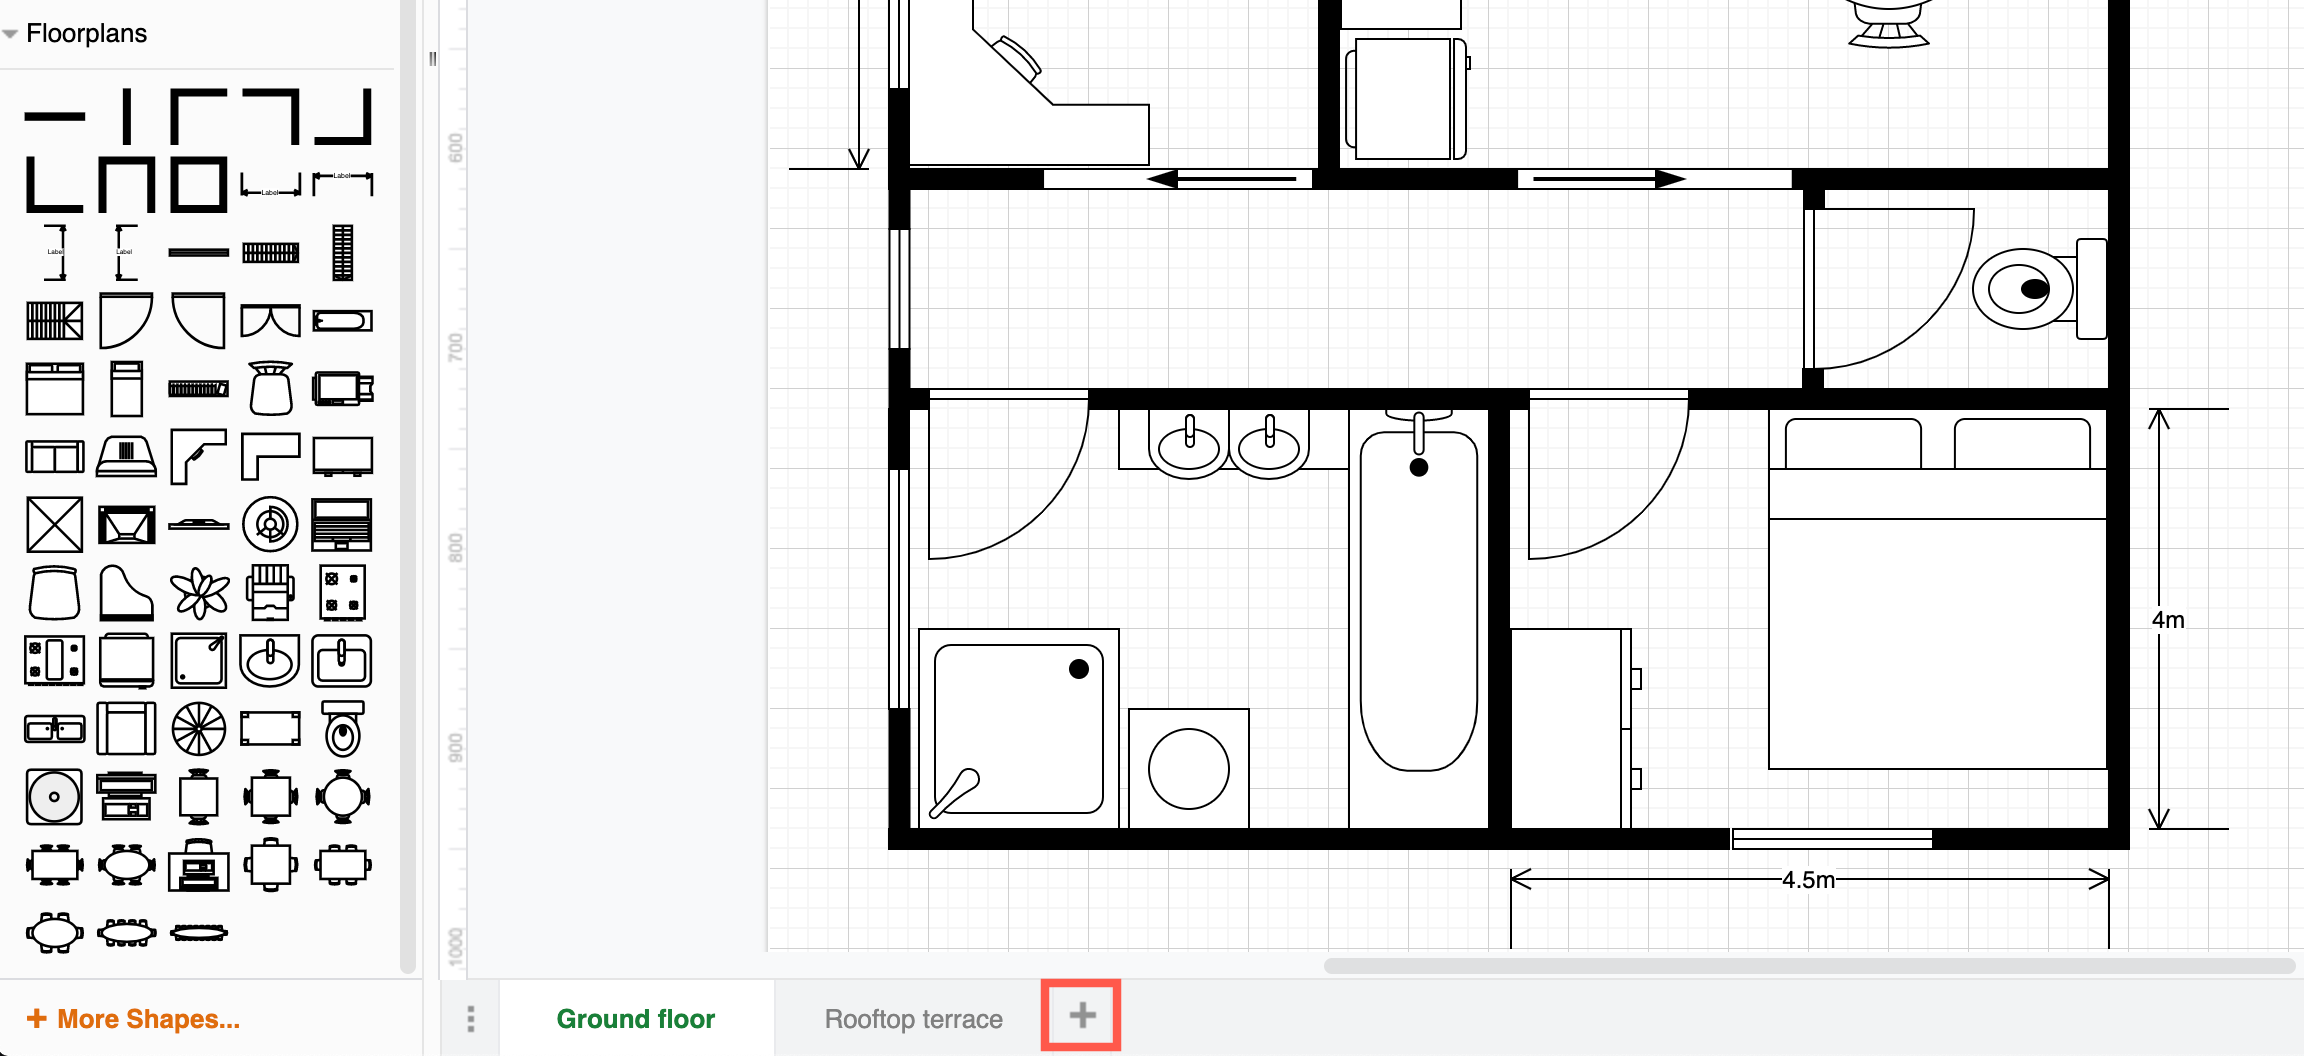
Then, use the shapes from this library (and the default library) to build your floorplan. Click on a shape to add it directly to the drawing canvas, or drag a shape from the library to the position it needs to be.
Tips for drawing floorplans in draw.io
Work with floorplan shapes
The bakground grid and the snap to grid option (enabled by default) will help you resize shapes to scale and position them neatly. Also when you drag shapes around, you'll see guidelines appear to help you align shapes relative to those that are already on the canvas.
To display the rulers at the edge of the canvas, select View > Ruler from the menu.
Once you have selected a shape, you can resize, rotate, flip and rearrange overalapping shapes via the Arrange tab on the format panel.
Use multiple pages for different floors
Instead of making a large and complex floorplan, use separate pages in your diagram for each floor.
- Click on + at the bottom of the canvas to add a new page to your diagram.
- Double click on the name of the page, enter a new name, then click Rename.
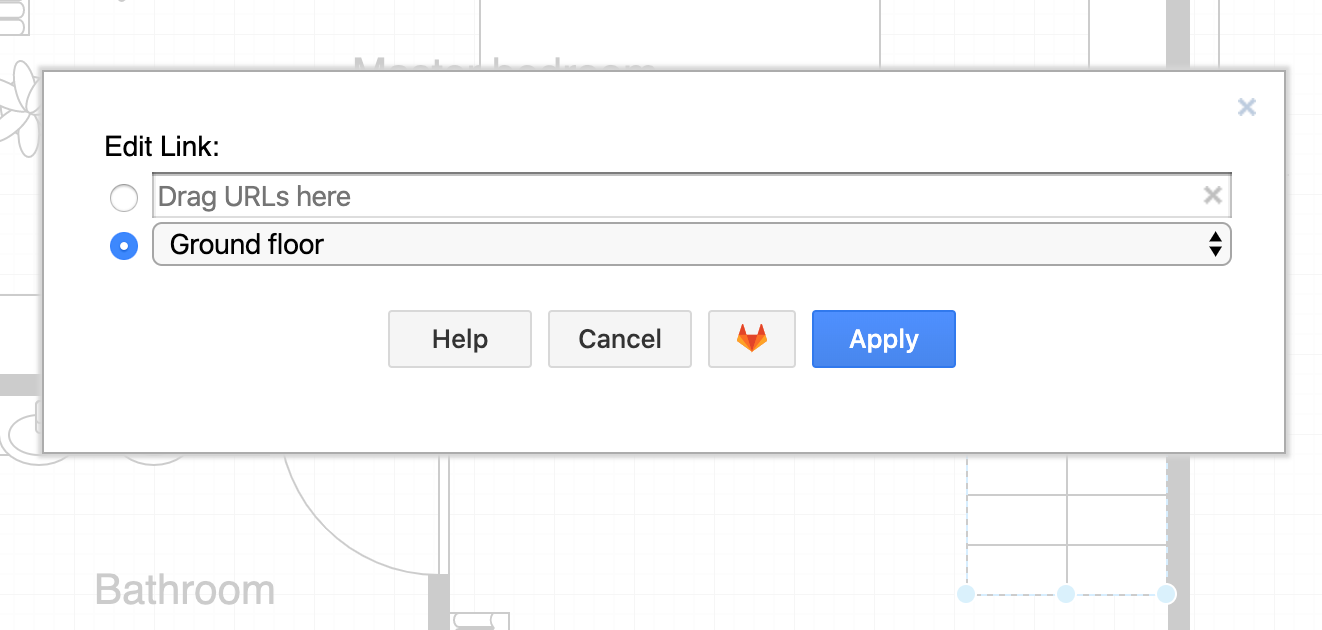
Add links to your floorplan
You can also link shapes so that they will take the viewer to another page in your diagram (or somewhere else entirely). For example, you can link a staircase to the page containing the destination's floorplan.
- Right-click on a shape to open the context menu, then select Edit Link.
- Click on the radio button next to the drop down list, then select the page name from the list.
- Click Apply to save your link.
Work with layers in your floorplan
Using layers lets you separate built-in immovable objects from the furniture that can be moved around. It's a good idea to lock the immoveable fixtures layer so you don't accidentally move a wall along with your furniture.
Select View > Layers from the menu to see the layers dialog.
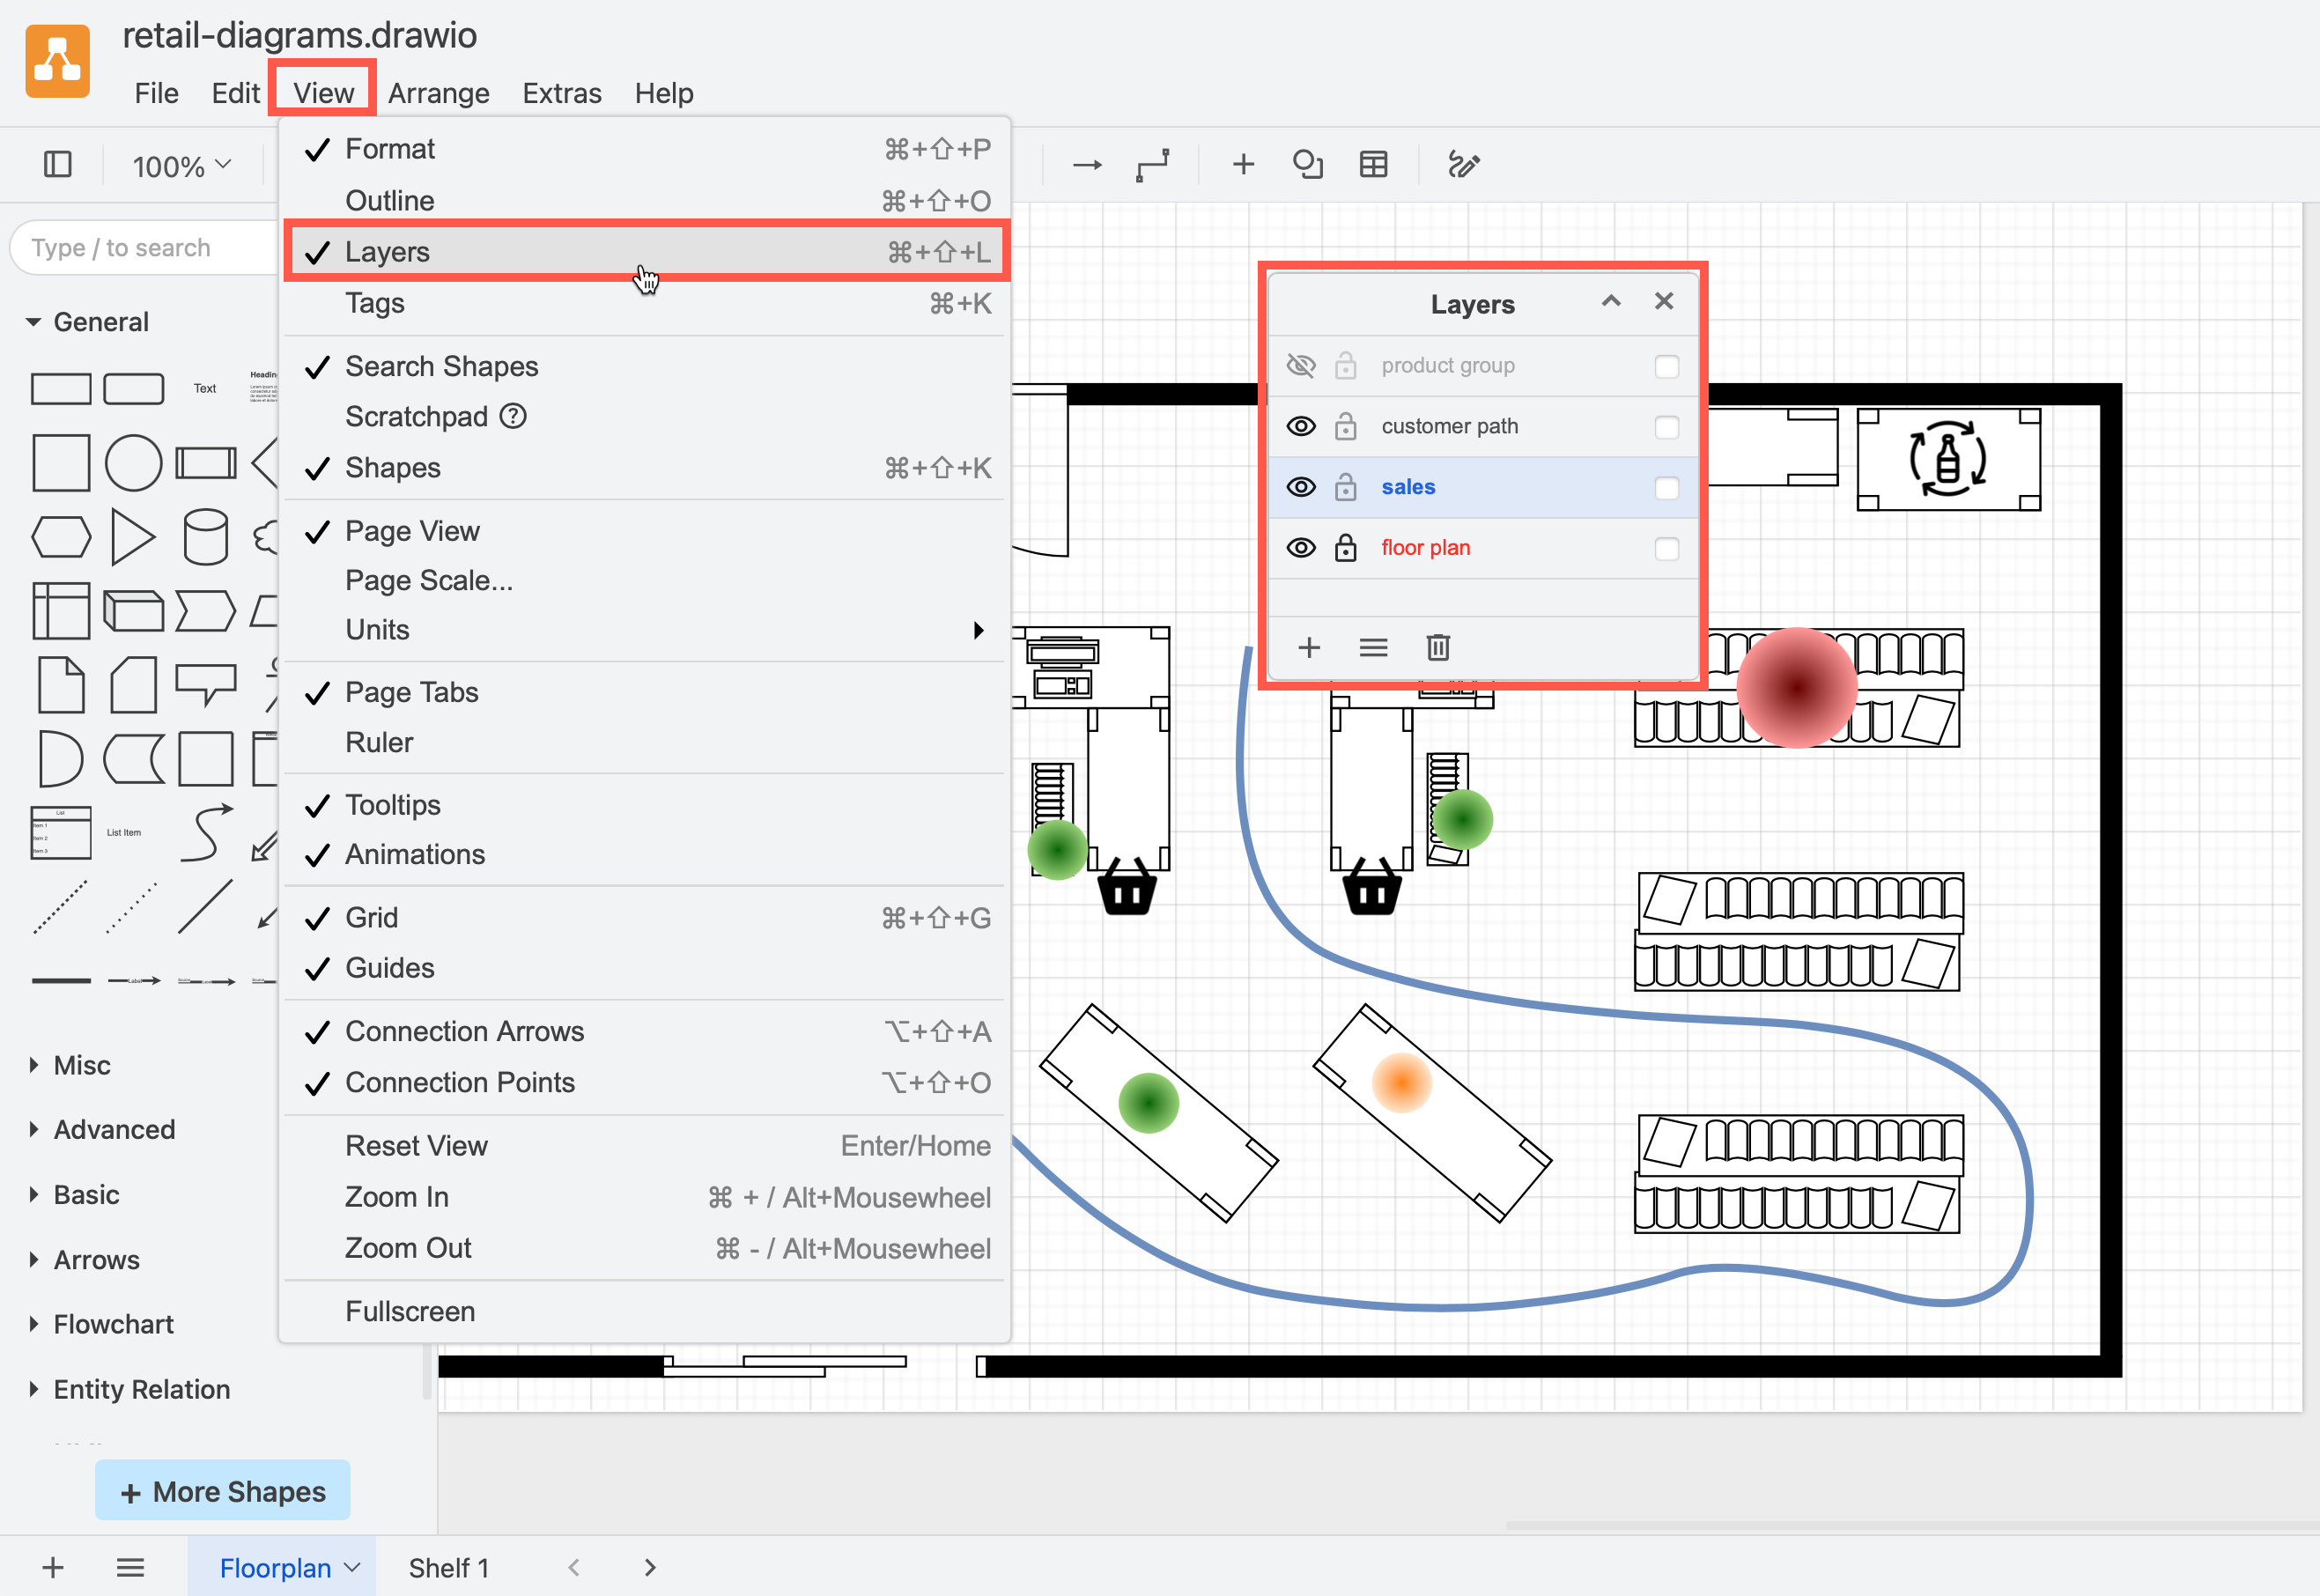
In the layers dialog:
- Add a new layer: Click on the plus icon at the bottom.
- Rename a layer: Double-click on a layer, then enter its new name.
- Duplicate a layer: Select the layer, then in the Layers dialog, open the menu (three horizontal lines) and select Current Layer > Duplicate.
- Delete a layer: Click on the trash icon.
- Move shapes to another layer: Select the shapes you want to move, then in the Layers dialog emnu, click on Current Layer > Move Selection to and choose the target layer.
- Display or hide a layer: Click on the eye next to the layer's name.
- Lock a layer: If you want to make sure nothing on a layer can be edited, click on the lock icon next to the layer's name. This locks all of the shapes on that layer, as well as whether the layer itself is hidden or not.
Note: Make sure you have clicked on (selected) the layer you want to add shapes to - it's easy to add shapes to the wrong layers.
Learn more about working with layers
Office floorplan template
If you want to create an office floorplan, you may find the floorplan templates in draw.io a useful foundation.
- Create a new diagram, or click Arrange > Insert > Template or + > Template to open the template library dialog.
- Select the Other category on the left.
- Select the floorplan template, then click Create.
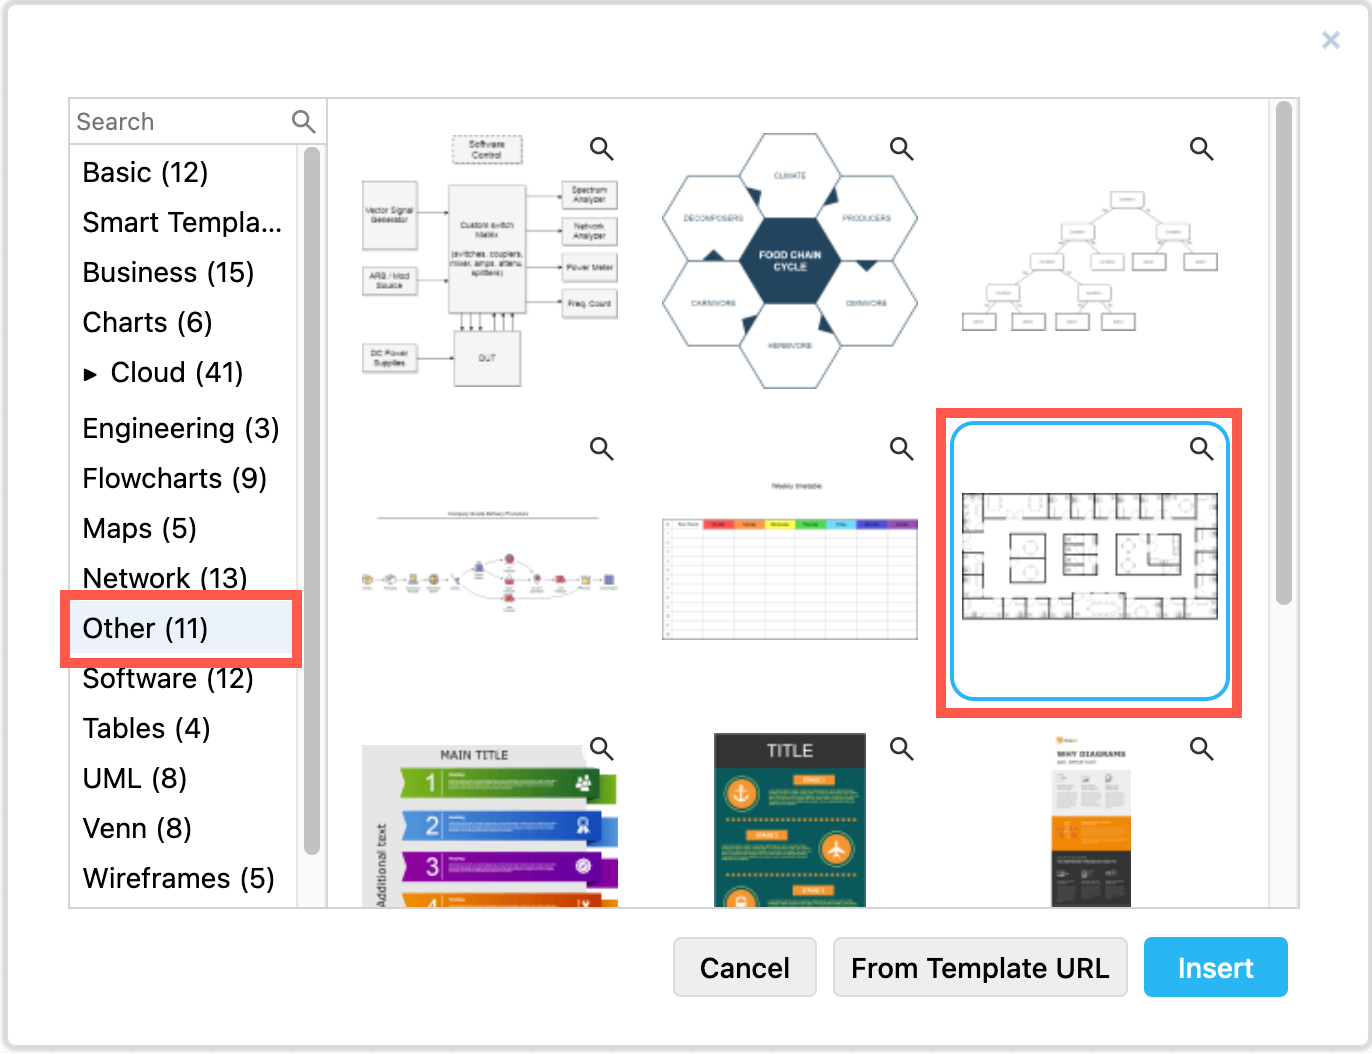
If you already have a blank diagram, select Arrange > Insert > Template, select the Other category then the office floorplan template, then click Insert to add it to your diagram.