Work with layers in draw.io
Layers add structure and organisation to your diagrams. When you interact with a complex diagram, to display or hide its various layers, you can understand them more easily.
Note: Each shape or connector (or group) can only be placed on one layer - it can’t belong to multiple layers.
Using layers in diagrams
The sections below explain how to work with layers in draw.io.
- Using layers in diagrams
- Work with shapes on layers
- Hide or display layers
- Lock layers to prevent changes
- Select objects in a layer
- Diagrams that work well with layers
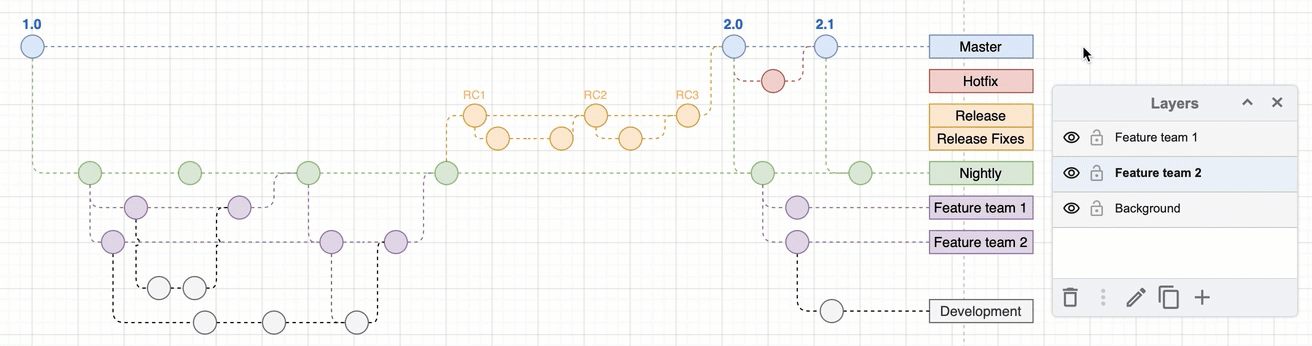
Tip: Open the example gitflow in the draw.io editor - use the sections below to learn how to work with these layers in a diagram.
You can also learn how the .drawio file format works with layers
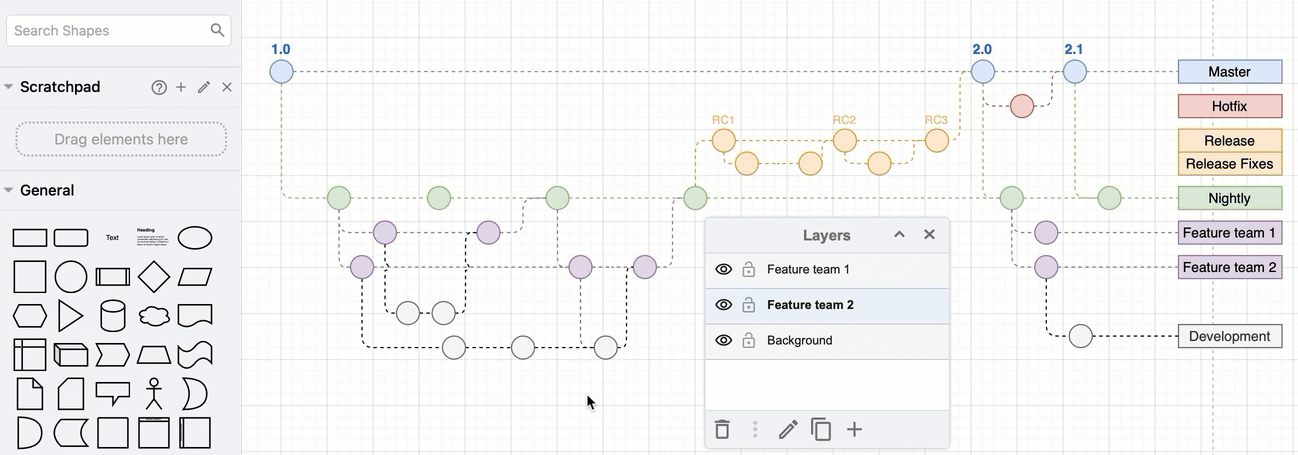
Open the Layers dialog
Select View > Layers or press Ctrl+Shift+L / Cmd+Shift+L to display or hide the Layers dialog.
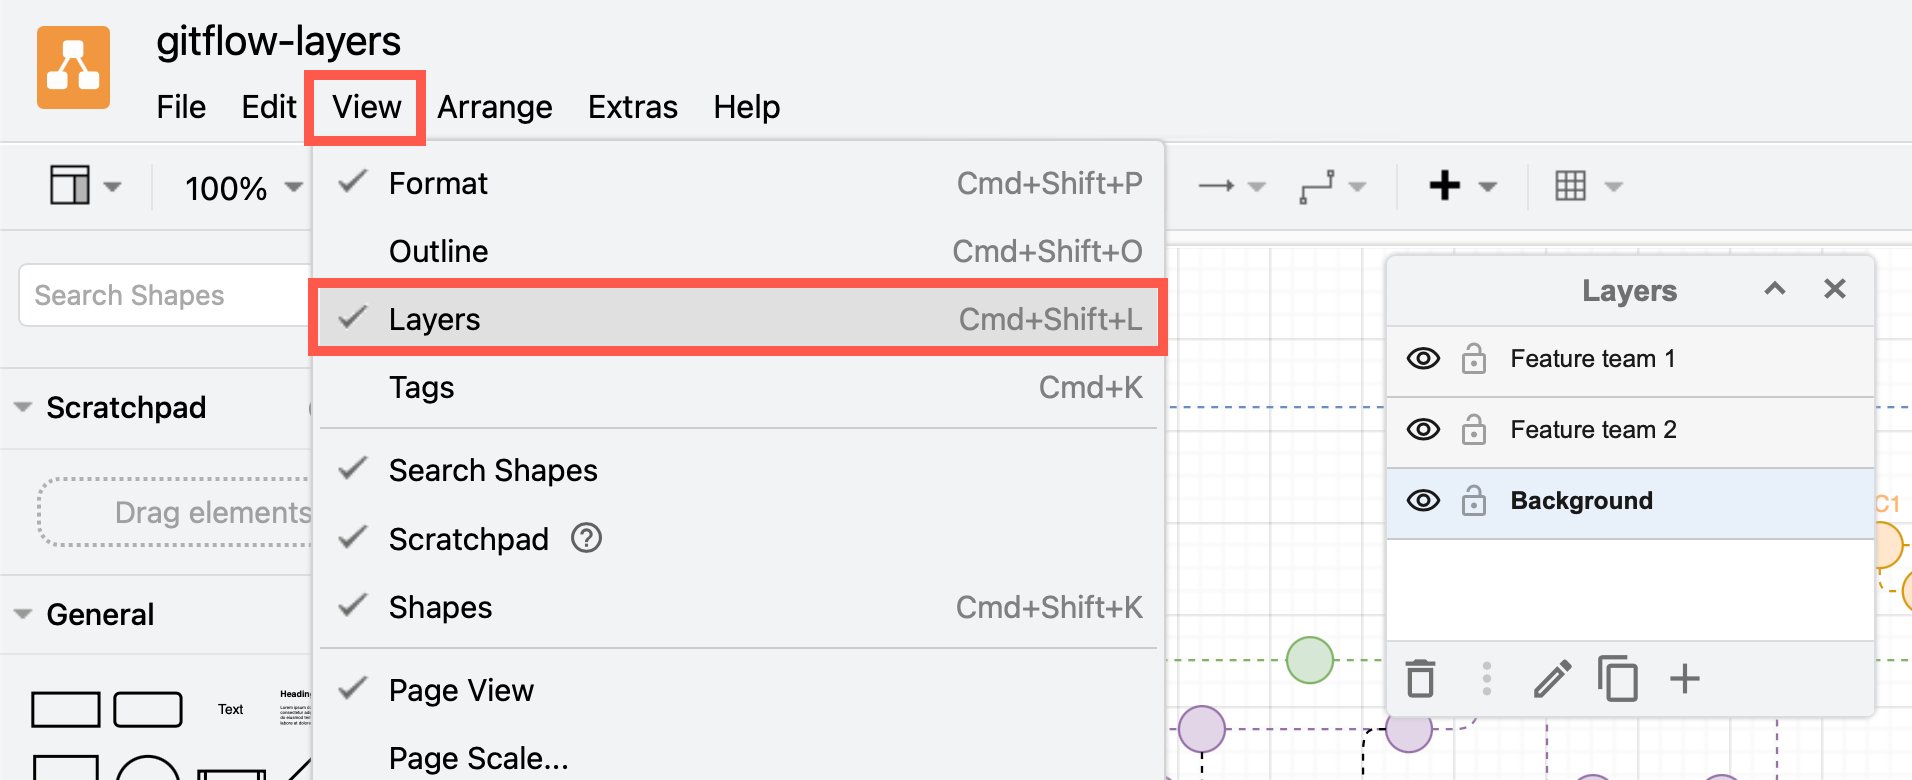
By default, a new diagram has a single Background layer, to which all shapes, connectors and text are added.
From the Layers dialog, you can add new layers and rename them, select which layer to add new shapes to, remove existing layers, and move selected shapes to a layer.
You can also display and hide layers, which will display or hide all the shapes, connectors and text that are on those layers.
Finally, locking a layer makes sure you can’t make any inadvertent changes.
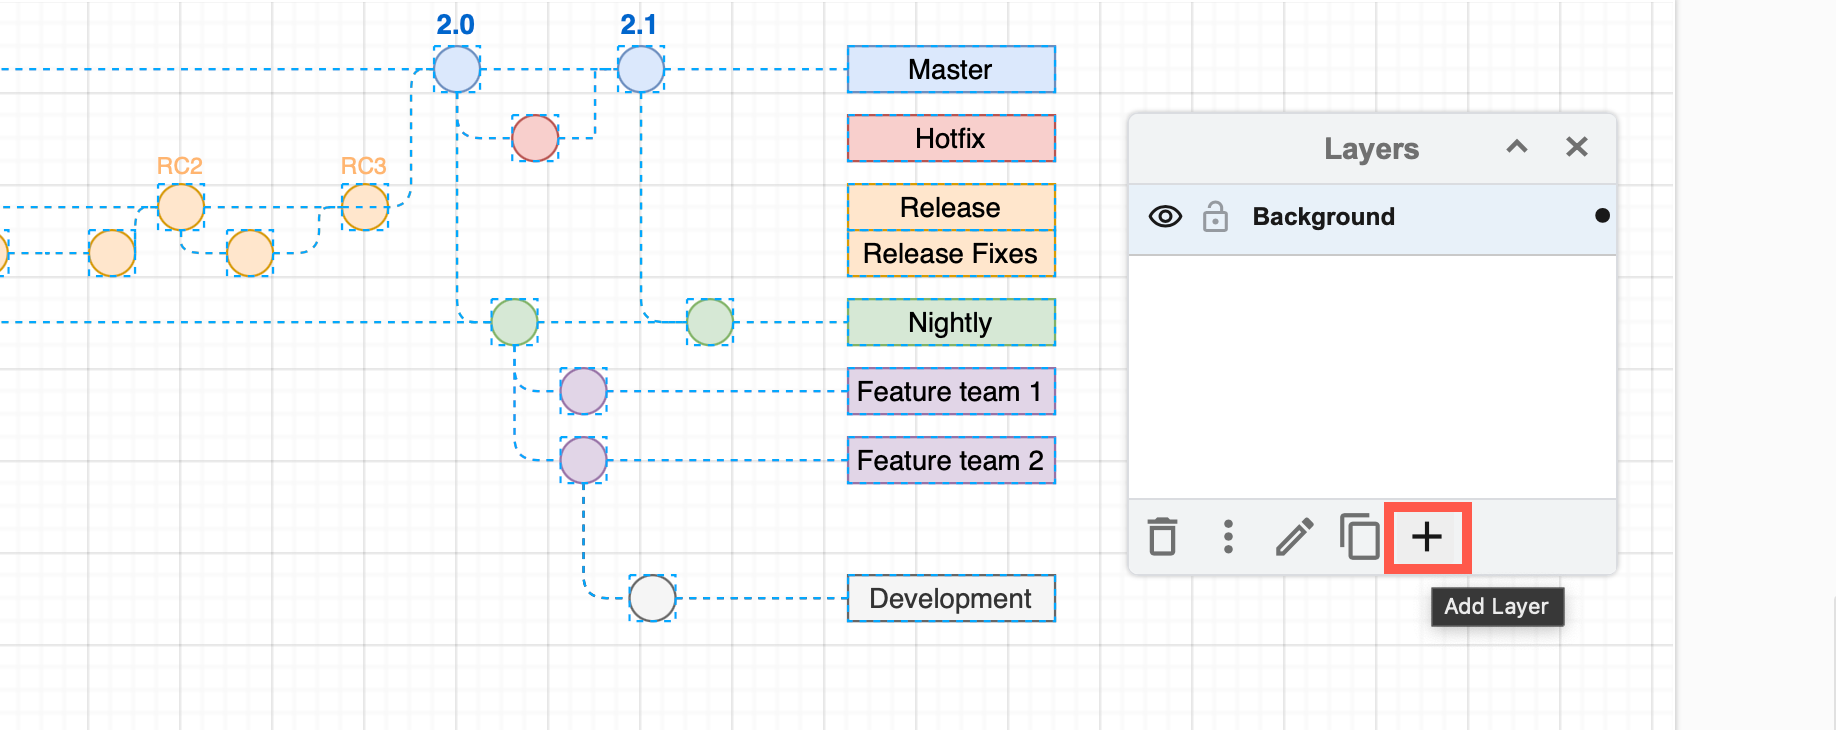
Add a new layer
At the bottom of the Layers dialog, click on Add Layer (+).
Your new layer will be automatically selected (with a blue background), and any new shapes you add to the drawing canvas will be placed on your new layer.
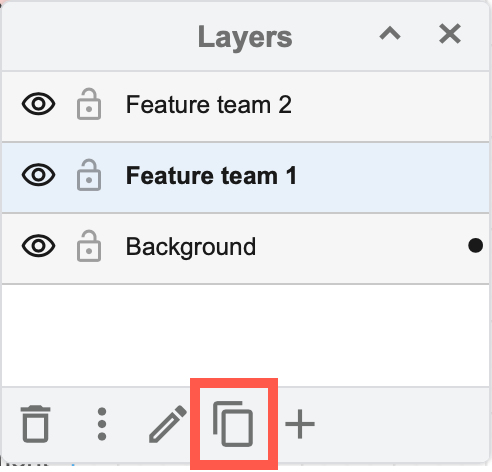
Duplicate a layer: Select the layer you want to duplicate, then click on the Layers menu (three horizontal lines) and select Current Layer > Duplicate.
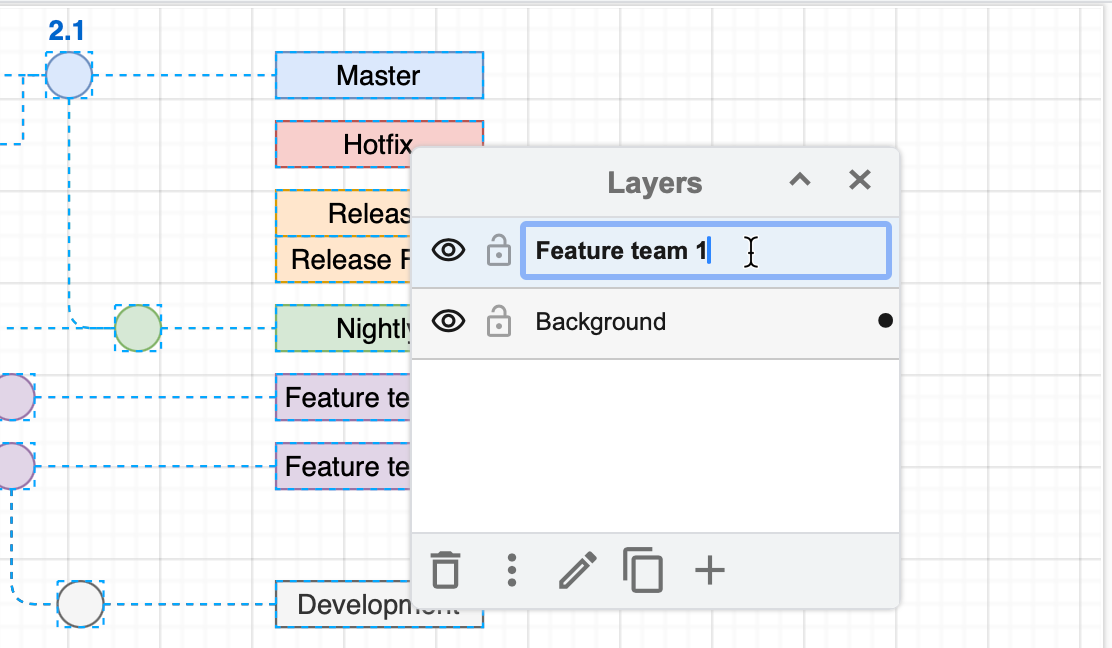
Rename a layer
When you add a new layer, it will be given a default name. Start typing immediately to change its name to something meaningful. Double click on any layer to edit its new name at any time, or open the Layers menu and select Current Layer > Rename.
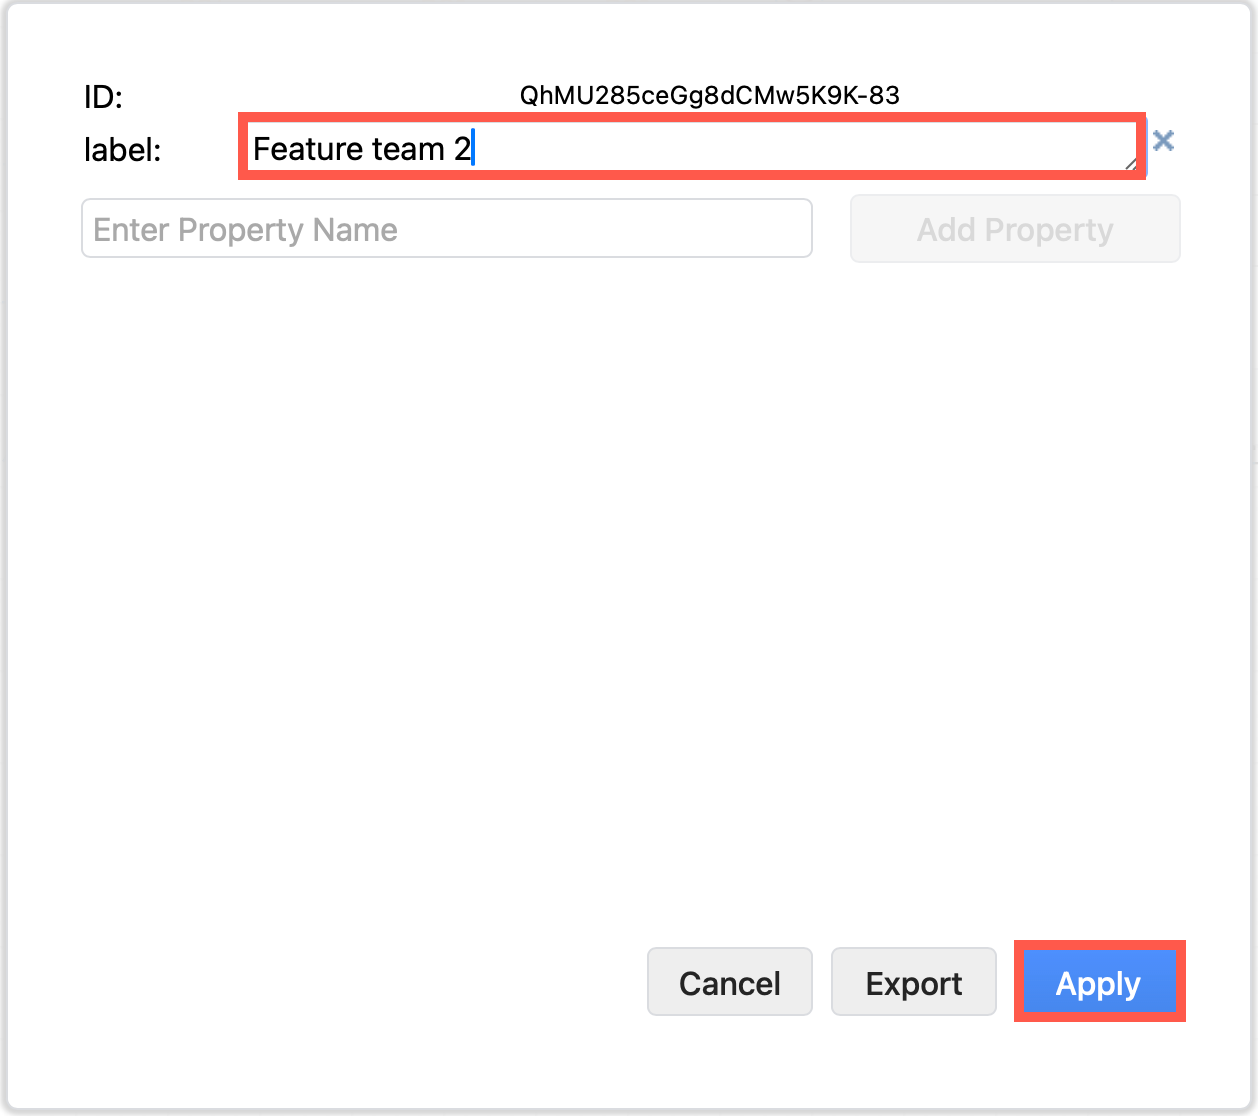
Rename a layer via its metadata
Layers have metadata, just like shapes have metadata. This metadata allowed advanced functionality within your You can also change a layer’s name via the Edit Data dialog.
See how to use metadata and placeholders in labels and tooltips
- Select a layer, then click on the Layers menu (three horizontal bars) and select Current Layer > Edit Data.
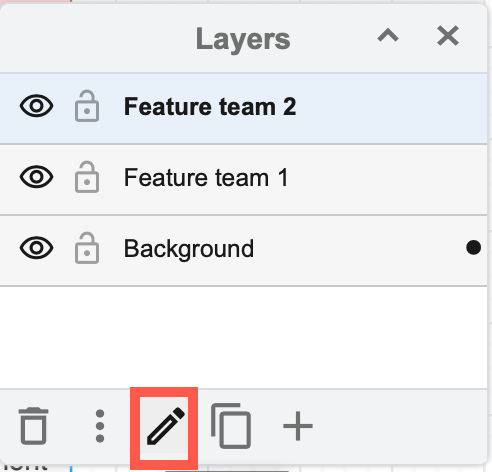
- Change the text in the Label field and click Apply to change the layer’s name.
Remove a layer
Removing a layer will delete all the shapes and connectors that are on it as well as the layer itself. Click on a layer to select it, then click on Delete in the bottom of the Layers dialog (rubbish bin) to remove the layer and its shapes.
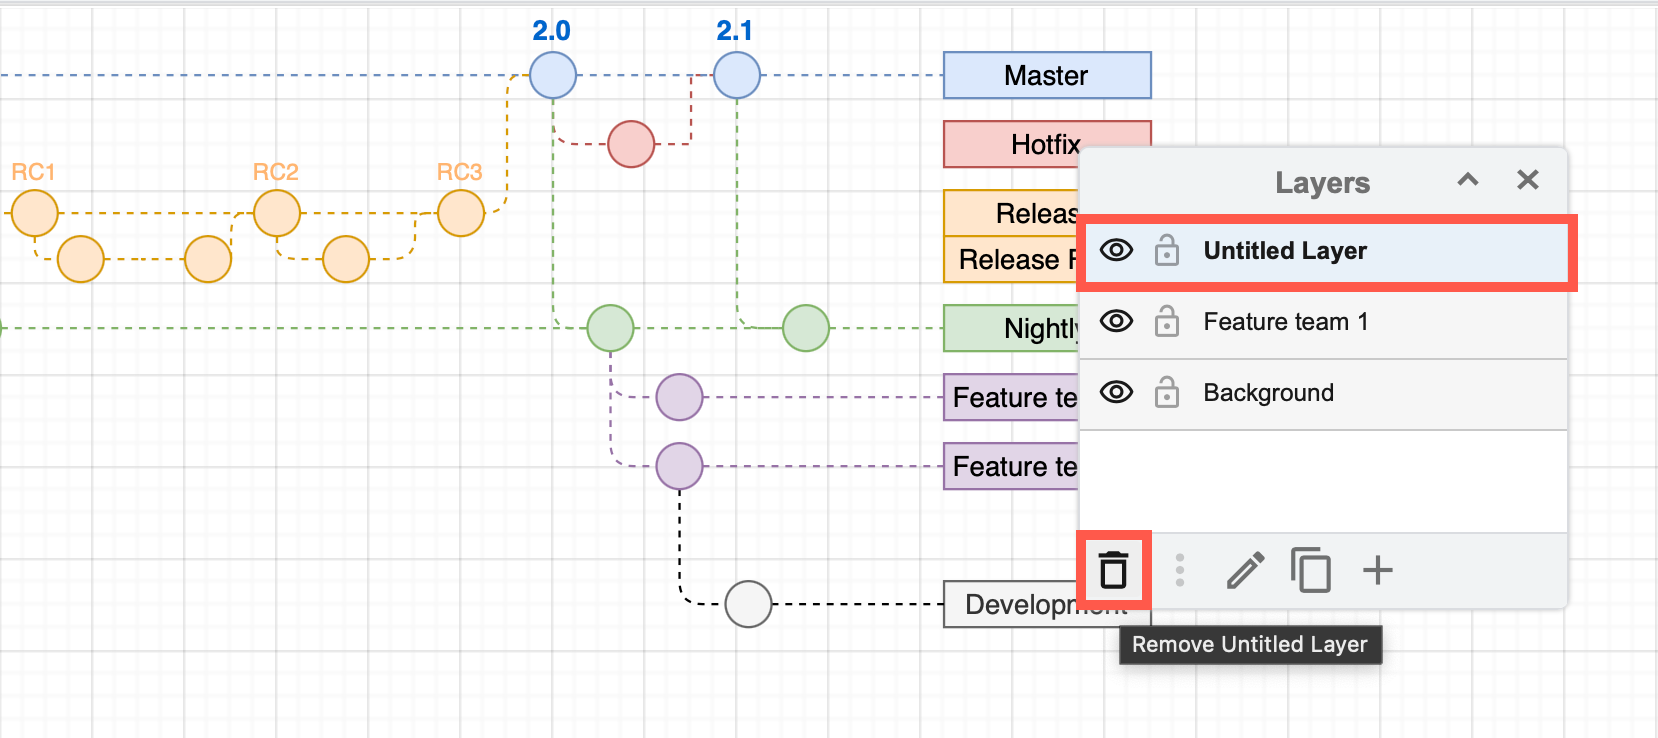
Note: Your diagram must have at least one layer for shapes and connectors to be placed. If there is only one layer in your diagram, you can not delete it.
Work with shapes on layers
Shapes are arranged in the order you added them to the drawing canvas, within the layer you added them.
Layers are arranged from front to back as they are ordered top to bottom in the Layers dialog. Shapes and connectors placed on a higher layer can not go behind shapes on a lower layer - they can only be arranged from front to back within their layer.
Add shapes to a layer
- Make the layers are visible and unlocked before you make changes (click on the eye to display a hidden layer and the lock icon to the left of the layer name). Layers are unlocked by default.
- Select the layer you want to add the shape to in the Layers dialog, then add the shape to the drawing canvas.
See which layer a shape belongs to
Select one shape or more shapes - make sure they are all on the same layer. Note the dot to the right of the layer name - this shows that your selected shape(s) are on that layer.
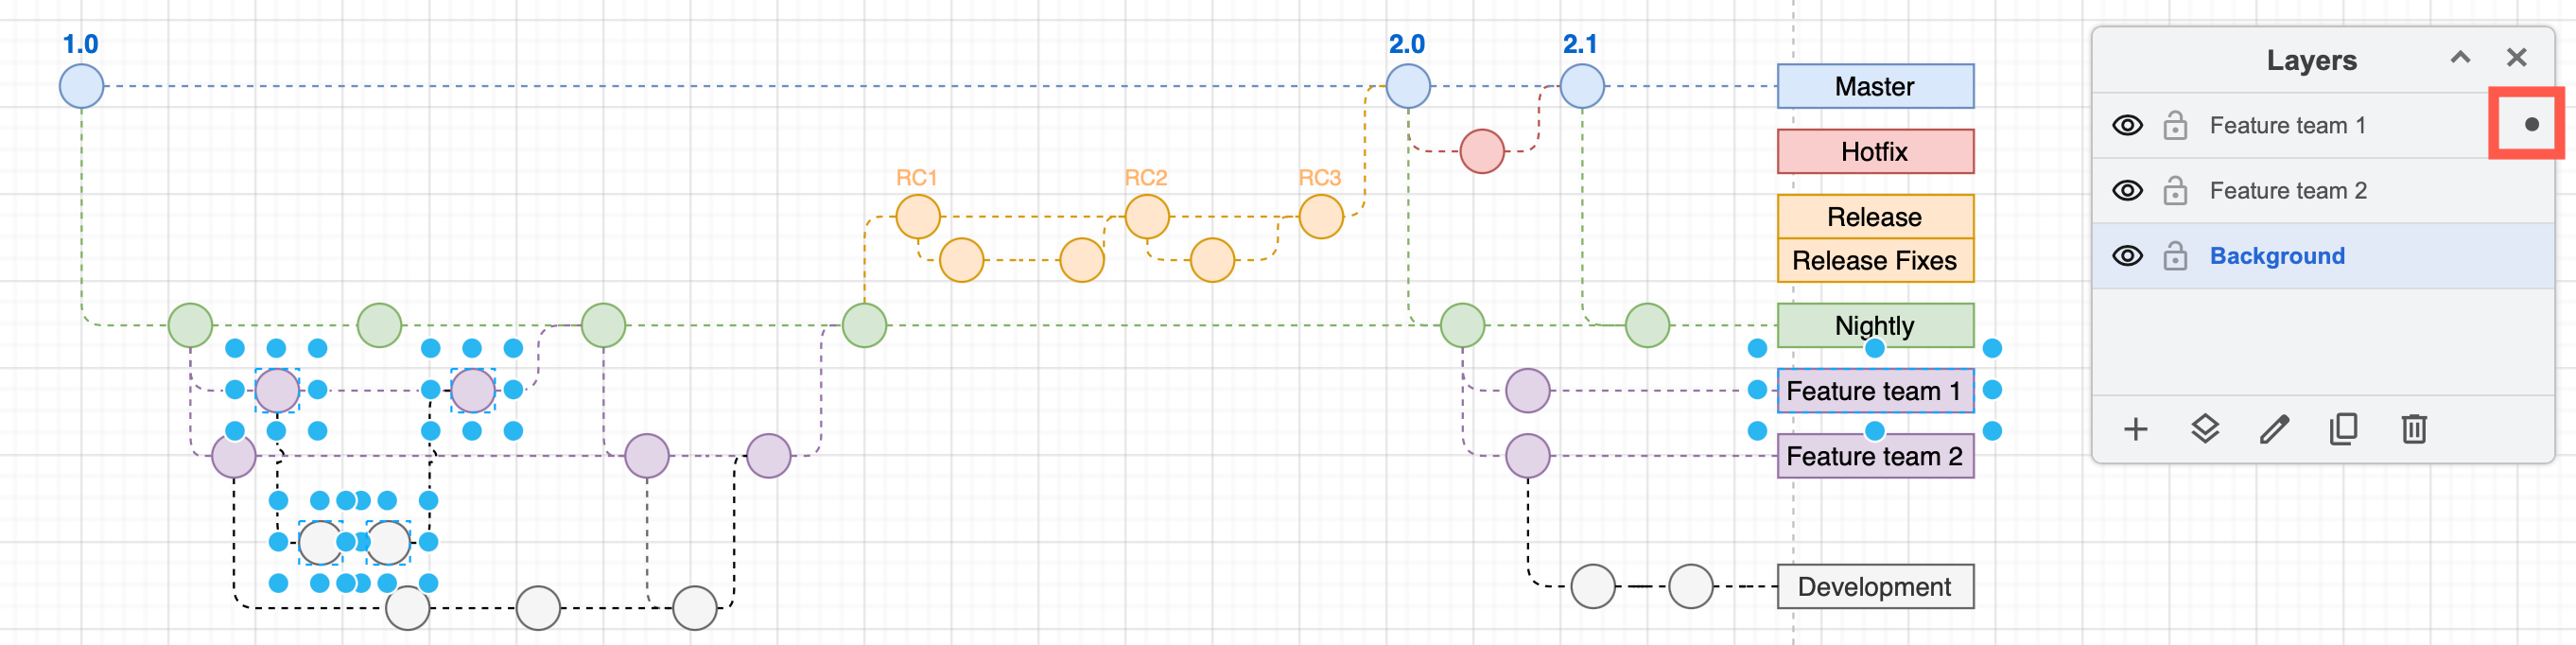
Note: If you have selected shapes on different layers, you will not see a dot in the Layers dialog.
Move shapes to another layer
- Select the shapes, connectors and text you want to move to another layer.
- In the layers dialog, click on the three horizontal lines (Layers Menu), then Move Selection to and click on the layer you want to move your selected shapes to.
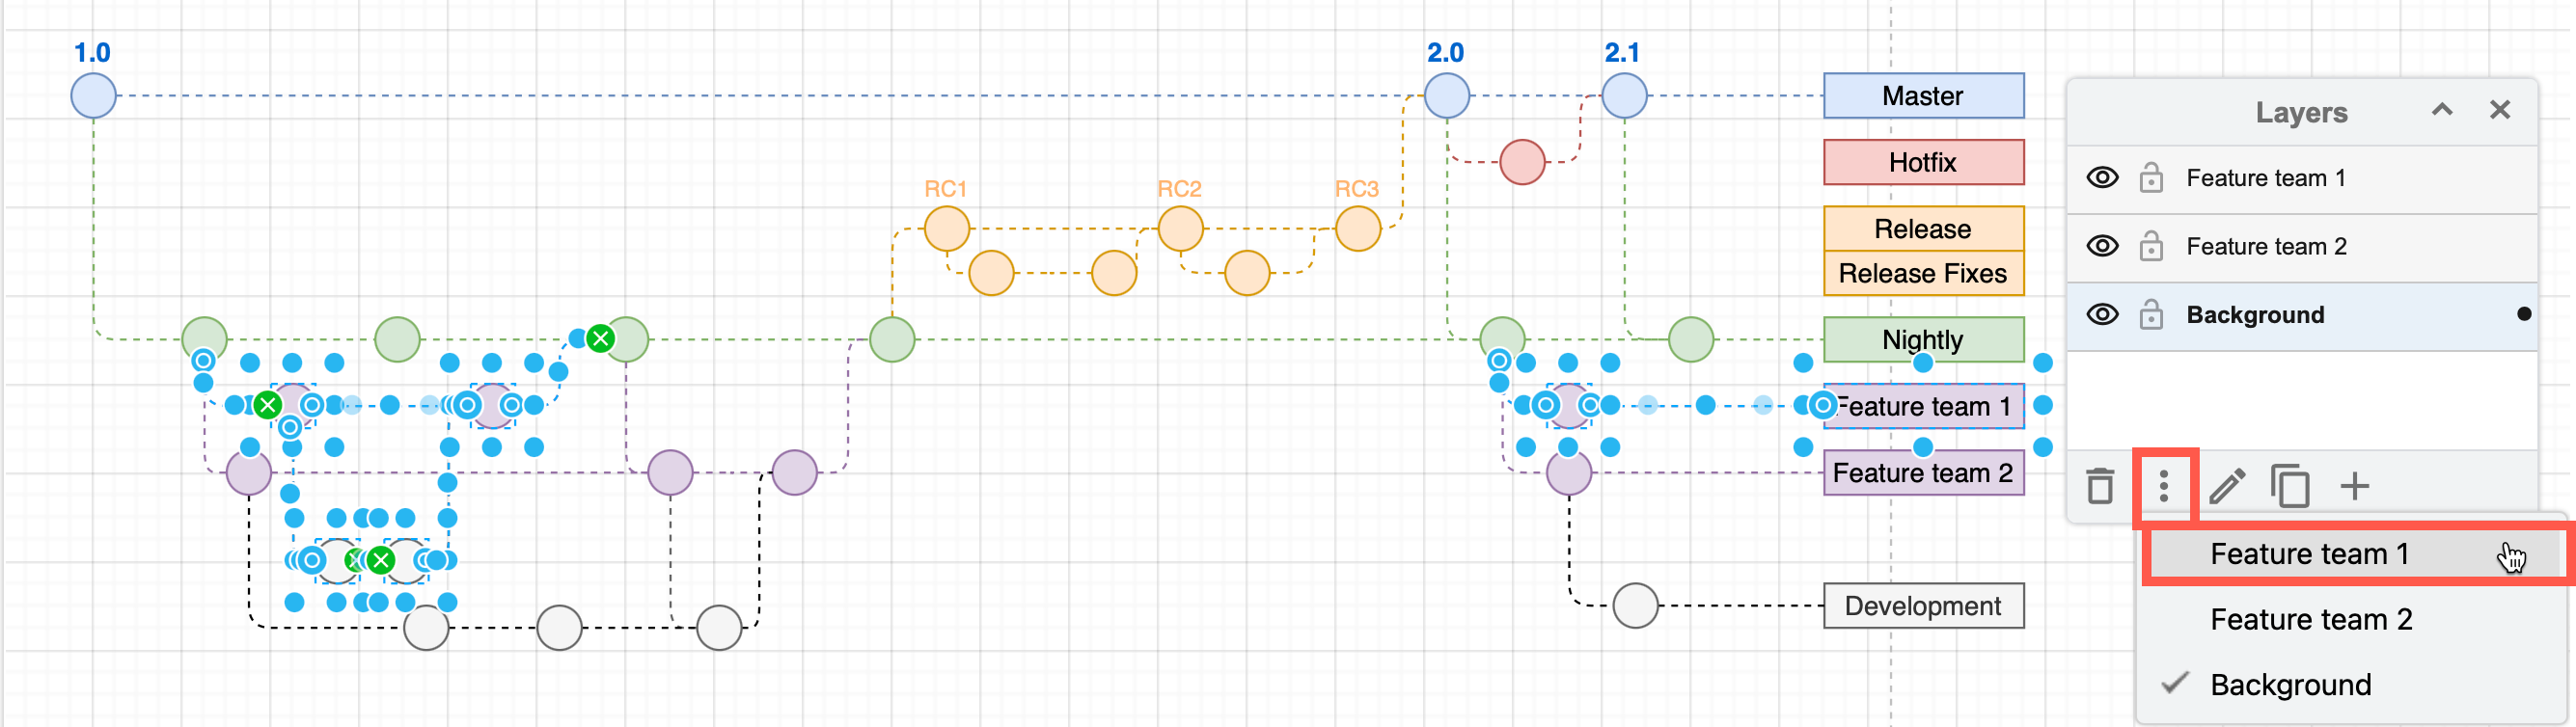
The dot indicating on which layer your selected shapes are will be updated to your choice.
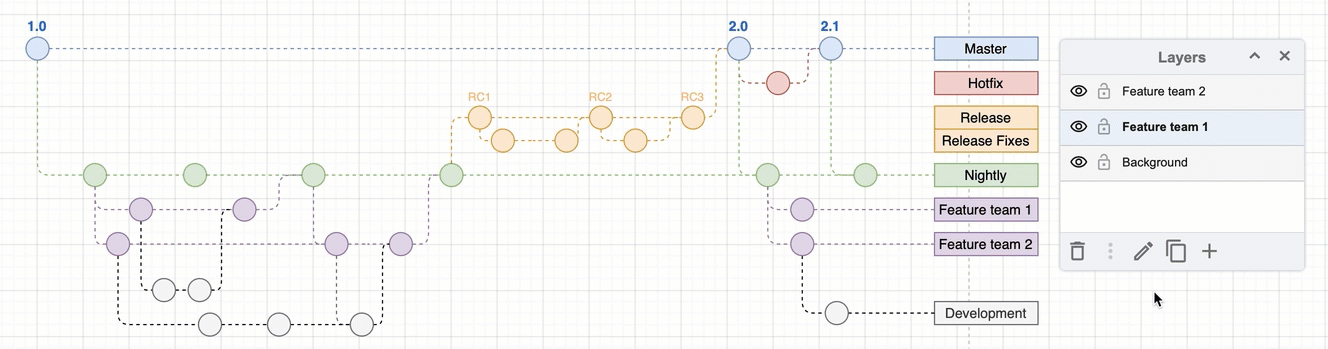
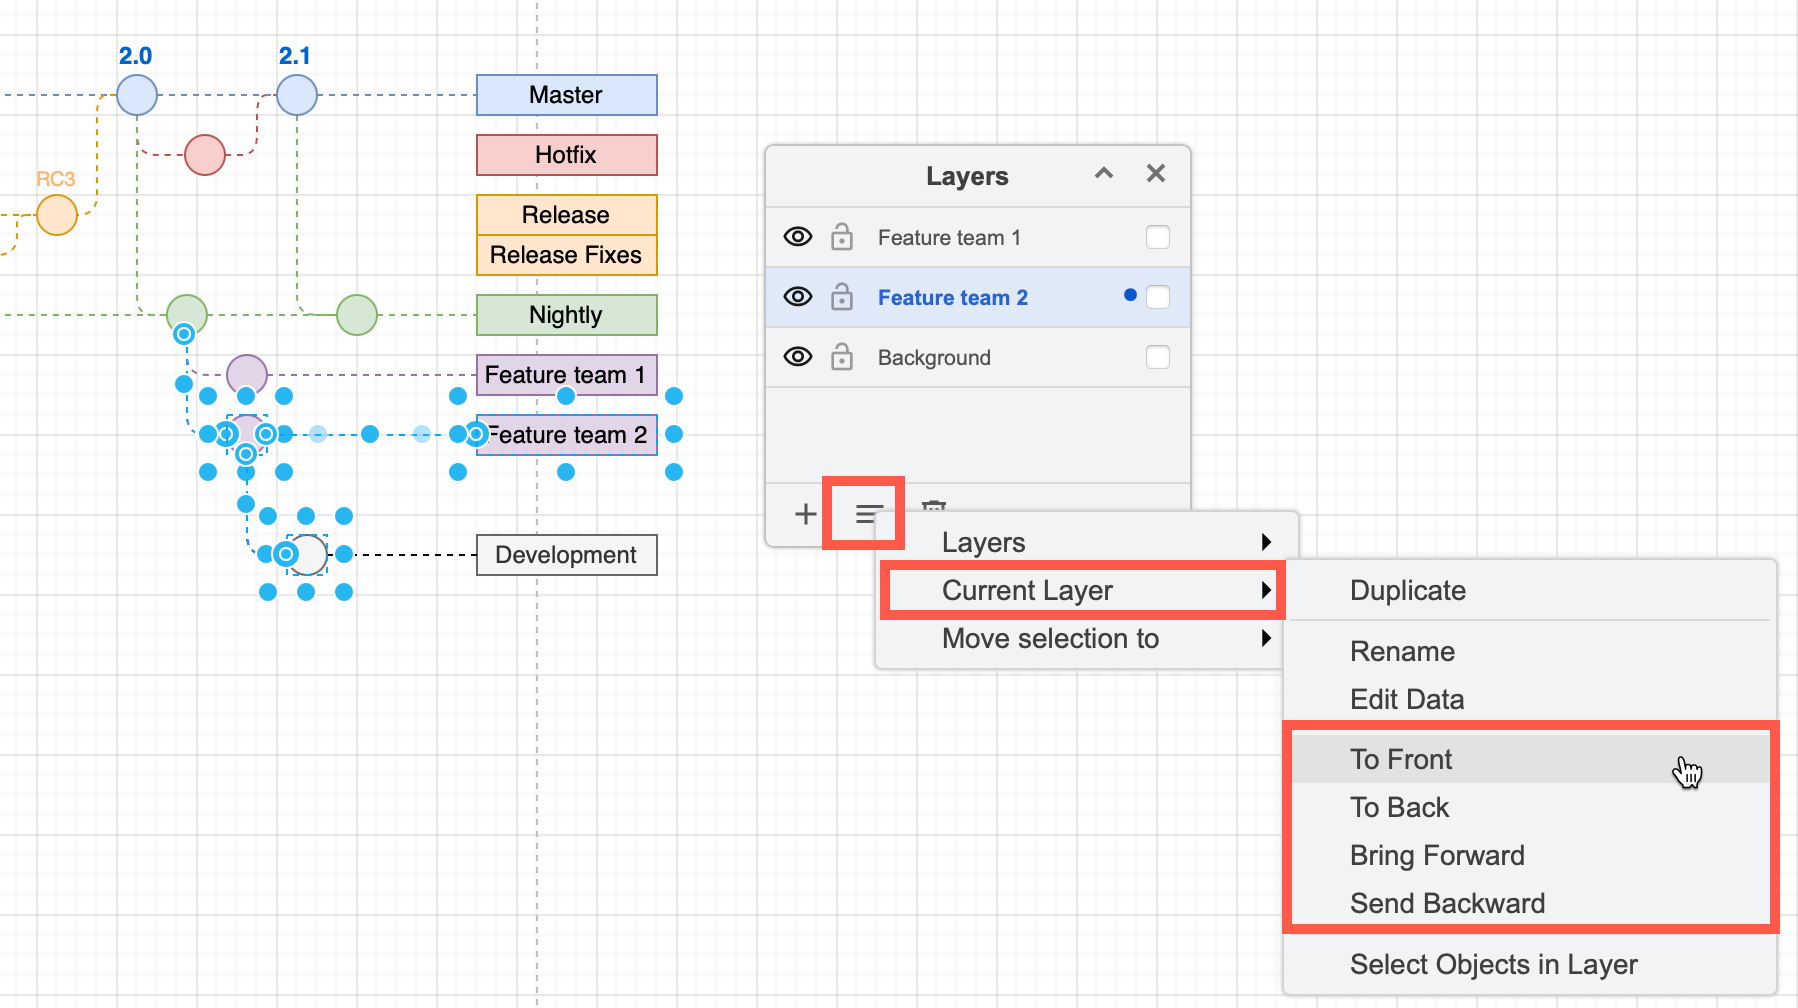
Rearrange layers to move shapes forward or backward
To move one layer’s shapes in front of another, you need to change the order of the layers in the Layers dialog. Layers are arranged from top to bottom (front to back on the drawing canvas).
Learn how the z-order of shapes positions them in front of or behind other shapes
Click and drag a layer in the Layers dialog to place its shapes in front of or behind another layer.
Note: When you move shapes to a layer, they are placed in front of any existing shapes on that layer, just like when you add new shapes to a layer.
Alternatively, select a layer, open the Layers dialog menu, click on Current Layer and choose to move the layer forwards or backwards.
See how layers work with z-order in draw.io
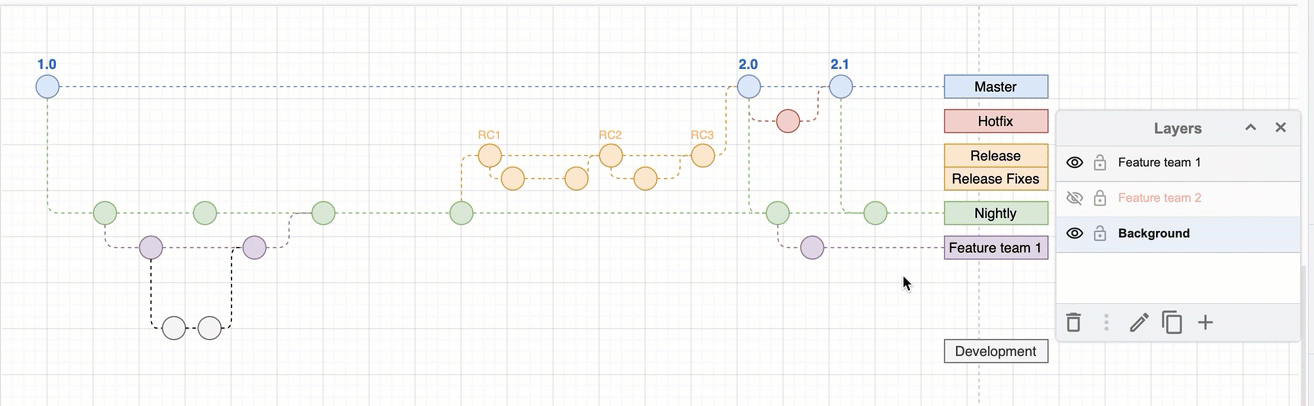
Hide or display layers
To understand complex diagrams that use layers, you can display and hide layers.
In the Layers dialog, click on the eye on the left of layer’s name to display or hide the layer.
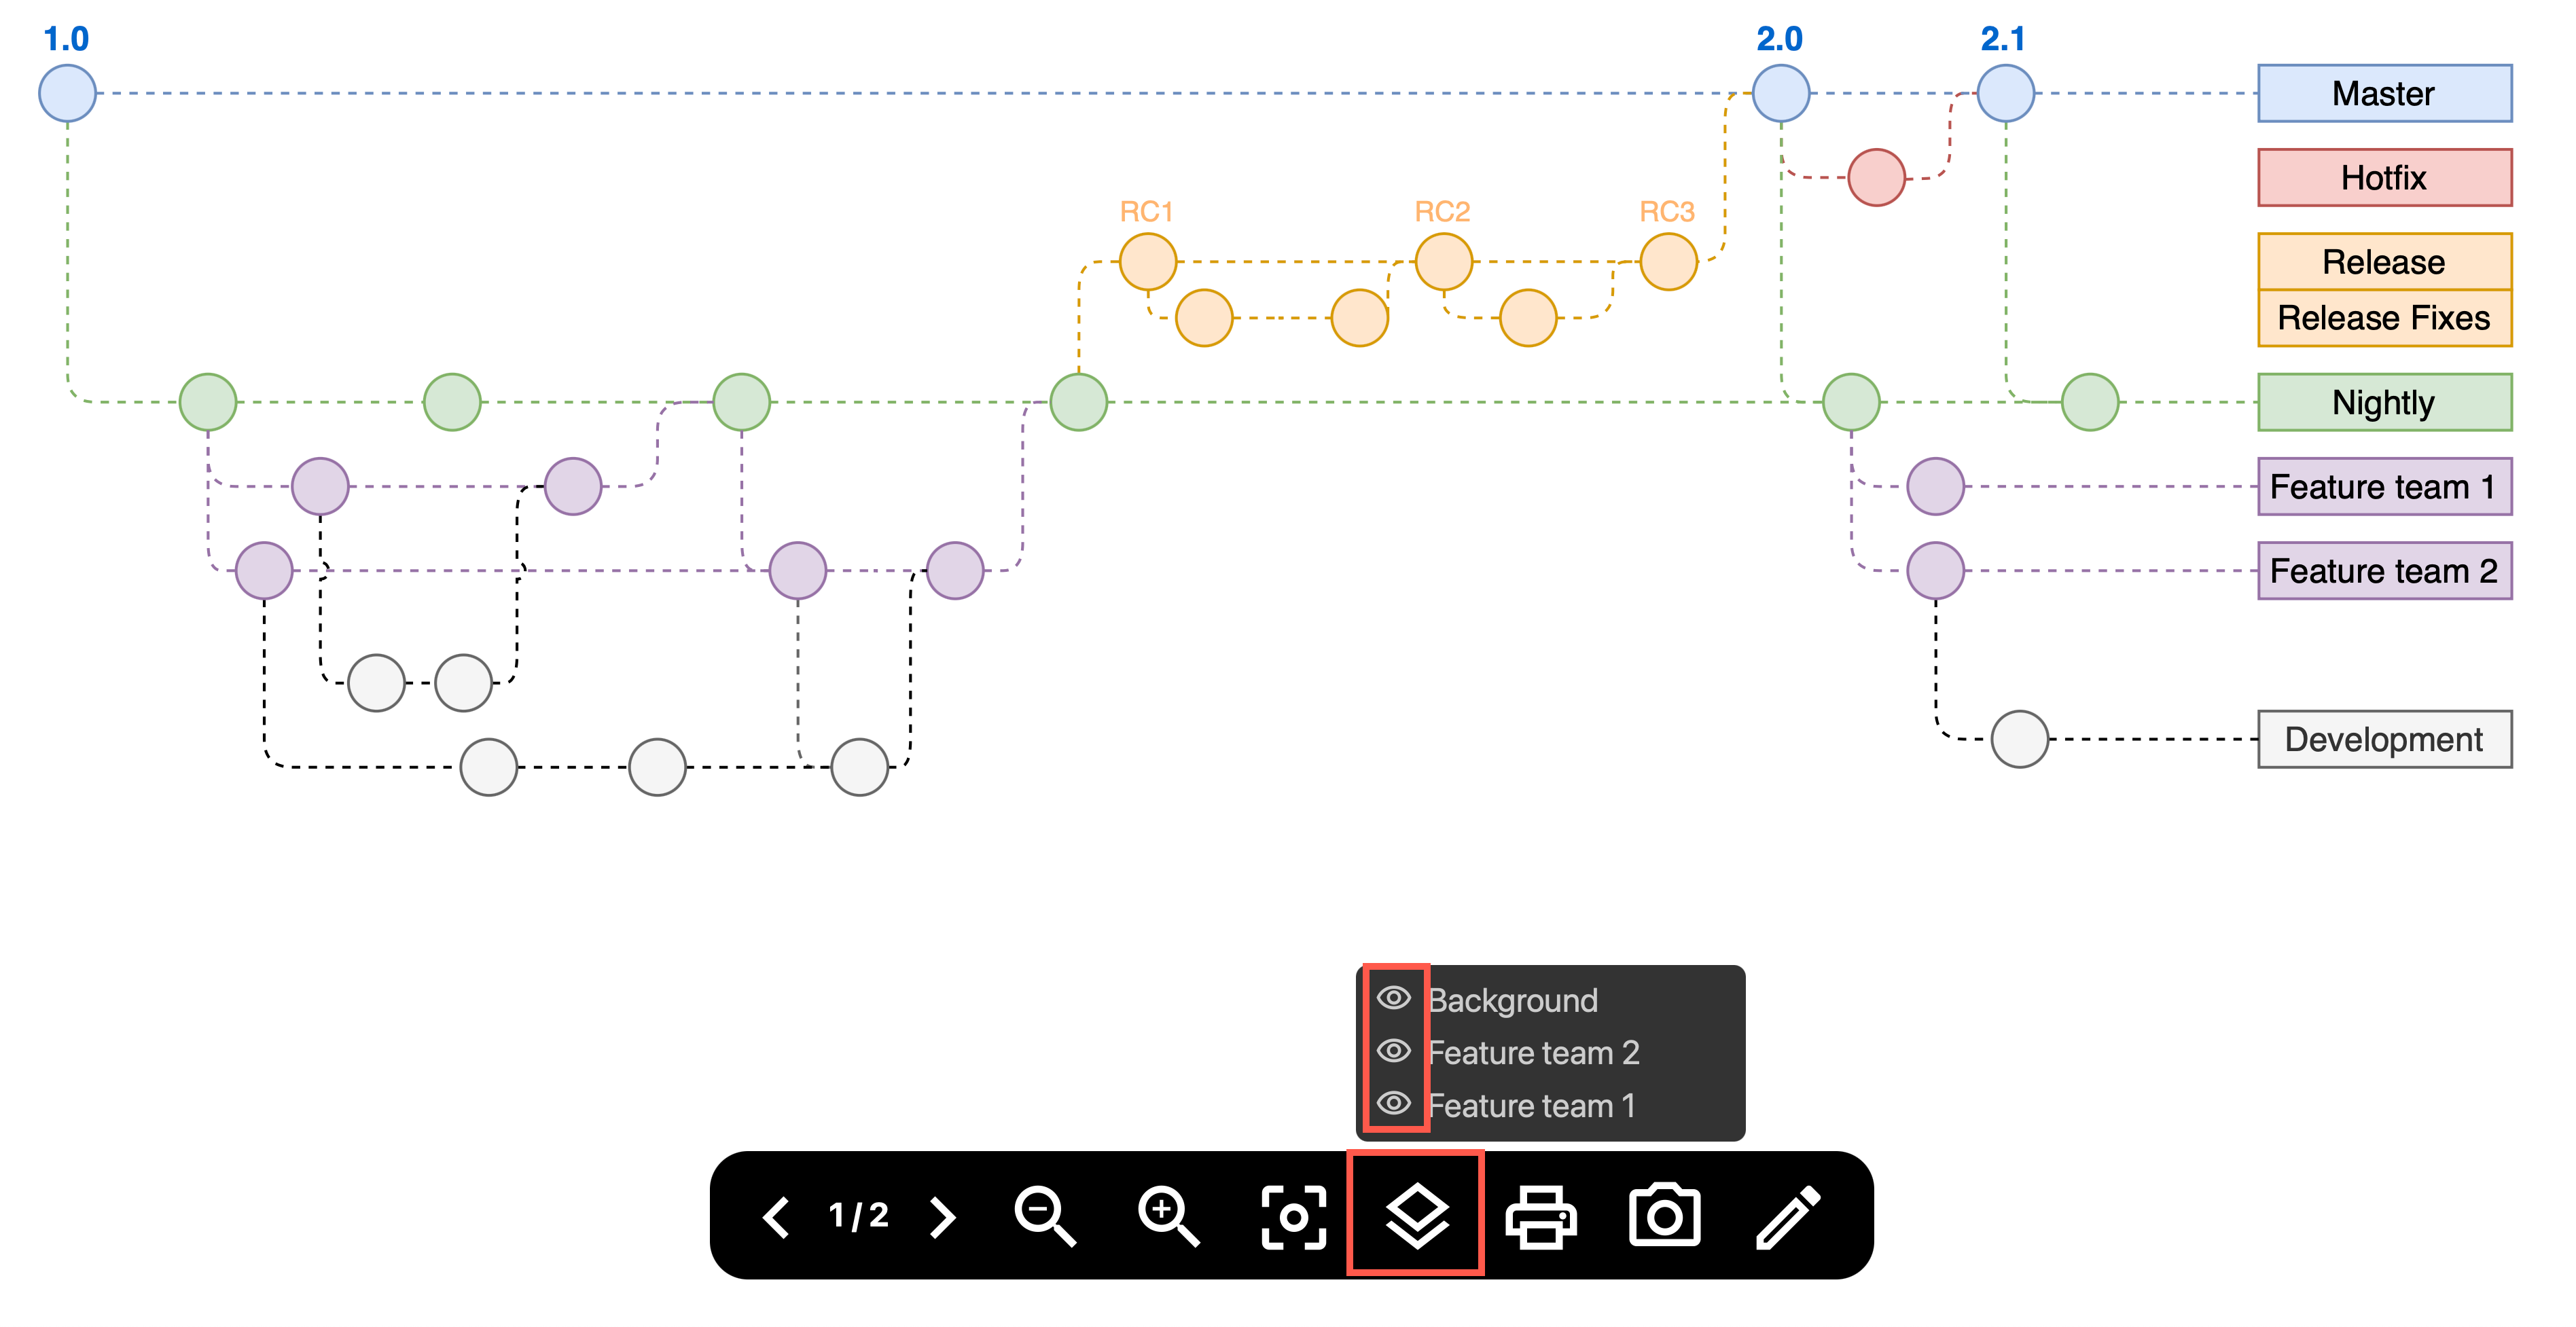
Hide or display layers in the diagram viewer: Click on the Layers tool at the bottom of the diagram viewer, then click on the eye icons next to the layer names to hide or display the layers. This tool is not available if the diagram only has one layer.
Tip: Use custom links to make your diagram interactive and toggle layers on and off when you click on a shape within the diagram.
Lock layers to prevent changes
Locking a layer means you cannot make any changes to it - you can’t add, move, edit, style or delete the shapes and connectors placed on that layer.
In the Layers dialog, click on the padlock icon to the left of the layer’s name that you want to lock.
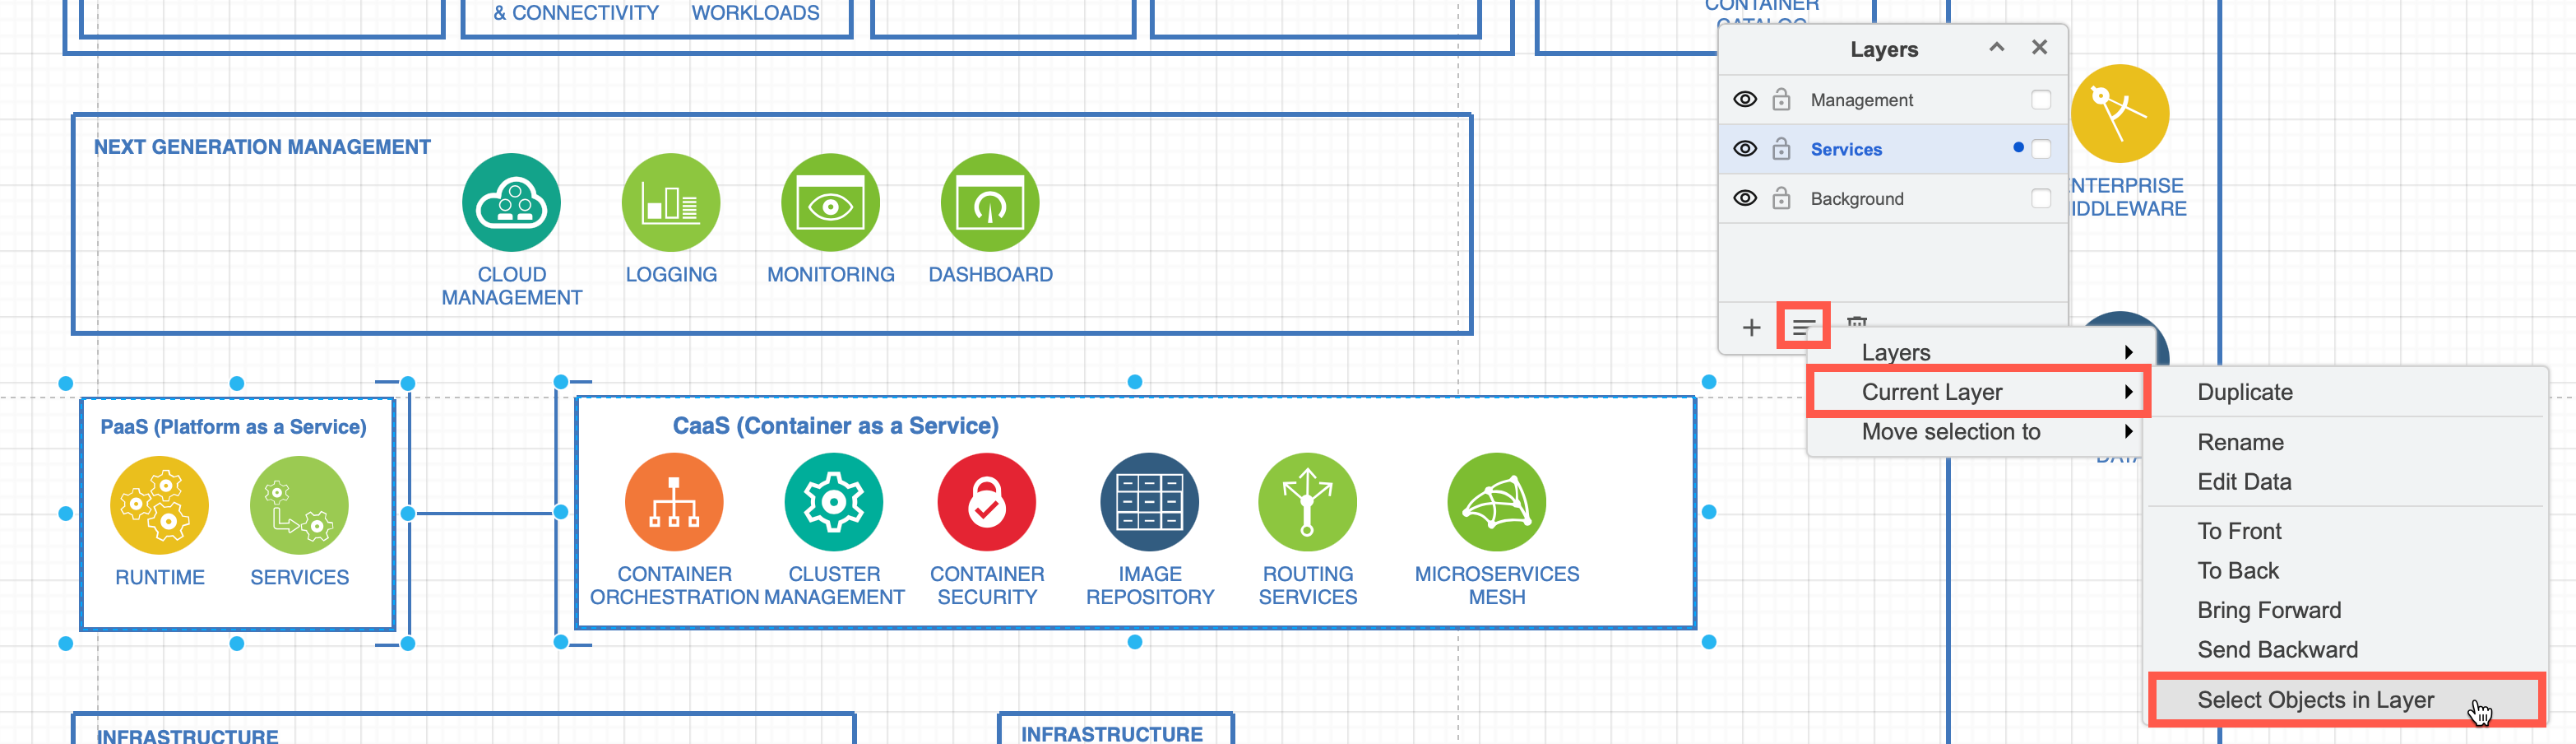
Select objects in a layer
- Select a layer in the Layers dialog.
- In the Layers dialog menu, select Current Layer > Select Objects in Layer.
This does not select shapes and connectors inside any container shapes or groups in that layer. In the example below the Container shapes and brackets in the Service layer are selected, but the shapes inside those containers are not. They will still move and be copied along with their container.
See how layers, shapes and connectors are organised inside the .drawio diagram format.
Diagrams that work well with layers
- Floor plans - Add furniture, appliances or IT devices, fixtures, and decorations on separate layers.
- Network diagrams - Place areas behind firewalls or on different subnets on different layers.
- Gitflow diagrams - Separate team or feature branches onto their own layers. Open this example gitflow diagram with layers in the lightbox viewer.