Feature flag development with tags in gitflow diagrams
Feature-based development and lean release cycles are becoming more common in online software services (SaaS products), where continuous development and continuous deployment are required. Feature flags give administrators and developers fine control over what features are available to which customer segments on release.
Traditional software development
Whether you follow an agile development cycle or not, software updates and new applications contain multiple features, bug fixes and improvements. Development of these usually happens on feature branches (or individual developer branches off feature branches). Once a feature is complete, that feature branch is merged into a development (or occasionally a nightly build branch).
After all the planned features are complete and merged to the this development branch, release candidate branches are used to test builds, and then the software is finally released on the main branch, as you can see in the gitflow diagram below.

Software development gitflow template using feature branches without feature flags
Once the software is released, you can’t control what features the users see - all users gain access to the same features, at the time of release. If something in the software causes a bug, that bug affects all users.
Feature flags provide fine control over released software
With feature flags and a deployment service that gives you control over updates and rollouts based on those flags, you can extend this feature-based development approach into release and deployment.
-
Release a new feature only for a target subset of your SaaS users.
-
Deploy but don’t release features that aren’t yet ready to test stability and prepare dependent systems.
-
Use front-end flags for UI visibility and back-end flags to control APIs and configurations.
-
Roll out an update incrementally to your user base.
-
Block certain users from accessing certain features.
-
Roll back an unstable update by disabling the problematic feature flag.
-
Release smaller updates more often and incorporate feedback faster.
Feature flags can make continuous development and continuous deployment smoother for both you and your customers.
Use feature flags with feature branches
Feature flags don’t replace feature-based development branches, they extend their functionality.
For this example, we’ll modify the gitflow that we developed in our earlier post (also available as a template in draw.io).
Note: The diagram file used in this post has multiple pages - one for each method used to display feature flags in the gitflow. Open the file in the draw.io viewer and step through the pages to compare the four different methods.
Leaner trunk-based development
- As the feature-flag based development cycle is lean with short-lived feature branches, controlled after release via flags, we’ll merge directly to the main branch (or trunk).
- Whenever a feature is merged to the main branch, open feature branches should pull those changes.
Gitflow diagrams are simple to draw and edit - they use the shapes in the General shape library with basic connectors between them. Follow the steps in our earlier post to create a gitflow that matches your branching structure.
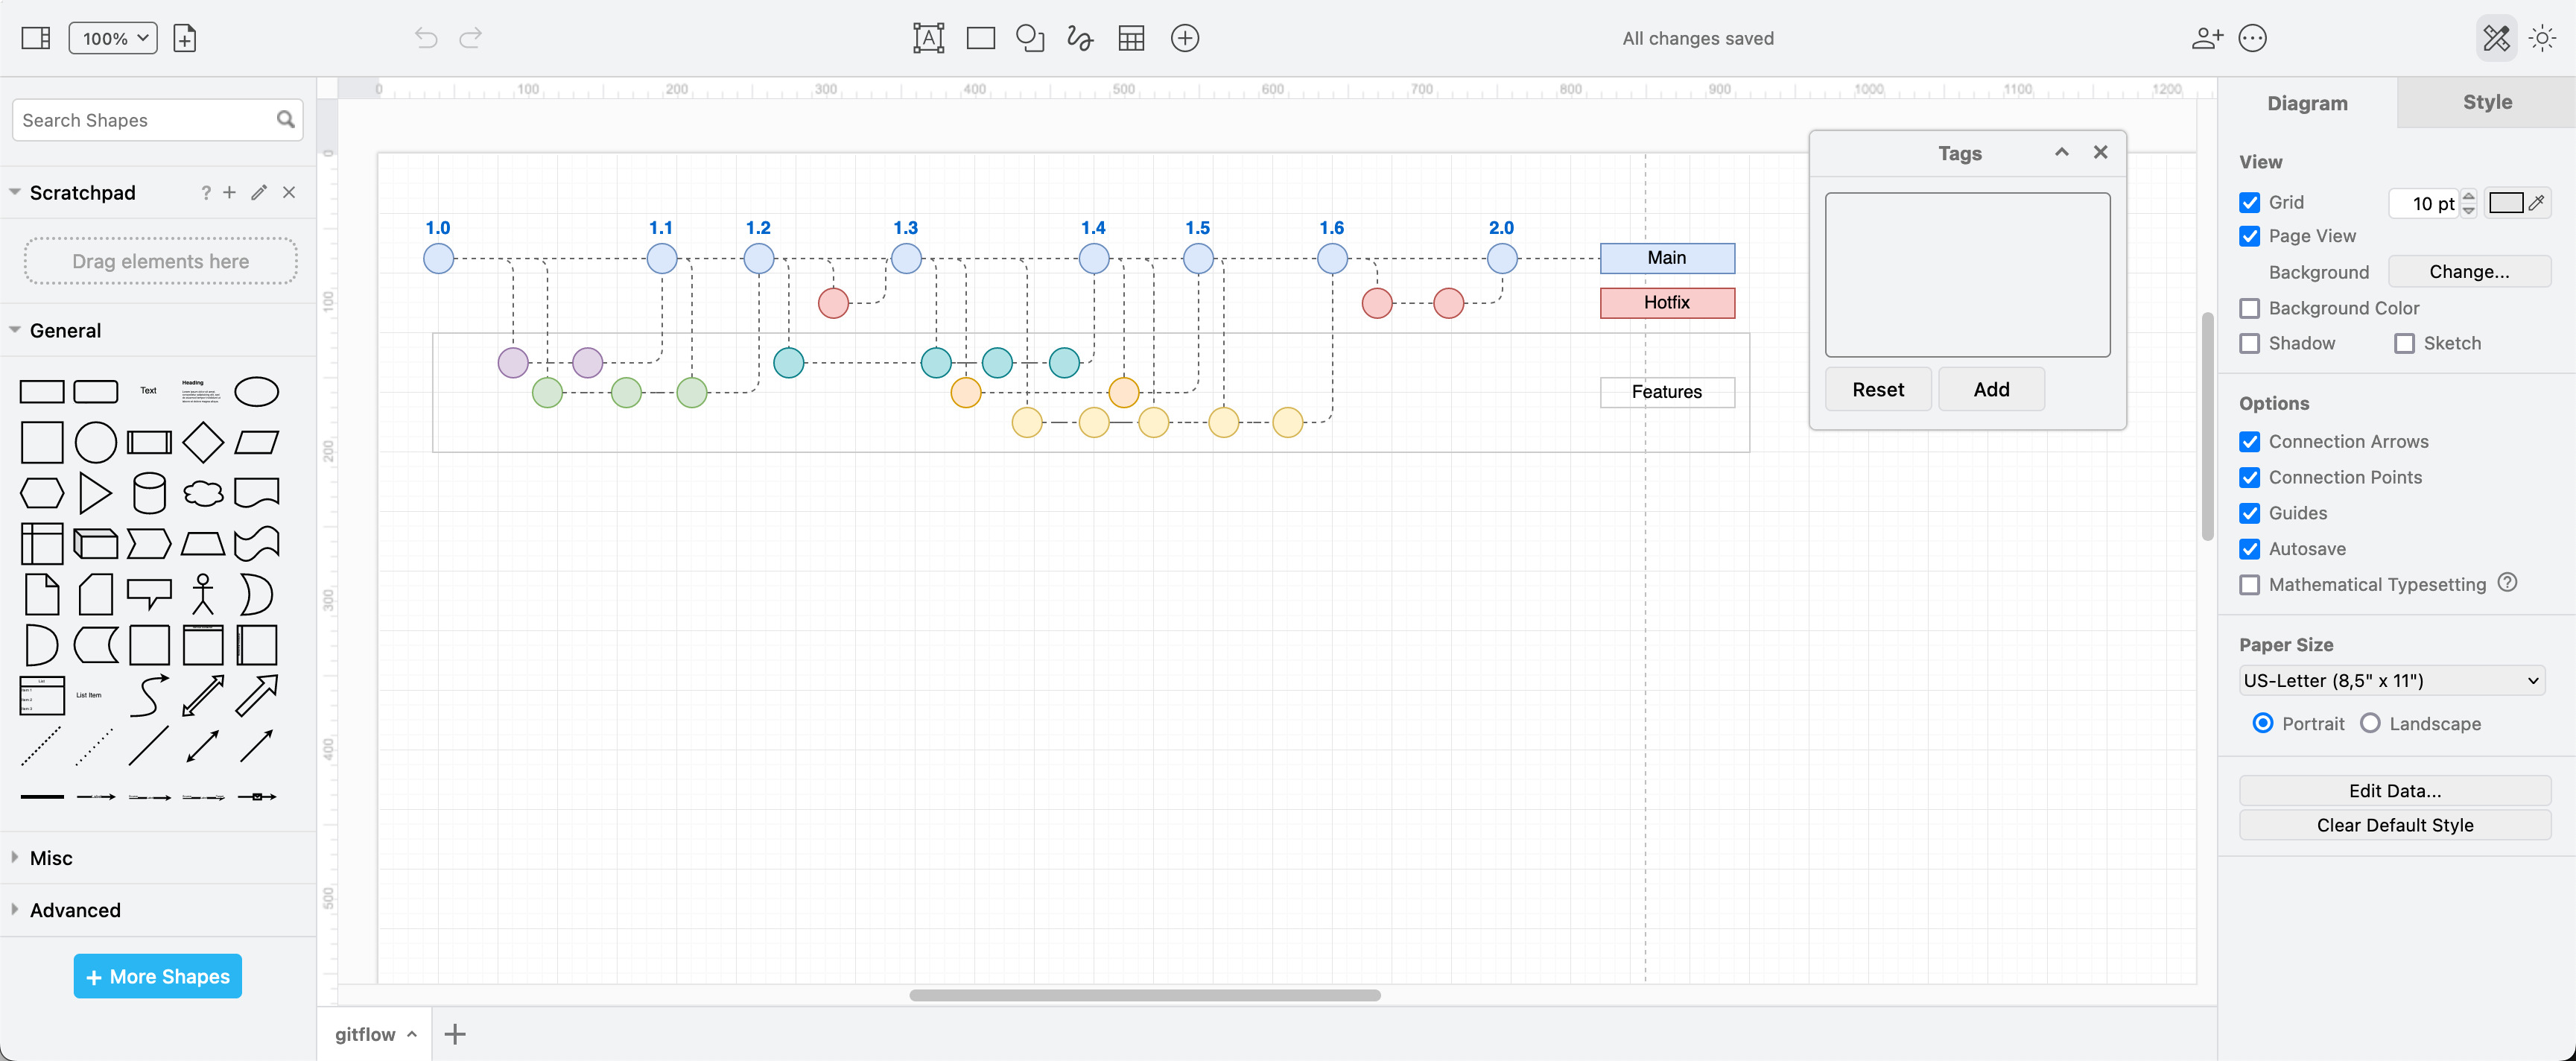
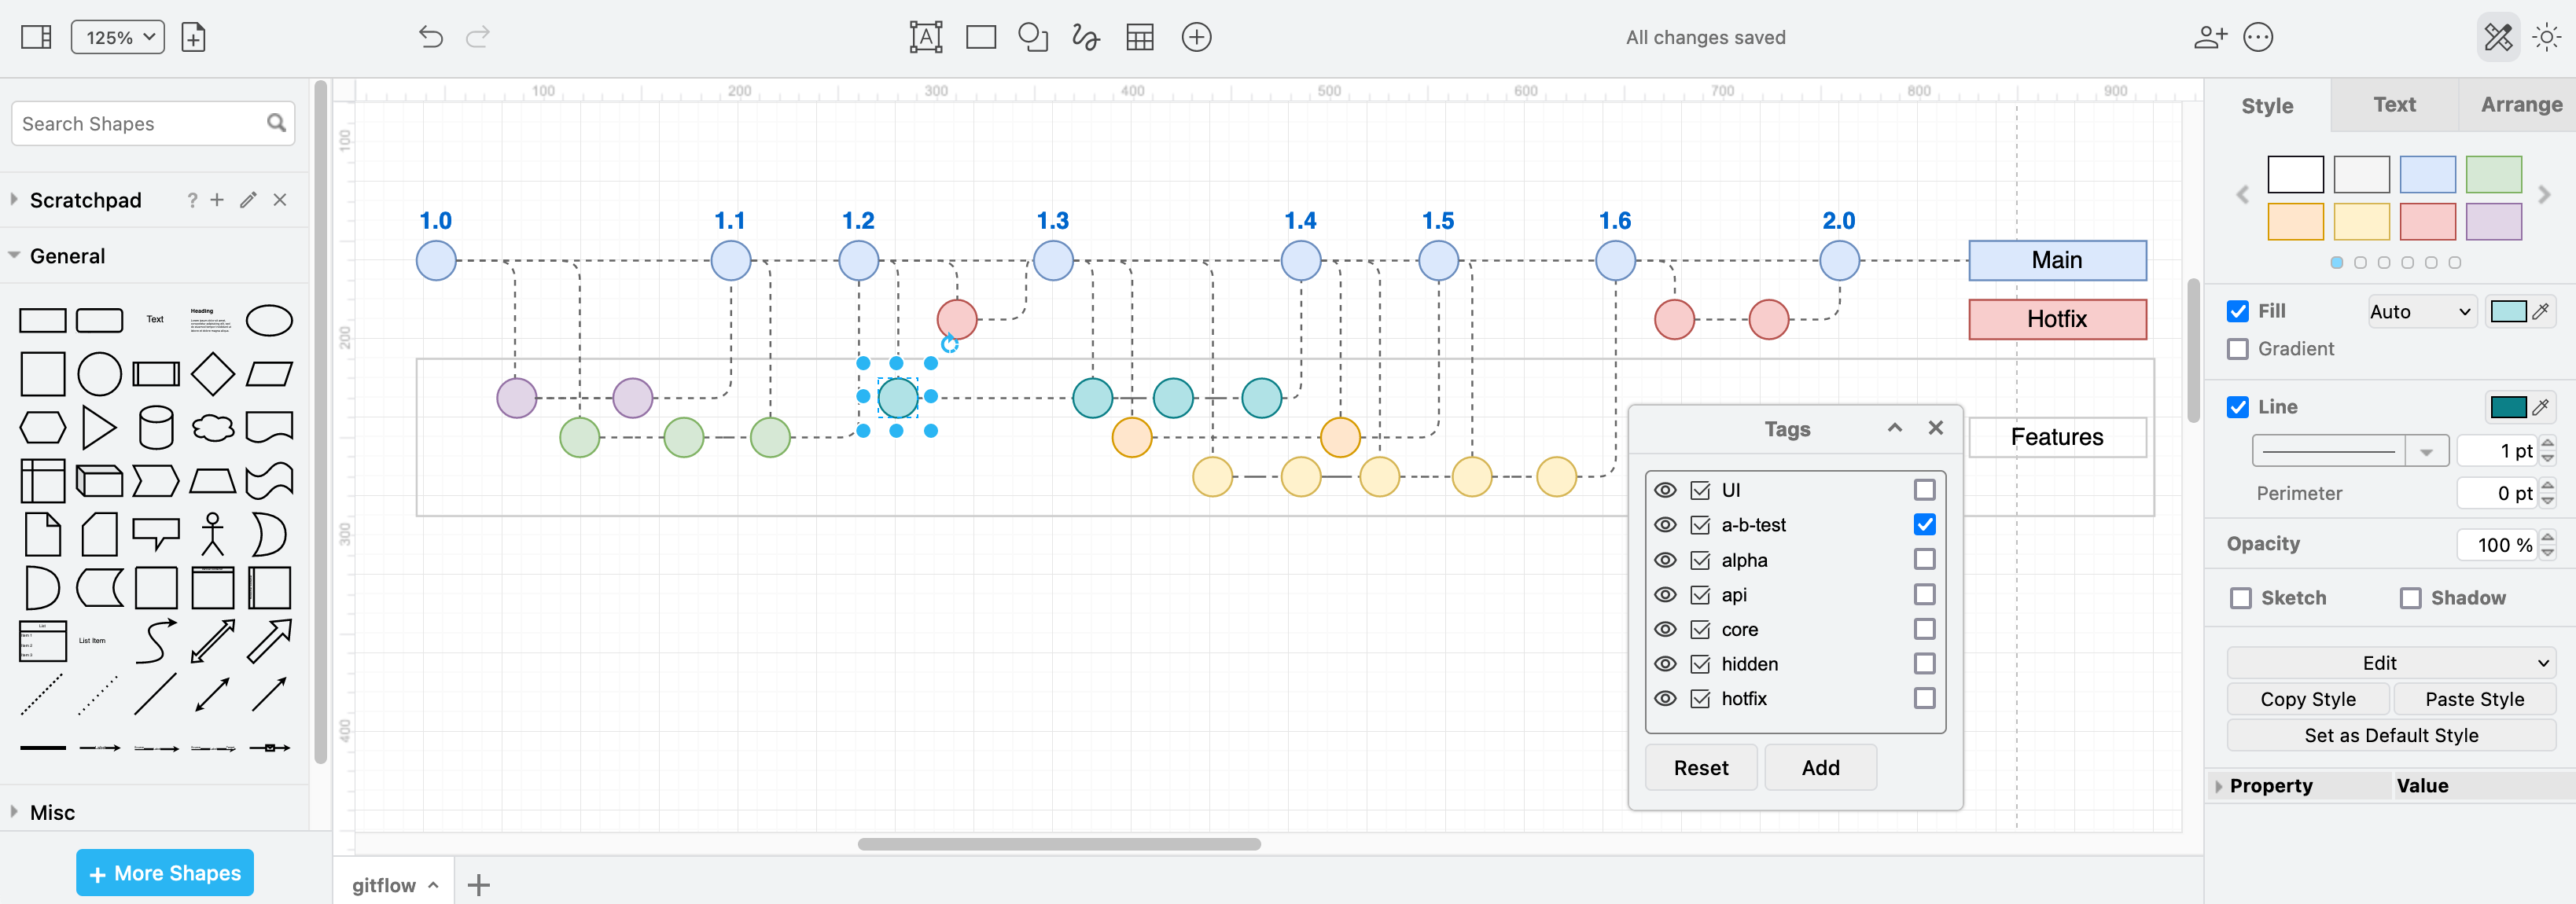
A modified gitflow from the built-in template to show a trunk-based development structure with short-lived feature branches
Use tags in your gitflow for feature flags
In a draw.io gitflow diagram, you can indicate feature flags in a number of ways, but the easiest is to add tags to shapes.
Tags let you hide or display tagged shapes and connectors, visualising how released software updates will appear to users when feature flags are enabled or disabled.
Add tags to shapes
-
To open the Tags dialog, click on View in the left of the toolbar and enable Tags or press
Cmd+Kon macOS orCtrl+Kon Windows.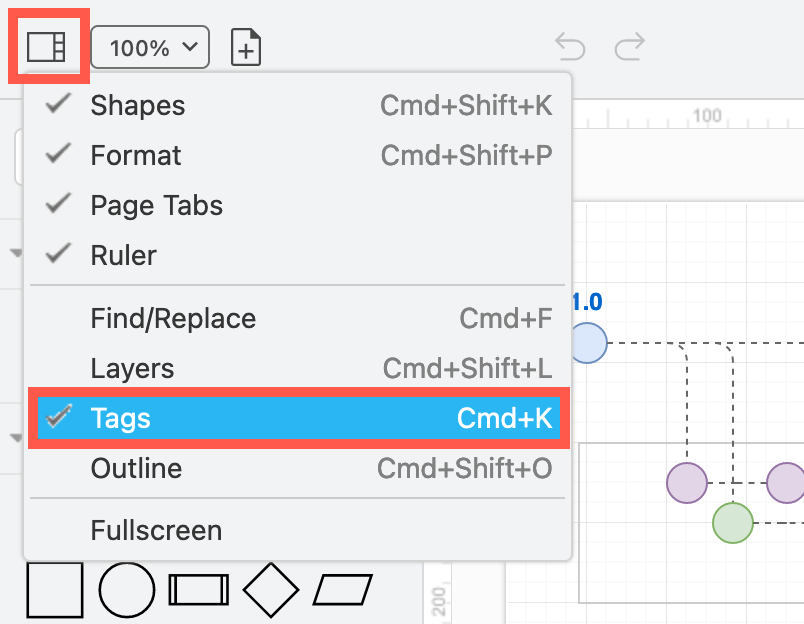
-
Select the shapes and connectors you want to apply a new tag to, and click + in the Tags dialog. Enter the new tag name and press
Enter. -
Select one or more shapes, then click a checkbox to the right of an existing tag to add the tag to the selected shapes.
-
To remove a tag from a shape, select the shape, then deselect the checkbox to the right of its tag name.
Note: In this example, we’ve added the core tag to all trunk (main) versions to make it easier to visualise.

Open this gitflow with all feature flag tags in our diagram viewer
Visualise feature flag-affected branches and releases
Now, with nothing selected in your diagram, click the eye symbols next to tags (feature flags) to see which feature branches and main versions they affect. If more than one flag is applied to a feature, both need to be hidden to hide those branches they affect.
For example, to see which feature branches are flagged as “api”, hide all other branches. If you want to select just those shapes/connectors, click on the select checkbox next to the tag name.
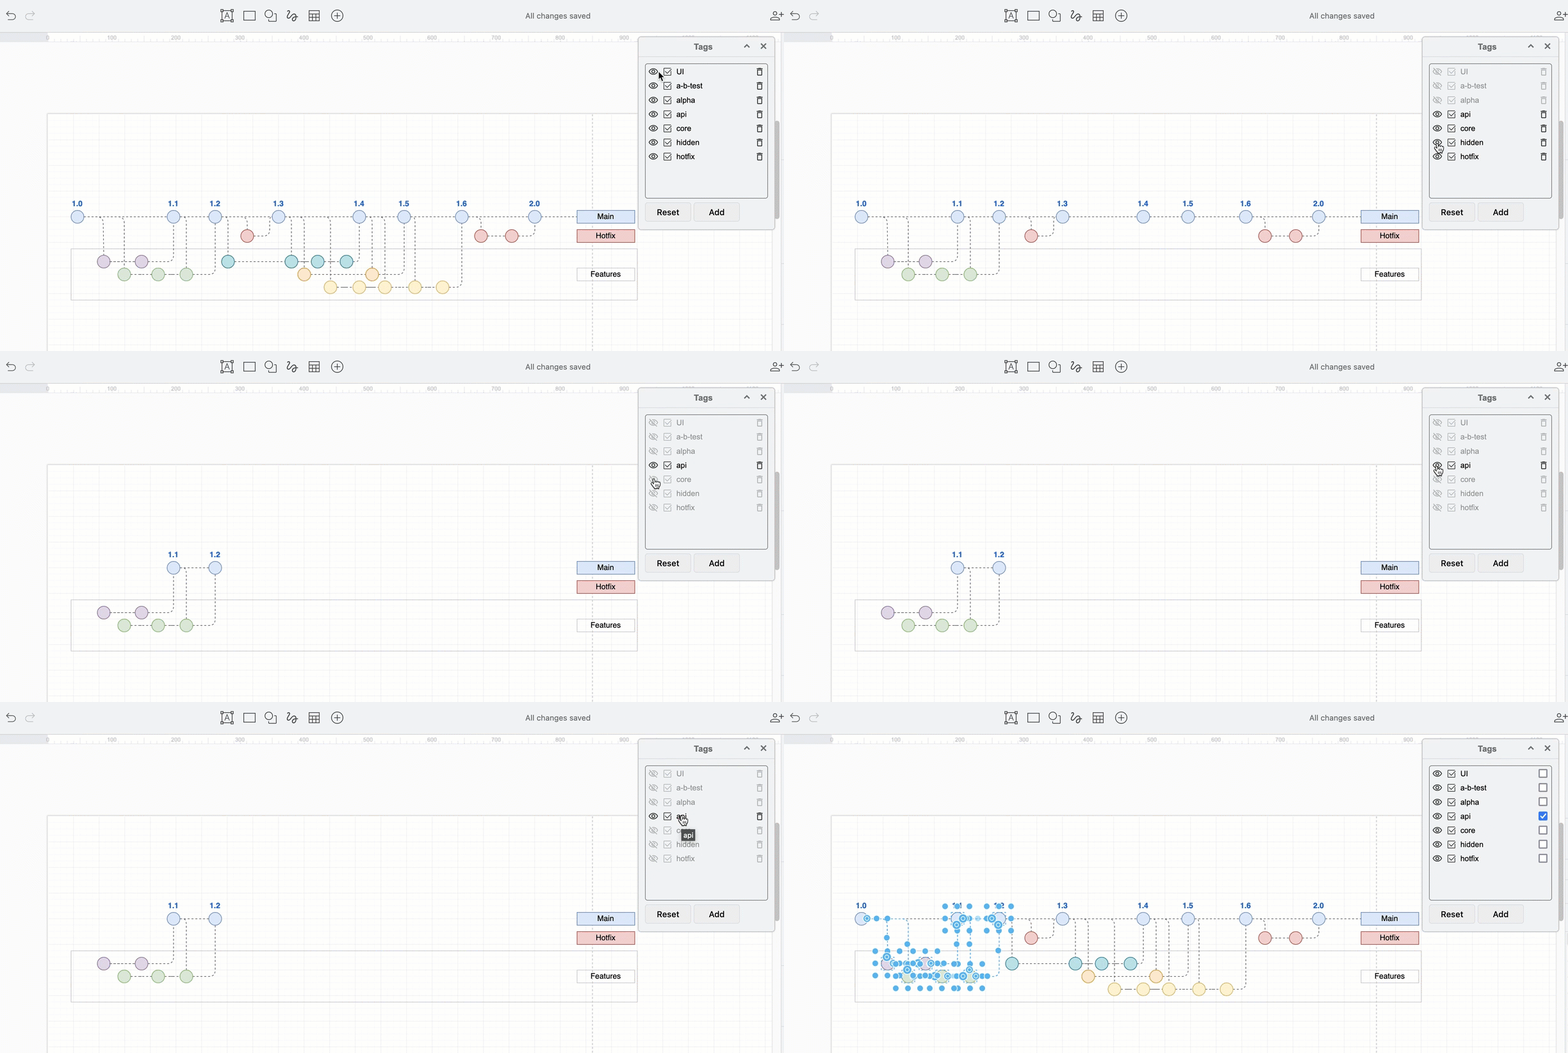
Reset to see all tagged shapes: Click the eye at the bottom of the Tags dialog to show all hidden tagged shapes.
Tips for working with tags in draw.io
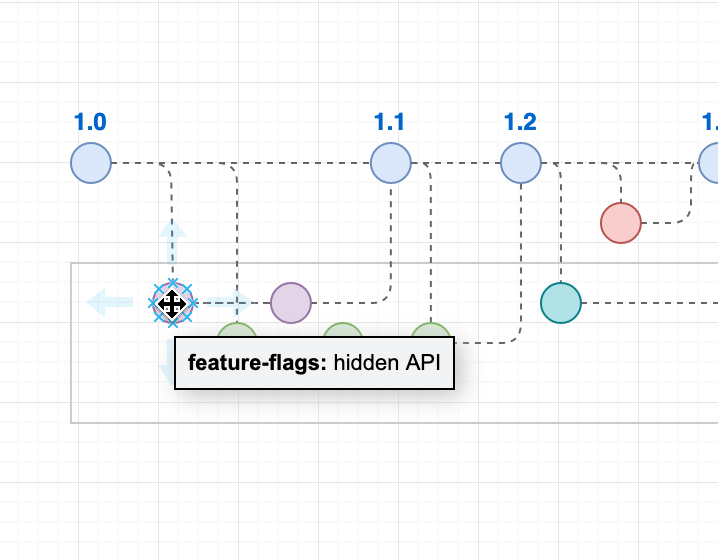
- Hover over any shape to see their tags.
- Note that connectors coming from or going to hidden shapes will not be displayed even if they are not tagged.
- Hold down
Shiftand click on any of the eye symbols in the Tags dialog to hide or display all tags.
In our example Gitflow with feature flag tags, to see which versions on any branch have a feature flags applied, hide the core tag. The shapes that have disappeared are ones that have no feature flags - all customers will be able to see all features on those main versions.

Alternative methods to add feature flags to gitflows in draw.io
If you don’t want the interactive visualisation of tags in the diagram editor or viewer, you could add feature flags in the following ways.
Feature flag labels on released versions
Add callouts with list shapes on the released versions to show which feature flags apply, and avoid cluttering the feature branches in the gitflow.

Open this gitflow with feature flags-labelled releases in the viewer
Feature flags in custom shape properties
Also called shape data, these could also indicate feature flags, as just like tags, they are displayed when you hover over a shape in your diagram.
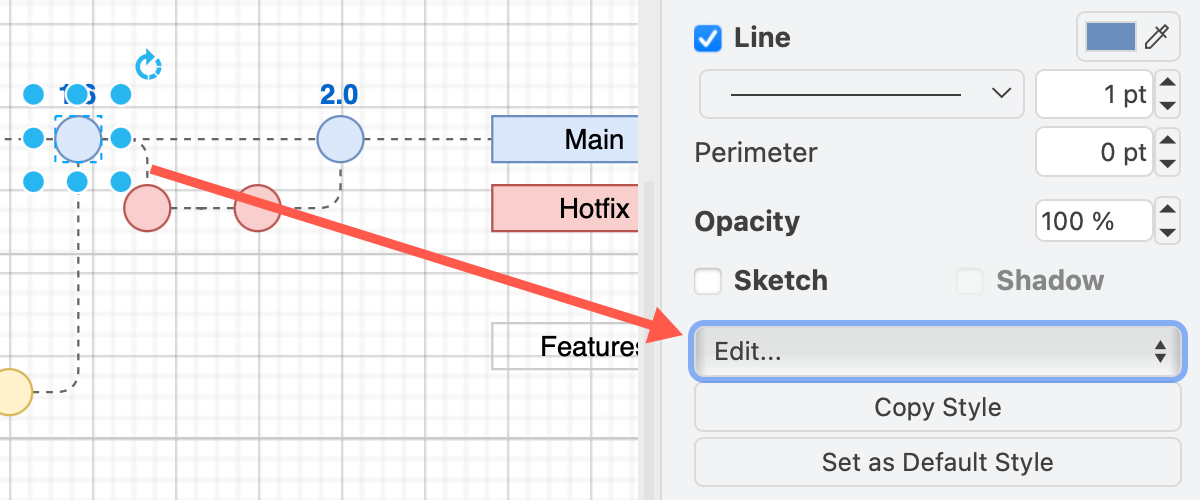
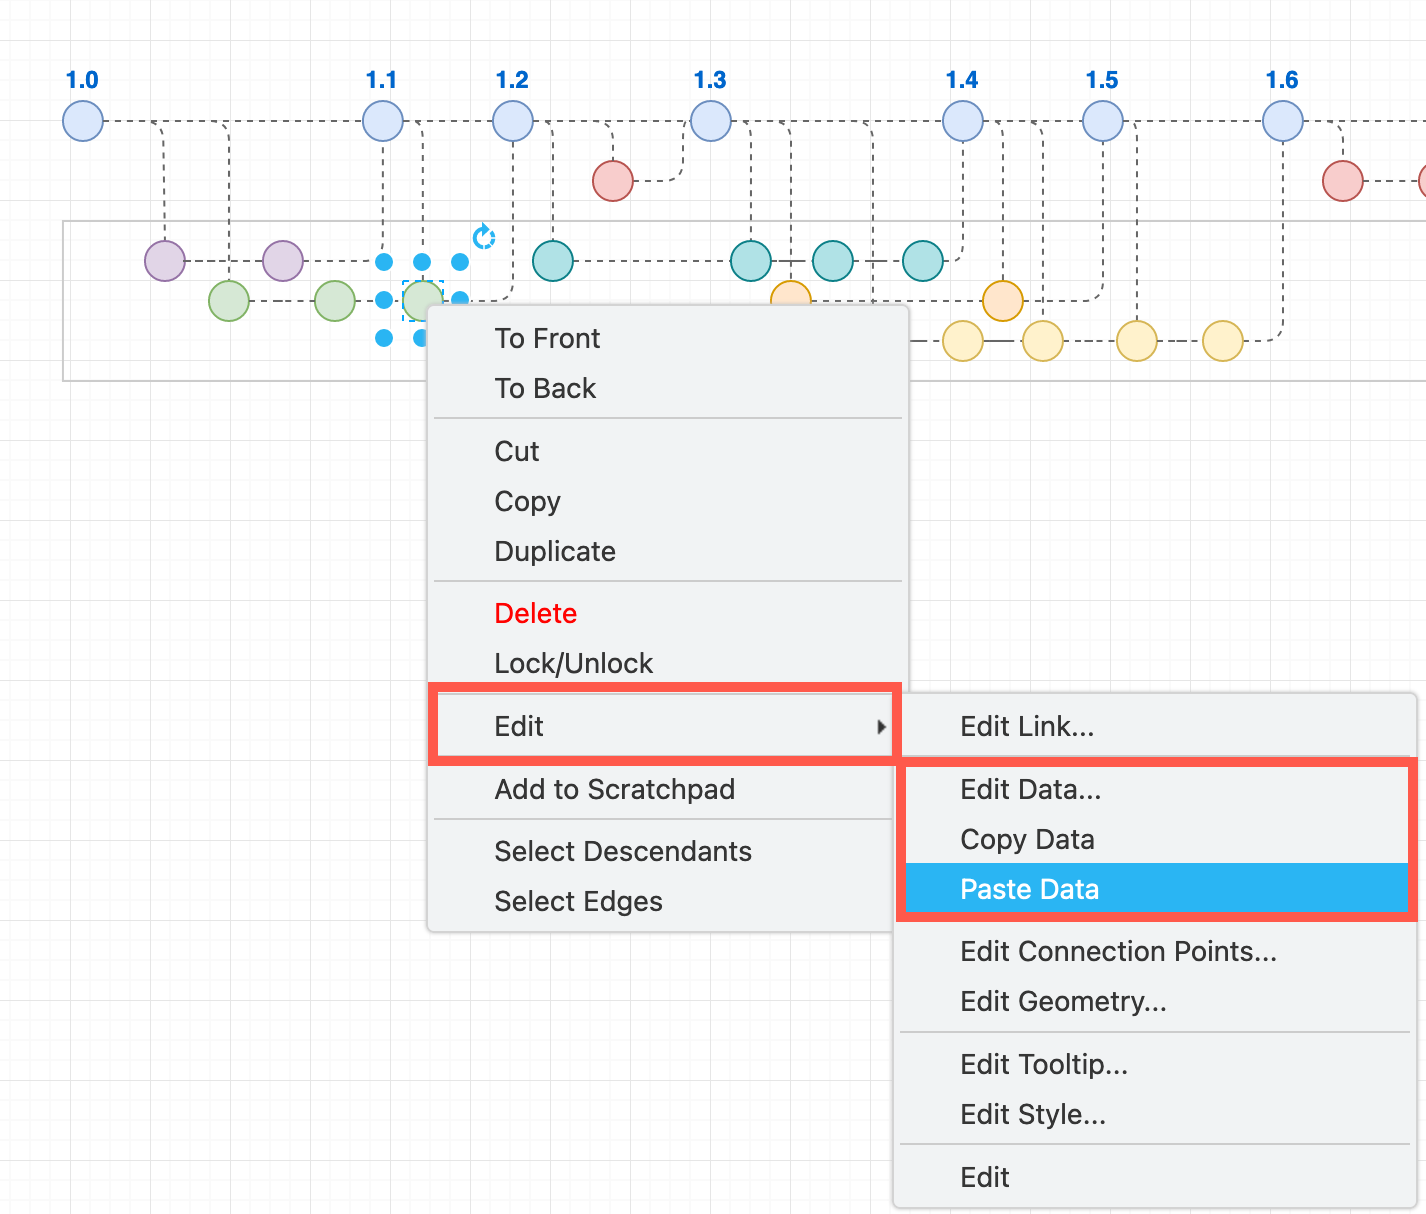
- Use the Edit drop down in the Style panel of the format panel on the right to edit, copy and paste shape data, or right-click on a shape then select Edit > Edit Data from the context menu.
- Type the name of a new custom shape property in the Enter Property Name field and click Add Property.
- Add the feature flag names in the field next to the new shape property.
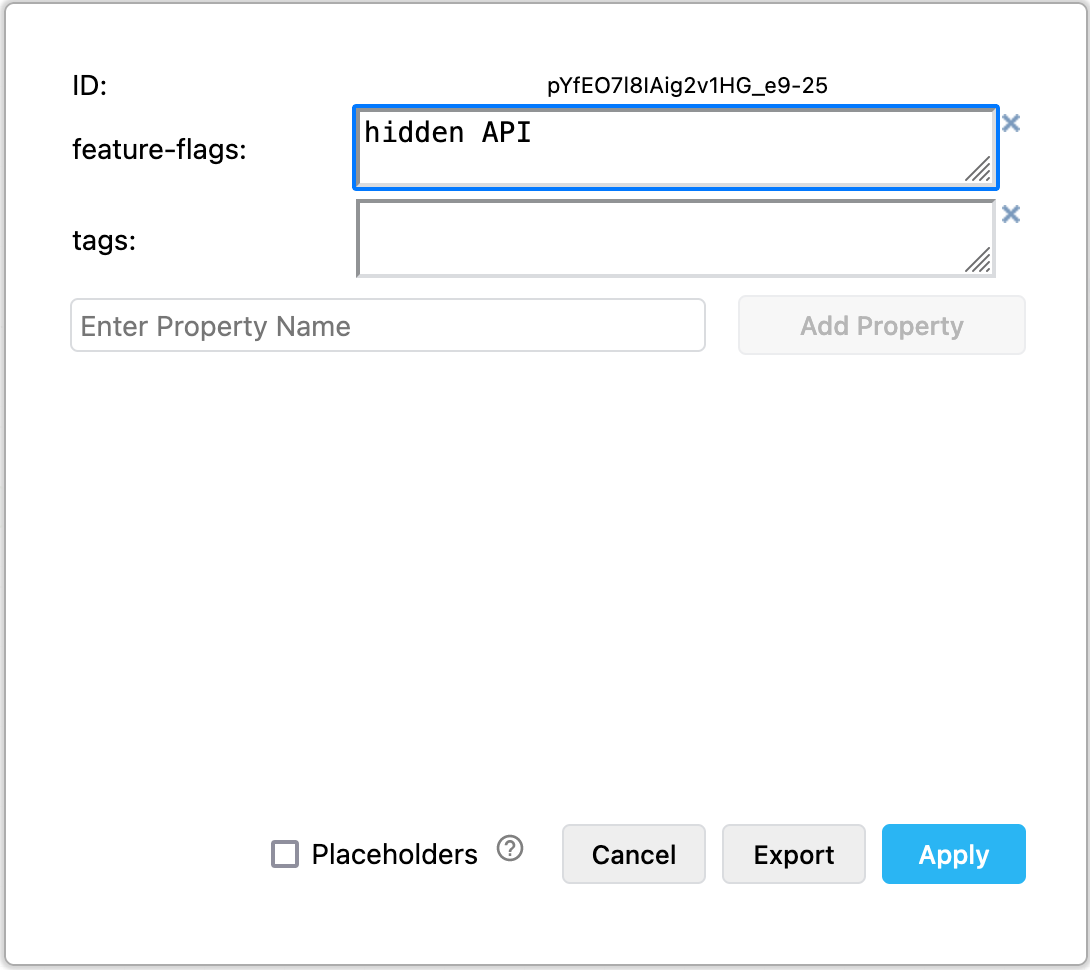
Tip: Copy and paste shape data to quickly duplicate custom properties on another shape via Edit > Copy Data and Edit > Paste Data in the right-click context menu.
Learn how to work with custom shape properties

Open this gitflow in the viewer to see feature flags in shape properties
Placeholder shape properties for automatic feature flags
Using container shapes to indicate feature flags, and placeholders on all feature branch shapes can automatically update feature flags tooltips depending on which container they are in.
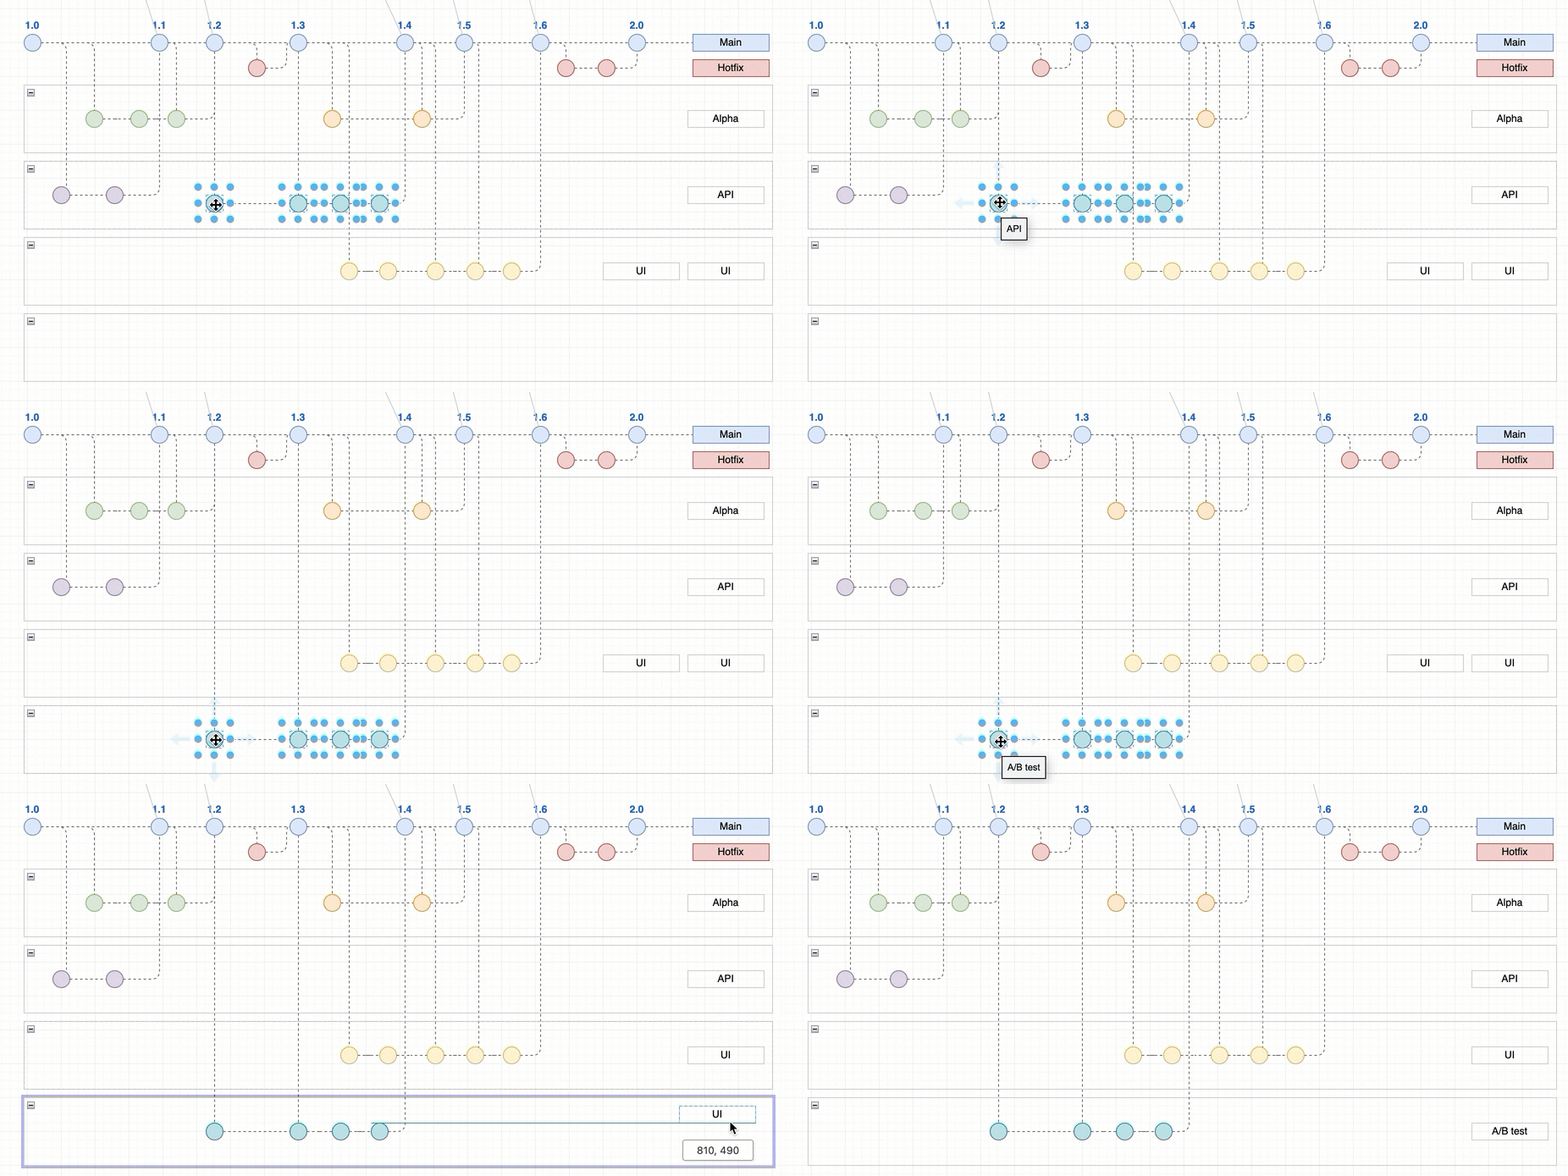
In this example, a tooltip shape property with a placeholder shows which feature flag container the branch is in when you hover over a shape. Additionally, the shapes used to label the containers also contain placeholder values.
- Select the shape that forms the container, expand its Properties in the Style tab in the format panel, and ensure the Container checkbox is selected.
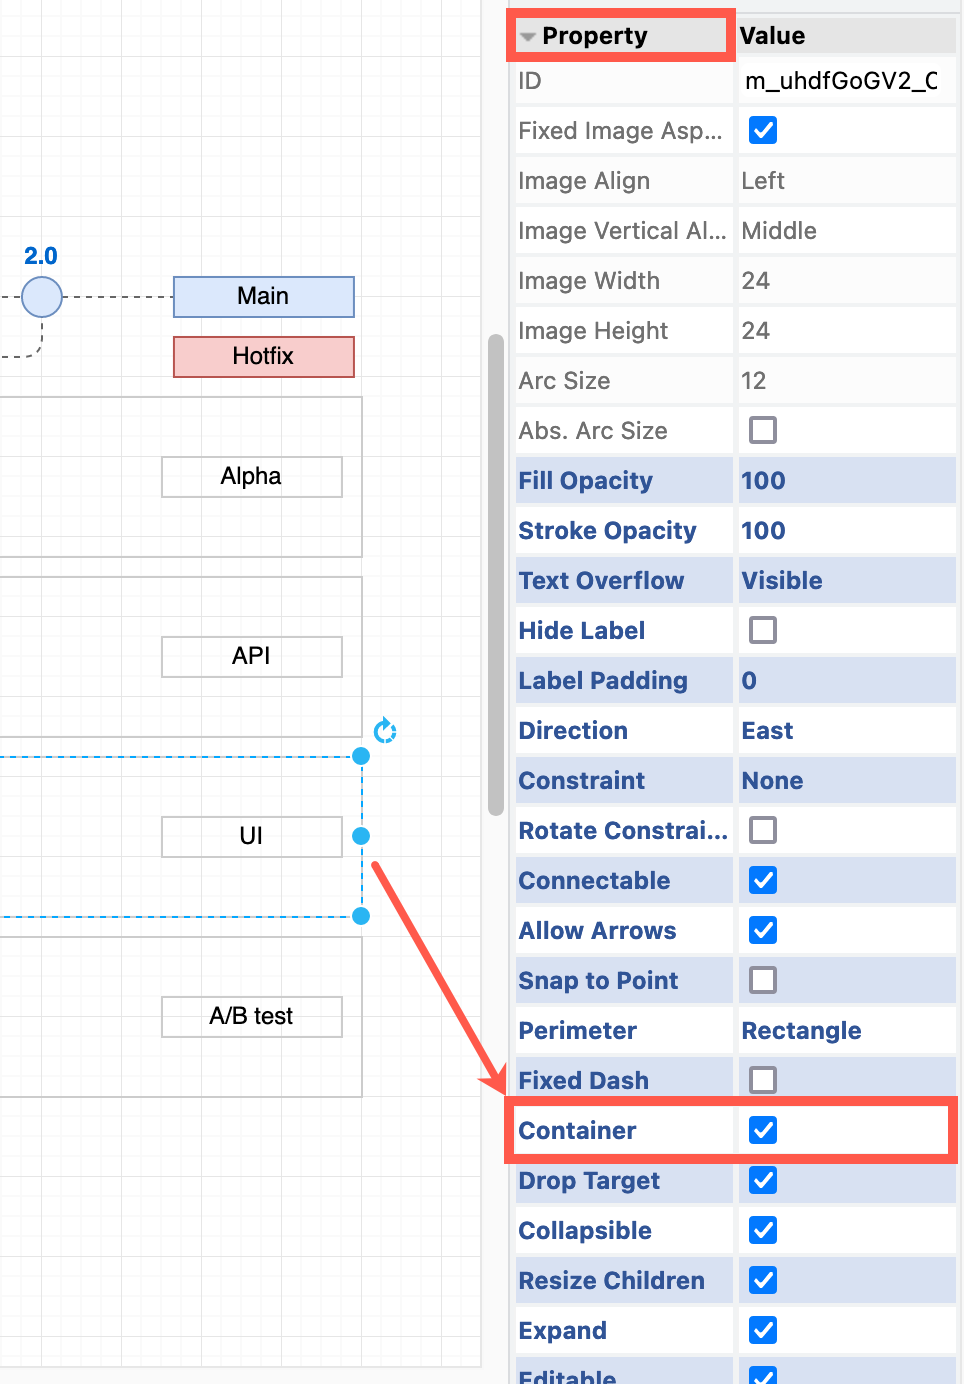
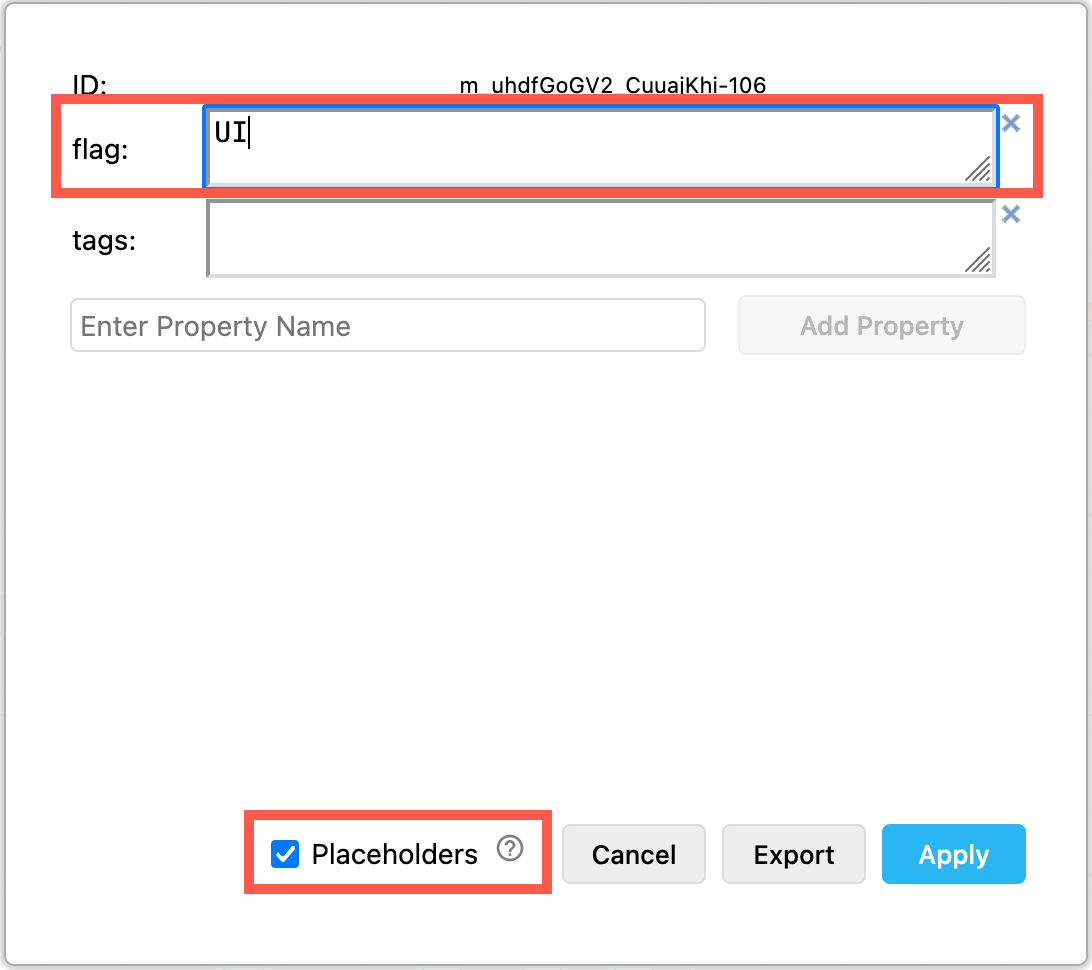
- Add the name of the feature flag to a custom shape property in the container shape, and ensure Placeholders is enabled.
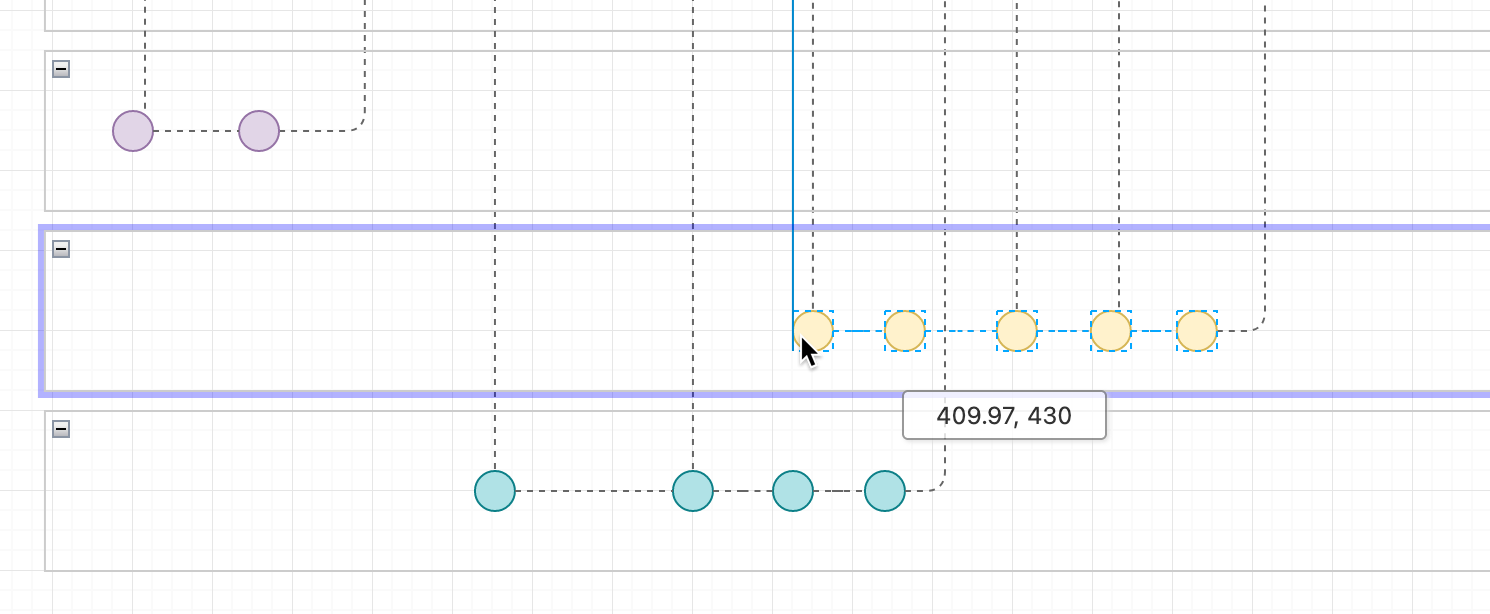
- Drag the feature branch shapes into the container shape, and drop them when the outline is purple.
- Edit the shape properties of one of the feature branch shapes, ensure Placeholders is enabled and add the tooltip custom property with the value being the feature flag property you defined in step 2 surrounded with percentage characters:
%flag%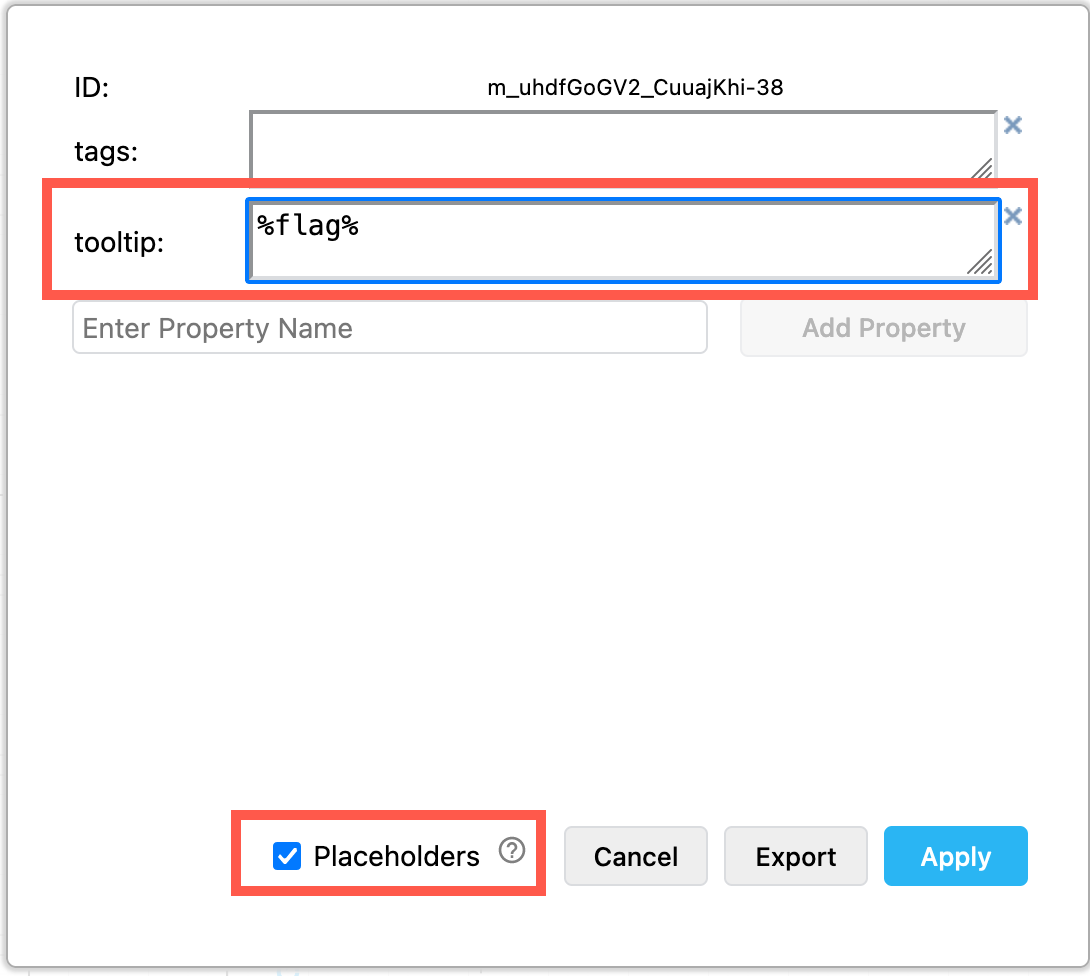
- In the shapes used noting the the containers’ feature flag, write the same shape property placeholder in the shape labels - e.g.
%flag%
Keep in mind that shapes will only be able to have one feature flag if you use this method as placeholders respect scope, where the placeholder (or variable) takes the value of the container in which it is located.
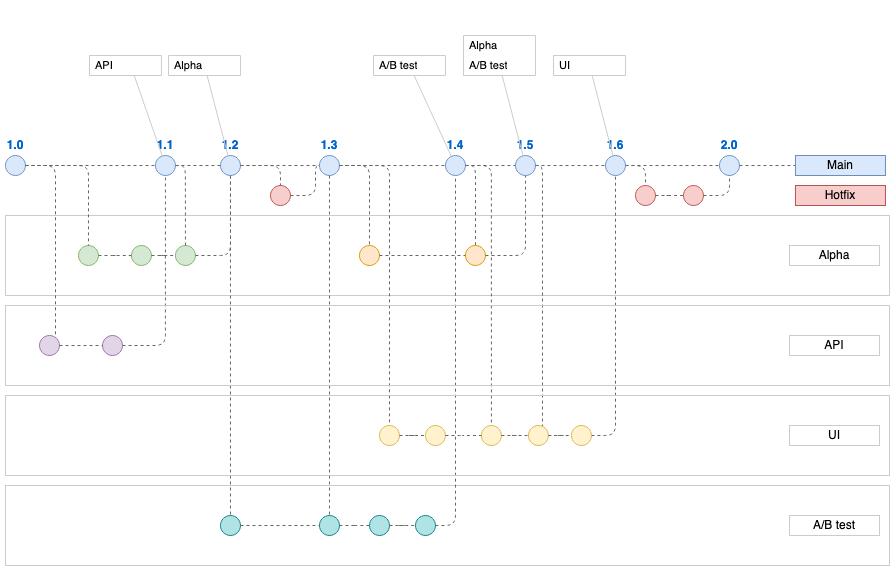
View this gitflow then click on Edit (the pencil) in the toolbar to open it in the editor and see how placeholder feature flags work
This structure clearly separates branches visually into each feature flag. You can combine this structure with list shapes on the trunk to show which flags apply to the actual release versions.
See how both the tooltips and the shape label changes when we move shapes to another container.
