How layers work in draw.io
Layers in art, photo and diagram software all work a little differently. In draw.io, unlike in the more artistic drawing tools, you can select diagram objects on different layers and move them together on the drawing canvas - these objects stay in their own layers. Plus, in draw.io, connectors ‘live’ on one layer, but can attach to target and source shapes that ‘live’ on different layers.
This post explains how layers function in the .drawio file format. To learn how use layers within the draw.io editor, please follow this layers tutorial.
How a draw.io diagram is organised
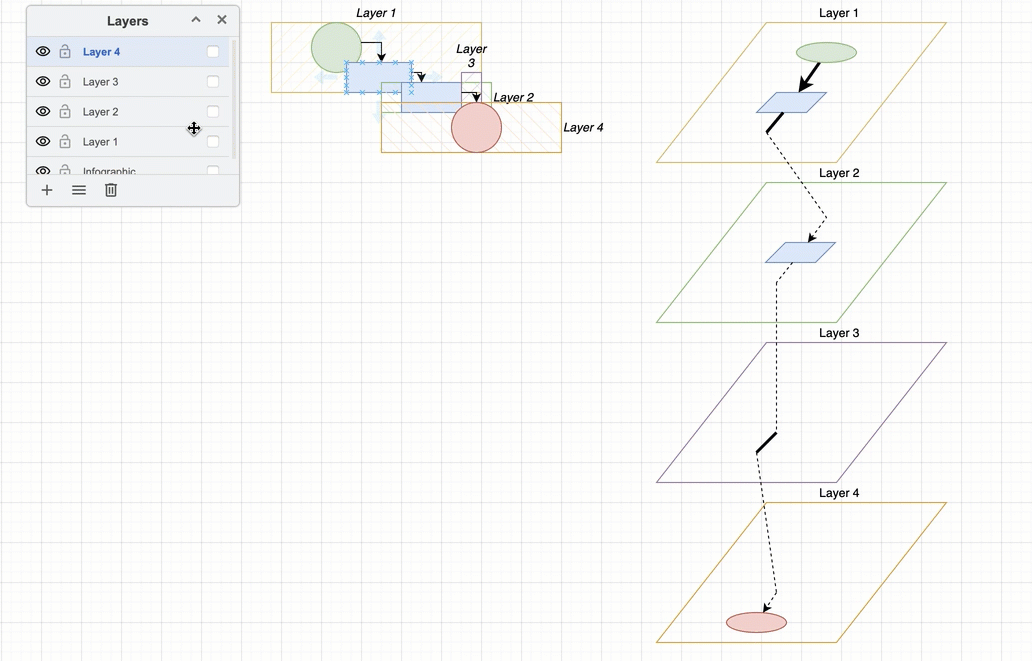
Each object in a diagram - text, shape and connector - ‘lives’ on a single layer.
Connectors live on one layer but also can link to source and target shapes on different layers.
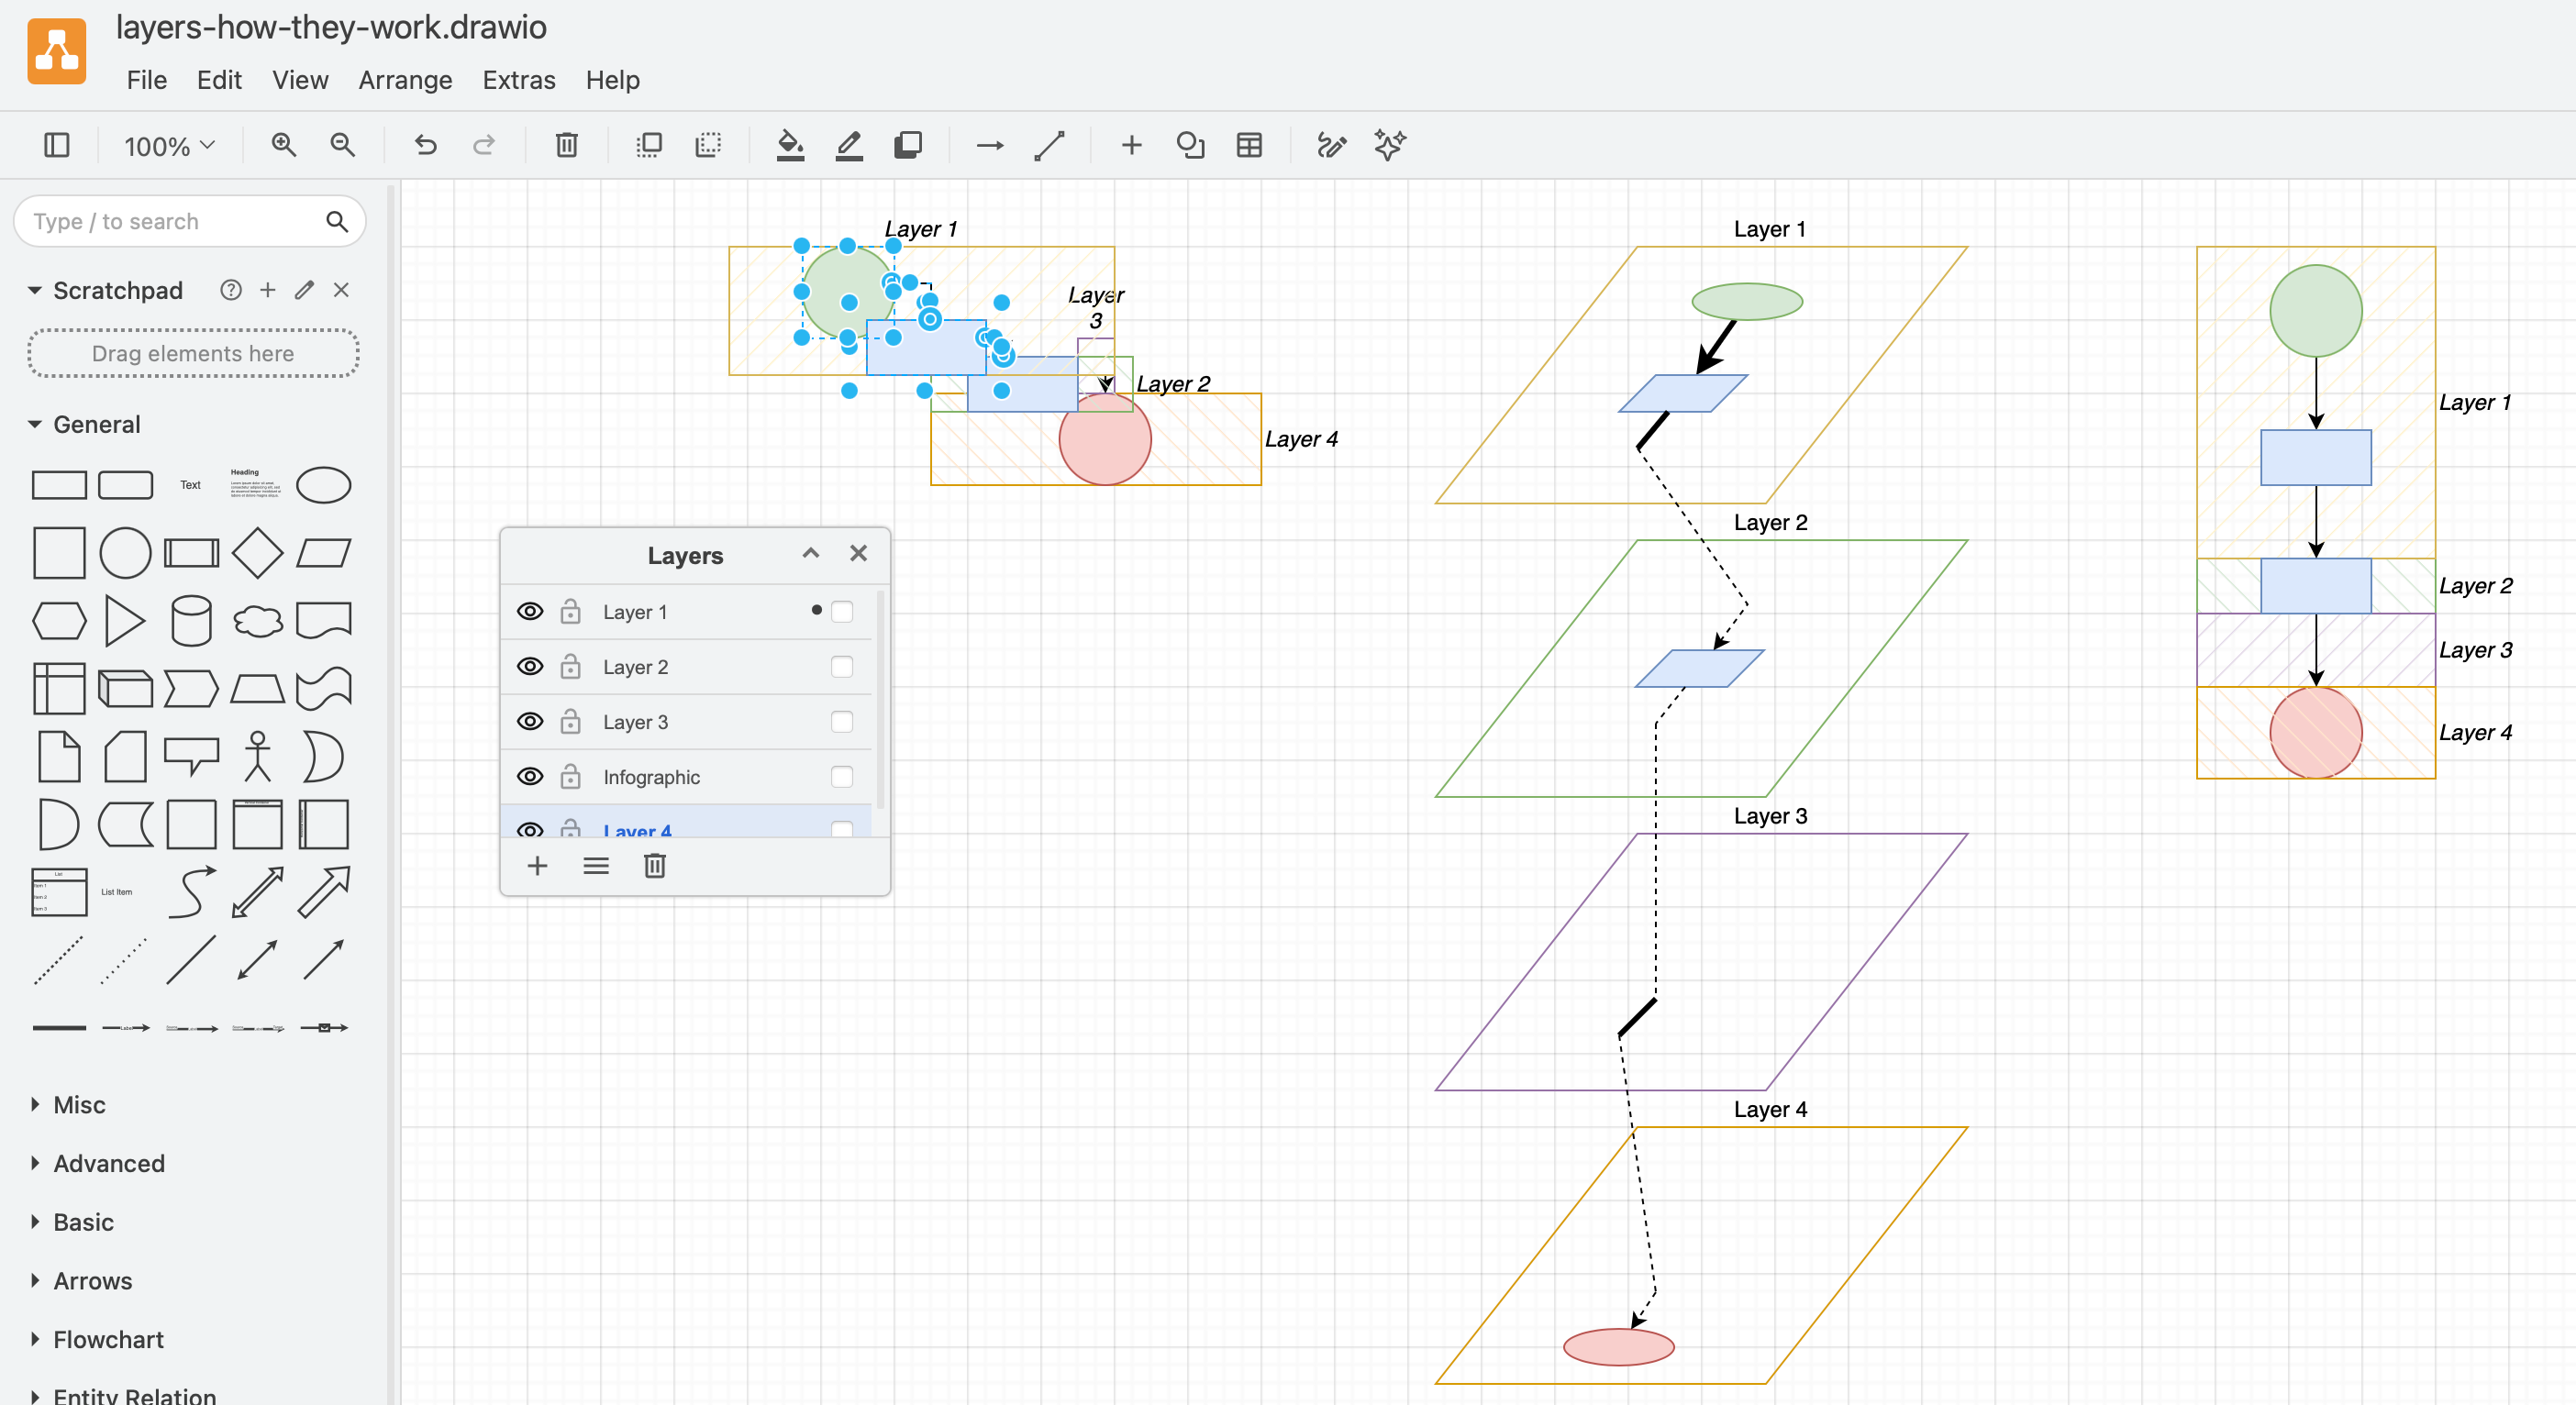
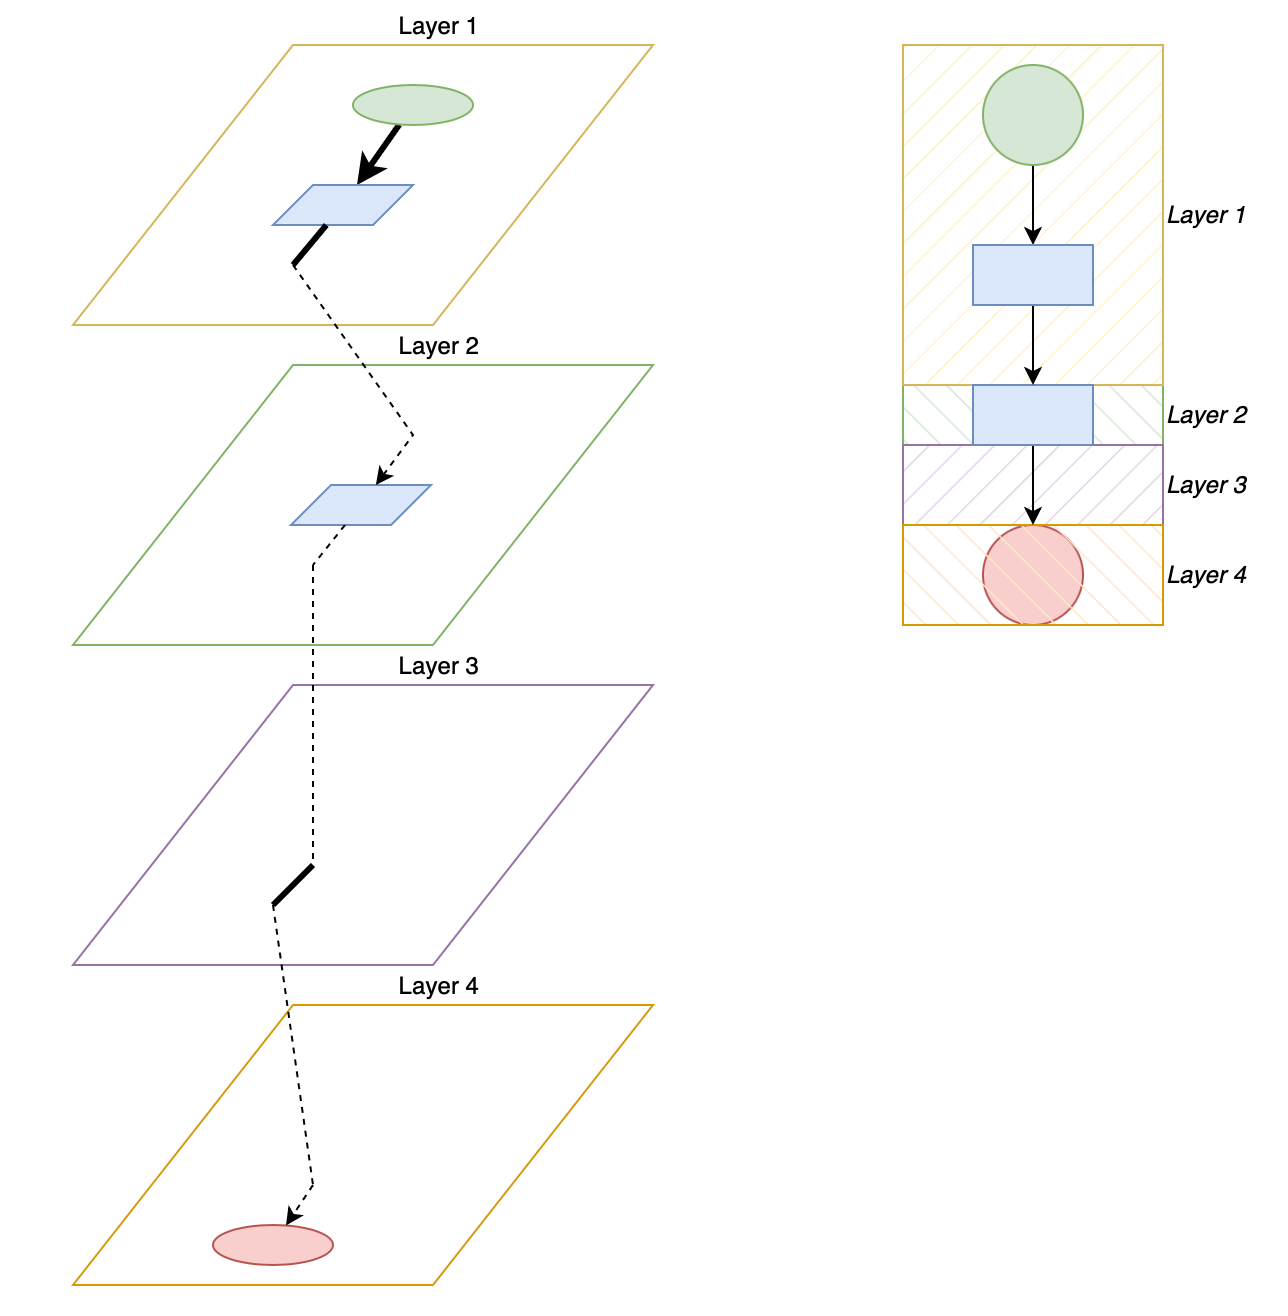
For example, although the flowchart on the right looks flat, but it is divided into four layers, as visualised on the left. The connector in Layer 3 has a source in Layer 2 and a target in Layer 4.
Open this example
The diagram inside a .drawio file is structured into cells in a tree-like structure. The diagram itself is the topmost single cell, the layers in a diagram form the next level of cells, then each element on a layer is a cell nested within its layer cell.
"cell":Root
└── Layer 1
    ├── Rectangle (cell)
    ├── Connector (cell)
    └── Container/group (cell)
        ├── Circle (member of the container)
        └── Text (member of the container)
└── Layer 2
    └── ...
Container shape objects live inside their containers
When you have a container shape or group of shapes, this is also a cell - every child object in that group or container is contained within that cell, which, with all its child elements lives only on one layer.
Therefore, assigning an element that was inside a container shape or group of shapes to a different layer will also remove that element from the container/group.
For example, moving the Image Repository shape from the Background layer into the CaaS container shape adds it to the Service layer. Then reassigning the Image Repository shape to the Management layer automatically removes it from the CaaS container shape.
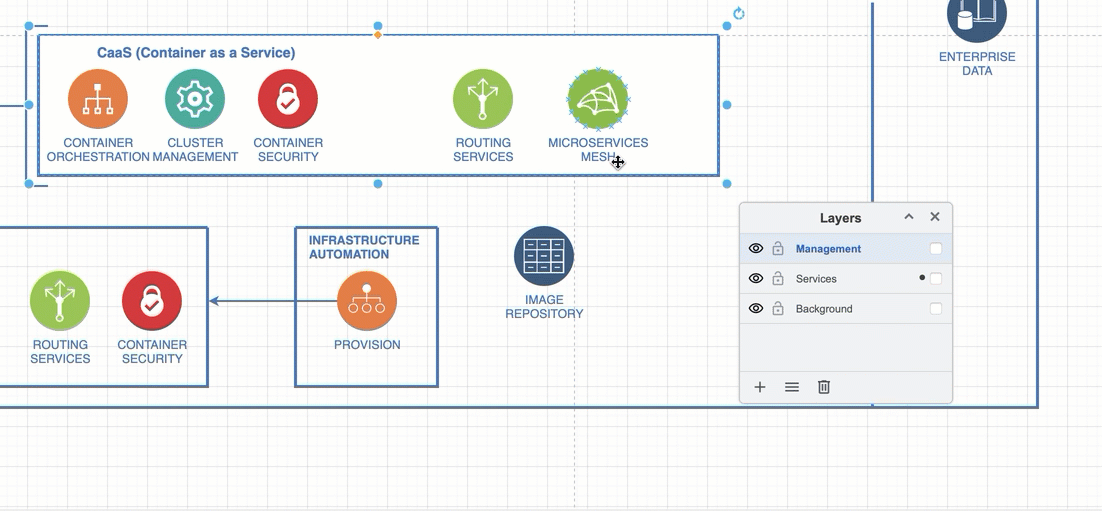
Open this example
Select all objects in a layer
- Select a layer in the Layers dialog.
- In the Layers dialog menu, select Current Layer > Select Objects in Layer.
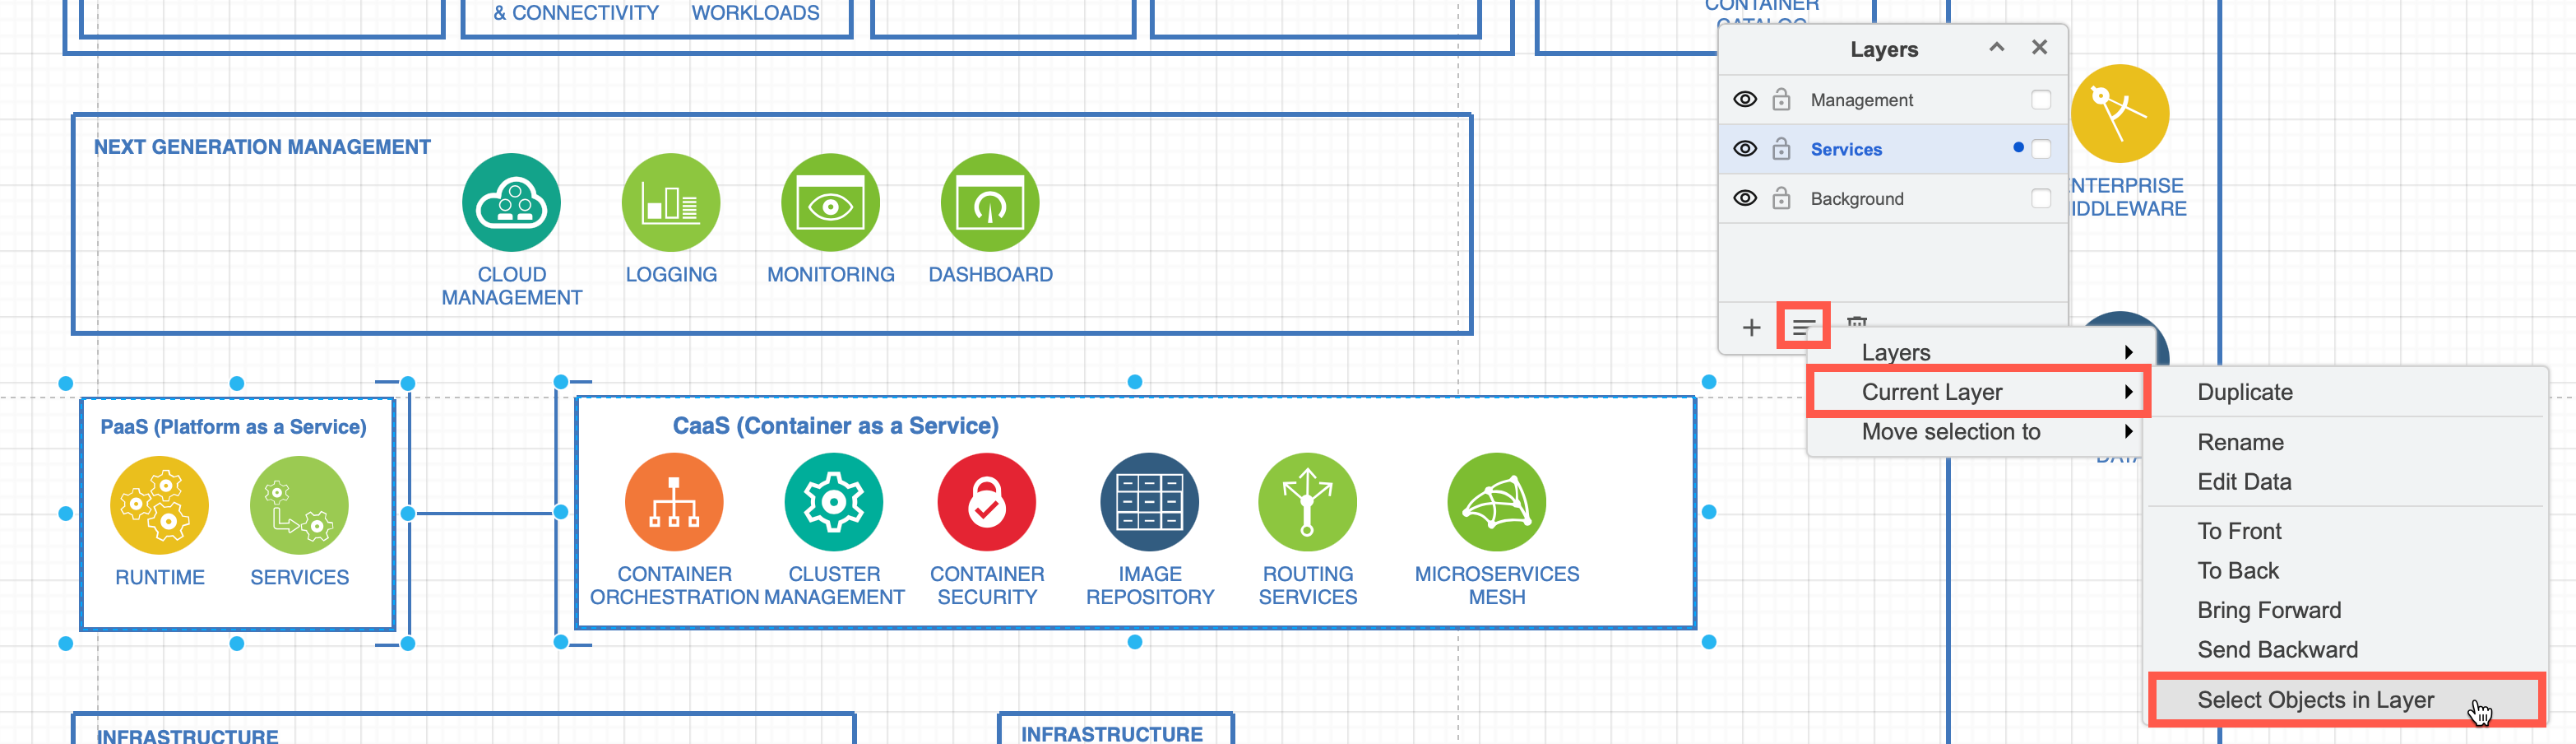
This selects the immediate objects (cells) that are directly under the layer cell. It does not select the objects inside any container shapes or groups in that layer.
When you move container shapes or groups on the drawing canvas, everything inside them moves with them as one entity.
Therefore, when you select objects on a layer and move them to a different layer (Layers dialog menu > Move Selection to), any parent containers or groups will take their objects inside with them to the new layer.
Diagram depth - z-order and layers
Diagram objects are displayed from front to back based on the order in which cells live in the .drawio file’s tree structure. This is called the z-order, and it determines when shapes and connectors overlap other diagram objects.
- Use the Arrange tab in the format panel or the right-click context menu to move shapes and connectors forwards or backwards.
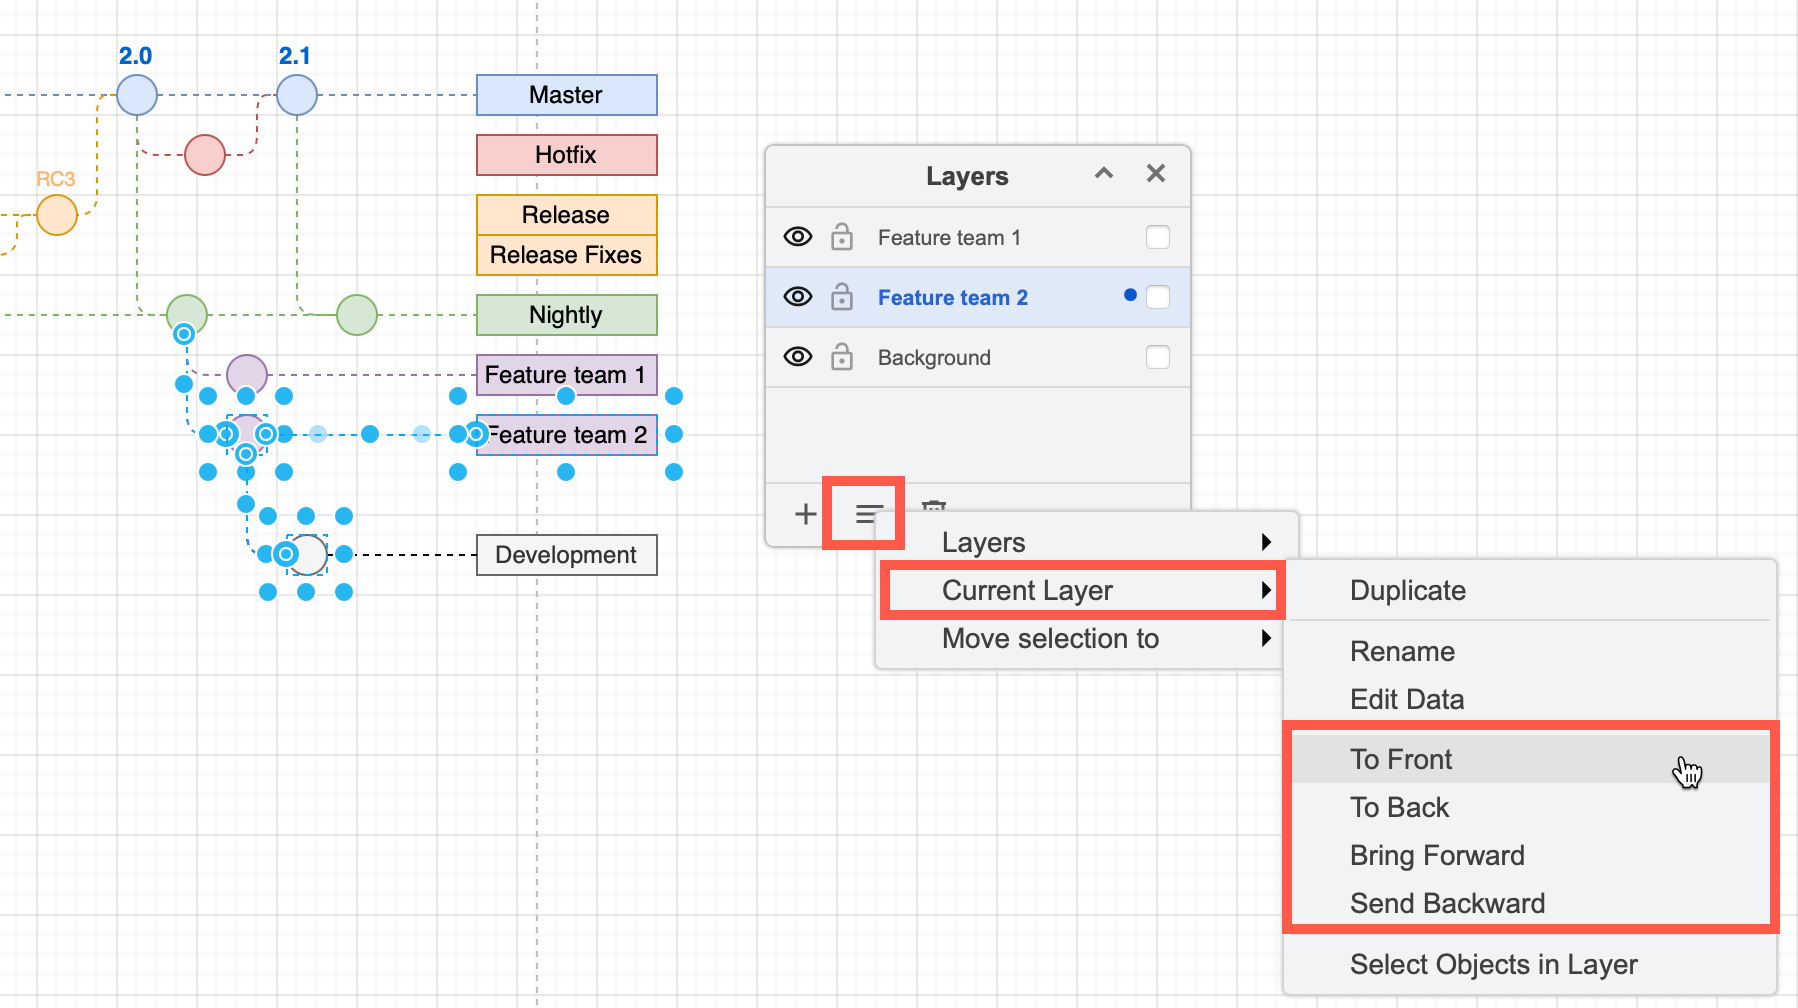
Each layer has its own z-order. When you select a shape inside a layer and send it to the back via the Arrange tab or the right click context menu, that shape will go to the back of its layer. Any layers further down the Layers dialog are still behind that shape.
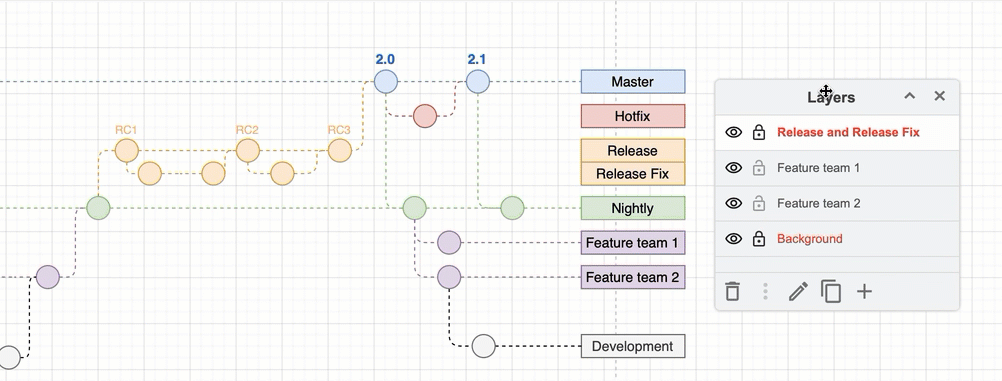
The objects in the flowchart from the previous example have been repositioned so they overlap. The animation shows what happens to overlapping shapes when you re-order the layers.
Open this example
Drag and drop layers in the list to change where their objects sit in the z-order of your diagram. Alternatively, select the layer, and in the Layers dialog menu, select Current Layer then move it forwards or backwards in the layers list.
Copy shapes from multiple layers?
You can select multiple objects in a diagram from different layers and move them around on the drawing canvas. This does not change what layer they ‘live’ on.
However, copying objects in a draw.io diagram does not copy their layer information. When you copy your selection to the clipboard (Ctrl+C) and paste it back onto the drawing canvas or into another diagram (Ctrl+V), all the copied objects will be pasted into a single layer.
Import a diagram file to import layer information
When you drag and drop a .drawio diagram file onto your drawing canvas, if that diagram had layers, these will be created and added to the Layers dialog, preserving the new shapes’ layer structure.
So, when you want to preserve the layer structure of selected shapes and connectors, export your selection to an XML file, then import that file into your target diagram.
Use layers in technical diagrams
Once you know how to use layers in draw.io, you can do more with your technical diagrams.
-
Make a draw.io diagram interactive with custom links.
-
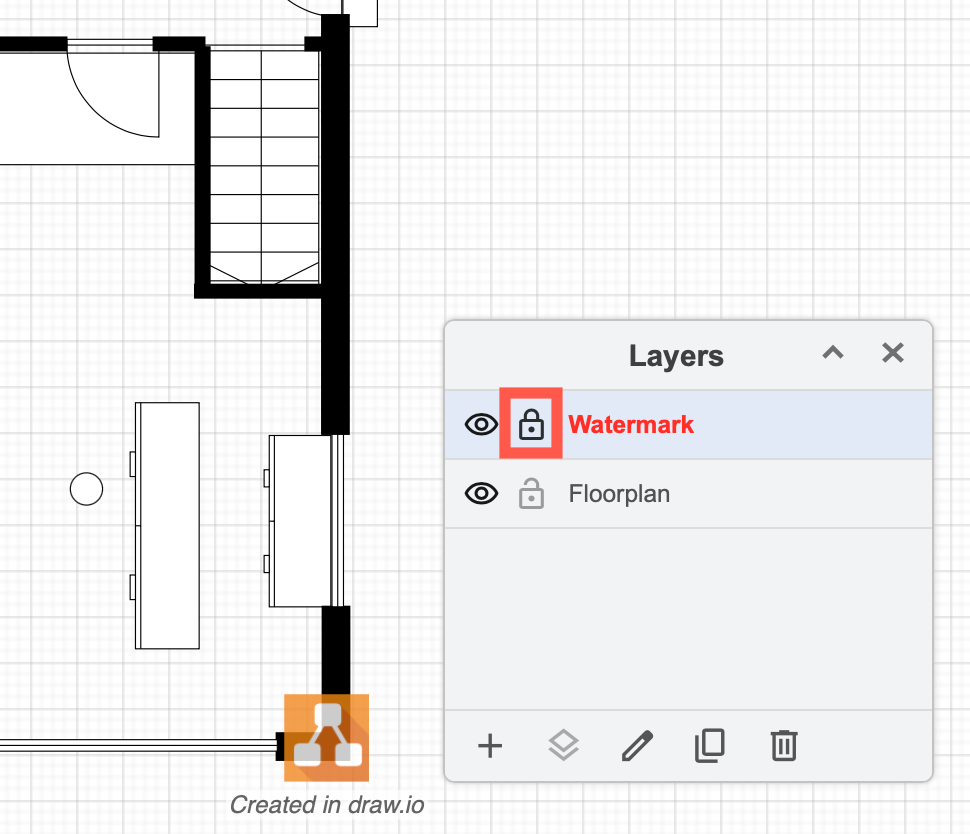
Place watermarks on locked layers over or under diagrams for branding, draft or approval notifications.
-
Hide and show layers to simplify complex diagrams and highlight important or omit irrelevant details - useful in training material and educational infographics.