Flowcharts with swimlanes
Flowcharts are one of the most common diagram types, showing all of the steps that must be followed to complete a process. Not many processes are limited to just one person or one team, which is why swimlane diagrams and cross-functional flowcharts are used - these show the flow of data or control across different groups.
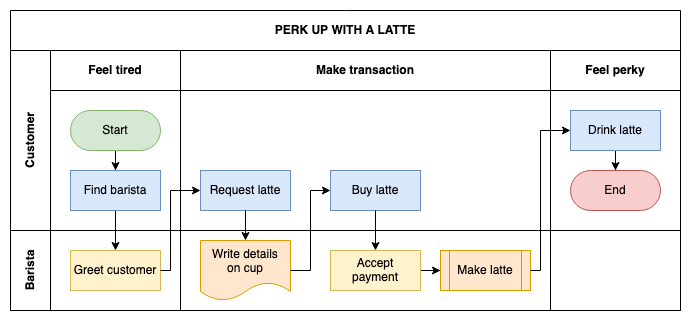
Swimlane diagrams, flowcharts and cross-functional flowcharts are used throughout organisations:
- onboard new team members
- document business processes for accounting, project approval and health and safety reporting requirements
- chart decisions made in the development of regulations and guidelines
Visually separating the steps in a process and showing who is responsible for completing those steps makes the information easier to understand, leading to less confusion between teams.
Specialised types of process diagrams are used in software engineering to document both the data flow and the flow of control in and between software systems: UML activity diagrams, sequence and other interaction diagrams, data flows, use case diagrams, and so on.
Draw a swimlane diagram
Swimlane diagrams add context to your flowcharts where the steps in you process are typically grouped by team responsibilities. BPMN diagrams are a form of swimlane diagram, where process steps are arranged by business unit, with space often left between to show when documents are created or data is stored.
Use a draw.io template
draw.io provides you with a simple swimlane flowchart to get you started. Get comfortable with swimlanes by using the template and explore how to add and connect shapes in the flow, move shapes between swimlanes, and add and remove swimlanes.
- Go to the online draw.io at app.diagrams.net, select your storage location, and create a new diagram.
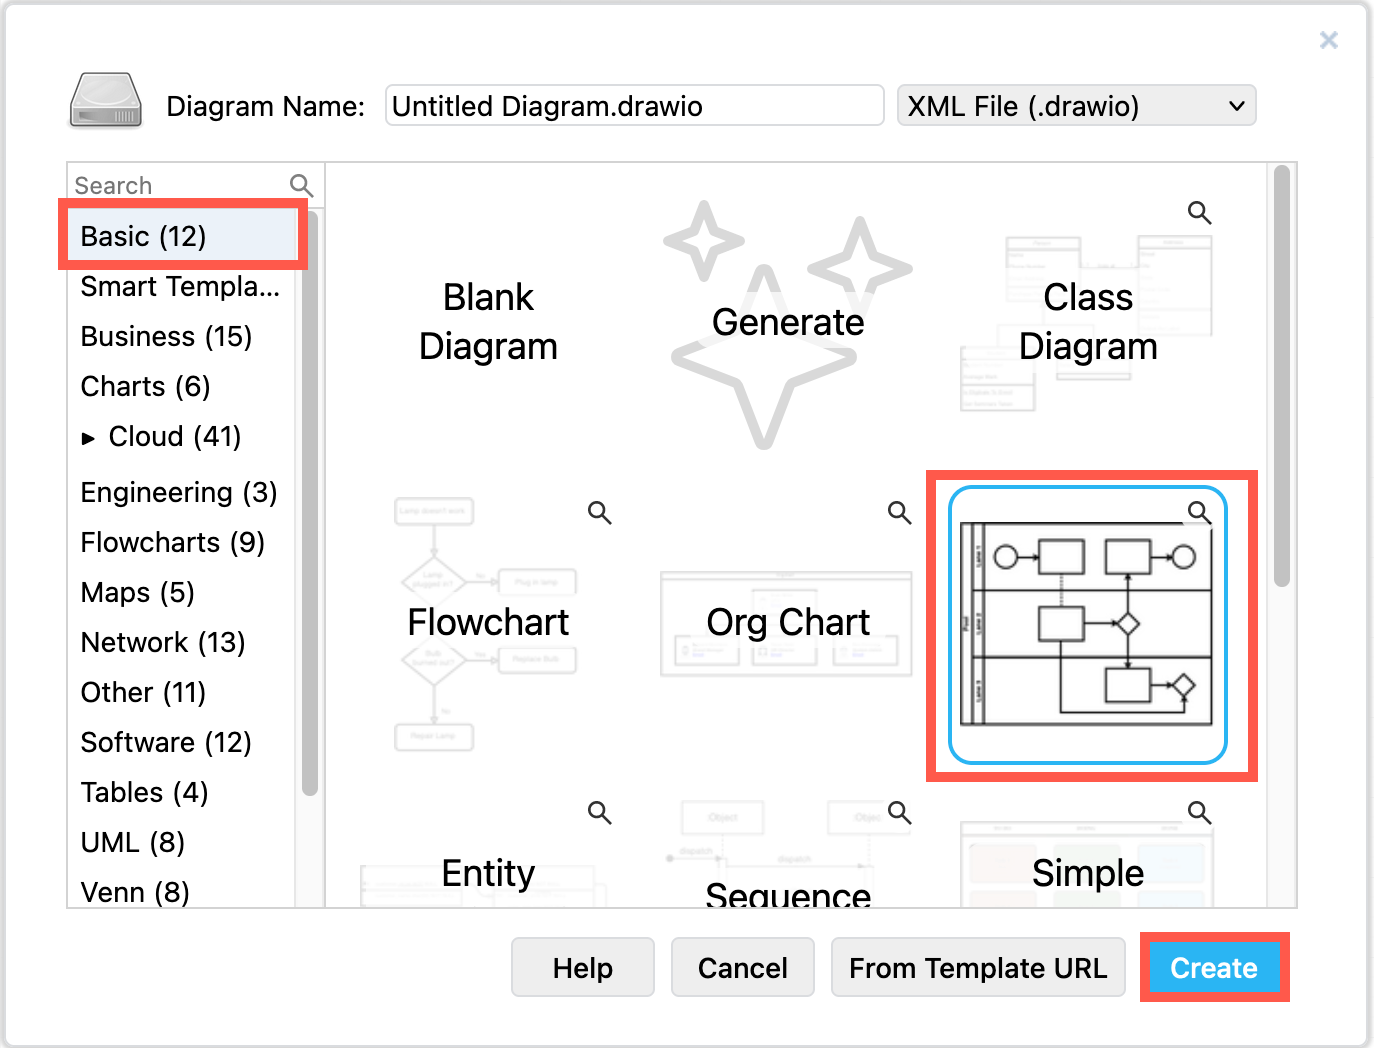
- Edit the filename, select the Swimlane Diagram template that is in the Basic template collection, then click Create.
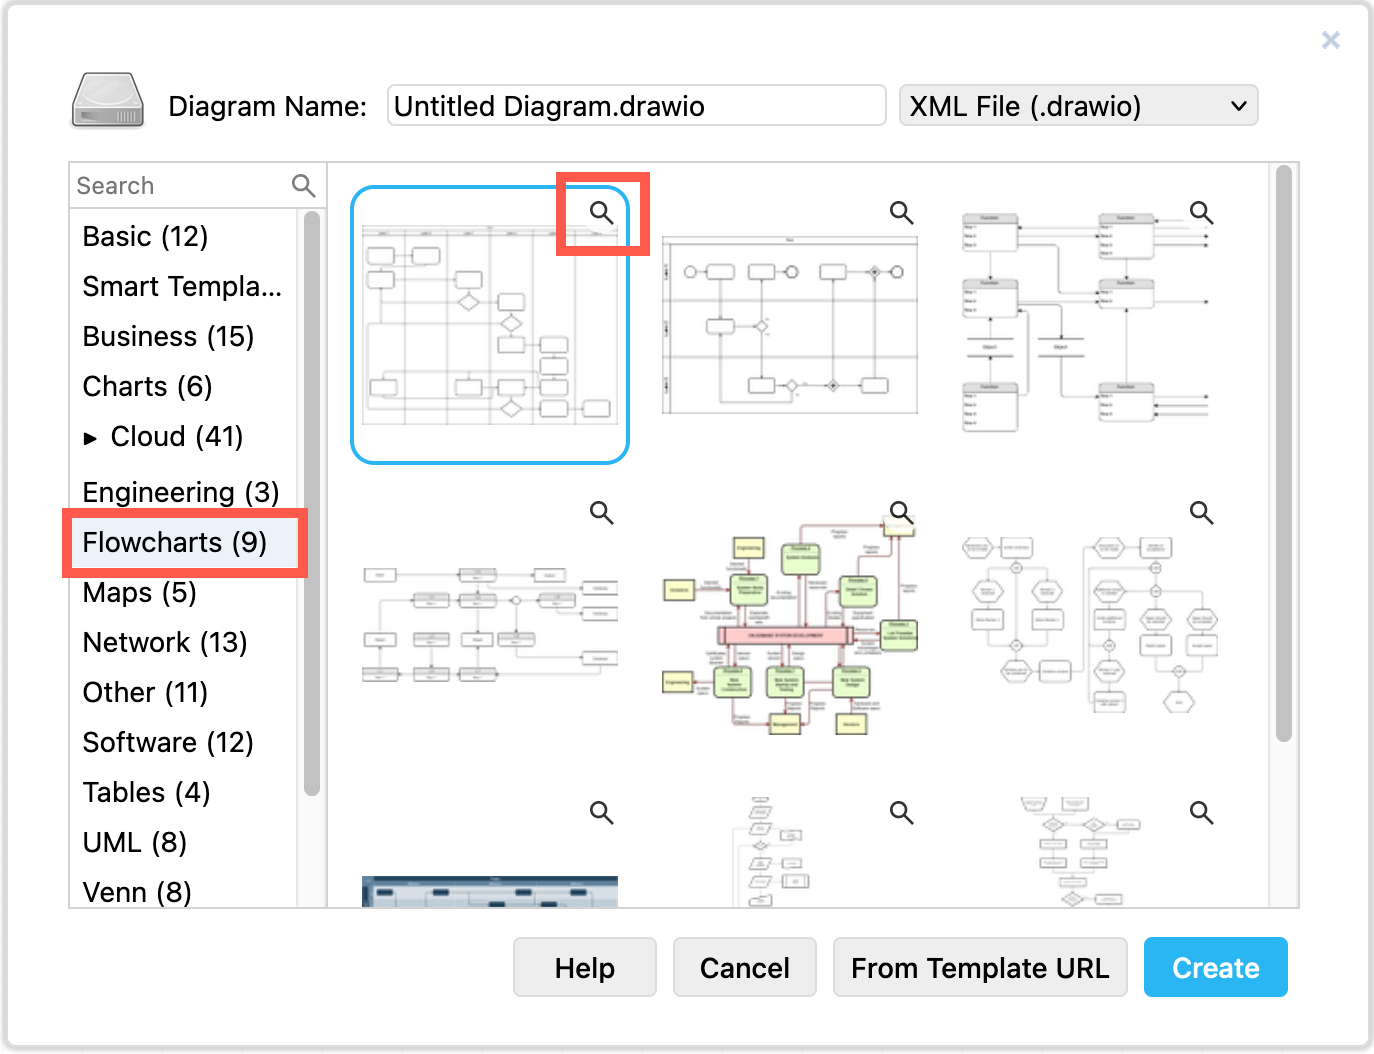
- There are more complex swimlane diagram templates in the Flowcharts template category: From the draw.io editor, click Arrange > Insert > Template, then select Flowcharts on the left.
- Click on the magnifying glass in the top right of a template to see a larger preview. Select the template you want to use, then click Insert.
- The swimlane diagram template is added to the drawing canvas, ready for you to modify and add to it.
Edit the swimlane diagram
As swimlane shapes are containers, they are a little more complex to work with than standard draw.io shapes on the drawing canvas.
Select swimlanes, shapes and connectors
Select a swimlane: Click on a blank space inside the swimlane to select it. If you click on a shape inside the swimlane, you'll select the shape instead. Clicking on a black space in the swimlane a second time will select the outer container shape.
Select a shape inside a swimlane: Click directly on a shape to select it.
Select multiple shapes inside swimlanes: Hold down Alt as you click directly on the shapes to select more than one.
If the shapes are in an outer swimlane, you can drag a selection box around them to select more than one at once. It won't select the swimlane unless you fully enclose it in the selection box too.
Add swimlanes, shapes and connectors
Add a new swimlane: Select the outer pool shape or one of the swimlanes. In the Arrange tab of the format panel, click Insert Row Above or Insert Row After. Alternatively, select a swimlane in the pool shape and press Alt+Enter to duplicate the selected swimlane.
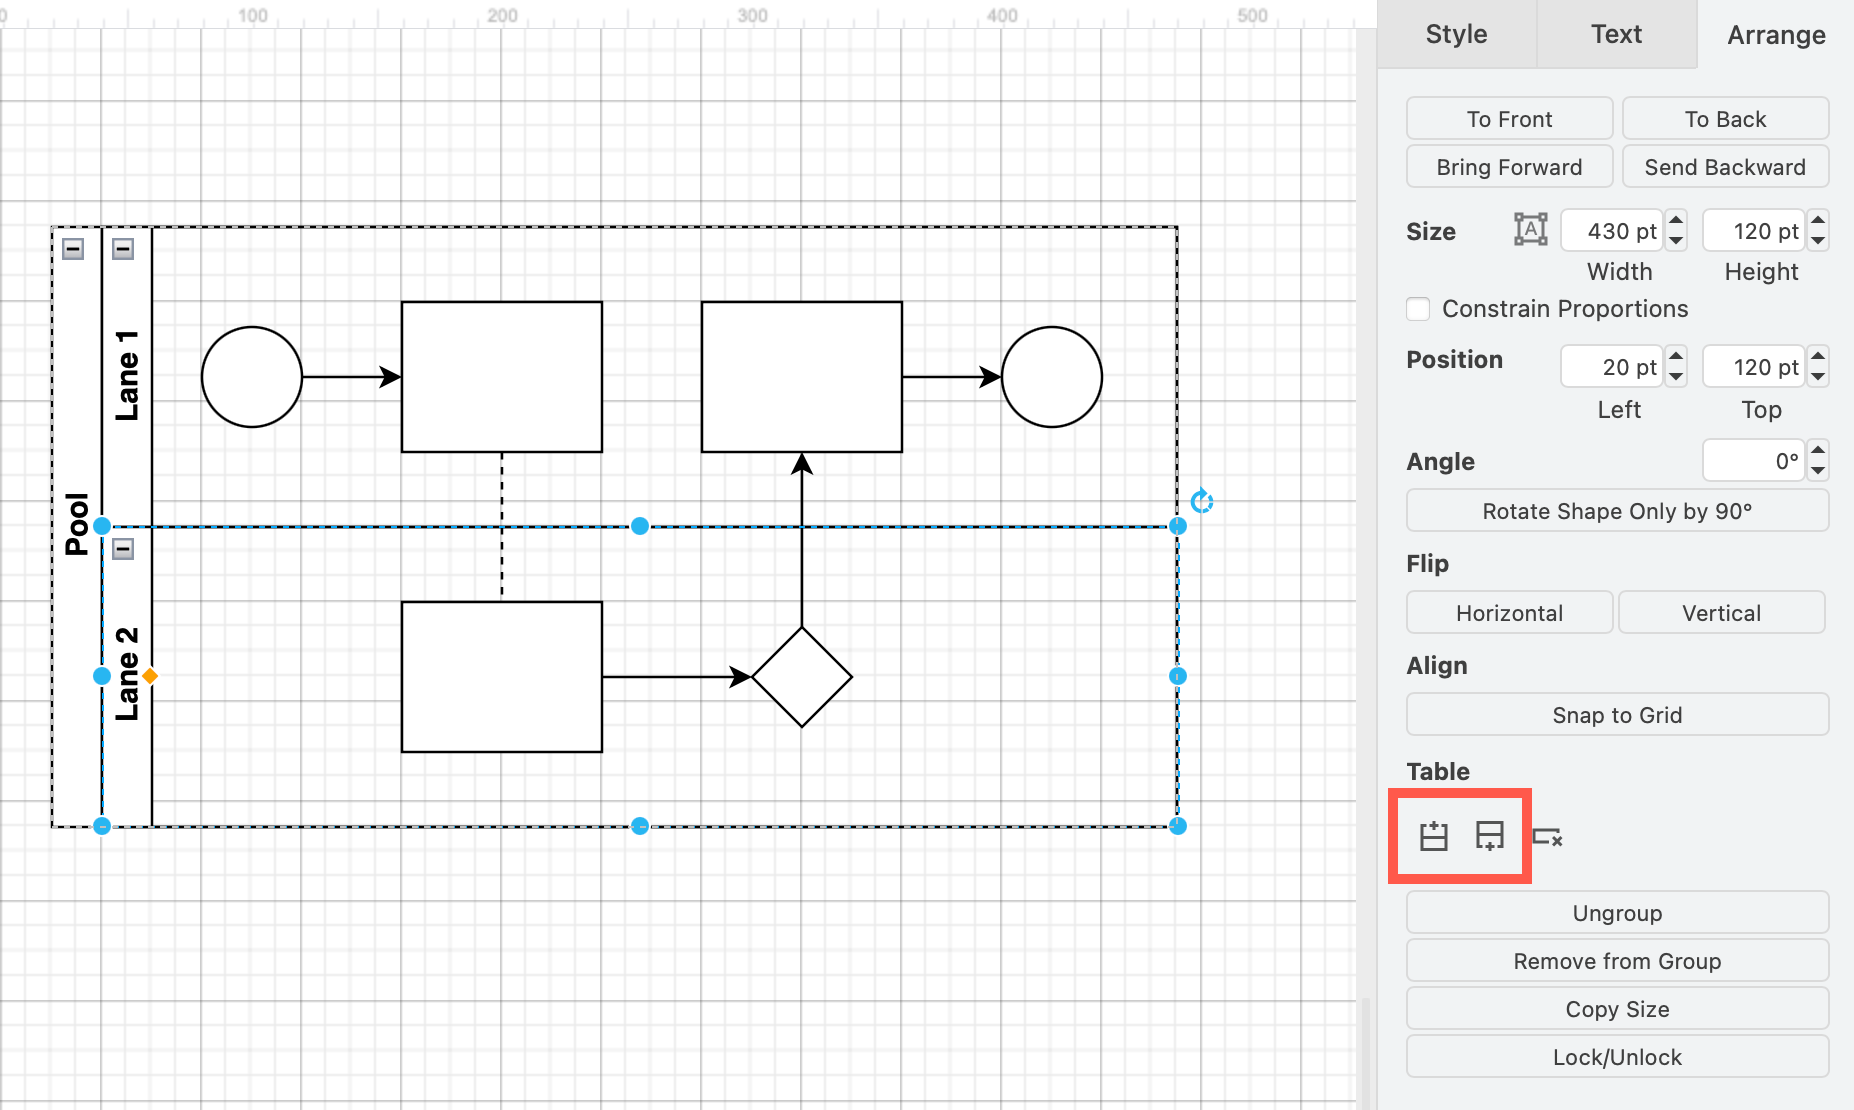
You can resize, reposition and rotate inside their swimlanes.
Add more shapes to a swimlane: Drag shapes from the shape libraries on the left into the swimlanes. You'll see the outline of a swimlane turn purple - drop the shape, and the swimlane will automatically expand in size to include the new shape. You can now draw connectors between the shapes as usual.
Move shapes: Drag shapes to a new position in the same swimlane, or to a different swimlane - the swimlane it belongs to will be highlighted in purple.
Replace a shape in a swimlane: Drag the shape you want to use from the shape library, hover over a different shape that is in a swimlane until you see the 'replace' arrow appear, then drop the new shape.
Overlap a shape on a swimlane: Normally when you drag a shape onto a swimlane, it will be added to it automatically. If you want the shape to just overlap and not be added to the swimlane container shape, hold down Alt on Windows or Option on macOS, then release the mouse button to drop it to place the shape over the swimlane
Draw connectors between shapes in swimlanes
Connect shapes: There are many different ways you can connect shapes in draw.io. Hover over a shape and drag a connector from one of the direction arrows or one of the fixed connection points, and drop it on the target shape to connect them.
Add and connect a shape in one step: Drag a shape from the shape library, hover over a shape that is in a swimlane, and drop the new shape on one of the blue direction arrows to add it to the swimlane and connect it.
Alternatively, hover over an existing shape on the drawing canvas, click on one of the direction arrows and then click on the shape you want to add and connect. Most of the common flowchart shapes are available here.
Move a connector: Drag connectors around to change their route on the drawing canvas. New waypoints will be automatically added to your connectors.
Connect shapes across swimlanes: Draw connectors from a shape in one swimlane and drop it on a shape in another swimlane to connect them.
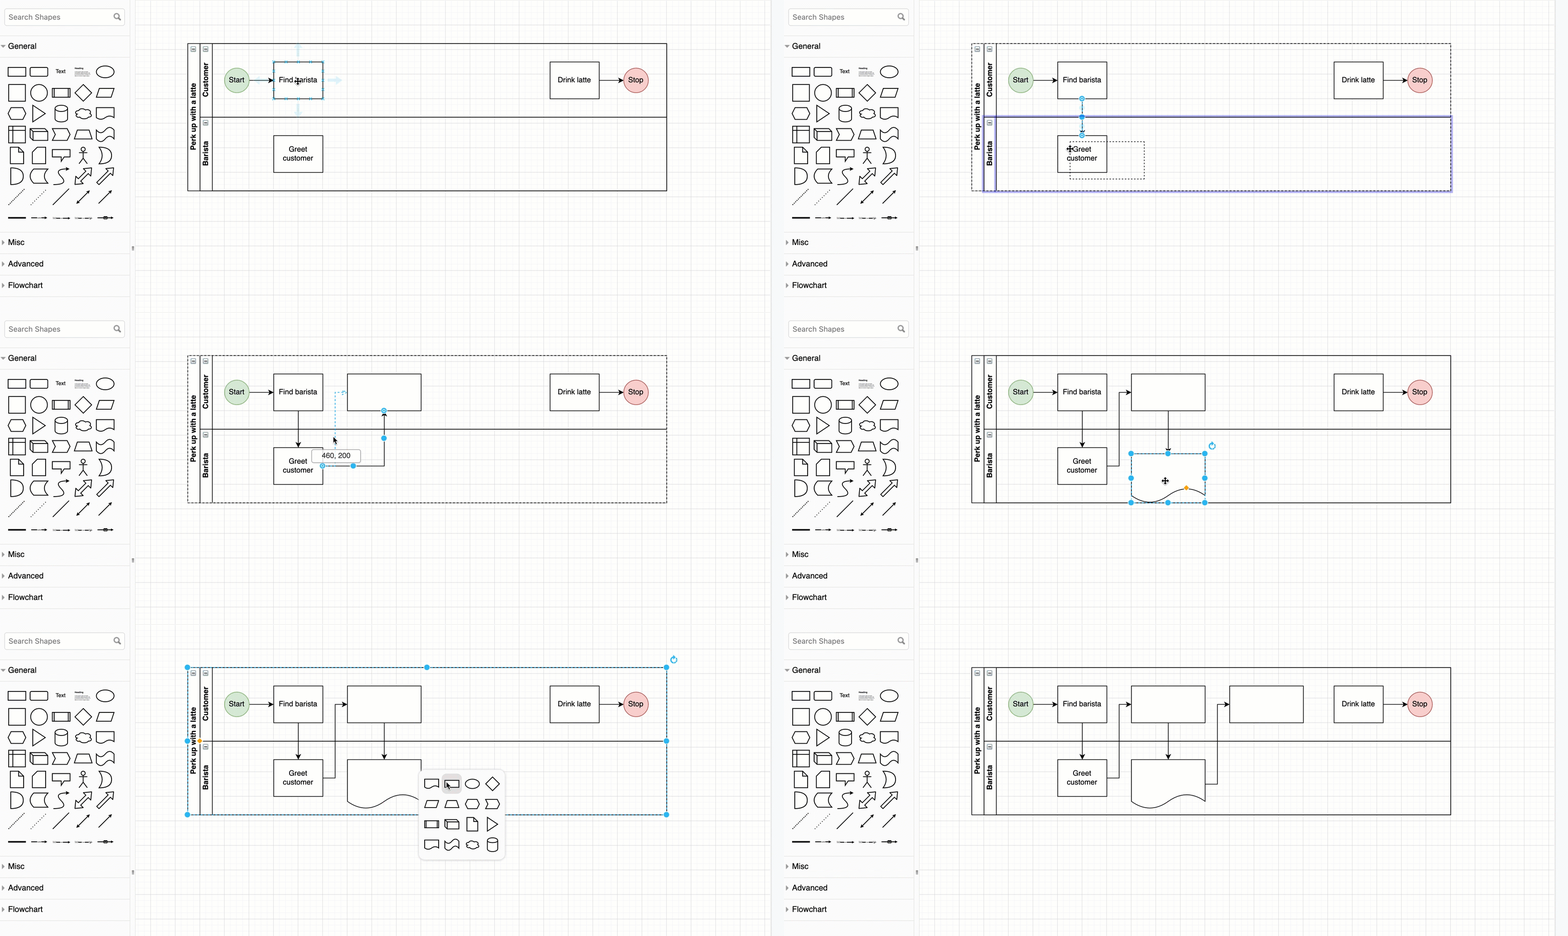
See how to work with floating and fixed connectors.
Add and change label text
Change the swimlane label text: Double click on the swimlane heading to edit the text. When you edit a vertical label, you will see it displayed horizontally for ease of reading - deselect the swimlane to save your label text.
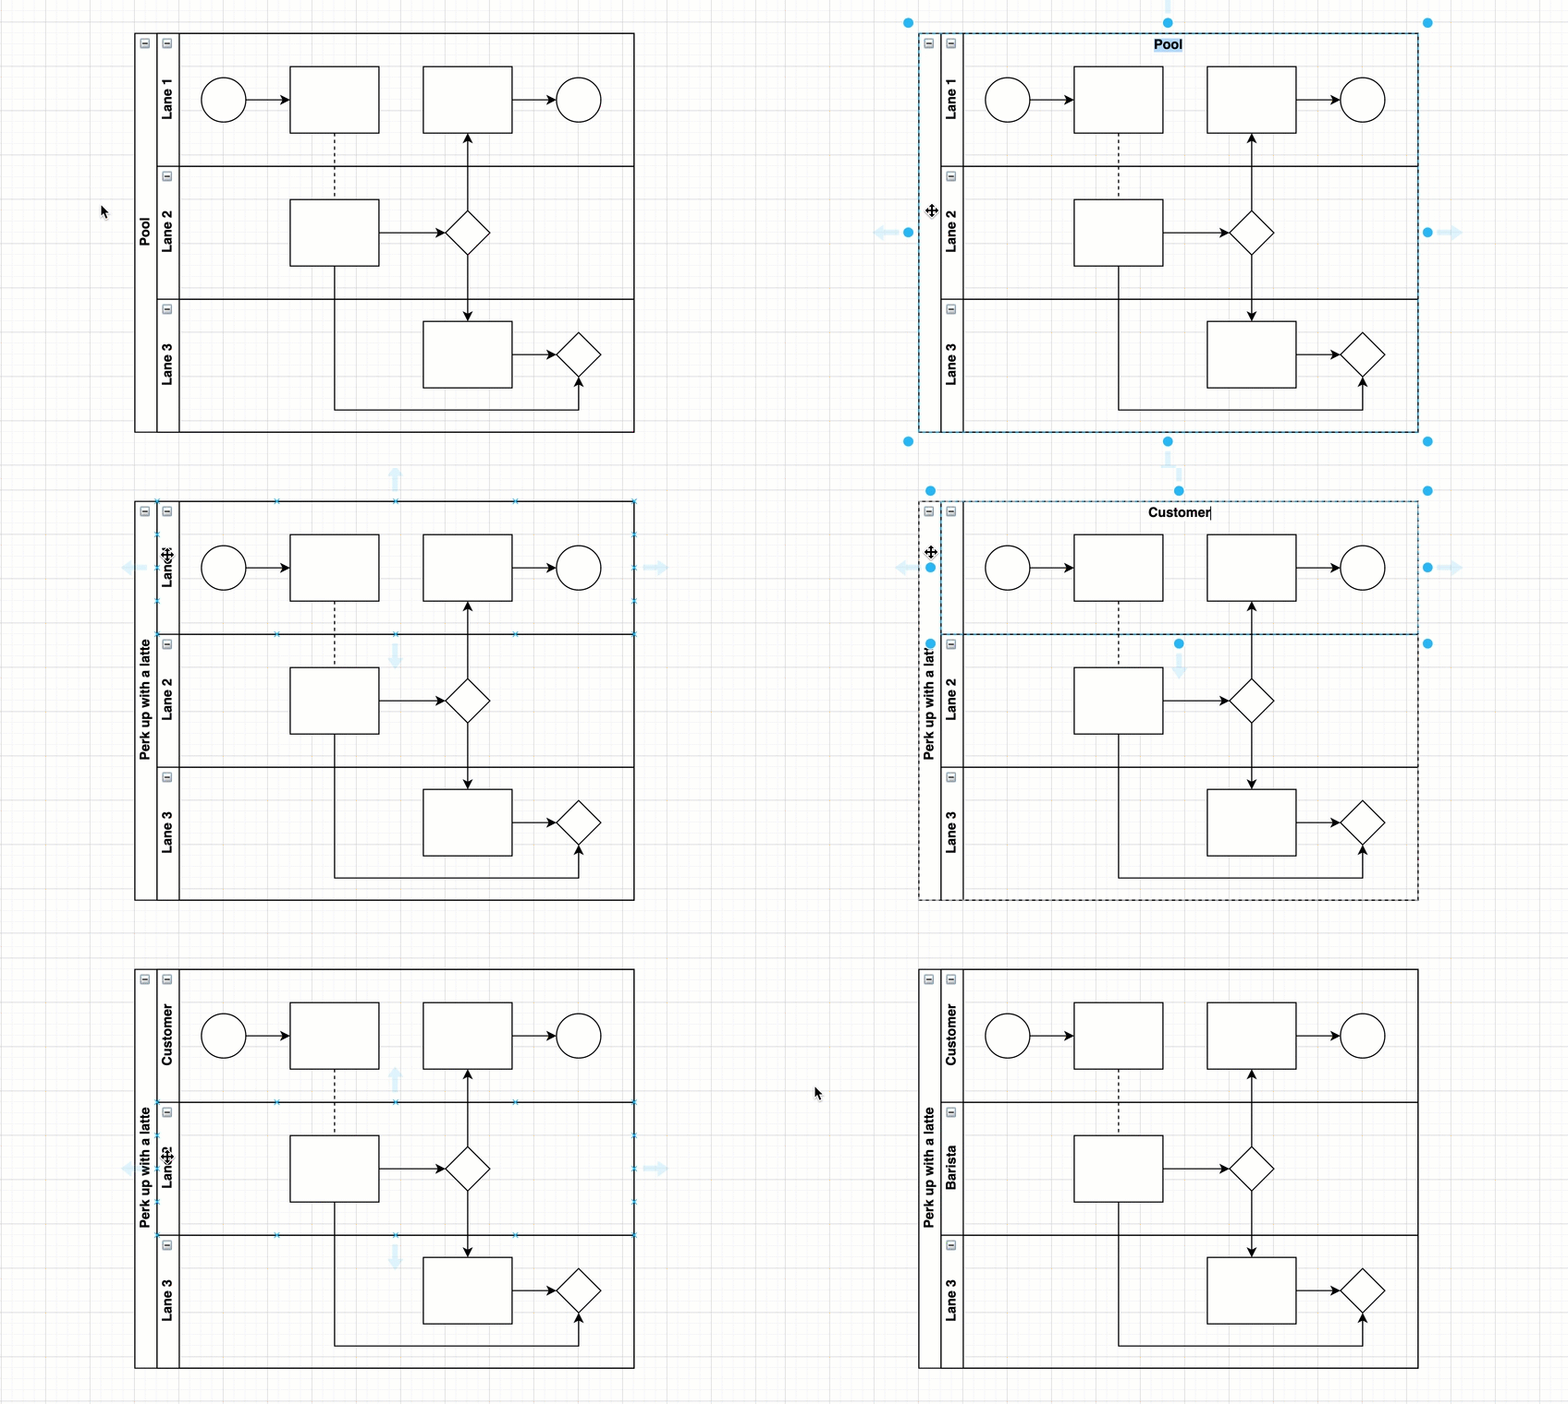
Add labels to shapes and connectors in the swimlanes: Double click on a shape or a connector to add or edit its label, or select one and start typing.
Delete swimlanes, shapes and connectors
Delete shapes and connectors inside swimlanes: Select the shapes and connectors you want to delete, then press Delete or Backspace to delete them.
Delete a swimlane: Select the swimlane, then press Delete or Backspace to delete it. Shapes inside the swimlane are also deleted. As connectors go across swimlanes, they must be deleted separately.
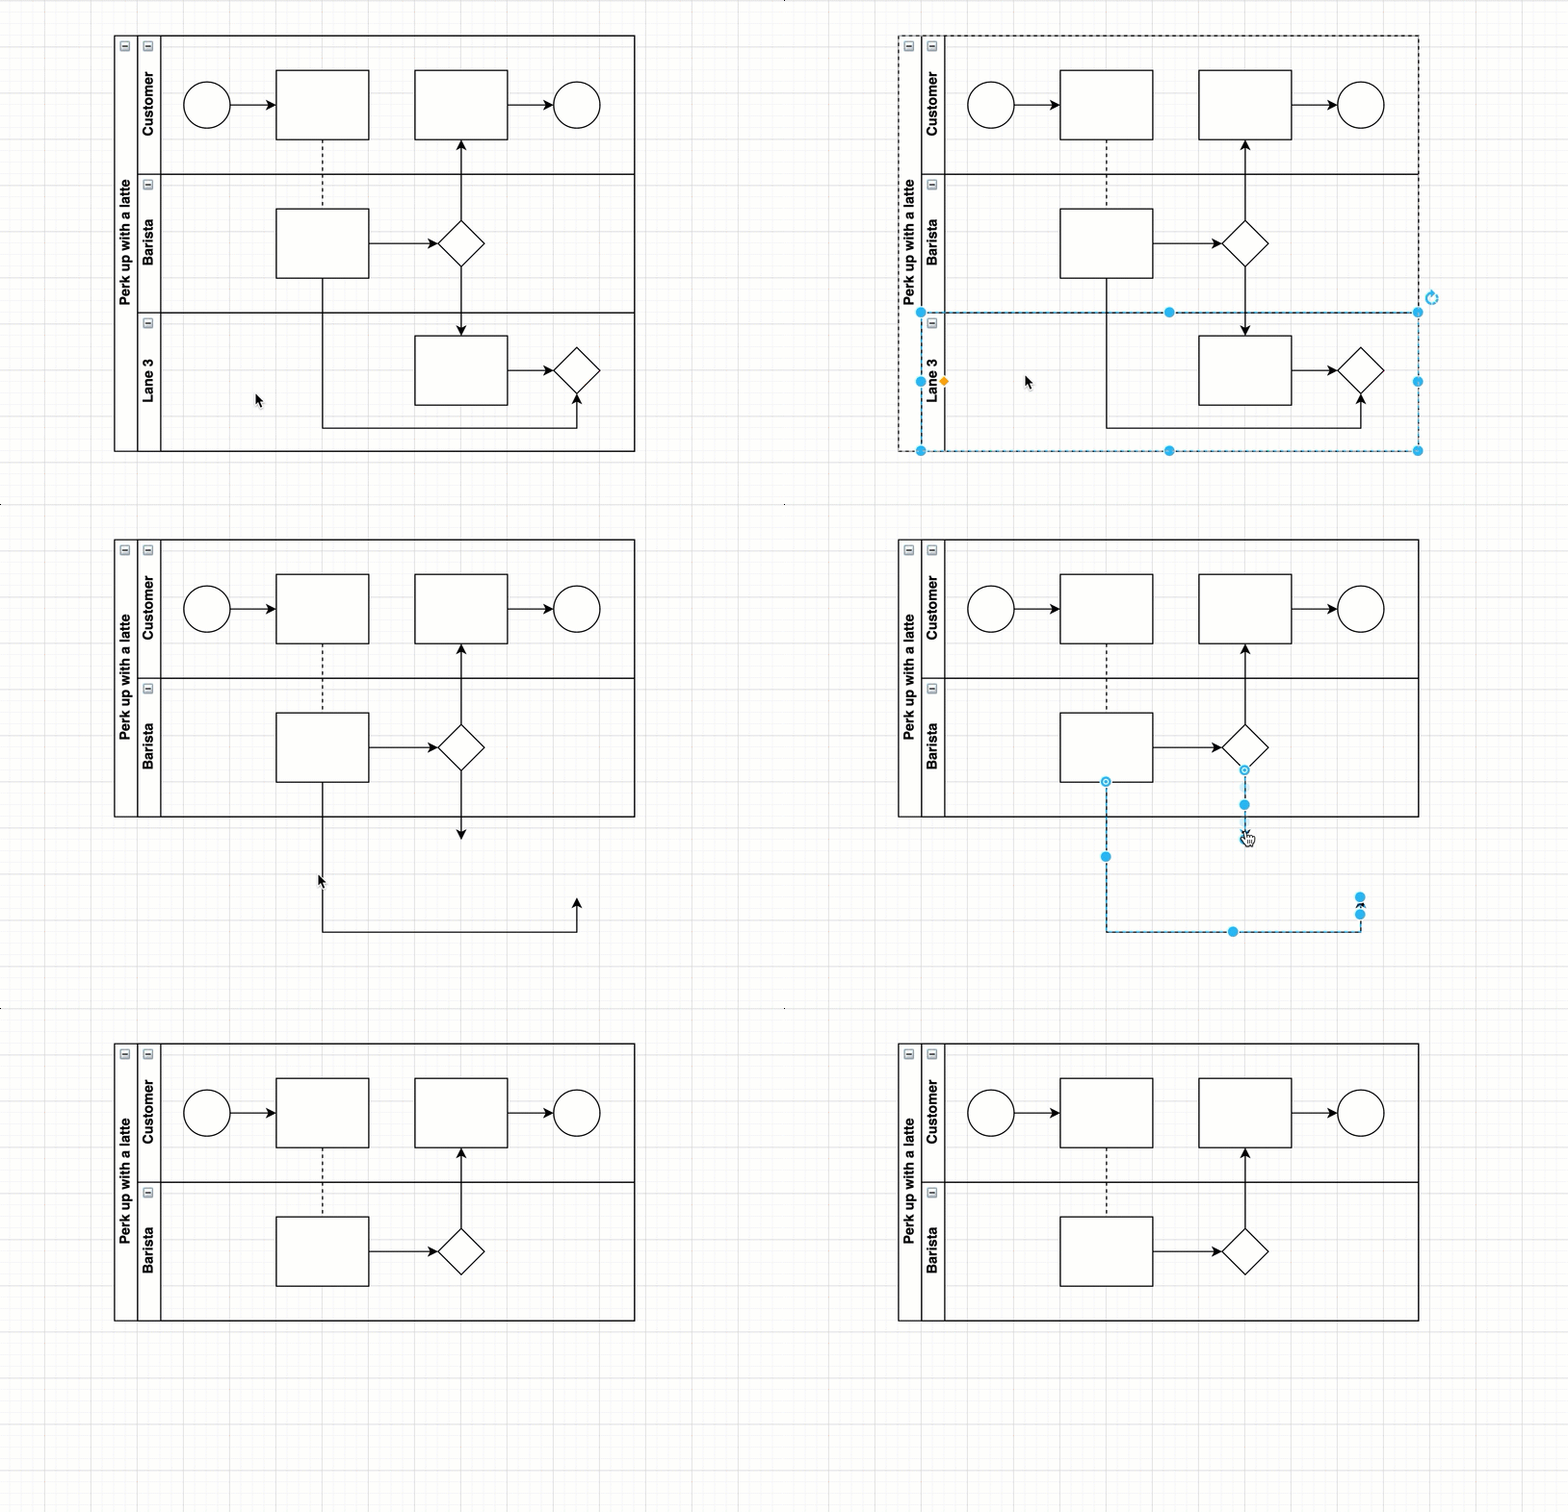
Style shapes, connectors and swimlanes
Style your swimlane diagram: Select the shapes and connectors you want to style, then change their styles in the format panel on the right. Use the Style tab to change their colours, outlines and connector styles, and the Text tab to style the shape labels.
Copy styles from one shape or connector to others: Select a styled shape or connector, click Copy Style on the Style tab, then select the target shapes or connectors, and click Paste Style to make the styles consistent.
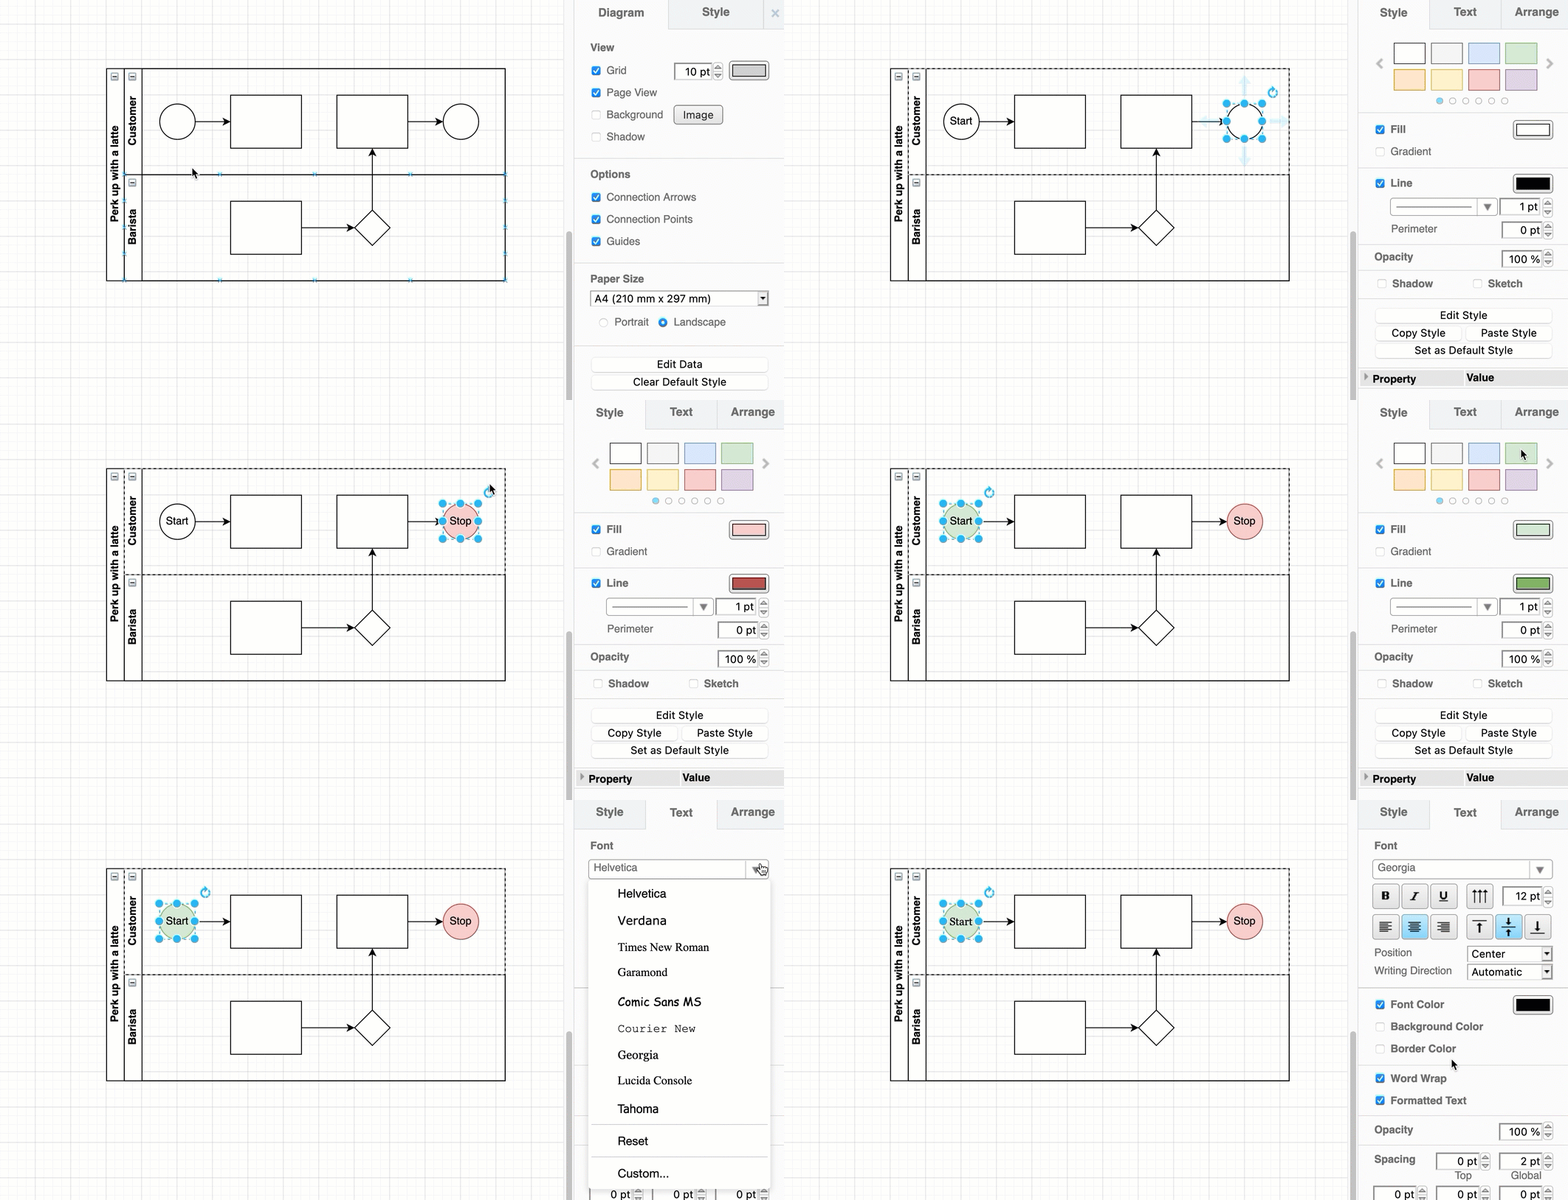
Copy shape sizes: To resize a group of shapes to match the size of another shape: Select the shape that is the size you want to use, click Copy Size in the Arrange tab of the format panel, select the target shapes, and click Paste Size. You will need to reposition connectors to make them neater after resizing the shapes.
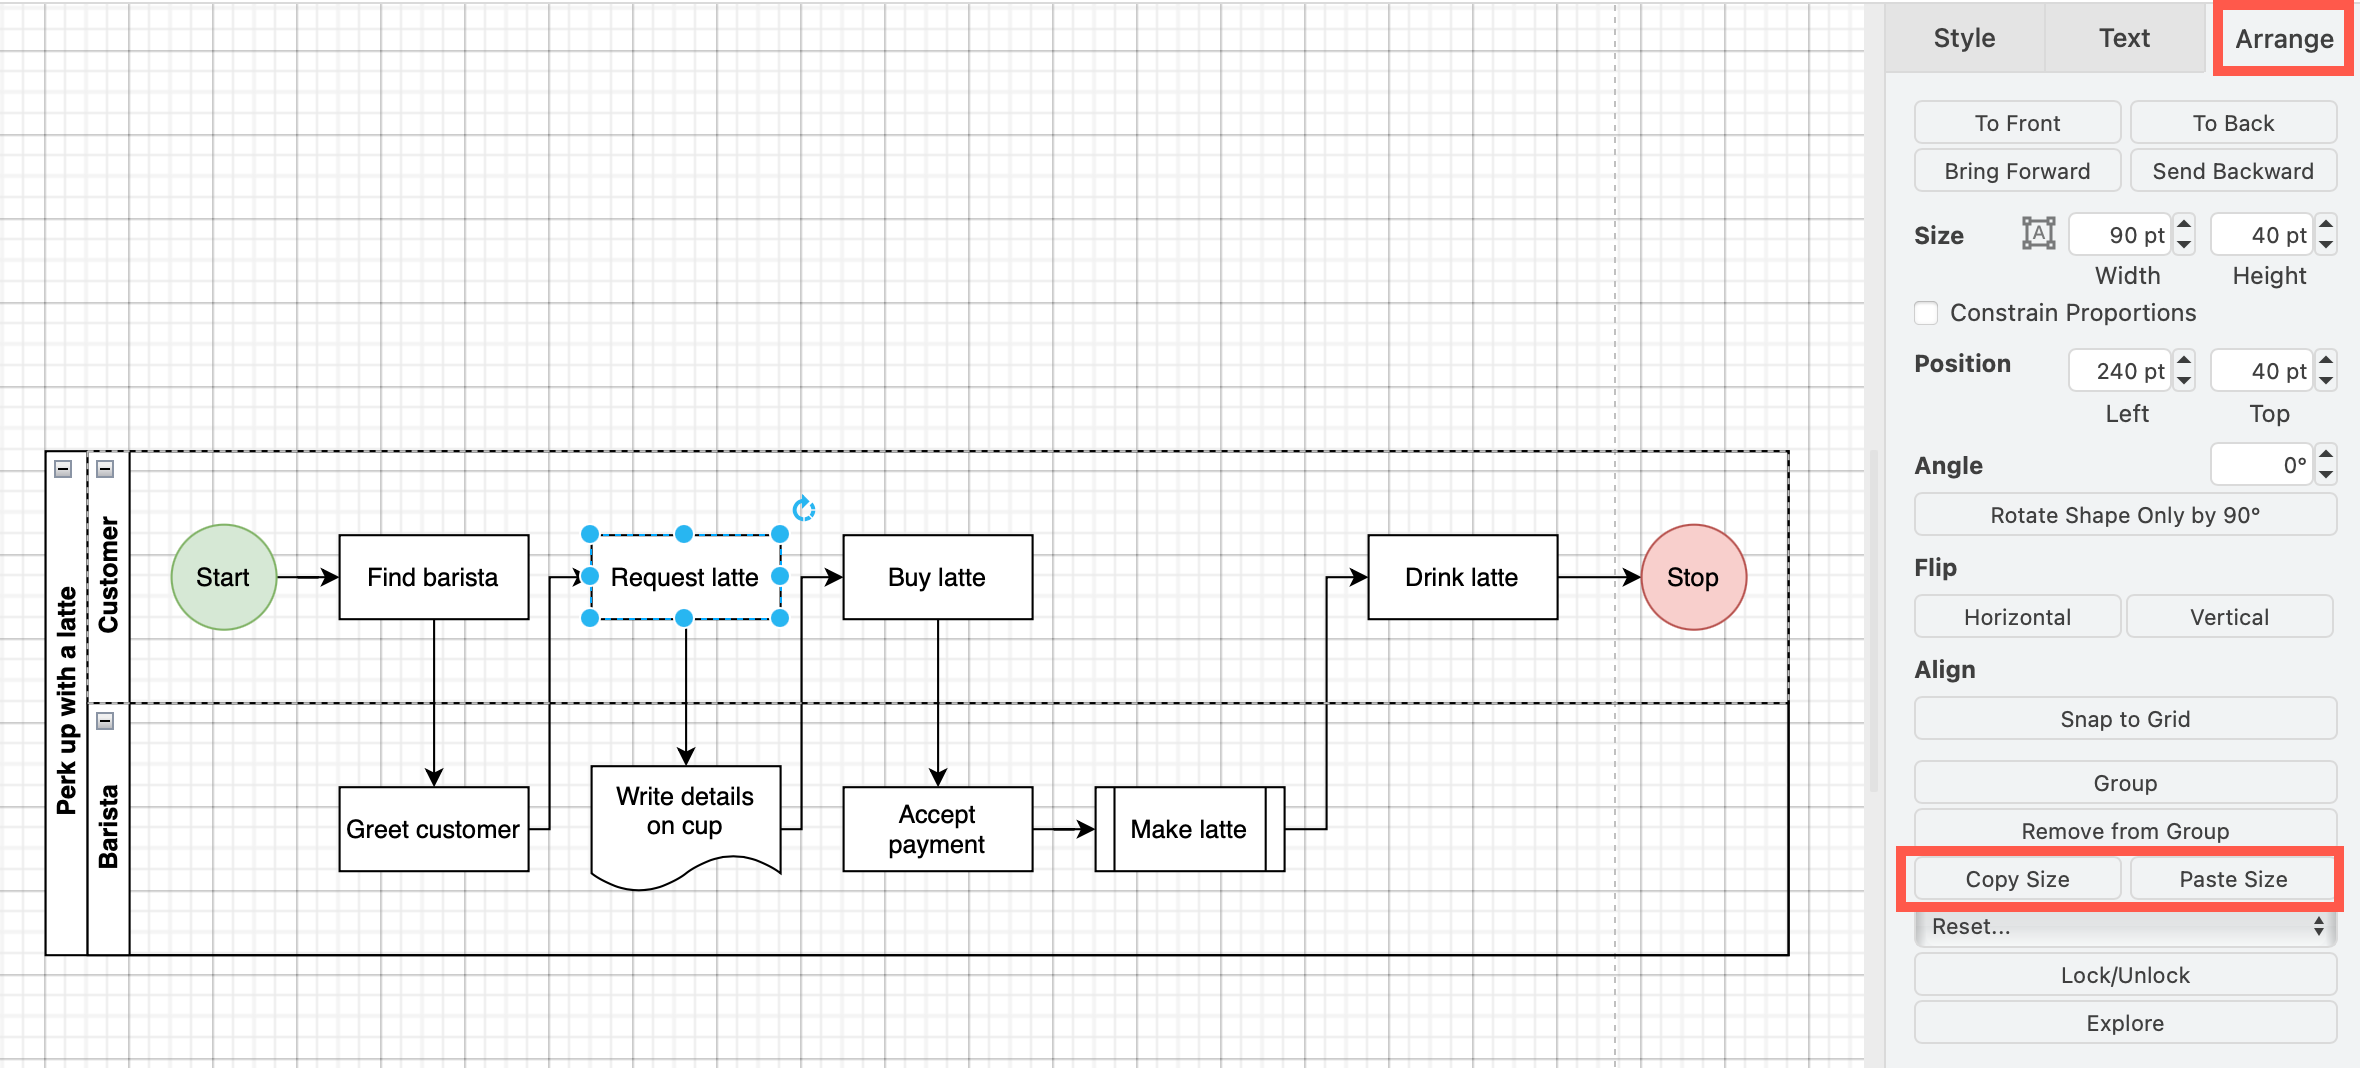
Style multiple shapes at once: To style a set of shapes at once, you can either select them all, then set a style using the format panel. Alternatively, you can style one shape, then click Copy Style in the Style tab of the format panel, then select the target shapes, and click Paste Style to format them in the same way.
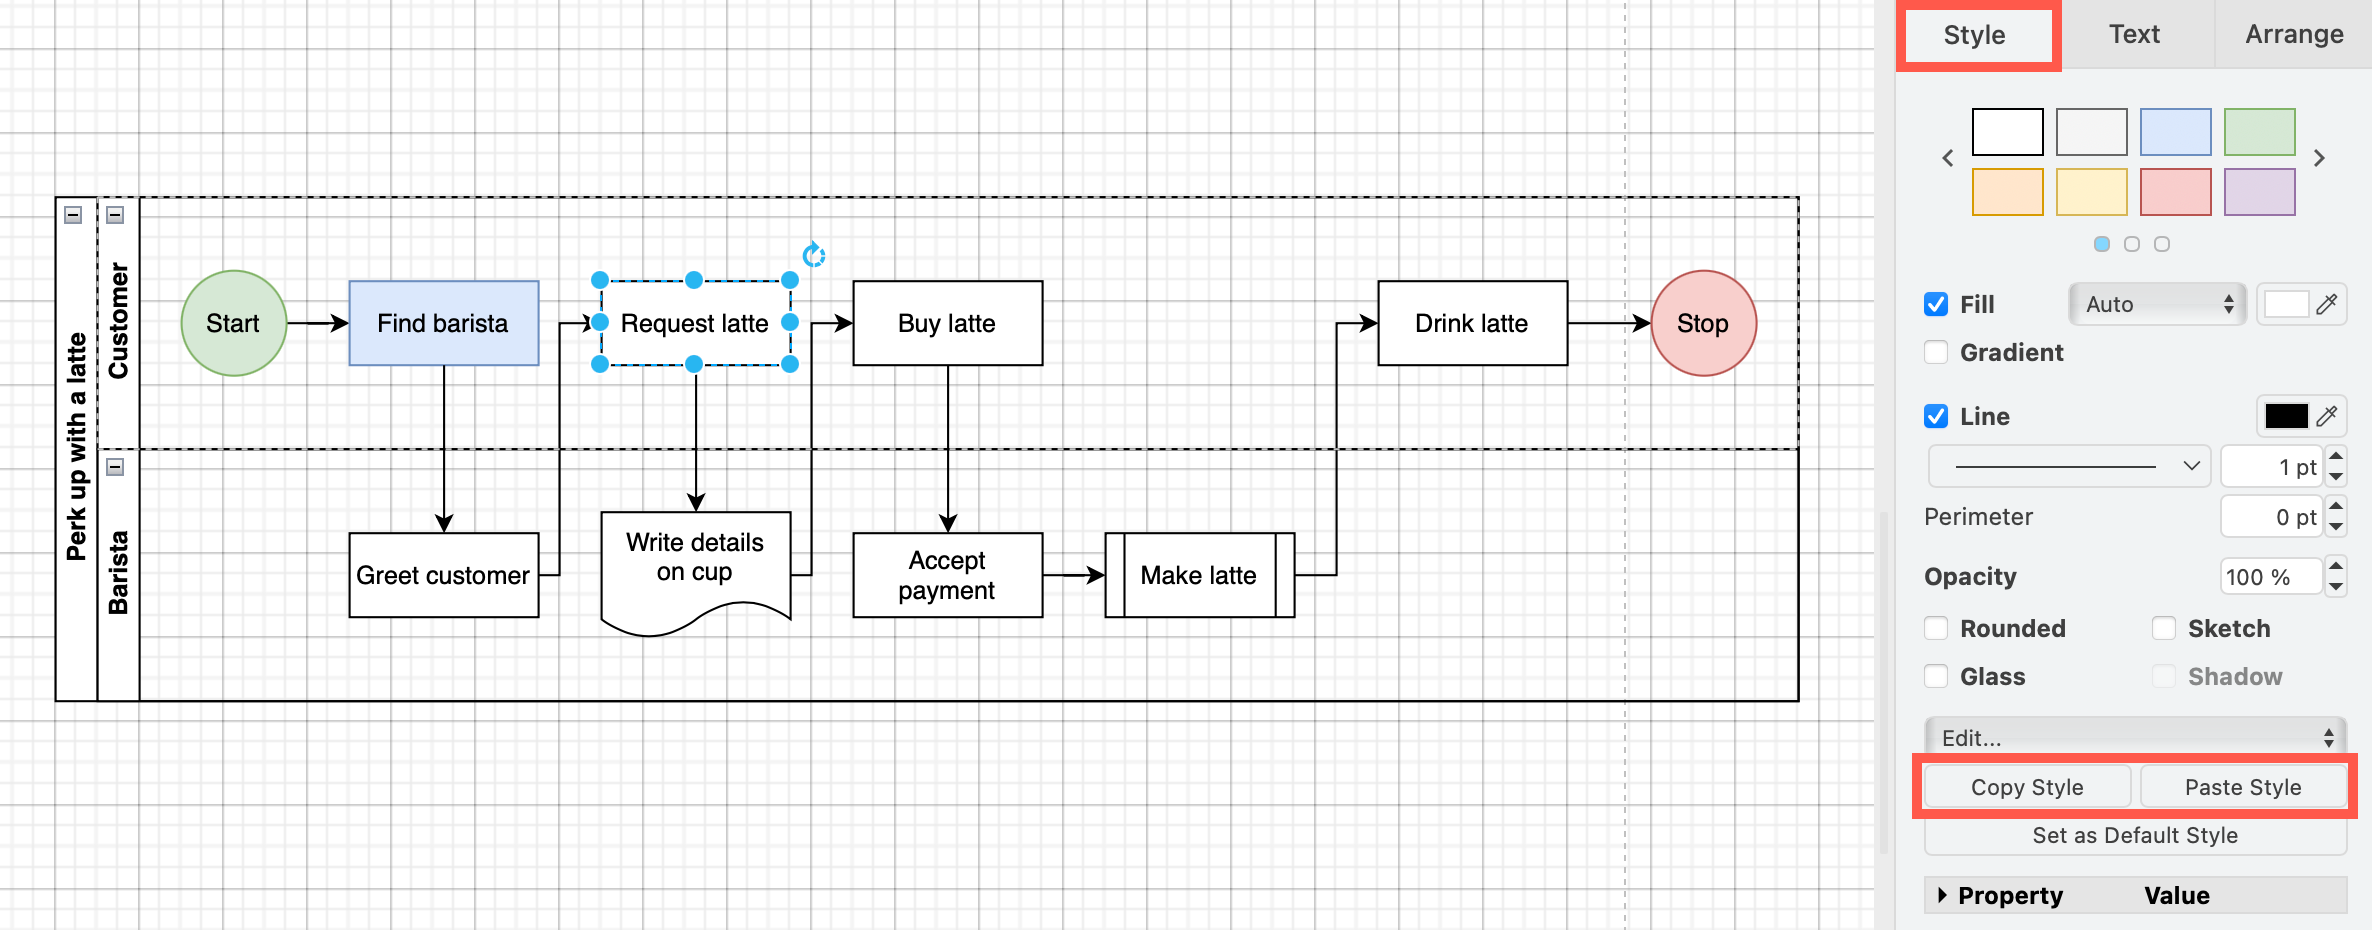
Tip: If you want to use a certain style as the default for new shapes added to the drawing canvas, click on Set as Default Style on the Style tab of the format panel.
Navigate and manipulate swimlanes
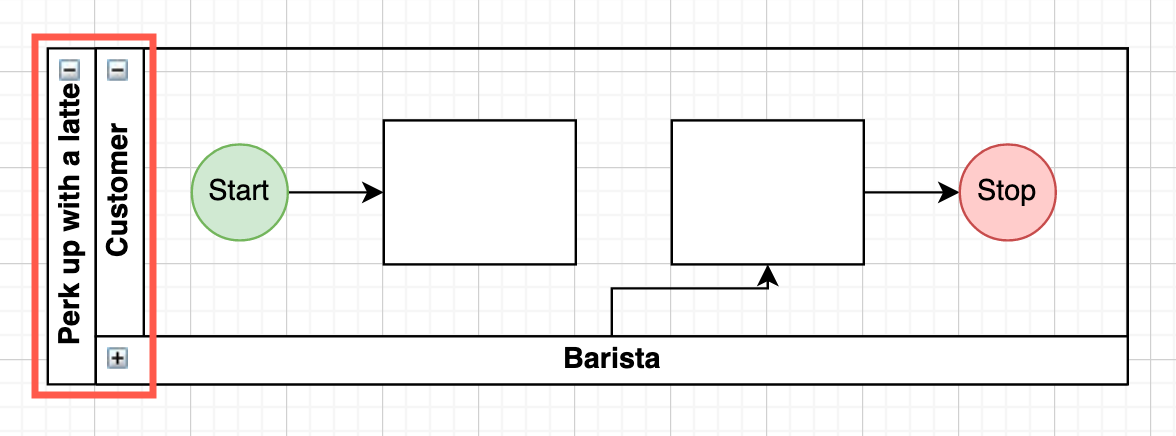
Expand and collapse swimlanes: Click on the tiny -/+ icons in the top right corner of the swimlane label to hide or display its content - it collapses the swimlane to a single line and the connectors leading to shapes in other swimlanes will be routed through a single entry/exit point. This does not delete any shapes inside the collapsed swimlane.
Resize swimlanes: Swimlanes will automatically resize themselves as you drop shapes into them, but you can manually resize them as well. Click on a swimlane to select it, and drag an edge or a corner to resize it.
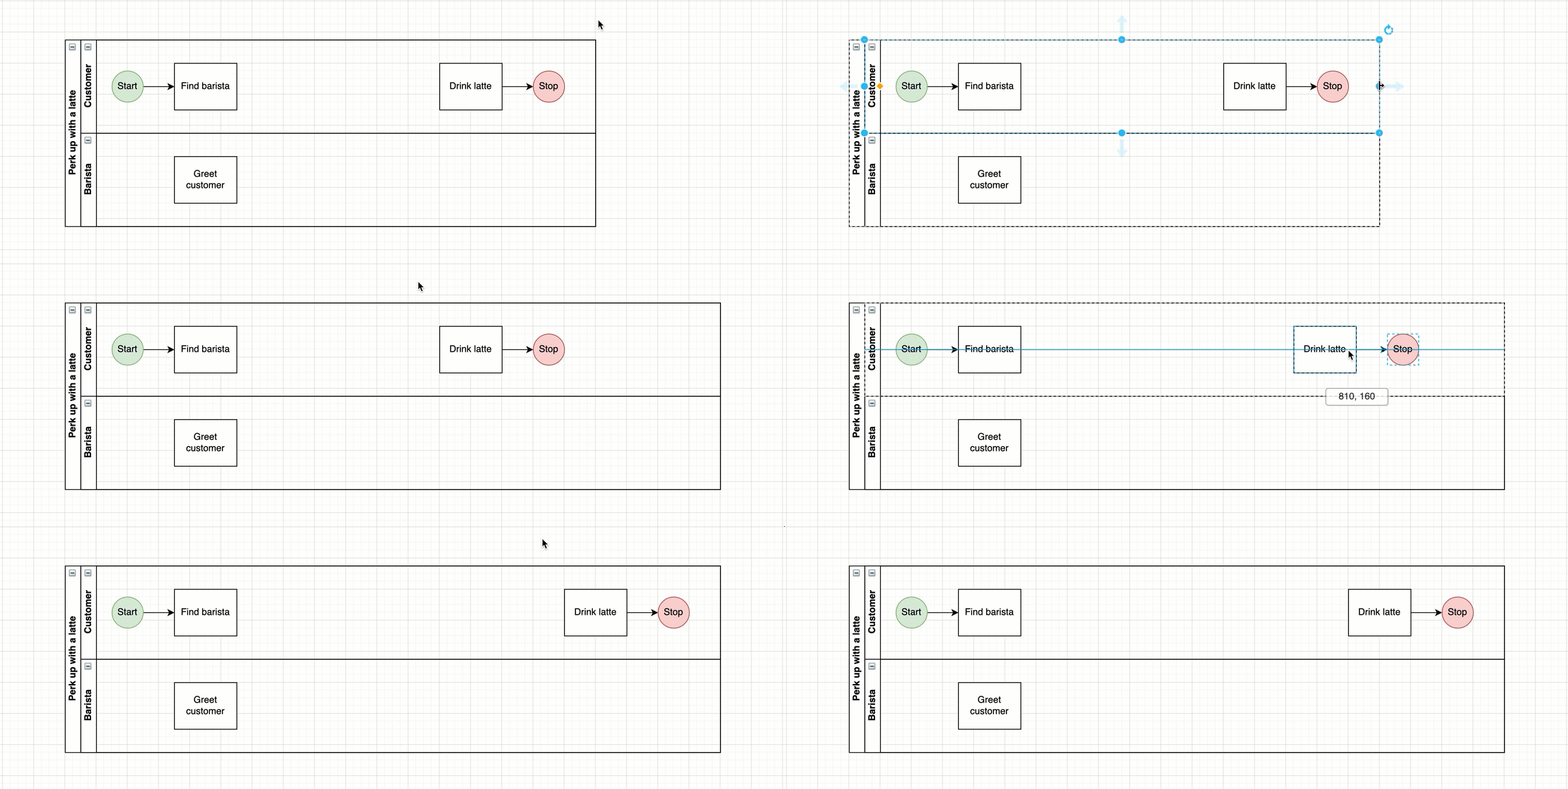
Move a swimlane: Select the swimlane you want to move, then drag it to a new position within the outer container shape (hover over the label of the outer shape, rather than over another swimlane).
Copy a swimlane: Select the swimlane you want to copy, hold down Alt and press Enter to copy it and its content and add the duplicate to the flowchart.
You can create a duplicate of a swimlane that isn't automatically added to the containing shape: Select the swimlane you want to duplicate, then press Ctrl+C then Ctrl+V on Windows (Cmd+C then Cmd+V on macOS) to create a copy (this also duplicates its content). Drag this copy and hover over the label of the outer container shape until the outside border is highlighted (make sure it's not one of the swimlanes that is highlighted). Drop the copy of the swimlane to add it to the flowchart.
Lock a swimlane but not its shapes: You can lock the swimlane within the pool shape so you don't accidentally move it when trying to move the shapes it contains. Select the swimlane, expand the Properties in the Style tab, and deselect the Moveable property. Note that Lock/Unlock on this swimlane will reset this property.
Shapes for flowcharts
Most of the shapes you will need are in the General, Misc, and Advanced shape libraries, which are enabled by default. Additional flowchart shapes are in their own, specialised shape library.
- Rectangle - Basic steps in your process.
- Diamond (rhombus) - Decisions that split the process into two or more branches.
- Circle or oval - Optional start and stop points.
- Parallelogram - Inputs and outputs that show communication with an external party or system.
- Cylinder - Databases and storage media that indicate when data is stored.
- Rectangle with a wavy bottom line - Documents that are produced as a result of a process step.

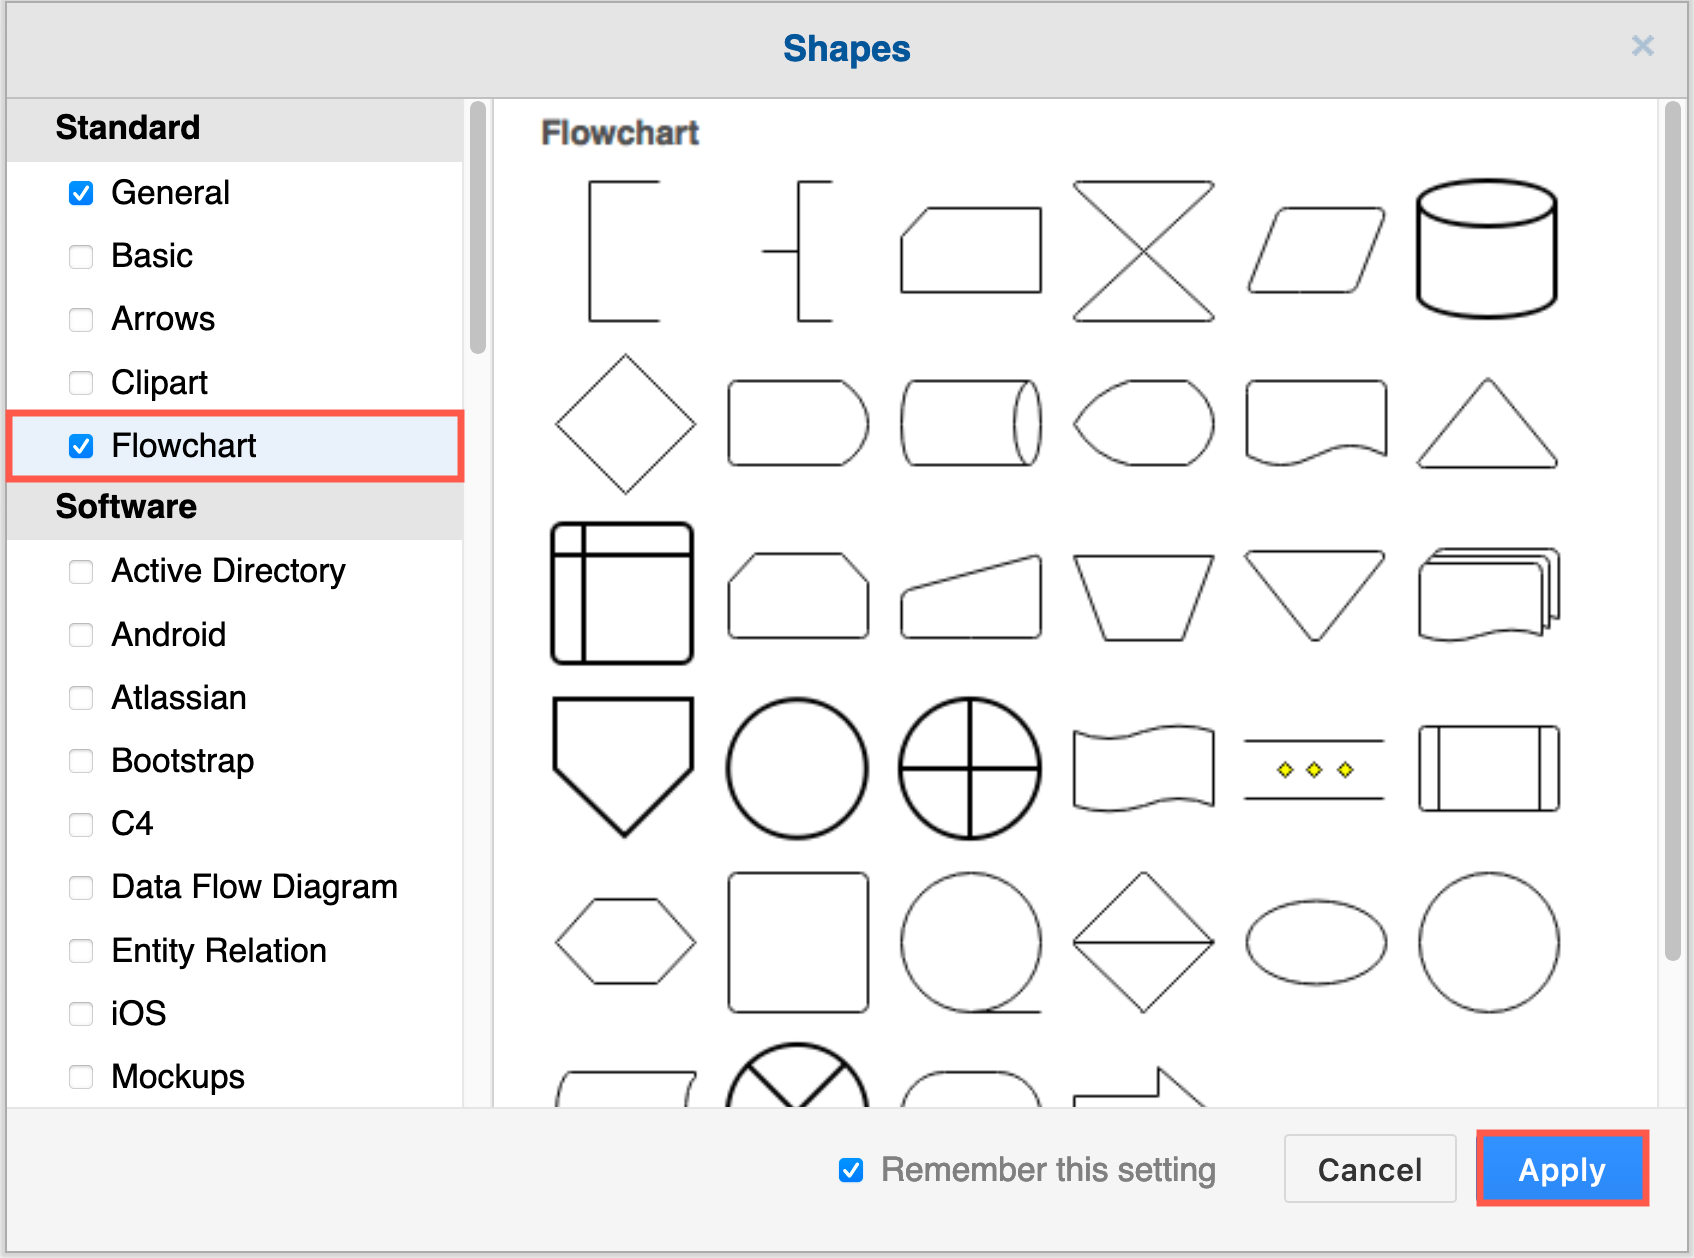
Enable the Flowchart shape library
Click on More Shapes at the bottom of the left panel, make sure the Flowchart shape library is enabled, then click Apply.
Related
Cross-functional flowcharts use both horizontal and vertical swimlanes, allowing you to add more contextual information and improve cross-team communication. In draw.io, cross-functional flowchart shapes are an advanced form of table, where you can add and remove columns and rows (swimlanes) using the Arrange tab of the format panel on the right.
Swimlane diagrams and cross-functional flowcharts are ideal for story mapping, diagrams which are often used in project planning in IT and marketing.