Container tables in draw.io
With draw.io, tables aren't limited to holding text data. Because you can drop shapes and images into container table cells and drag connectors between them, you can get creative with diagrams inside tables.
Container tables are typically used to draw cross-functional flowcharts where steps in a process are organised into two types of catagories, such as deparments and approval status.
Add a container table to a diagram
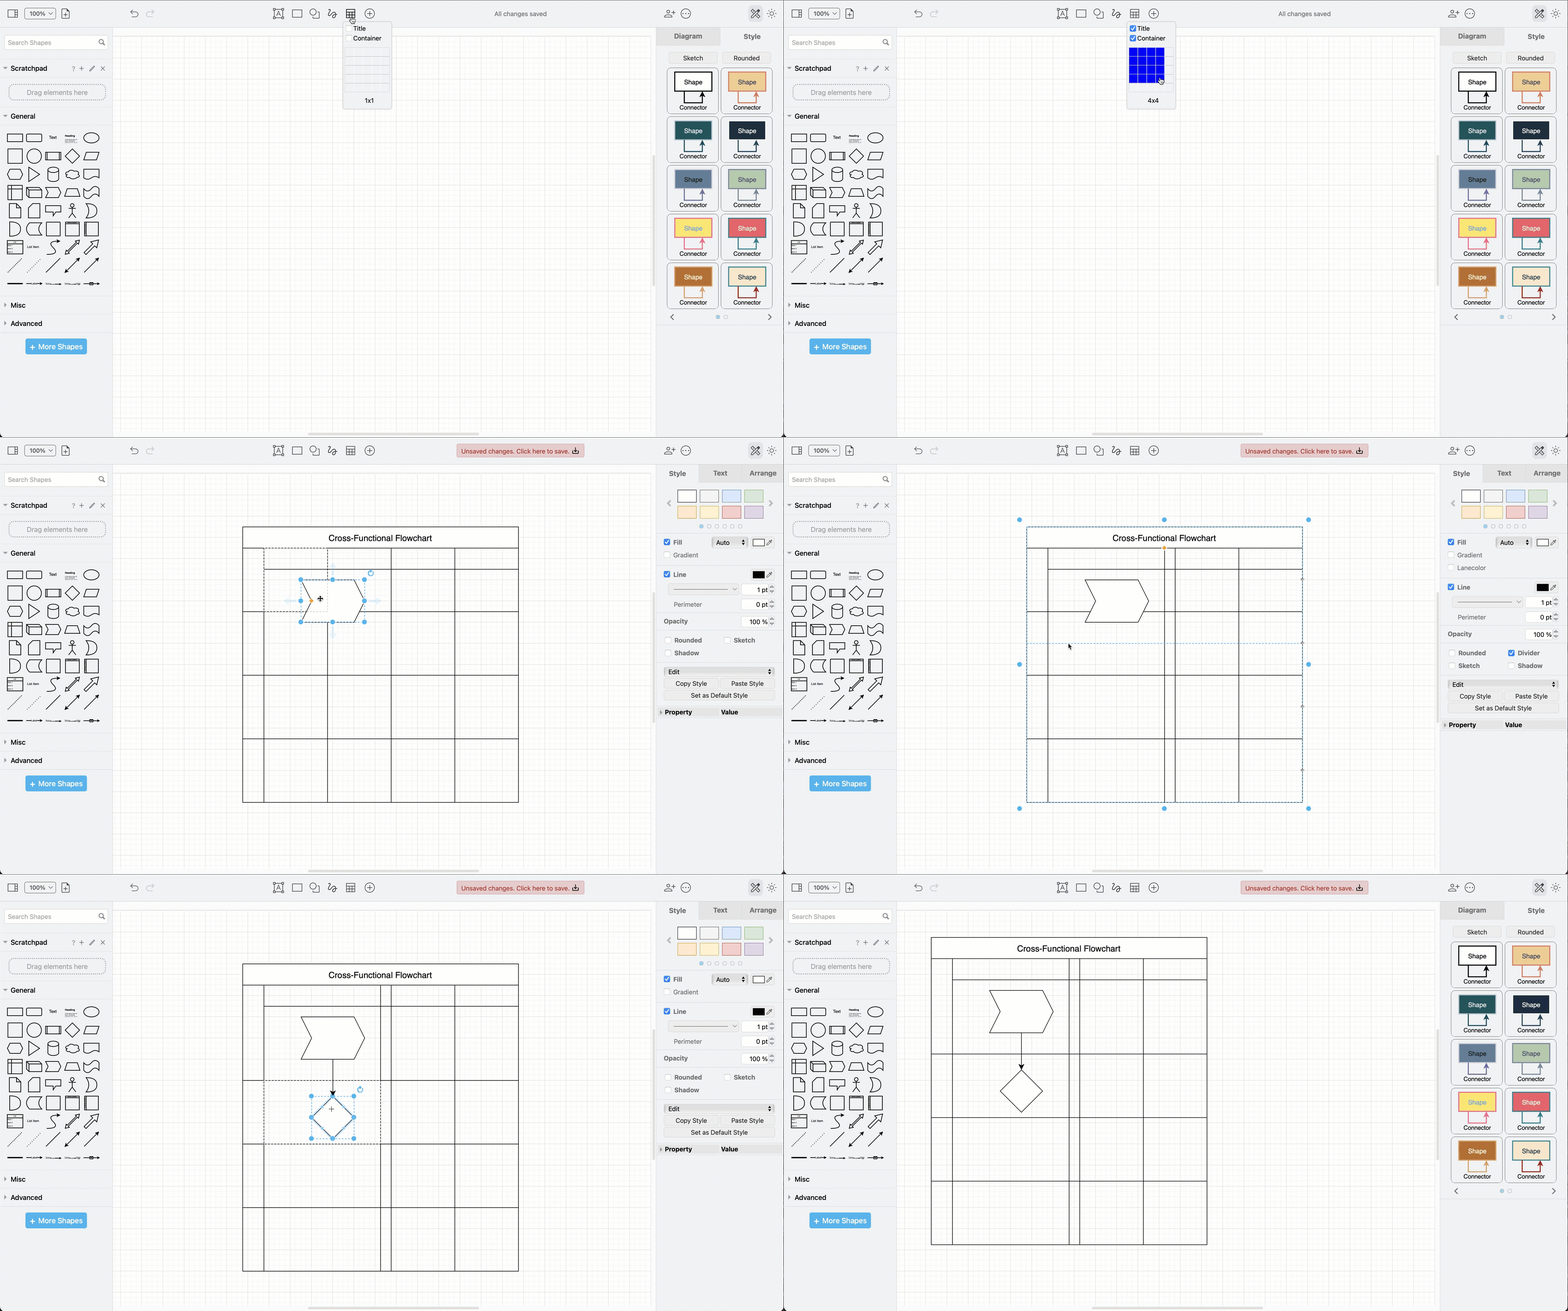
- Click on the table tool in the diagram editor, either in the top toolbar, or the side toolbar in the Sketch whiteboard editor theme.
- Click on the Container checkbox to make the table cells hold other shapes. This will automatically add row and column titles, but you can drag the title separator to remove these title sections.
- Move the mouse in the table selector to include the rows and columns you need, and click to insert the table. You can change the number of columns and rows later.
Add shapes into container table cells
- Drag shapes from the shape library or toolbar into the table cell. This won't resize the row or column to fit the shape you just dropped, so drag the column and row borders to fit.
- Hover over a shape, drag a connector from one of the direction arrows or fixed connection points, and drop it on a target shape to connect them.
Shapes in container cells in tables move with the table when you reposition it on the drawing canvas, along with their connectors.
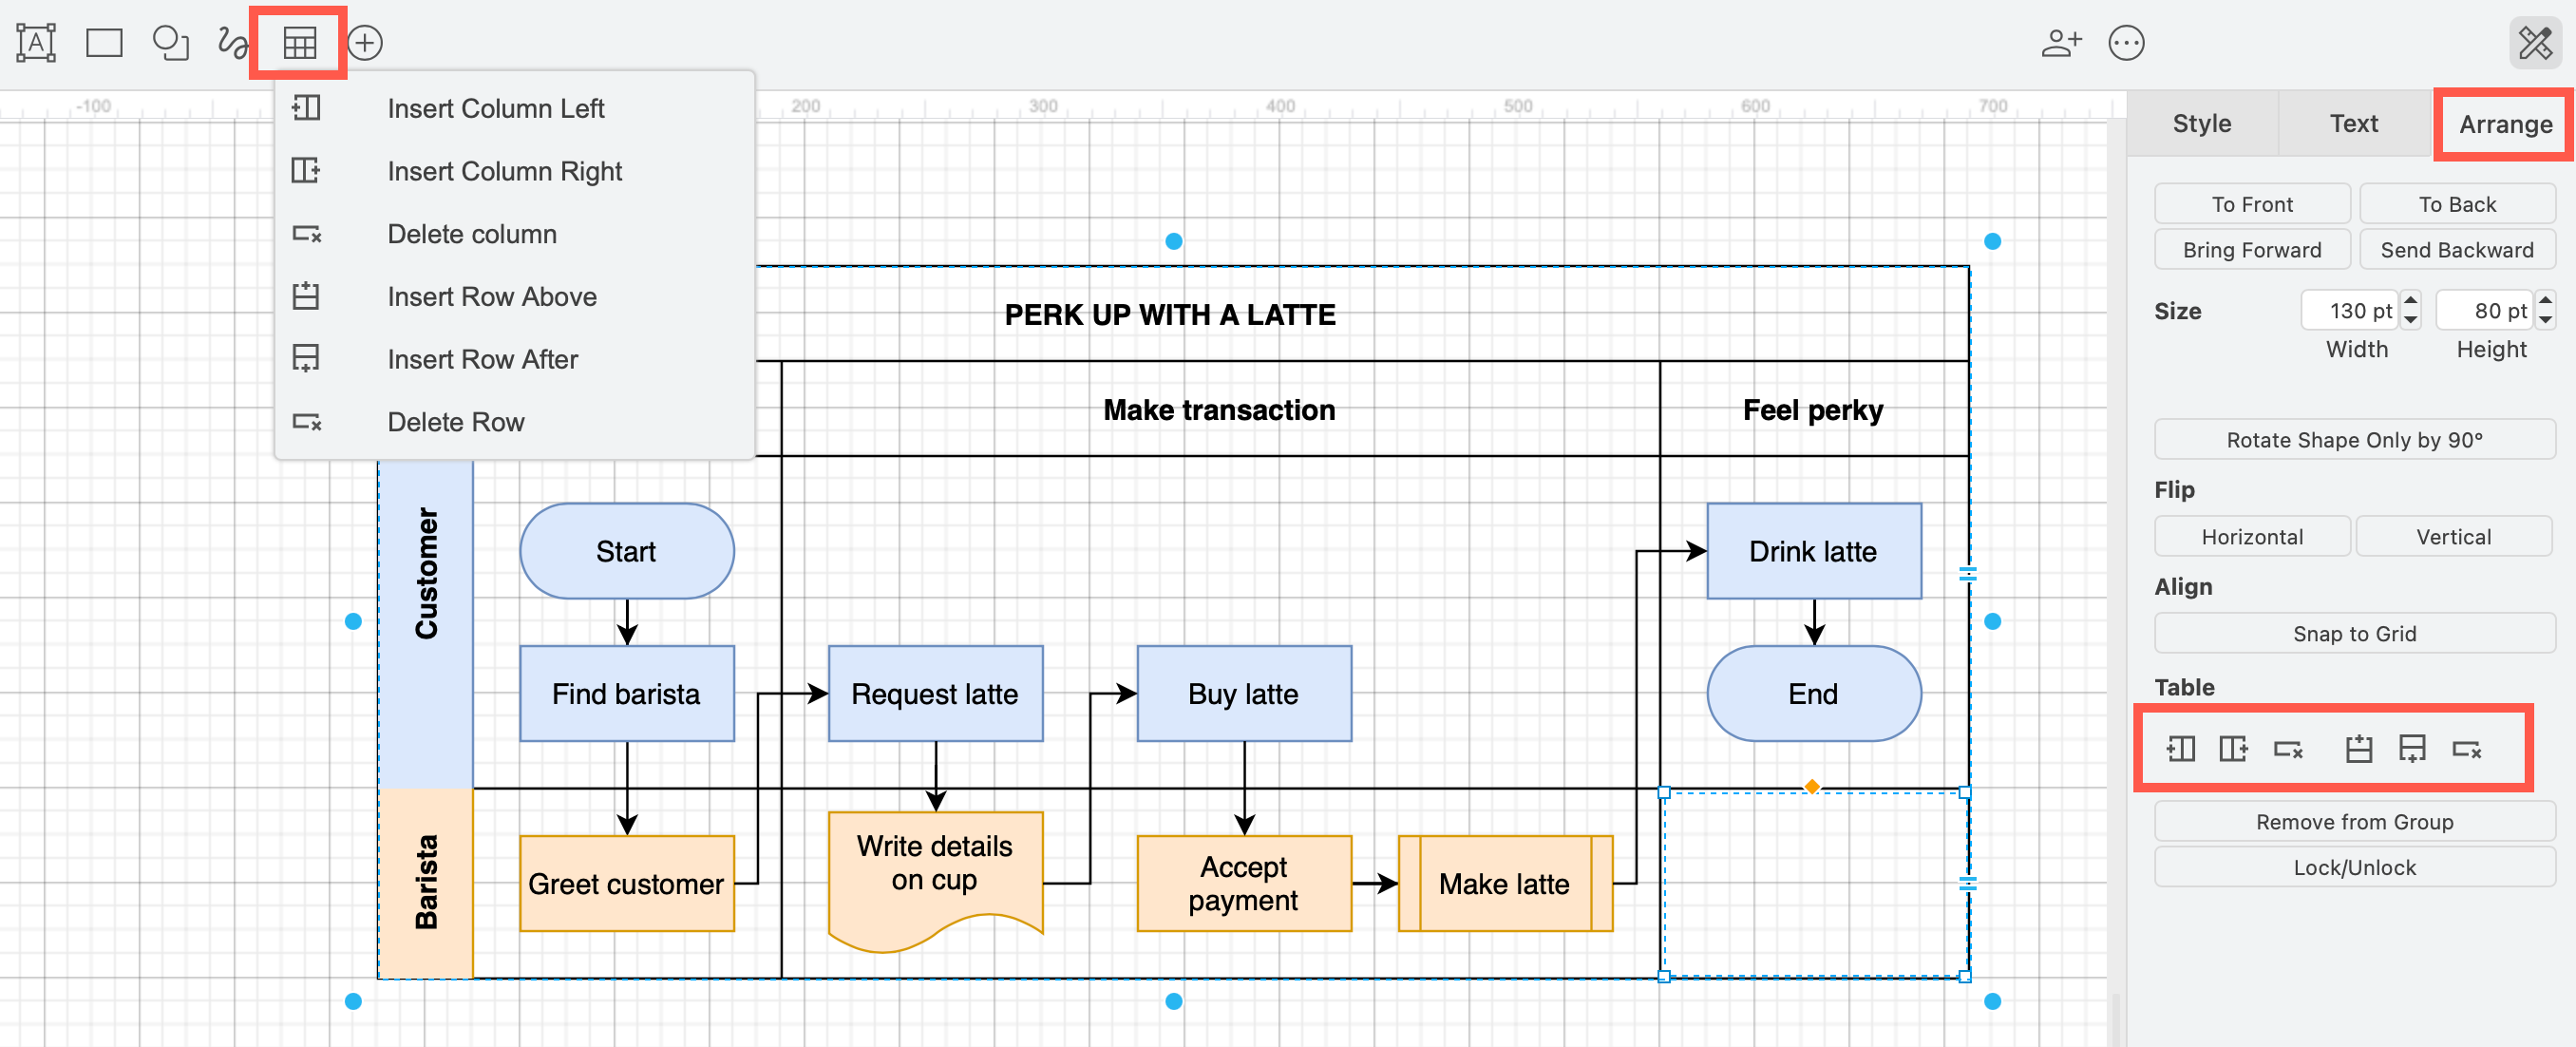
Tip: To add or delete columns and rows, use the Arrange tab in the format panel, or the table tool in the toolbar.
Overlap a shape and a container table
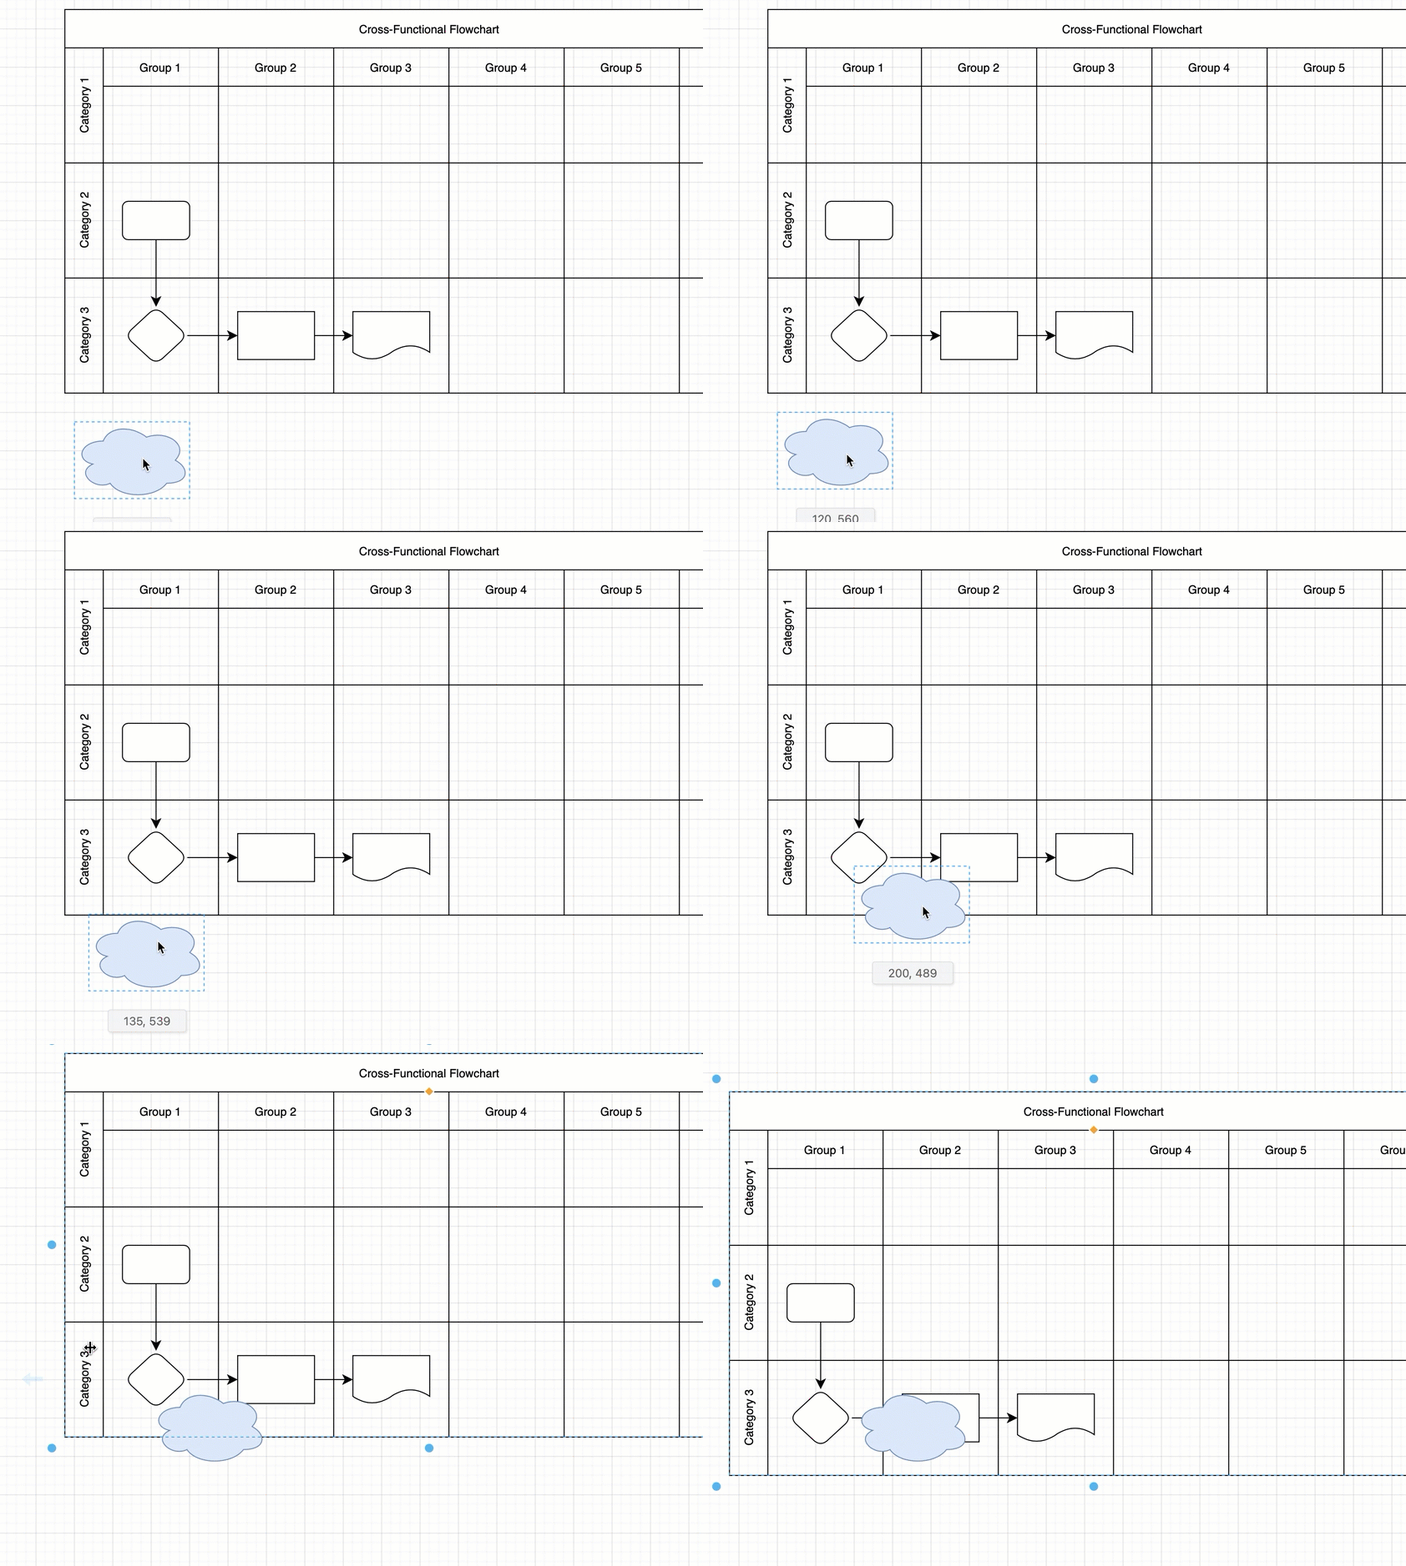
Overlap a shape on a container table cell without adding it to the cell by holding down Alt on Windows or Option key on MacOS as you drag and drop it.
Related
- Learn more about working with tables shapes in draw.io.
- Draw diagrams with tables faster with table shortcuts.
- See the many different types of diagrams that use container tables