Create an interactive diagram with layers and custom links
Complex diagrams can be made a lot easier to read and understand when you split them up into logical smaller diagrams on multiple pages, or by using a number of layers, as in this tutorial.
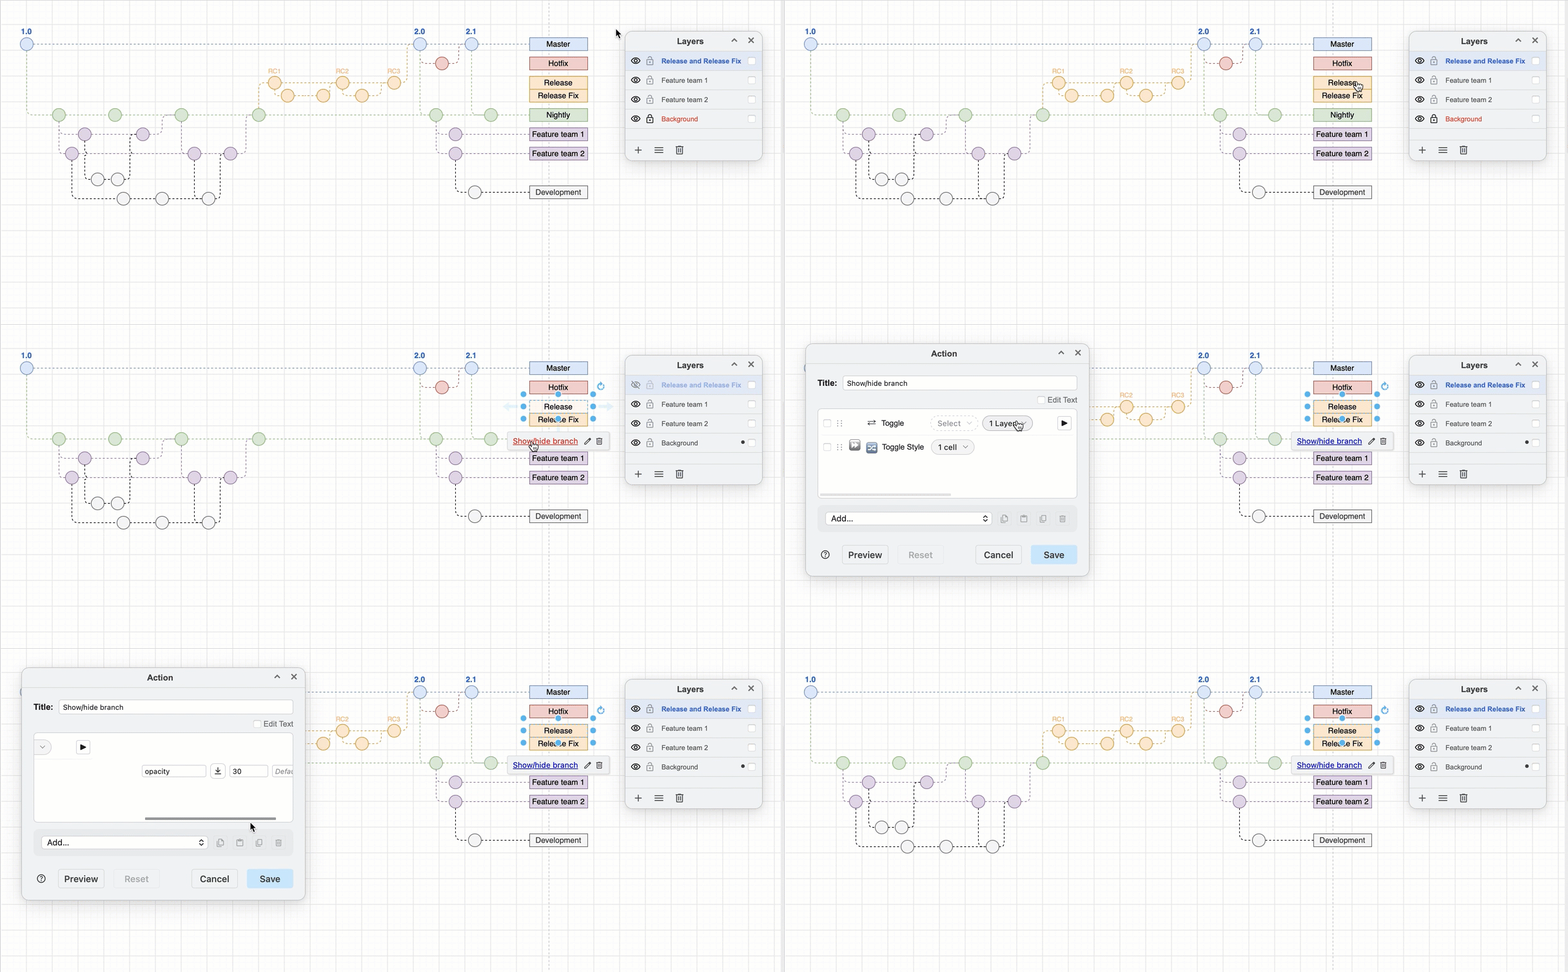
To learn more about any complex diagram, you can toggle the display of layers on and off, and step to another diagram page using the toolbar at the bottom of the lightbox viewer. If you are in the draw.io editor, you can do the same via the Layers dialog and page tabs at the bottom of the drawing canvas.
You can take this one step further, and make your diagram itself interactive by adding custom links to the shapes and text within the diagram.
The linked shapes in the diagram will act as intuitive toggle switches for animations or paths to another diagram page. You don't have to use the toolbar, page list or the layers dialog to interact with your diagram. Click directly on a custom link in the draw.io editor, or on the cell with the link in the lightbox viewer or in presentation mode to play the custom actions.
Diagrams that can benefit from adding ineractivity within the diagram itself include network or infrastructure diagrams, floor plans and gitflow diagrams.
Use custom links to add interactivity
Custom links are small pieces of JSON code containing the shape or layer IDs or tag names of the diagram elements you want to make interactive.
You can open a web UR or diagram page, toggle elements on or off, fade elements in and out, show, hide, or highlight diagram elements, select elements, pan to a specific element in the diagram, apply different style, and more with custom links.
Add sequential and parallel actions to selected, layers and tags via the custom link actions editor.
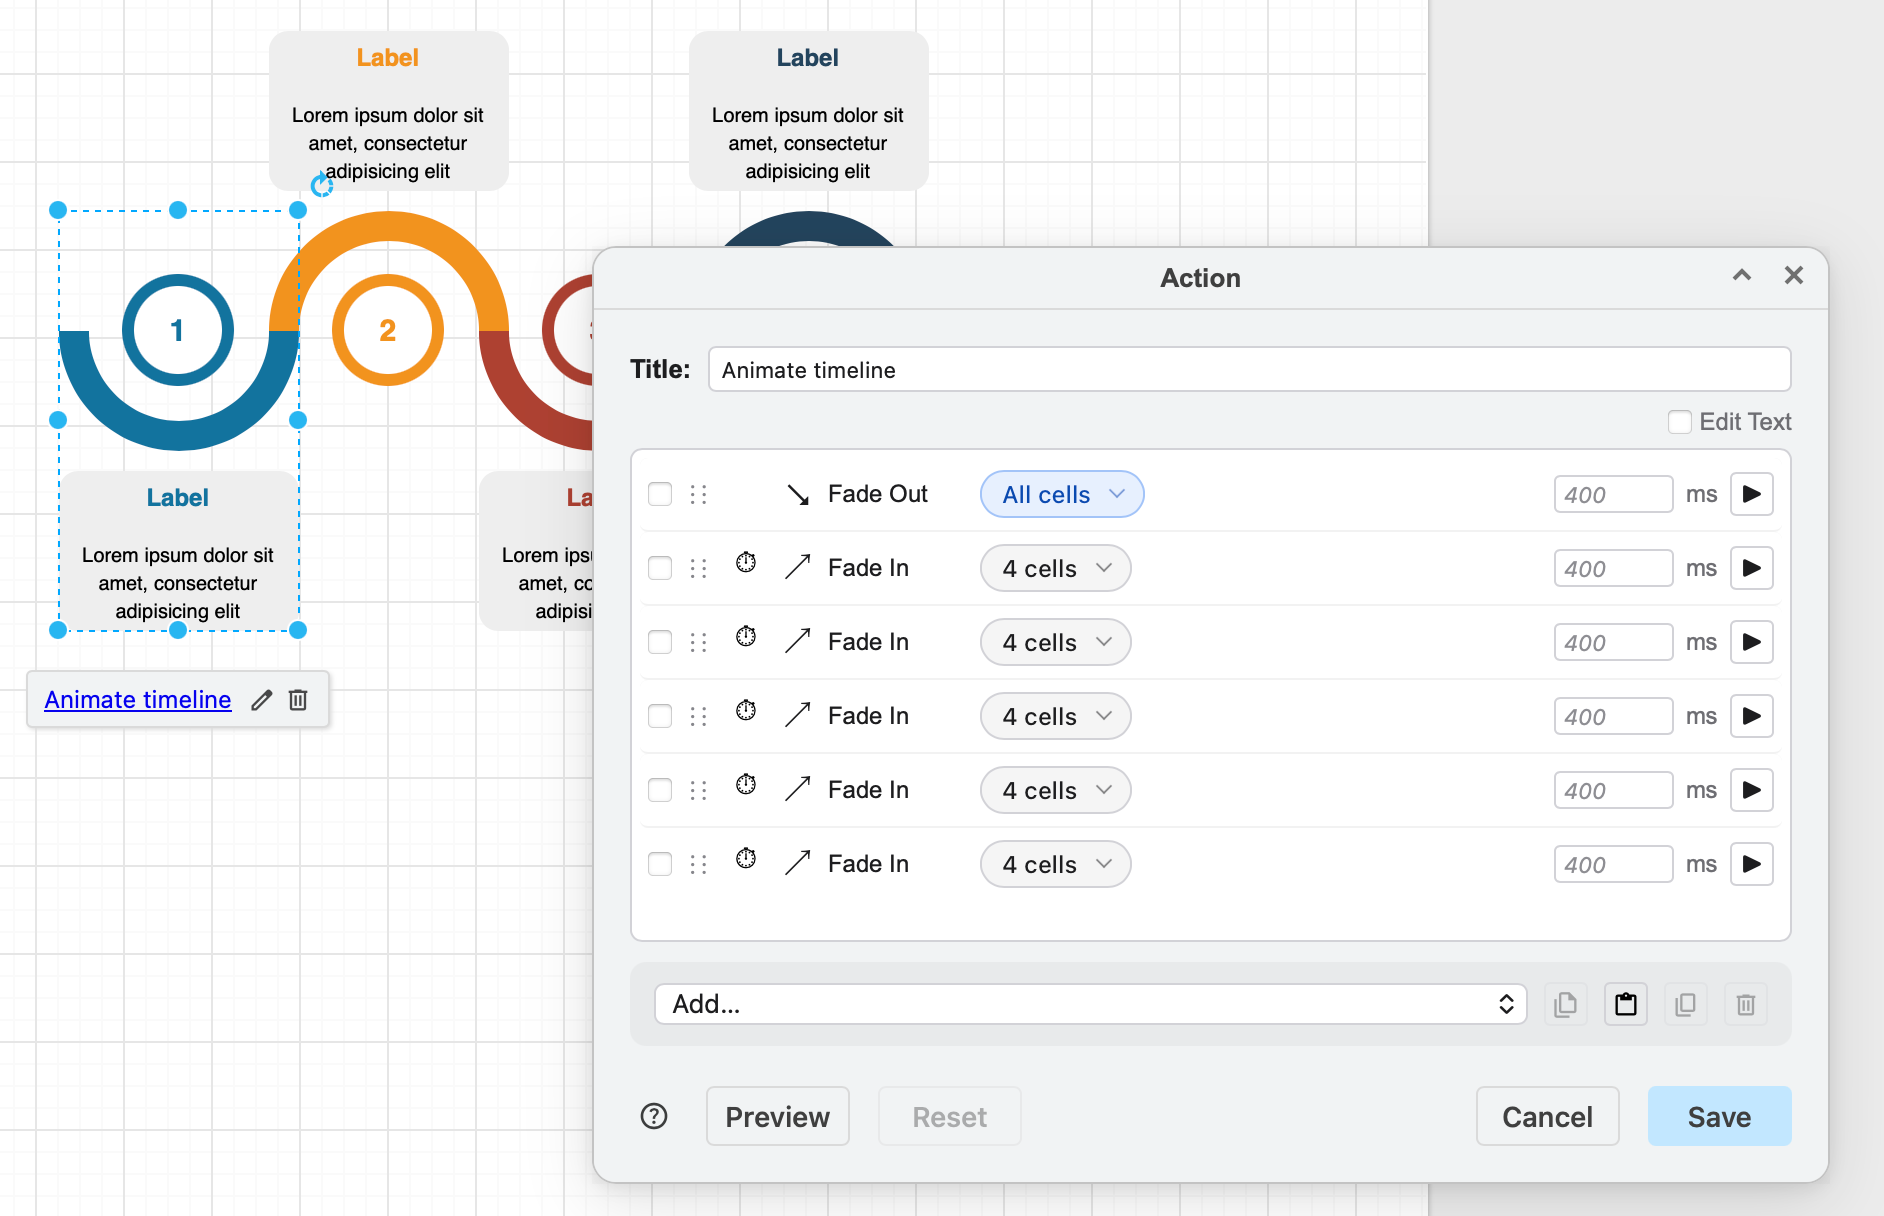
Custom link actions are recorded in the shape metadata as JSON text strings and saved in the diagram data. People who you share your diagram file with can interact with those links in the lightbox viewer, in presentation mode, and on the drawing canvas.
An example interactive gitflow diagram
In the example below, interactive layer toggle switches will be added to the gitflow diagram to let you click on the following labels and display or hide their branches that will be placed on their layers.
- Release and Release Fix
- Feature team 1 and their development branches
- Feature team 2 and their development branches
Note that the labels for each branch are always displayed, and therefore placed on the background layer. When a layer is hidden, a lighter opacity will be applied to that layer's label as a second custom link action.
Open the interactive gitflow example in our online diagram viewer
Tip: Prior to the custom link editor dialog, you would have had to set up additional background shapes that would be displayed whenever a layer was hidden to change a shape's style. The action editor is a simpler and more flexible way to build custom links.
Add a custom link to a shape
- Right-click on a shape or connector and select Edit Link from the context menu or press
Alt+Shift+L.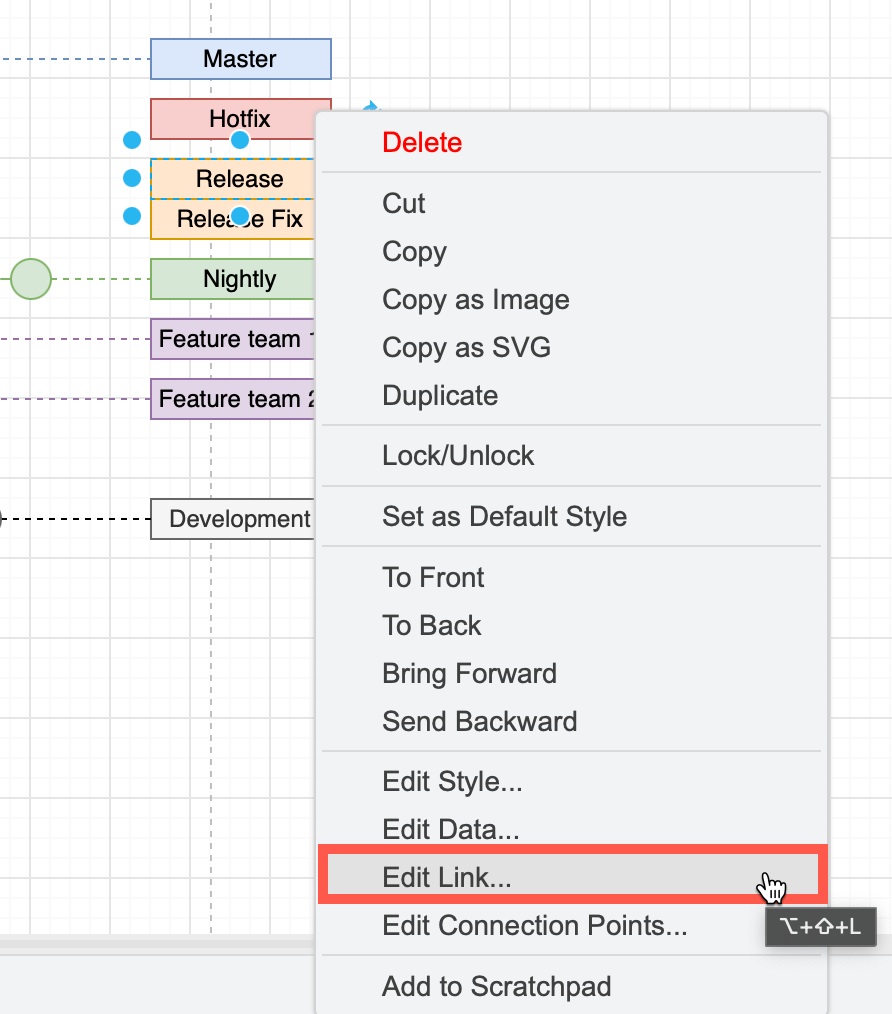
- Select the Action radio button and click Insert.
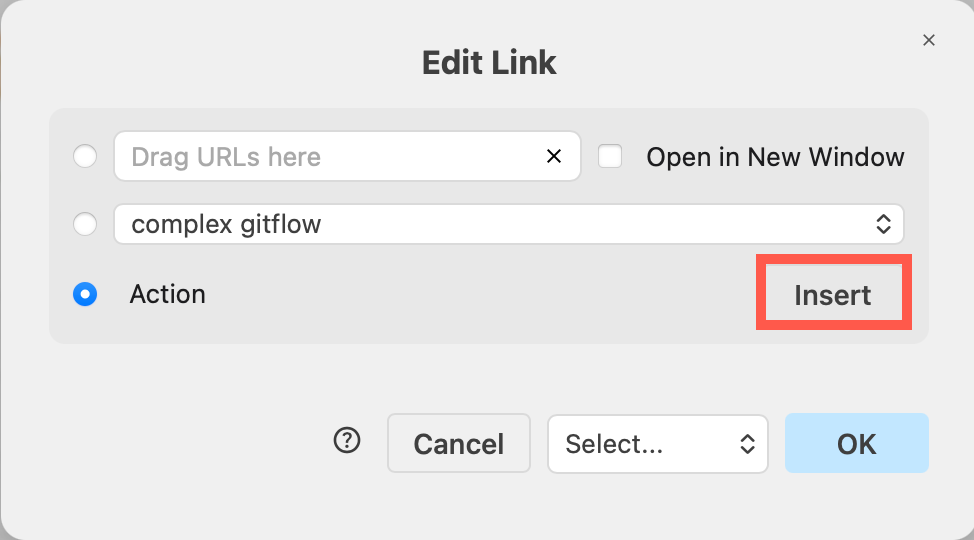
Add an action
Add a Toggle action so that whenever the custom link is clicked it will show or hide shapes.
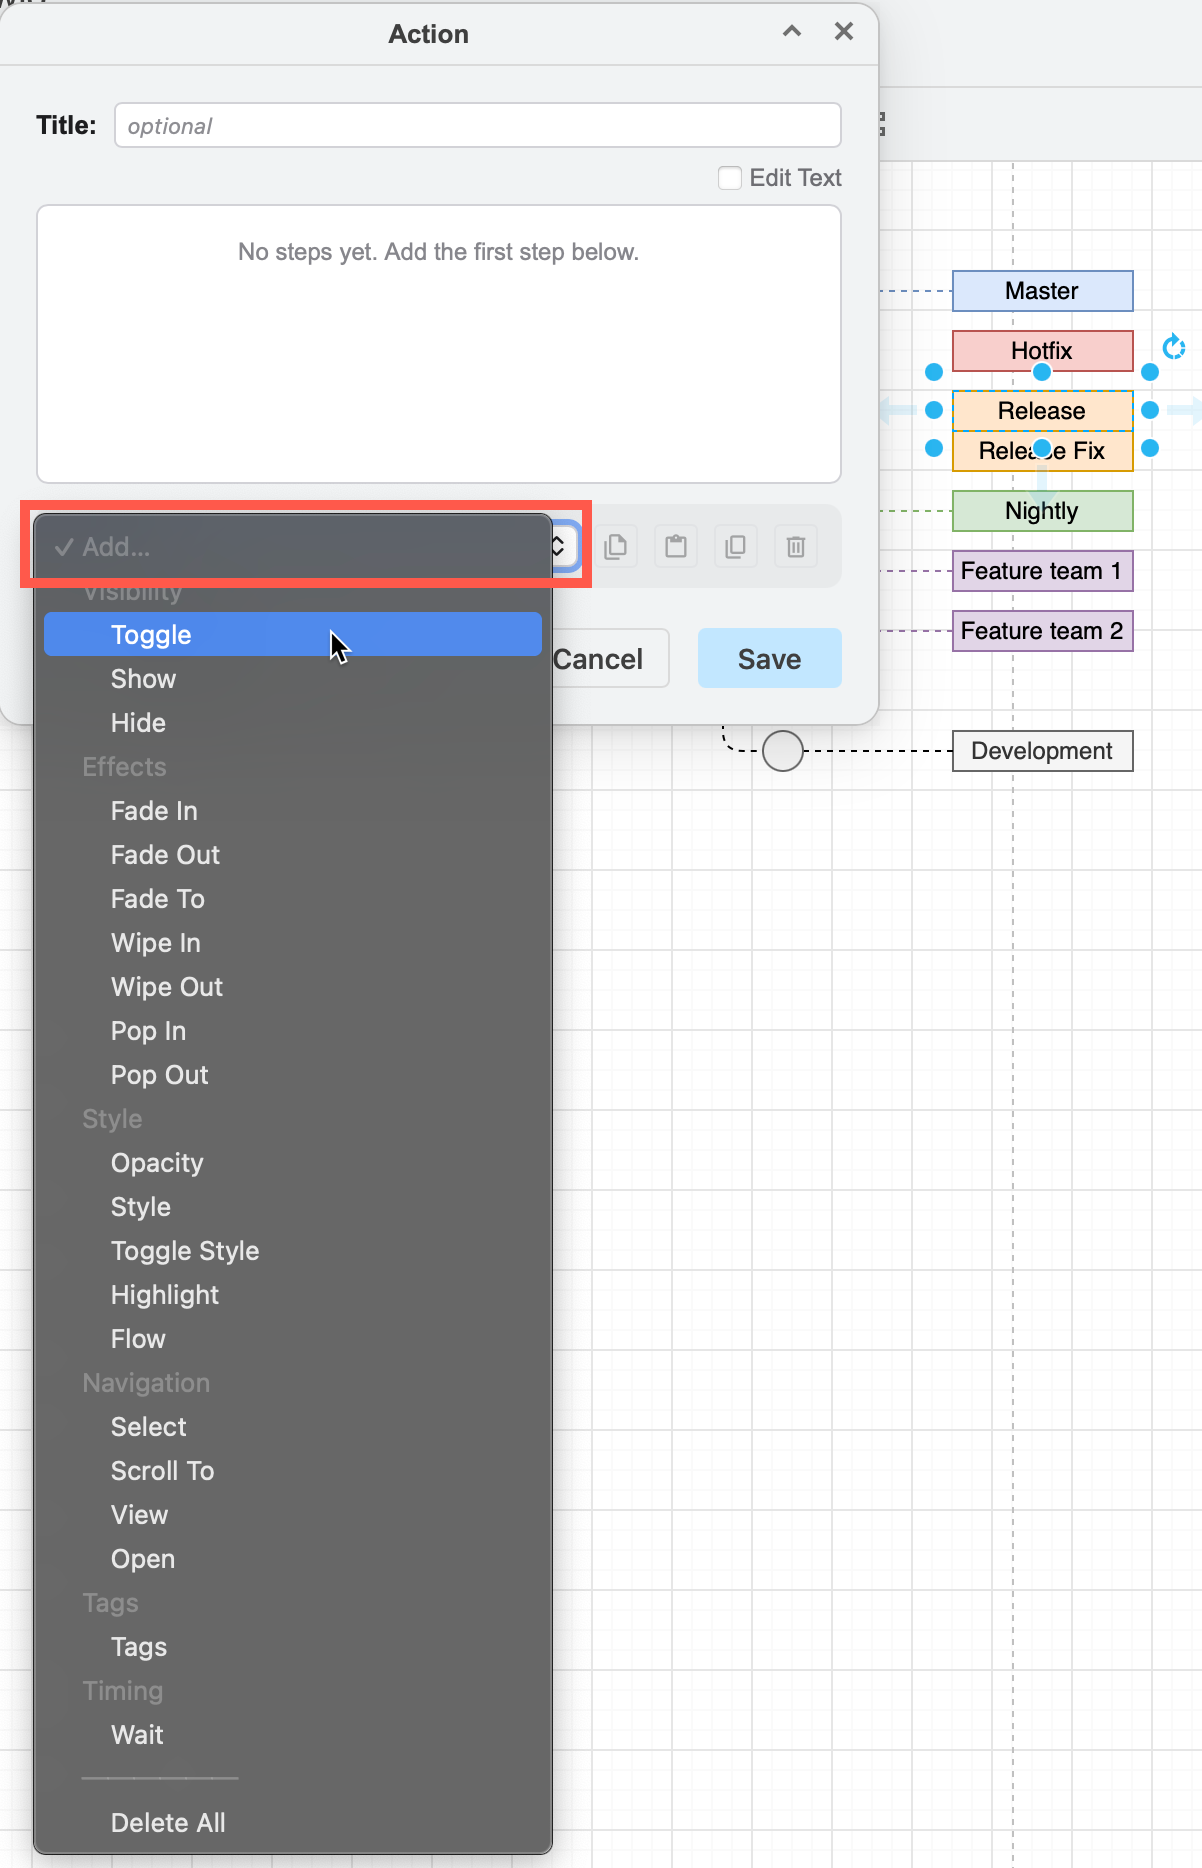
This will automatically add the current selected cell (shape) to the list of Cells the action acts upon.
Refer to the custom link selection list documentation for how to use these lists.
Make the action apply to a layer
In this example, all the shapes on one layer need to be toggled instead of single cells.
Click on the Cell list and choose Select layers, then select the layer you want to toggle on or off. A new Layers list will appear next to the Cells list.
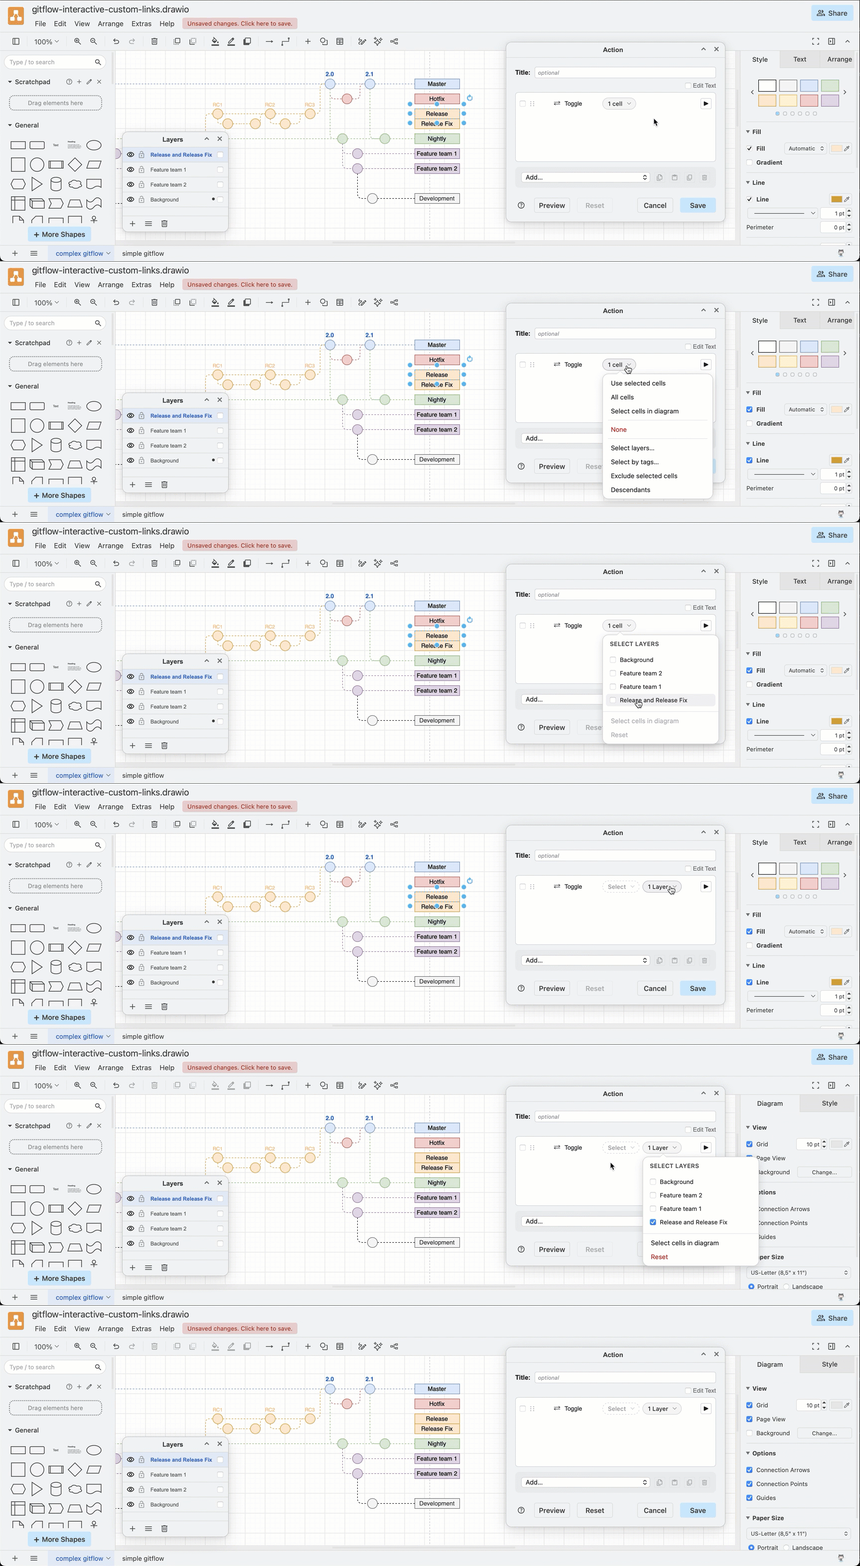
- Preview the action: Press the play icon to the right of the action to preview just that action step.
- Select the cells the action acts upon: Choose Select cells in diagram from the Layers list.
Add a Style toggle to the layer label
To visually indicate a layer (branch) has been hidden when the custom link is clicked upon, the branch label needs to change colour or have a lighter opacity applied.
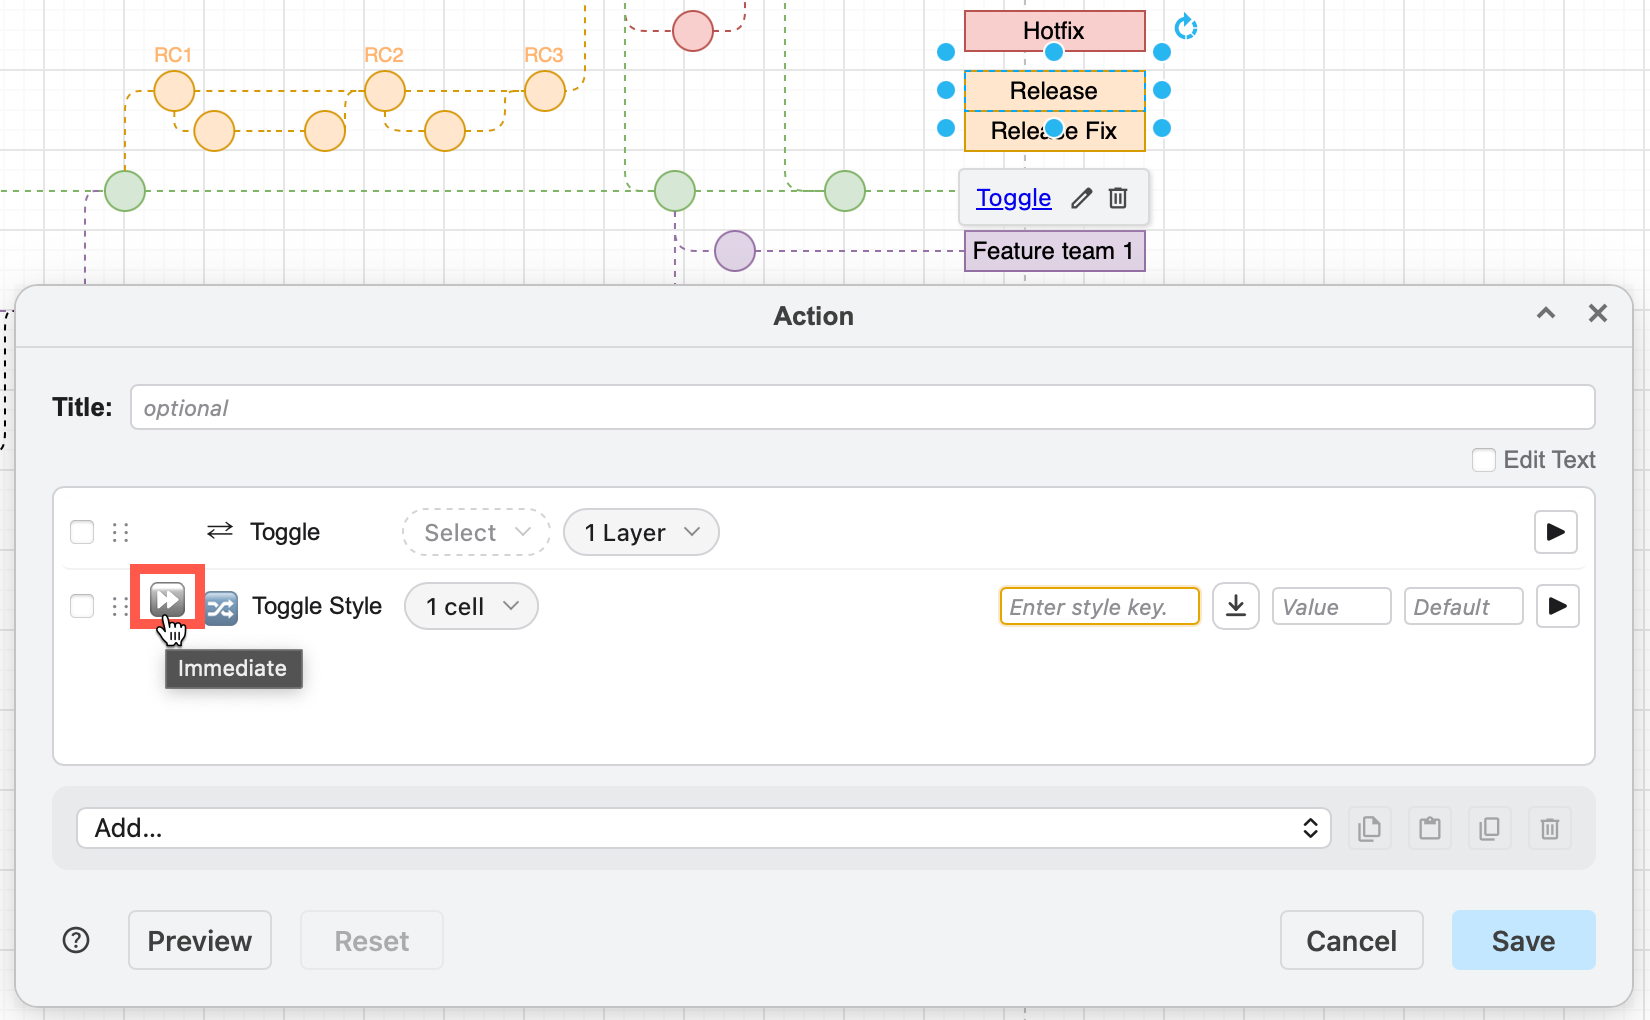
- Now, add a Toggle Style action. By default, each action step is performed with a slight delay, but this style toggle should happen at the same time as the layer is hidden. Click on the Wait (timer) icon to switch it to Immediate (double arrows). Now the action will play at the same time as the action above.
- Type
opacityin the style key field. The style name autocompletes - select the shape style you want the action to modify.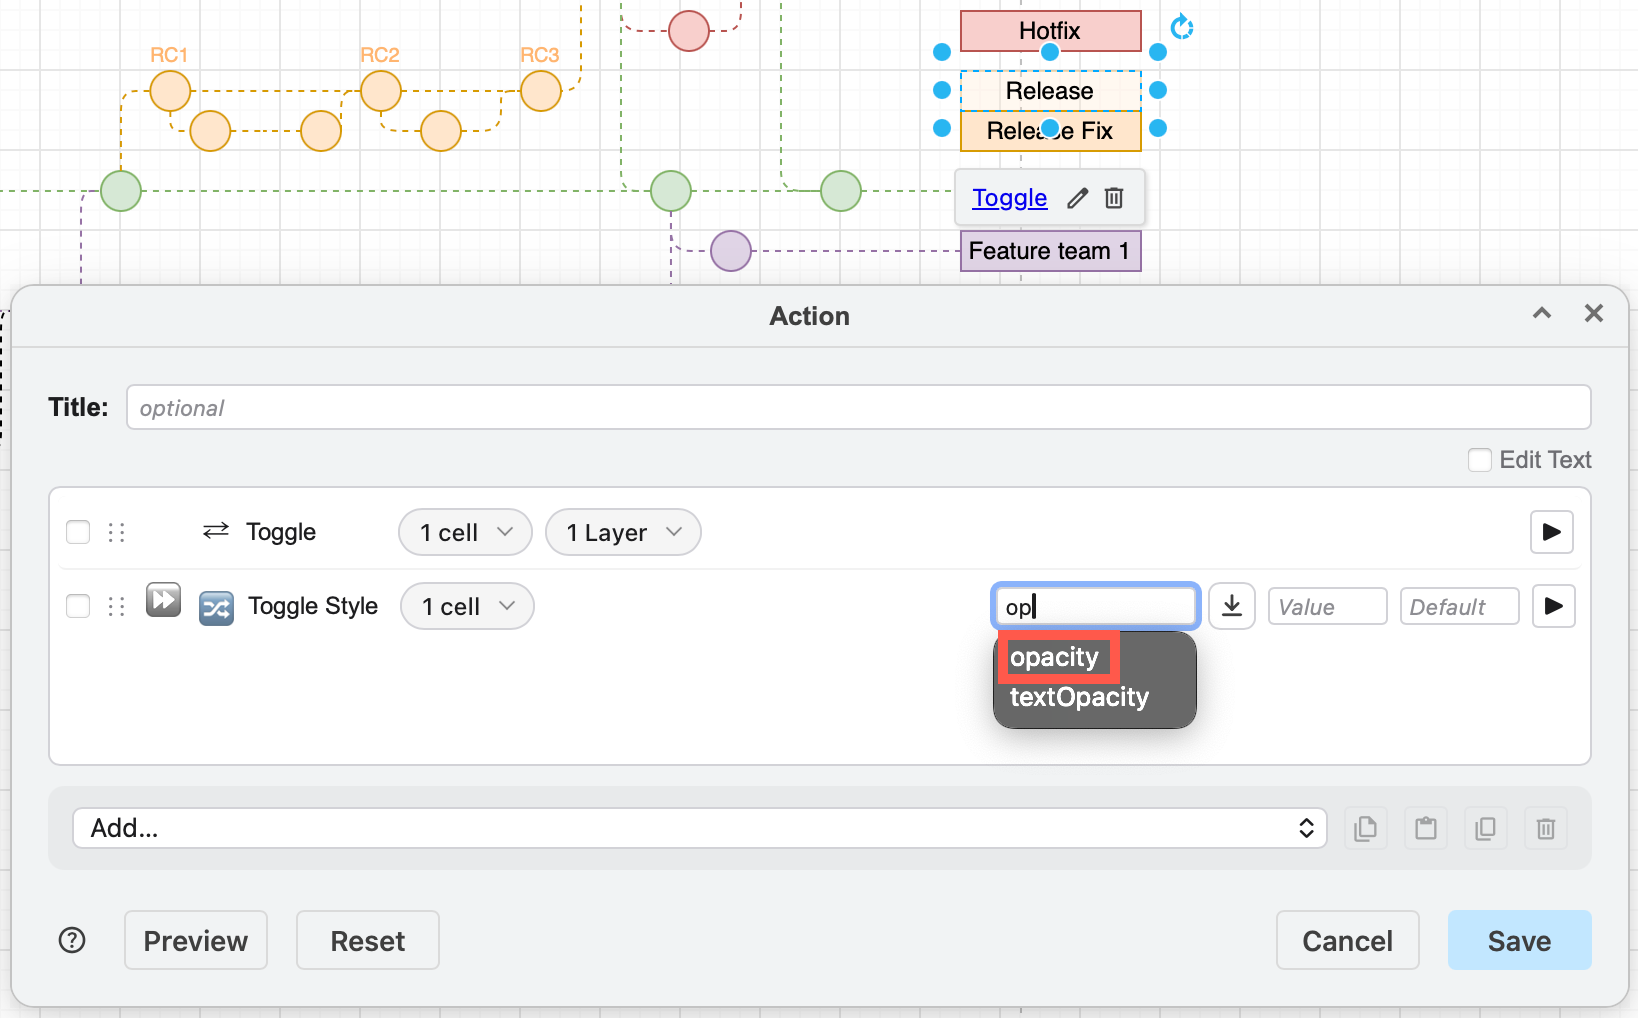
- Set the value to 30, and preview the action to see if it is light enough. Click on Play again to toggle the style off, or click Reset.
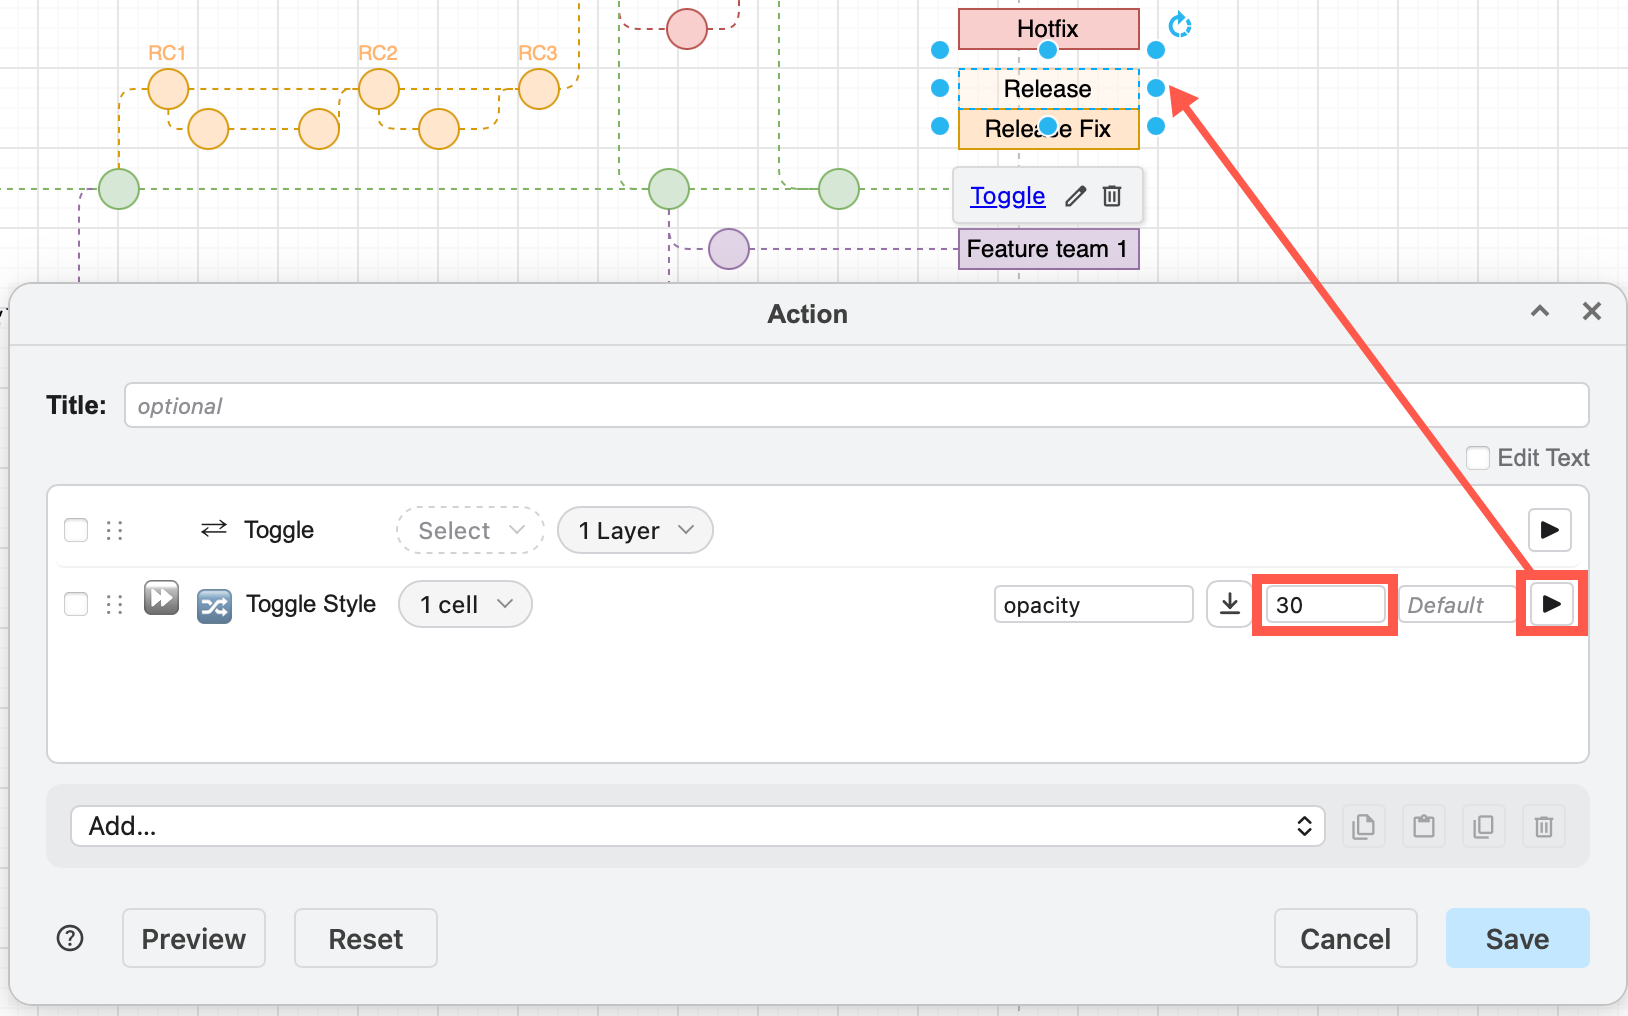
- In this example, the style should apply to both the Release and Release Fixes labels. Select both labels, then in the Cells list, choose Use selected cells.
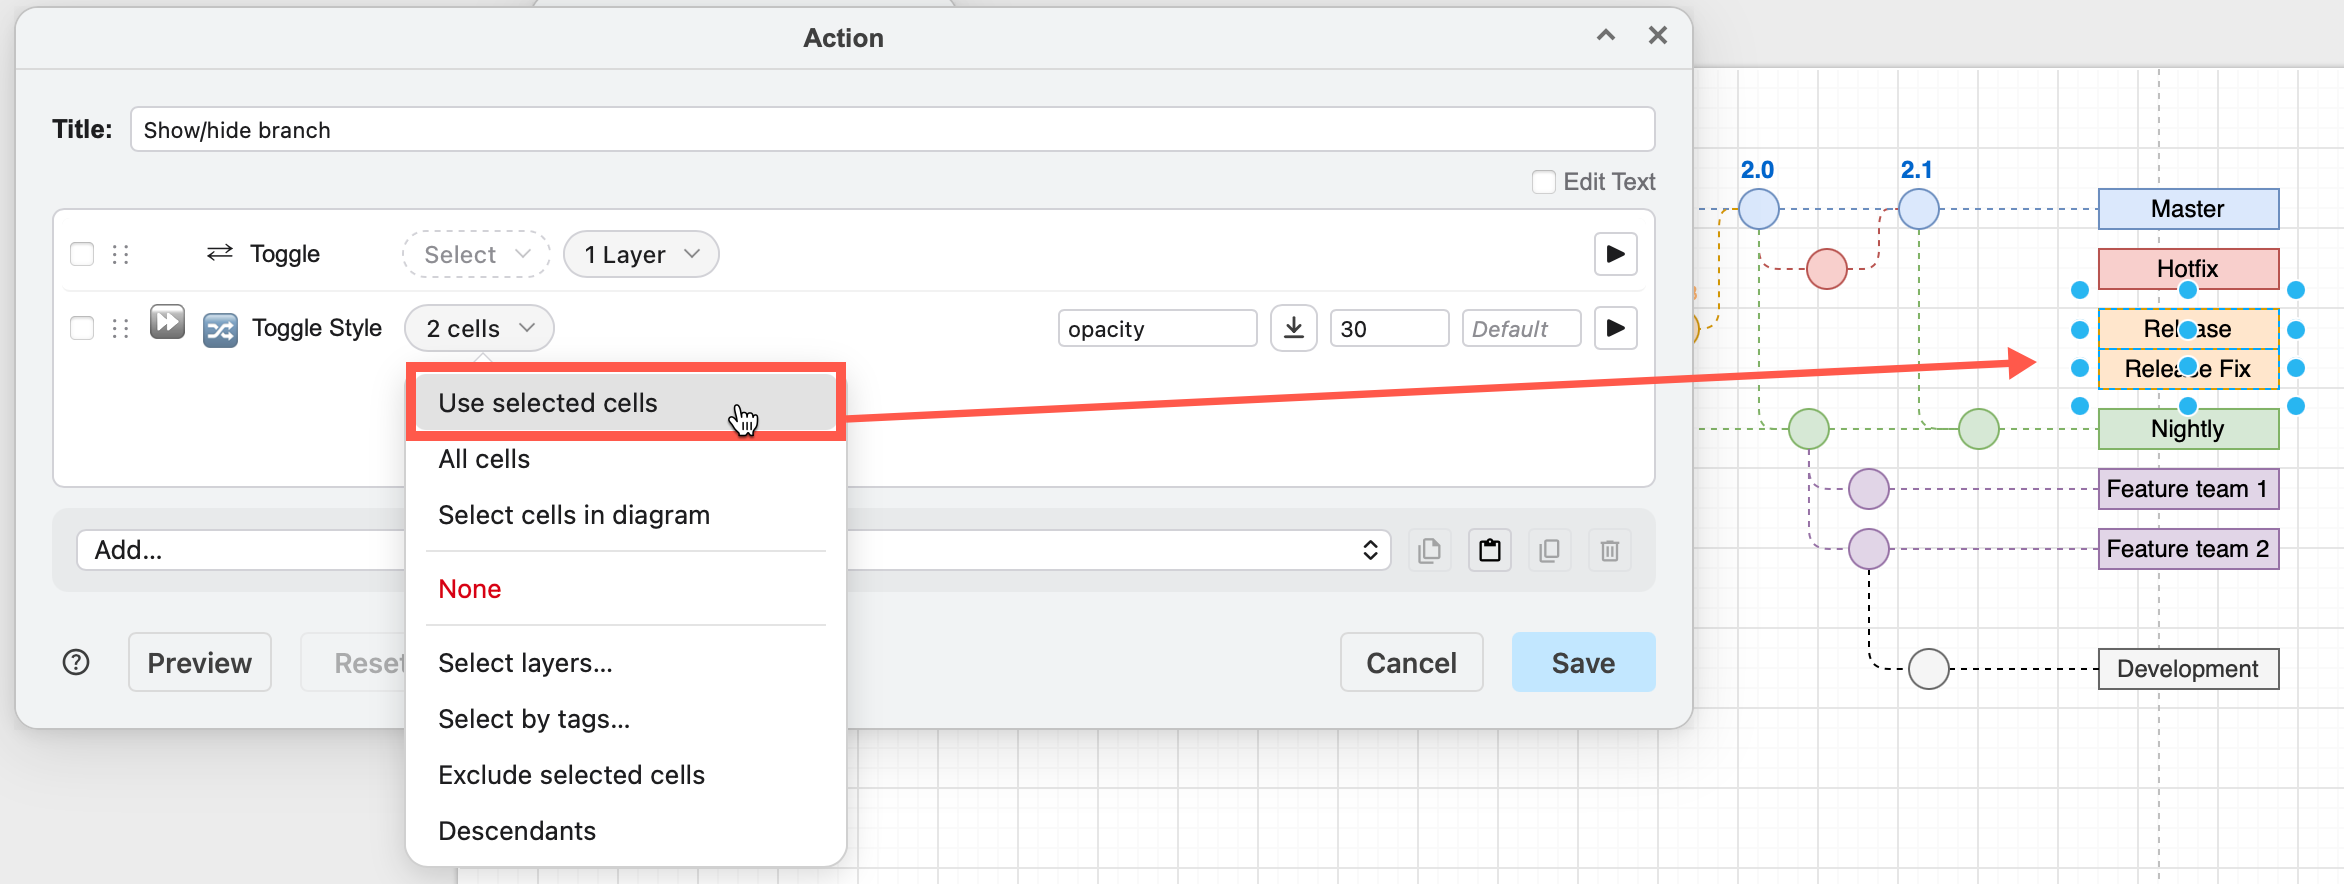
Now, when you hide the layer via the custom link, both related labels will immediately become lighter.
Note: Transient styles and colours applied by actions on custom links will automatically use adaptive colours to be visible in dark and light modes. They do not change the original style of the shape, and will reset when you next load your diagram file or click Reset in the custom link action editor dialog.
Set a sensible custom link title
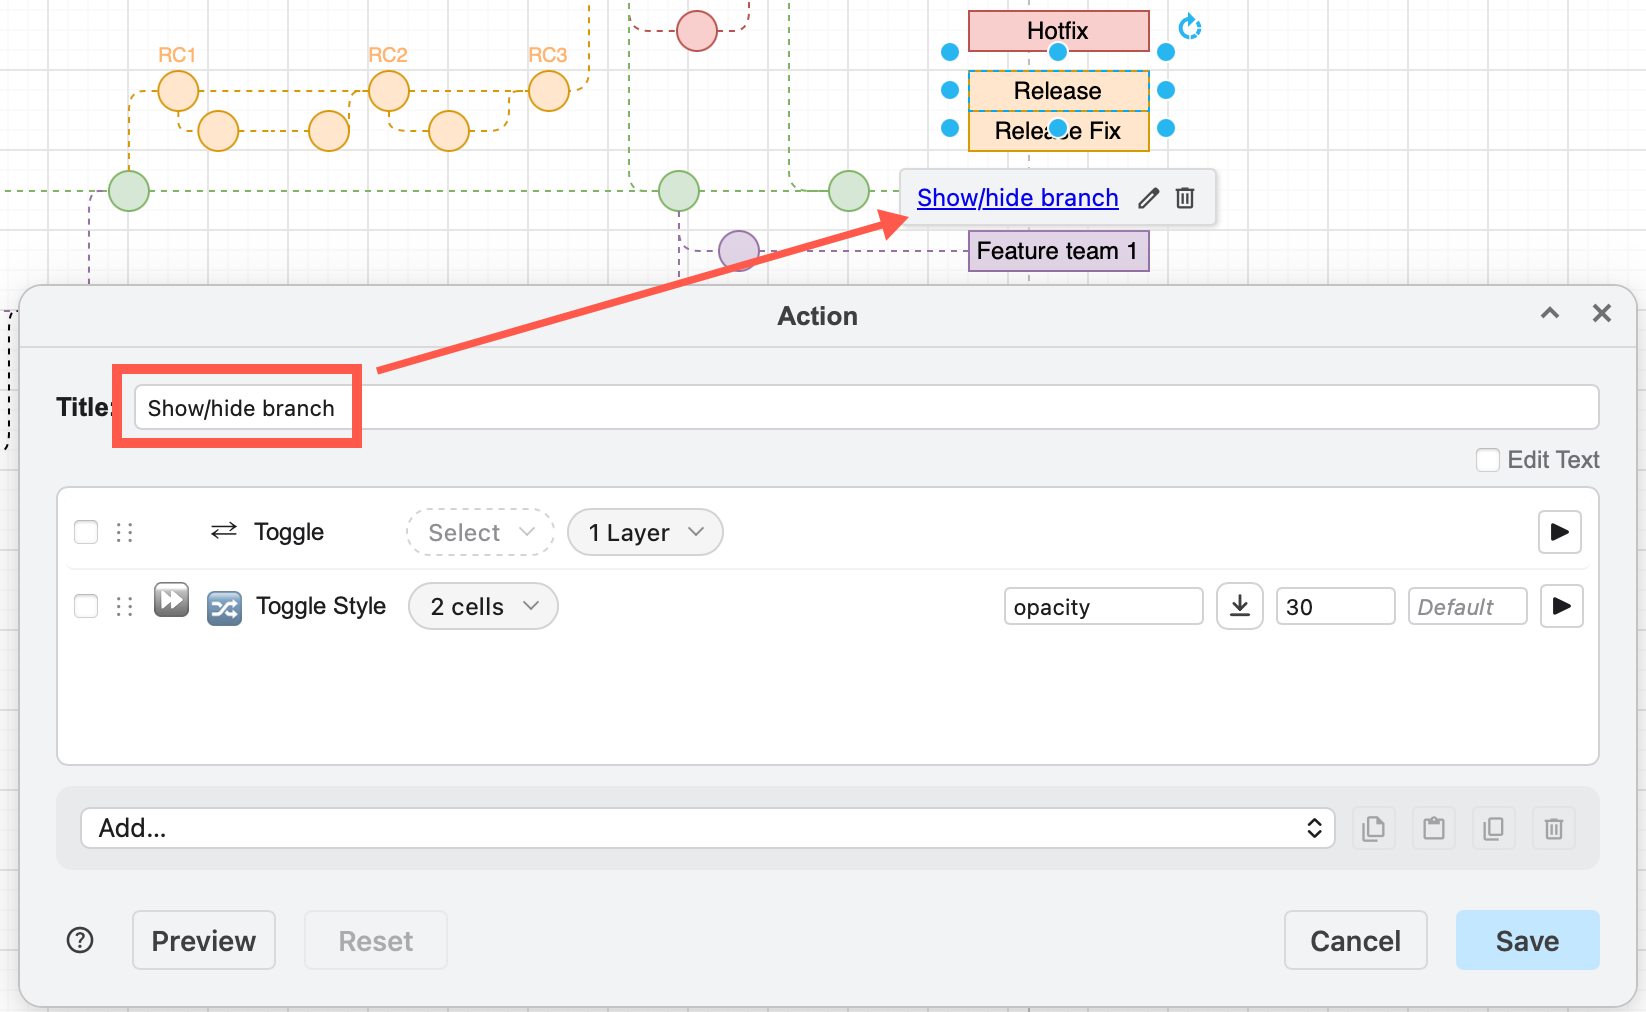
The Title at the top of the action editor dialog is the custom link text. Write something sensible here (e.g. Show/hide branch) so people who look at the diagram know they can click on it to do an action. Then Save your custom link.
Copy custom link actions
- Select the actions you want to copy in the action editor and click Copy to save these actions to a clipboard. Save or Cancel to close the source shape's action editor.
- Add a custom link to a different shape.
- Click Paste in the target shape's action editor.
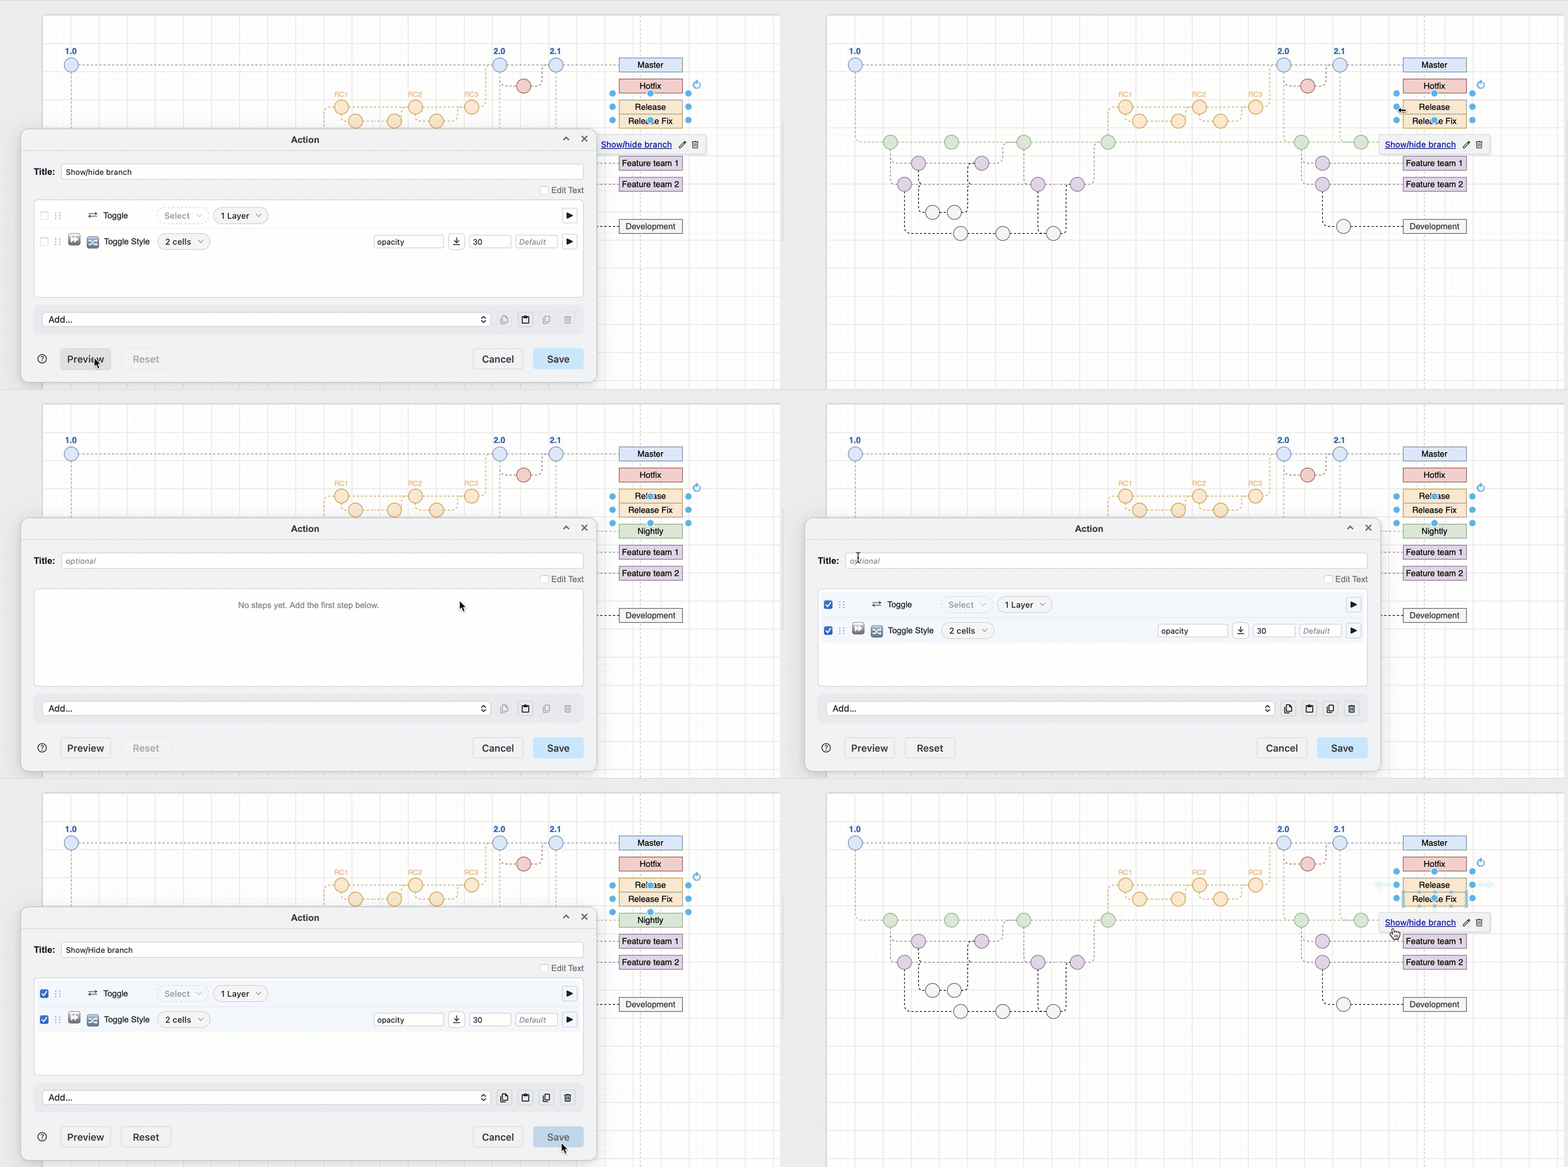
You can now change the selected Cells, Layers and Tags if you need the new custom link to act on different elements in your diagram.
Note: This only copies the selected actions, it does not copy the custom link Title. To copy everything - custom link title, all actions, tooltips, and other shape metadata - select the source shape, then select Edit > Copy Data in the Style tab of the foramt panel (or the menu), then select the target shape and select Edit > Paste Data.
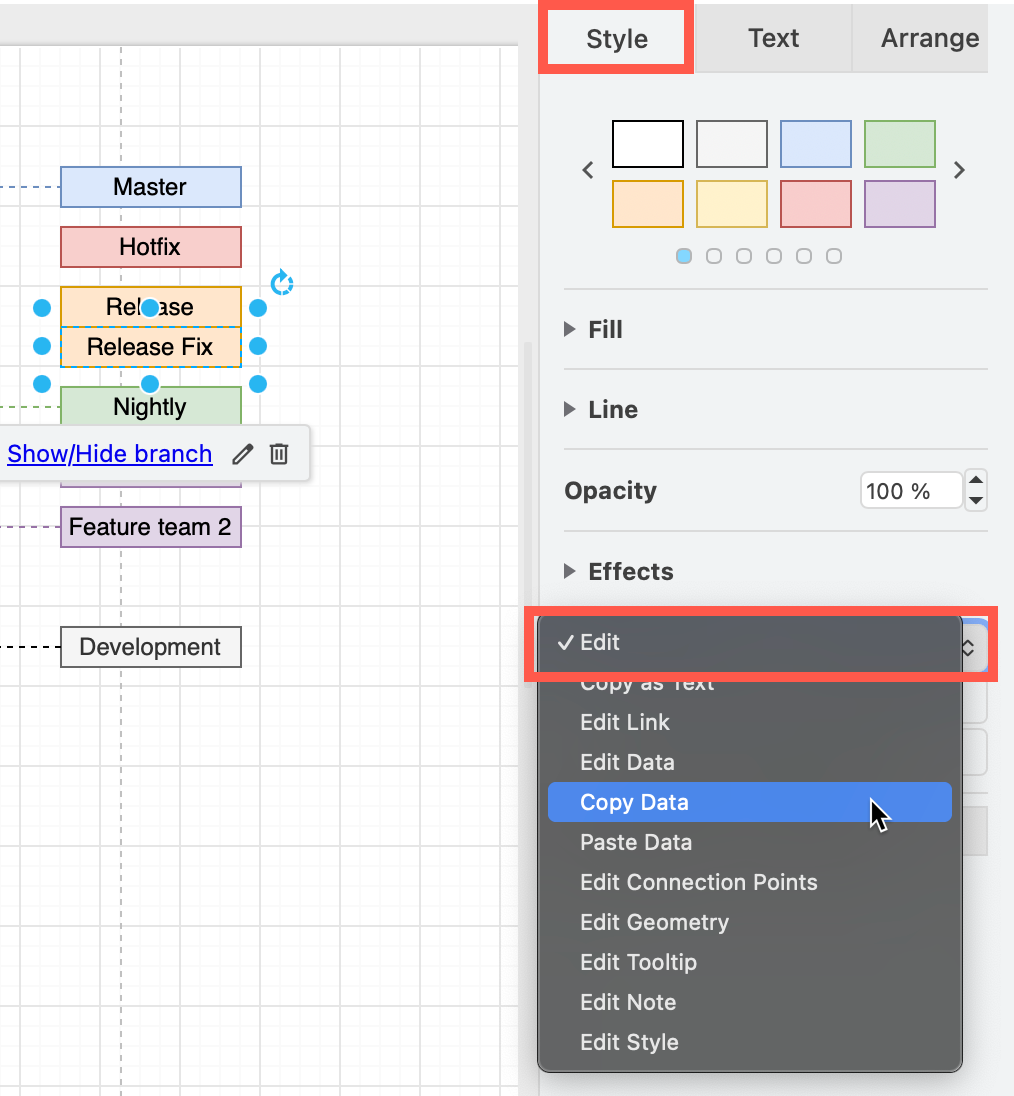
Keep adding custom links and actions to the shapes in your diagram until you have finished.
Interact with your diagram
In the editor: You can now interact with your diagram on the drawing canvas in three ways:
- Click on the checkbox in the the Layers dialog to show and hide layers.
- If the layer is unlocked, hover over the shape or select the shape with the custom link and the link will show in a tooltip below the shape. Click on this link to display or hide your layers and shapes.
- If the layer is locked, this tooltip will not appear - click directly on the shape to display or hide the layer.
ß
In the lightbox viewer or presentation mode: When you look at the diagram in the lightbox viewer or in presentation mode, click directly on the shapes that have custom links to interact with your diagram.
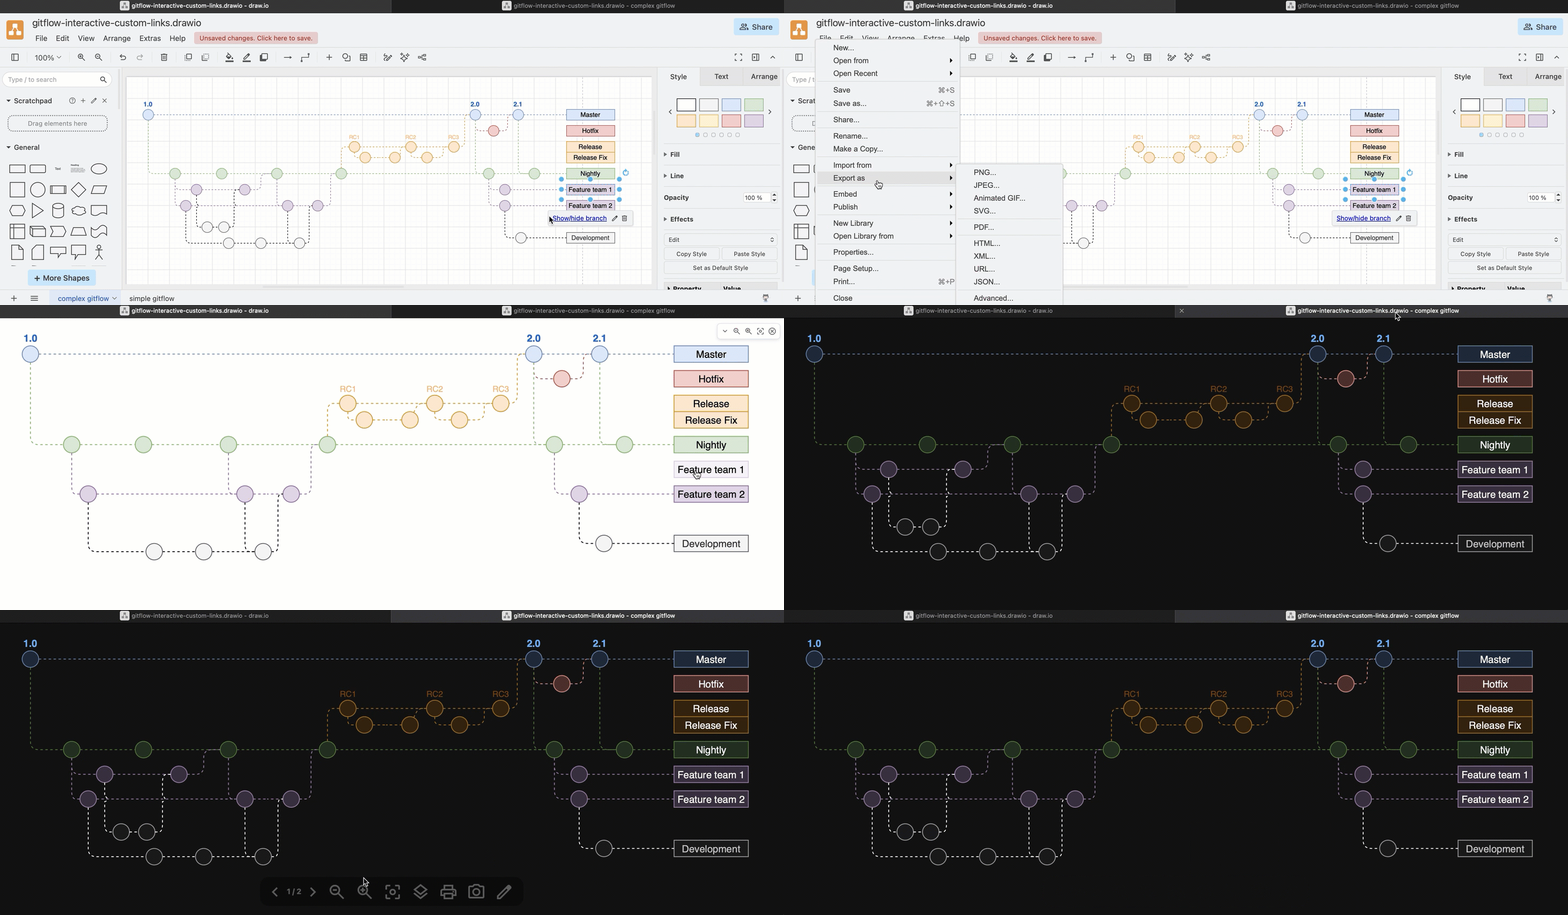
Open this interactive gitflow in our diagram viewer
Related
Learn more about using layers in draw.io. Note that interacting with a diagram that toggles layers and shape styles via both custom links and the Layers dialog can result in misaligned visibility or applied styles.
Add page animations using the same action editor that auto-play when the diagram page is opened in the lightbox viewer or in presentation mode.
See all the different animation actions you can use in custom links and page animations.