Add actions to custom links
Custom links add interactivity to diagrams via a link on a shape or connector or group, actions that play when the link is clicked on.
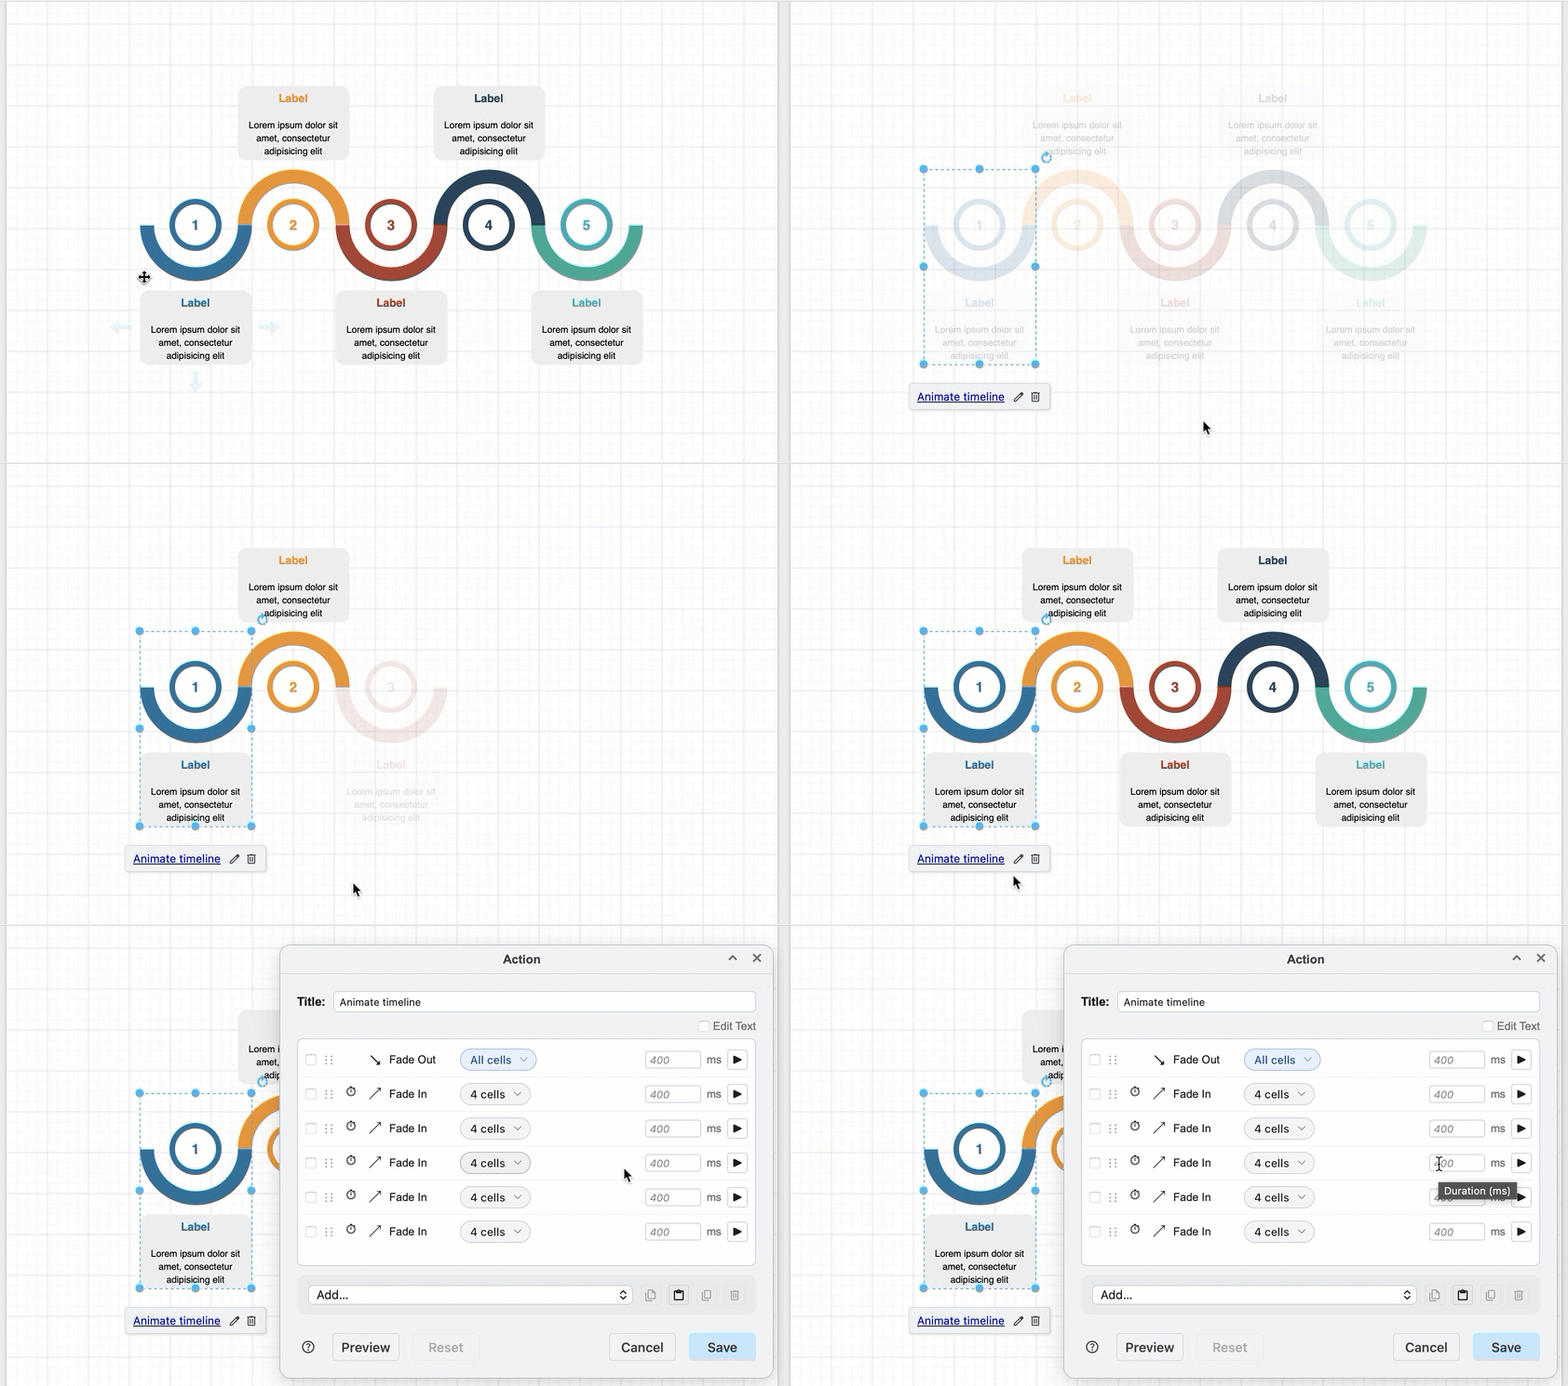
Click on the custom links in the diagram editor - on the tooltip if a cell is unlocked, or on the cell itself if it is locked - to run the action sequence stored in that link. These animations and actions only fire when a user clicks on the link.
With custom links, you can hide or show elements in the diagram, toggle or set styles, animate connectors, highlight elements, pan to another location in the diagram, or even open an external link in a new browser tab. Actions in a custom links can be set to run immediately when a link is clicked, or one after another in an animated sequence.
Custom links use the same action editor as page animations, as well as the same available actions, and allow you to select cells in the diagram in the same way - shapes, connectors, and groups.
Note: Actions on custom links are not available in draw.io for Confluence Server.
Open the custom action editor
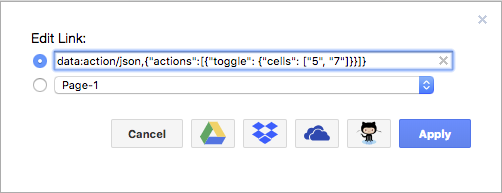
Custom link action: Right-click on a shape or connector and select Edit Link from the context menu or press Alt+Shift+L, select the Action radio button and click Insert.
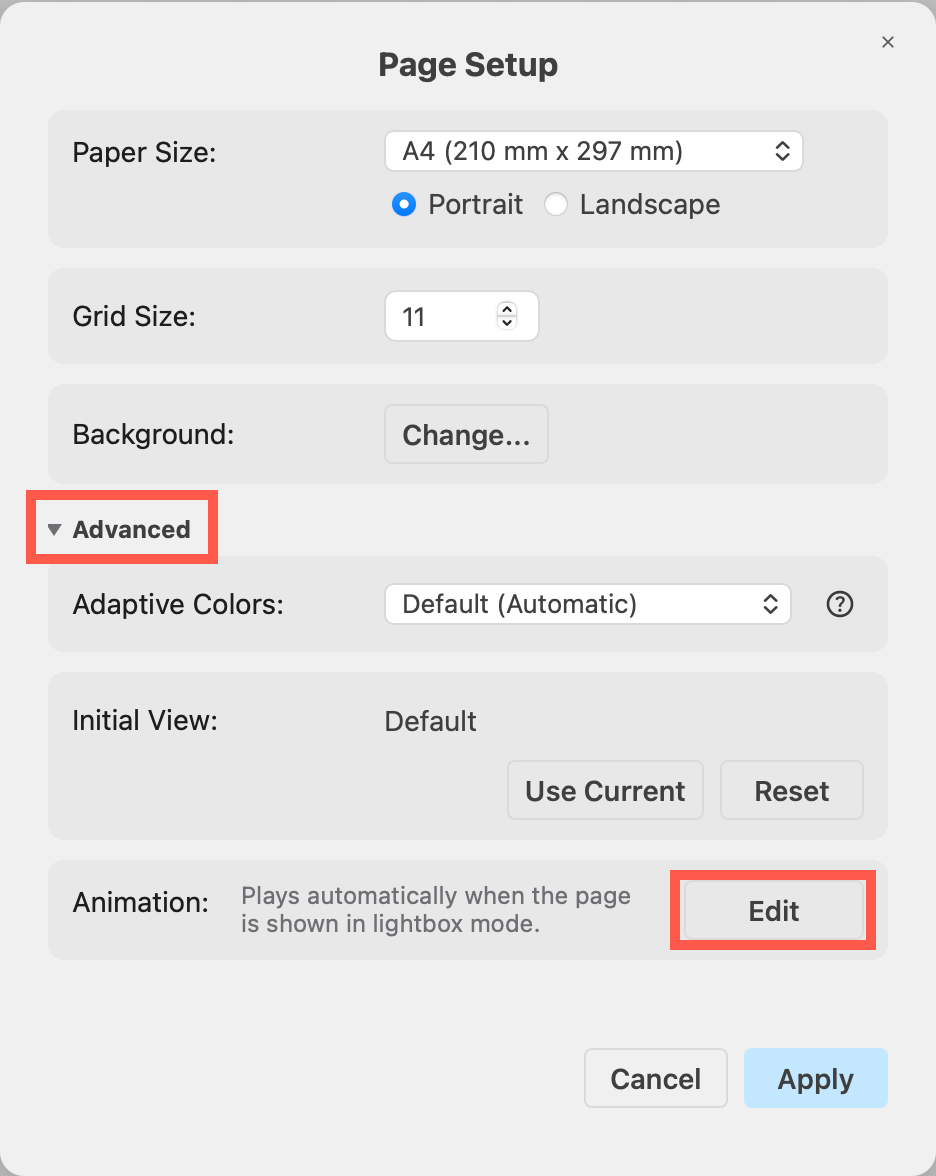
Page animations: Select File > Page Setup from the draw.io menu, expand the Advanced section and click the Edit button in the Animation section.
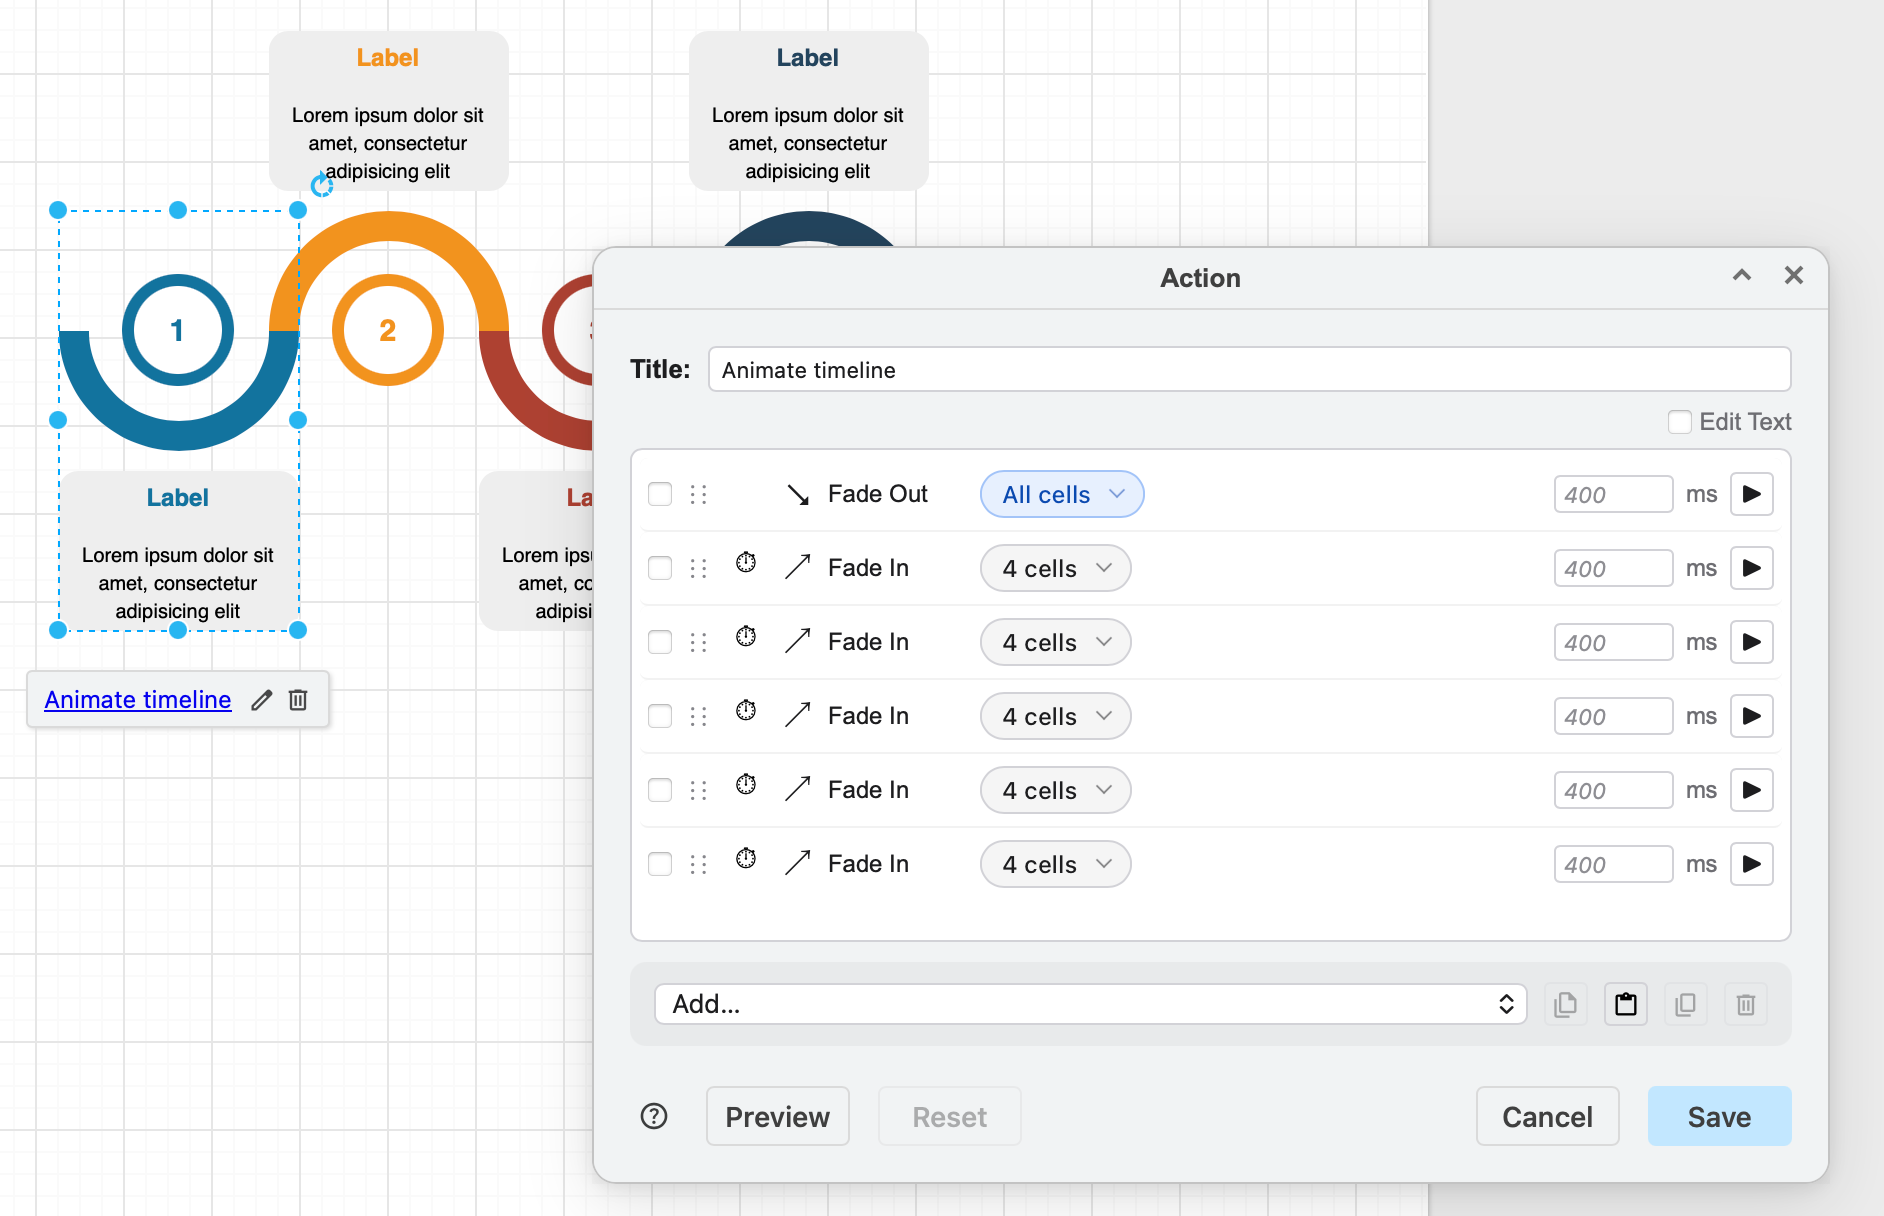
The action editor dialog is a draggable, resizeable dialog that lets you select cells on the drawing canvas and edit animation actions. Drag the dialog near a corner of the browser window to snap it to the edge of the browser tab.
Advanced: To edit the raw JSON, click the Edit Text checkbox at the top of the dialog, then paste an existing custom-action snippet or hand-edit the fields that the dialog doesn't expose (like transient: false for legacy persistent actions).
Add selected cells to actions.
Every step or action targets a set of cells using four lists of cell IDs.
Tip: See the section toward the end of this page to find cell IDs via its shape or connector data or layer data.
Cells
Each action applies to an explicit list of cell IDs. If you have selected something in the diagram and add an action, the selected cells will be automatically added to this list.
- To see which cells any action acts upon, select Select cells in diagram from the selector list.
- To remove all cells from an action, choose Reset or None from the selector list.
Click on the Cells list to open a menu, then choose one of the following selection commands.
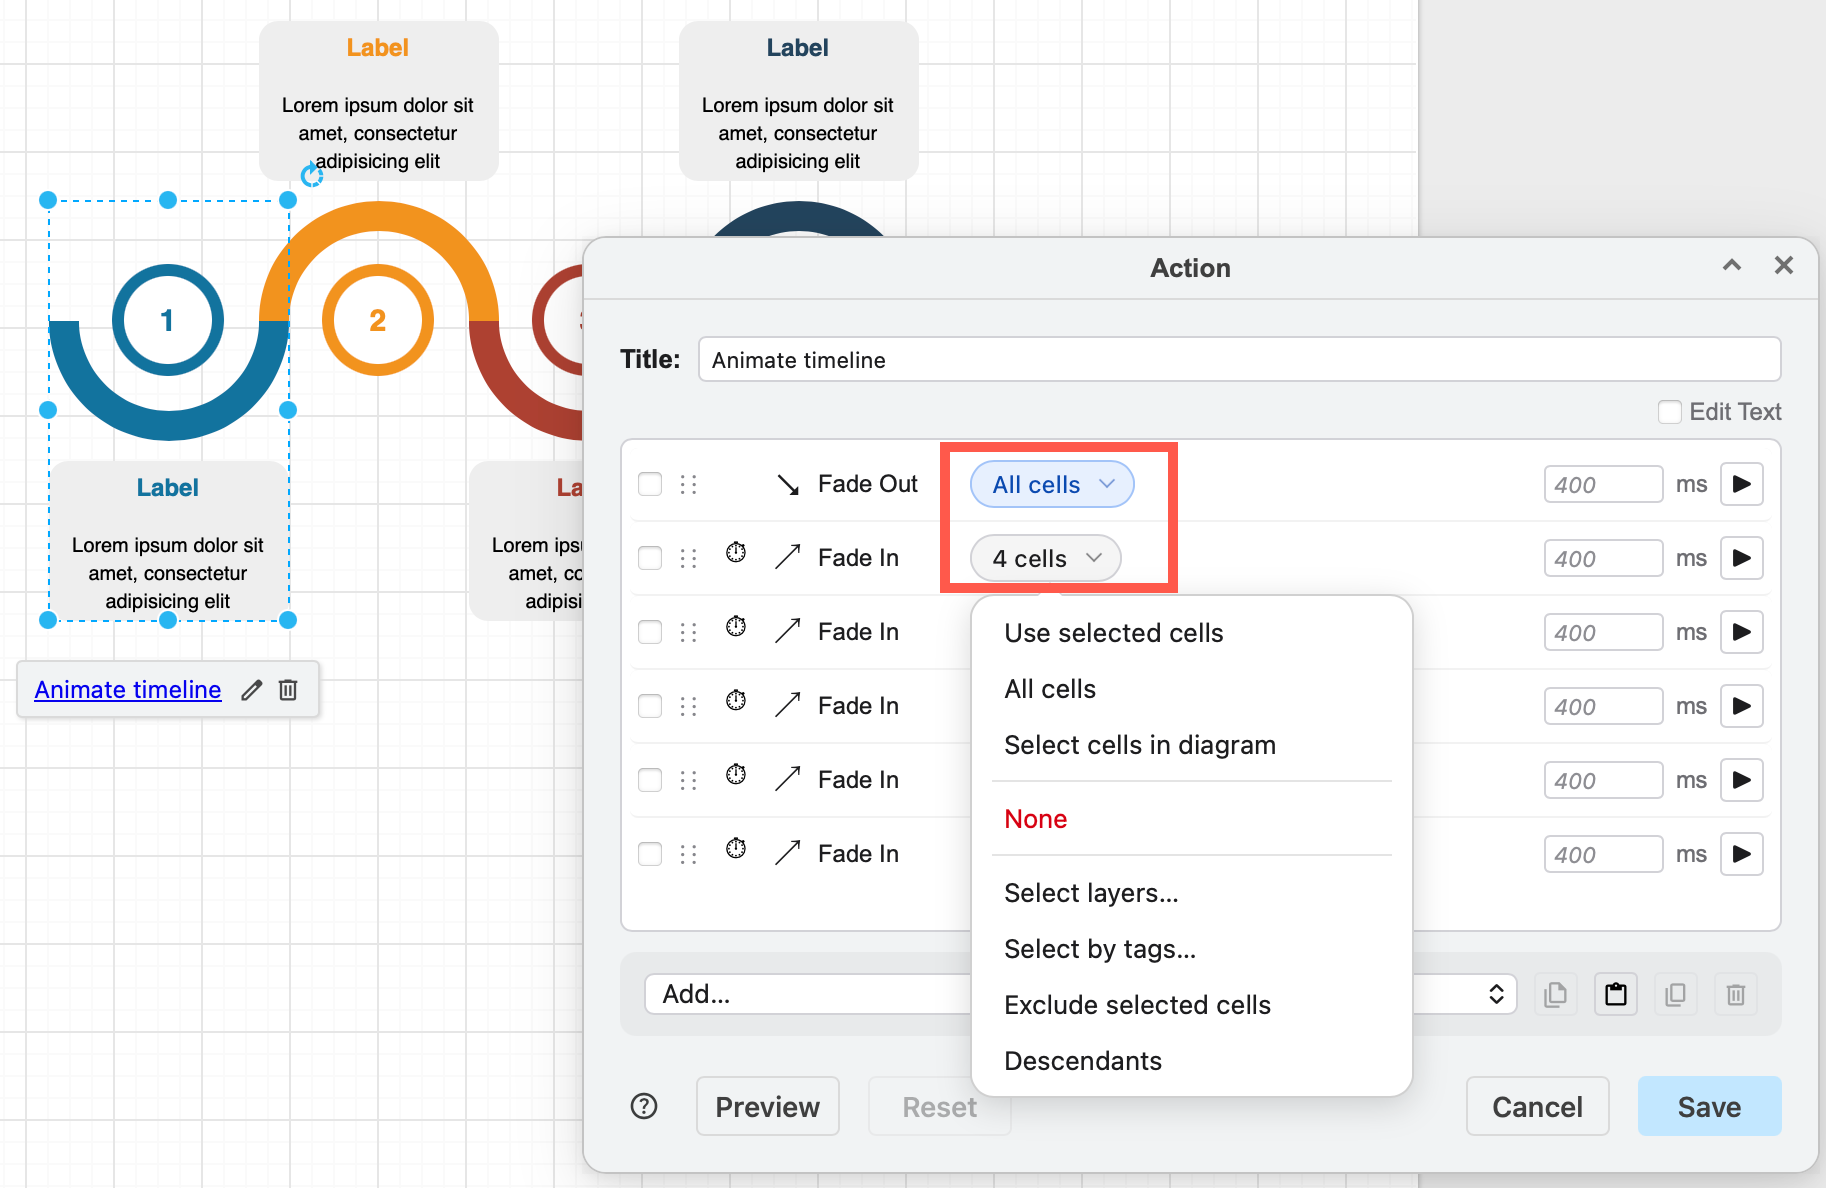
- Use selected cells — replace the list with the current selection on the drawing canvas. This is disabled when nothing is selected.
- All cells — selects every cell on the drawing canvas with a wildcard
*. Any previous cell IDs in this list are saved and will be restored if you toggle this wildcard off again. - Select layers — opens the layer picker. When you select a layer, a new Layers list appears.
- Select by tags — opens the tags picker so you can select existing tags (and the cells that have those tags). When a tag is selected, a new Tags list appears.
- Exclude selected cells — appends the selected cells on the drawing canvas to the action's exclude list (without recording duplicates). Once a cell has been excluded, a new Exclude list appears. This is disabled when nothing is selected.
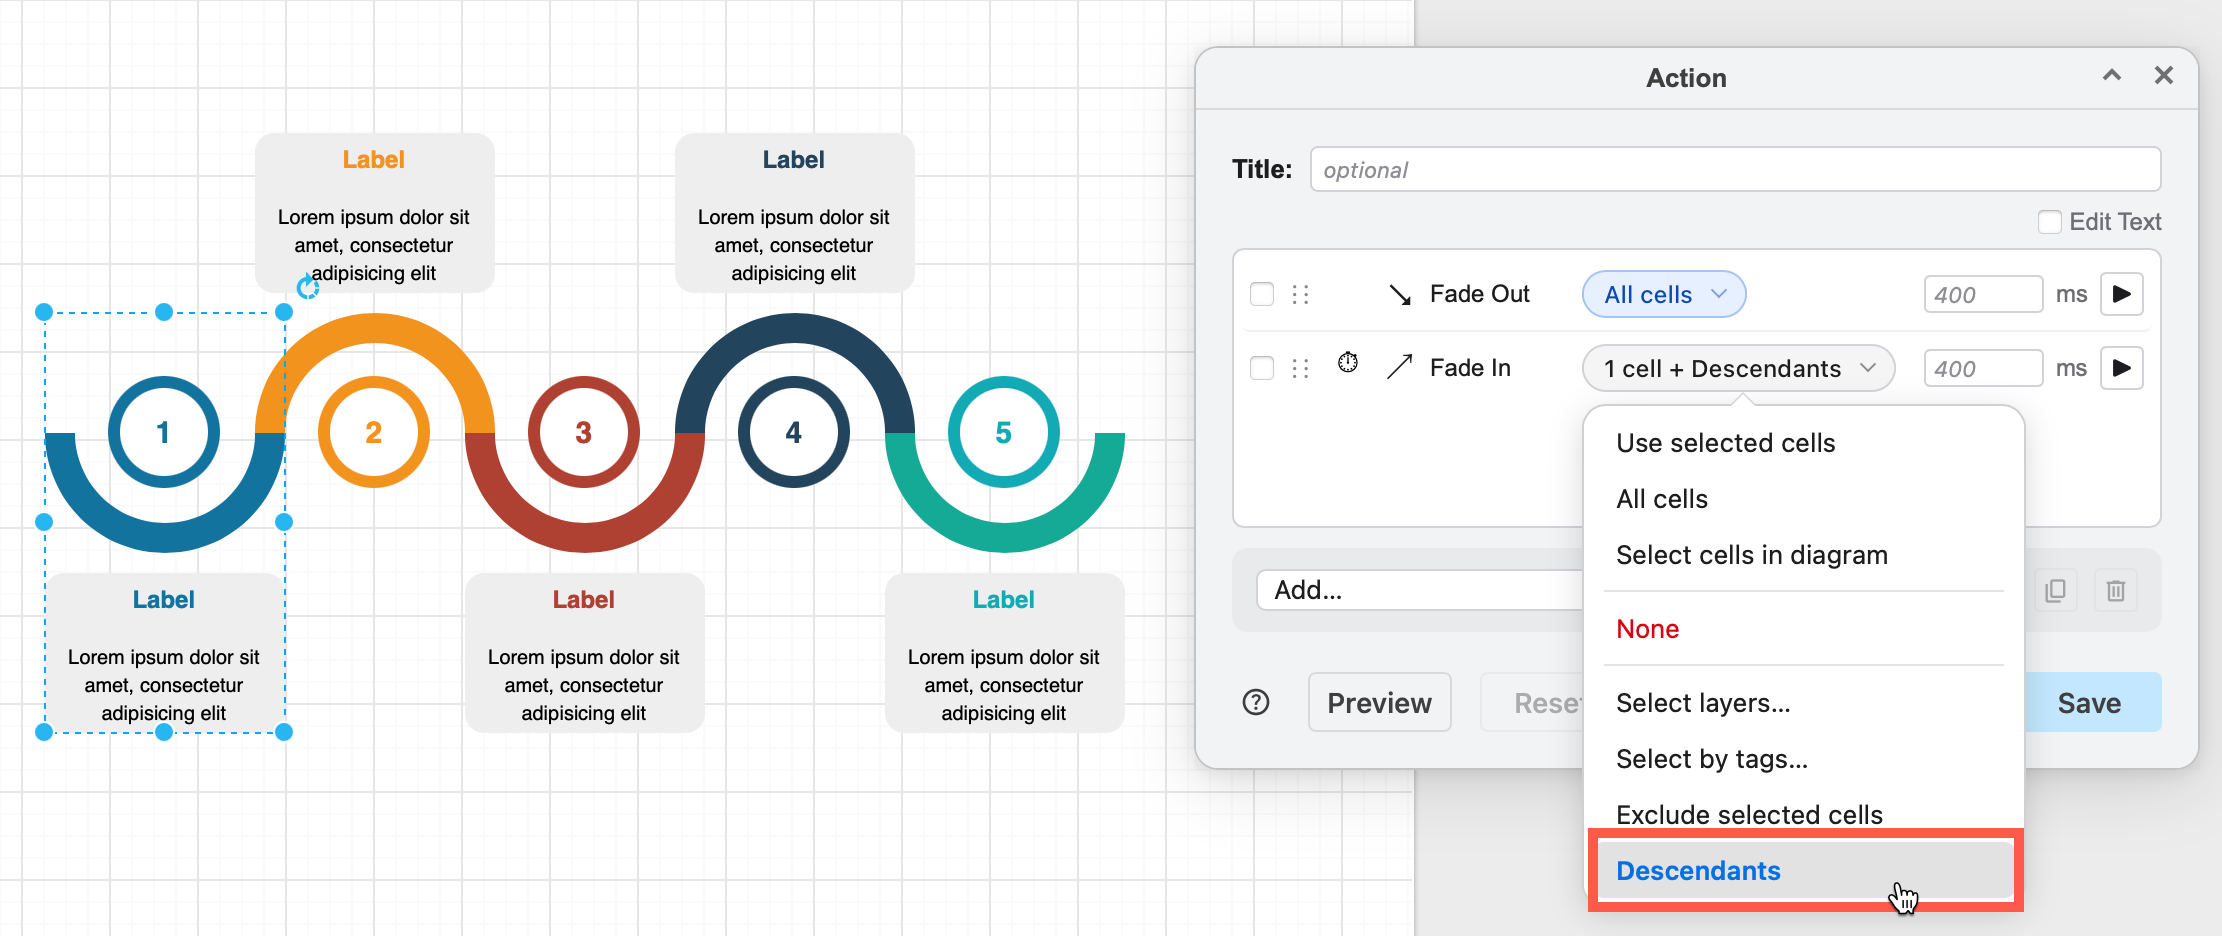
- Descendents - includes the child shapes that are inside the selected groups and compound shapes like swimlanes, layout shapes and cross-functional tables.
Layers
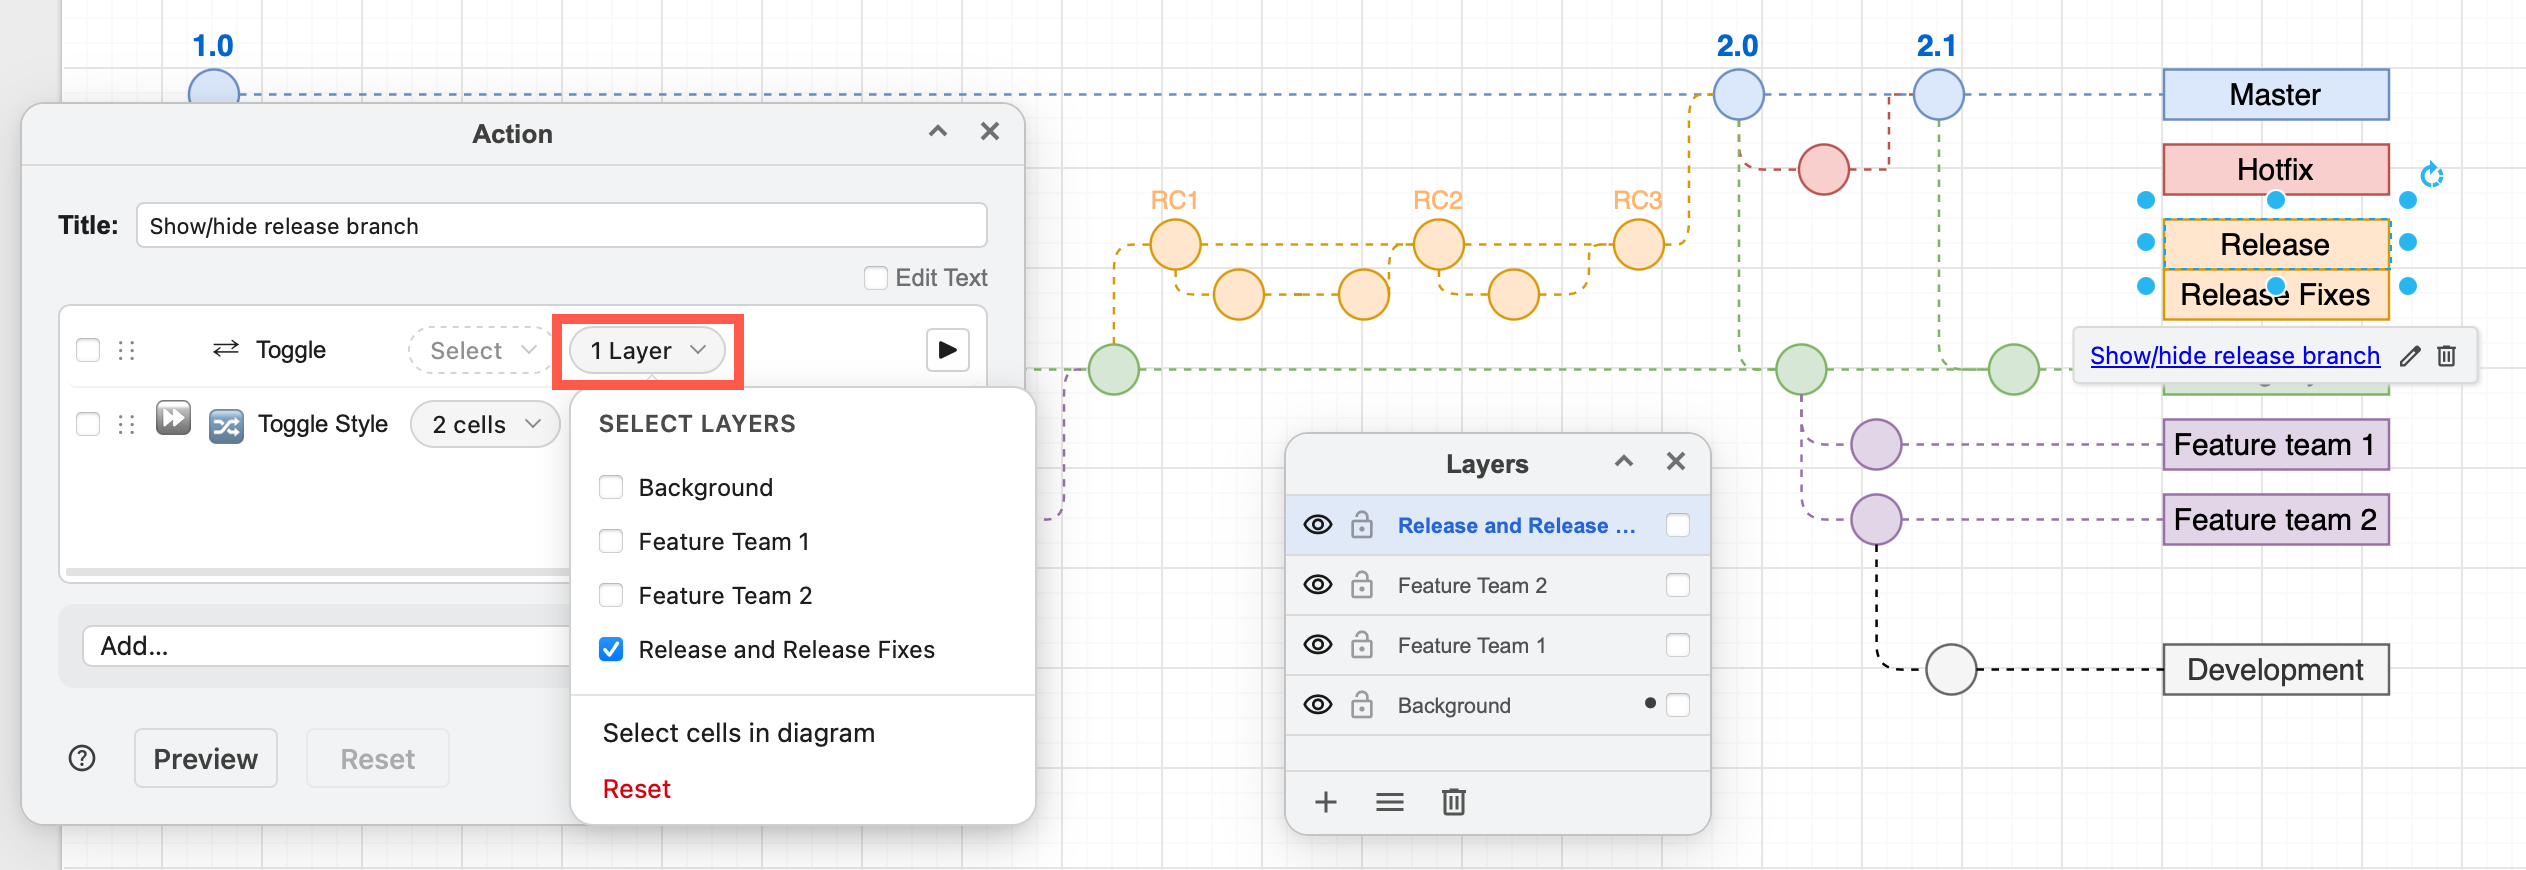
The Layers list is hidden by default and only appears if you have added a layer to an action via the menu above. Click on the Layers list and use the layer picker to select or deselect the checkboxes next to layer names. Layers are listed in their z-order.
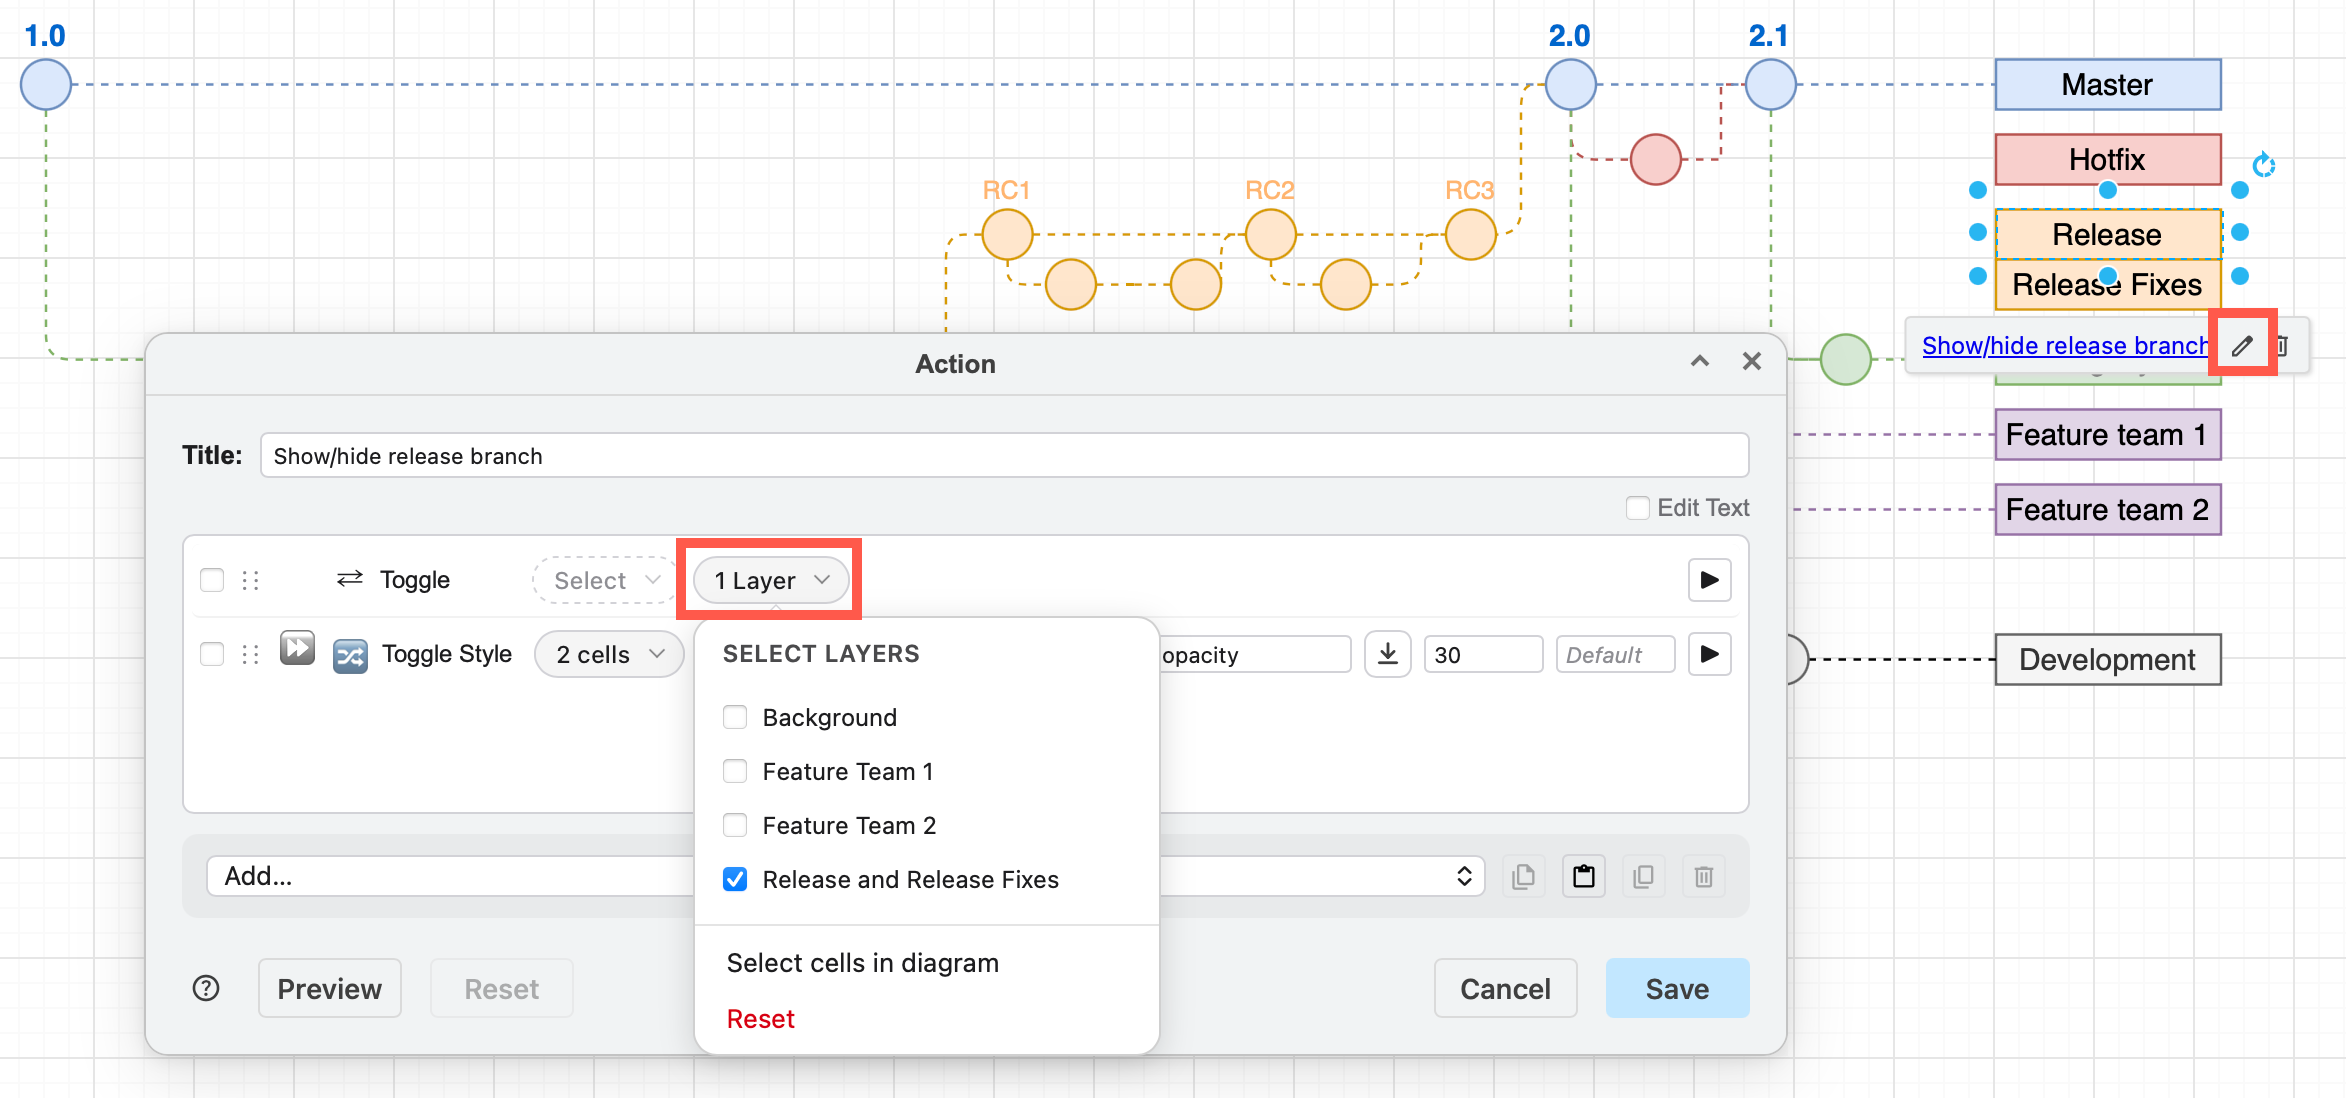
When you add new shapes and connectors to layers that are targeted by actions, these new shapes will automatically be included in the action the next time the custom link is clicked on the drawing canvas, in the lightbox or in presentation mode.
Tags
The Tags list is hidden by default and only appears if you have added a tag to a action. Click on the Cell list and choose Select tags to open the tag picker, then select the tags you want to add to the action and the Tags list will appear. Edit the Tags list to change the selected tags.
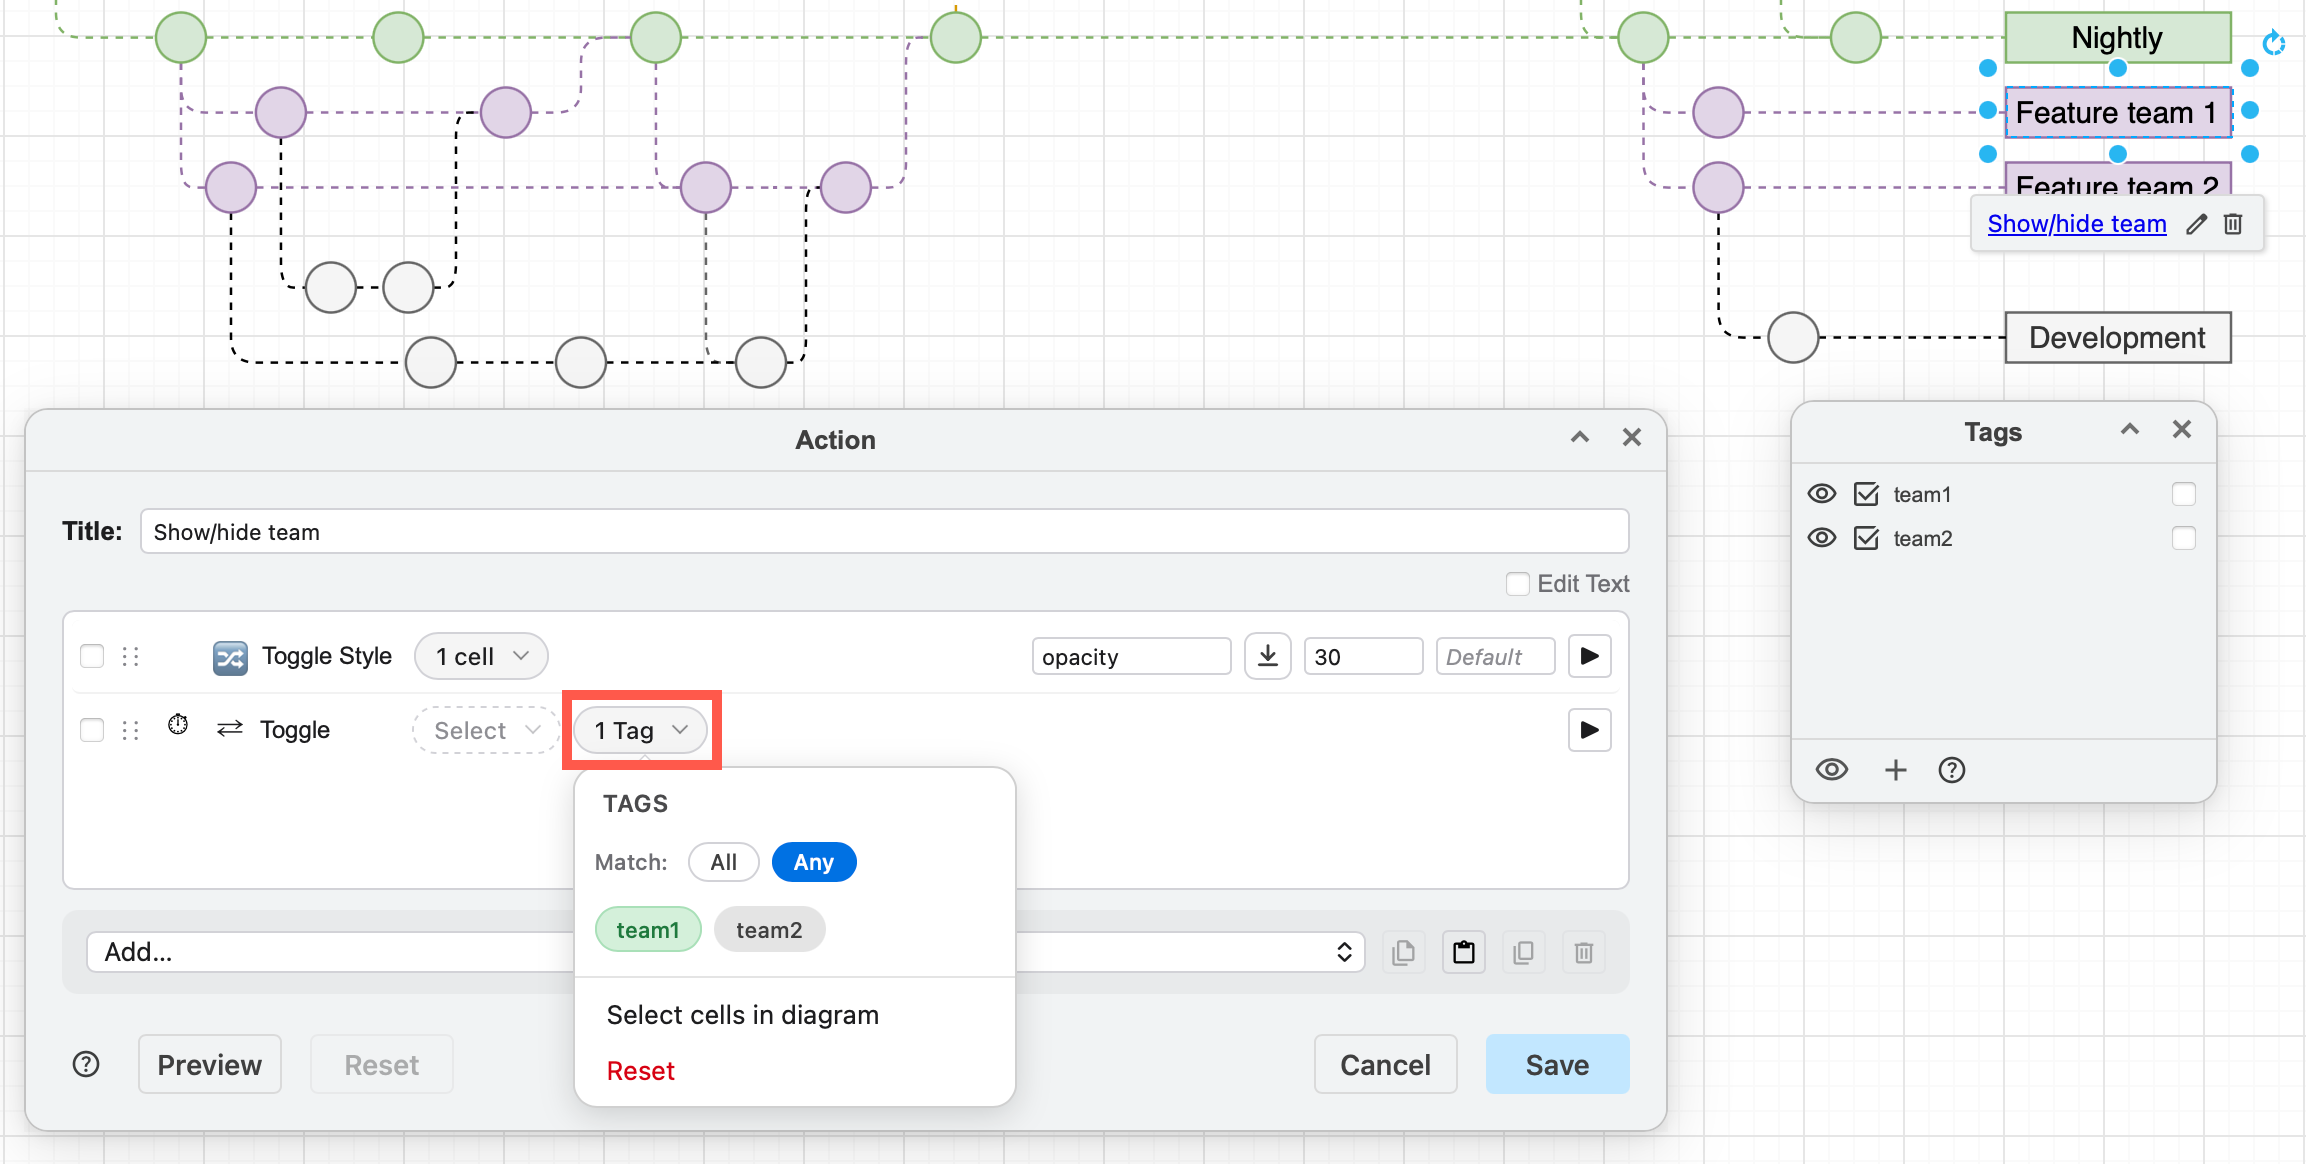
- Match: All (And) — the cell must have every selected tag (default).
- Match: Any (OR) — the cell must have at least one selected tag.
- Each tag name is green when it is selected, or gray when it is not selected.
When one of these tags is later applied to other cells in the diagram, they will be automatically included in the action the next time that the custom link is clicked on.
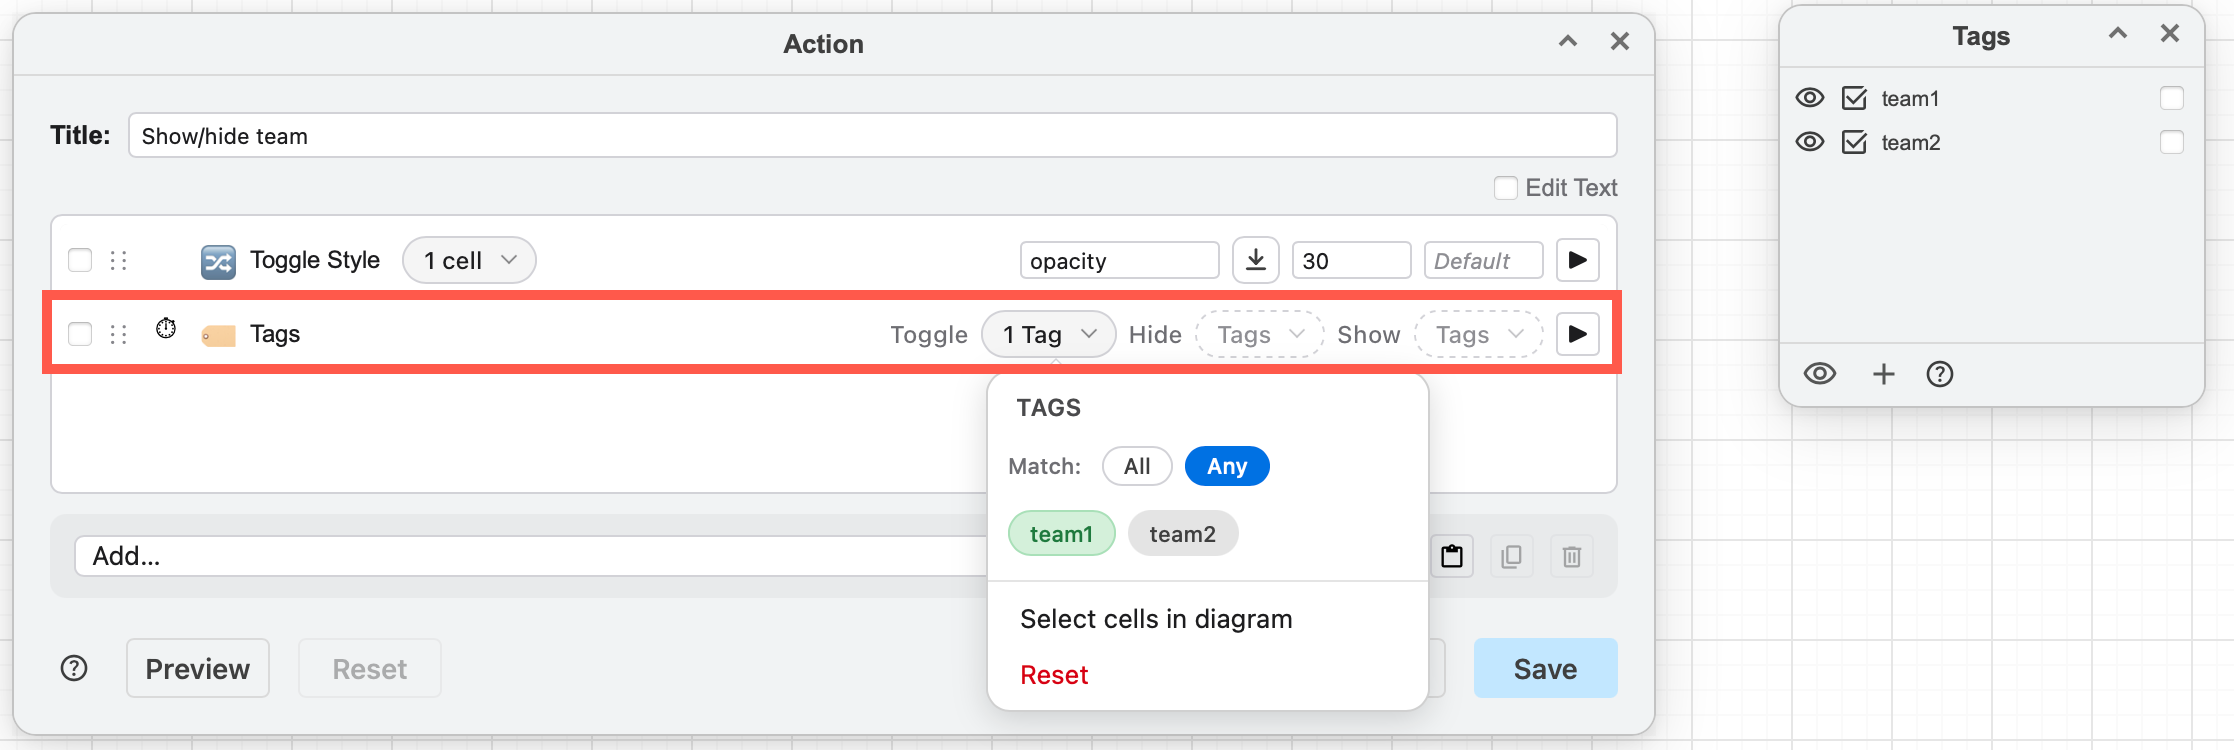
Tip: For more flexibility in hiding or displaying or toggling tags, add a Tag action - there are tag selection lists for each of these sub-actions.
Excluded
Excluded is an explicit list of cell IDs to ignore when running the action. The excluded list is applied as the final step in an action, so cells: ["*"], excluded: ["cellA"] means "every cell except cellA".
The Excluded list is hidden by default and only appears if you have excluded a cell via the menu above. Select the cells you want to exlcude, then click on the Cell list and choose Exclude selected cells.
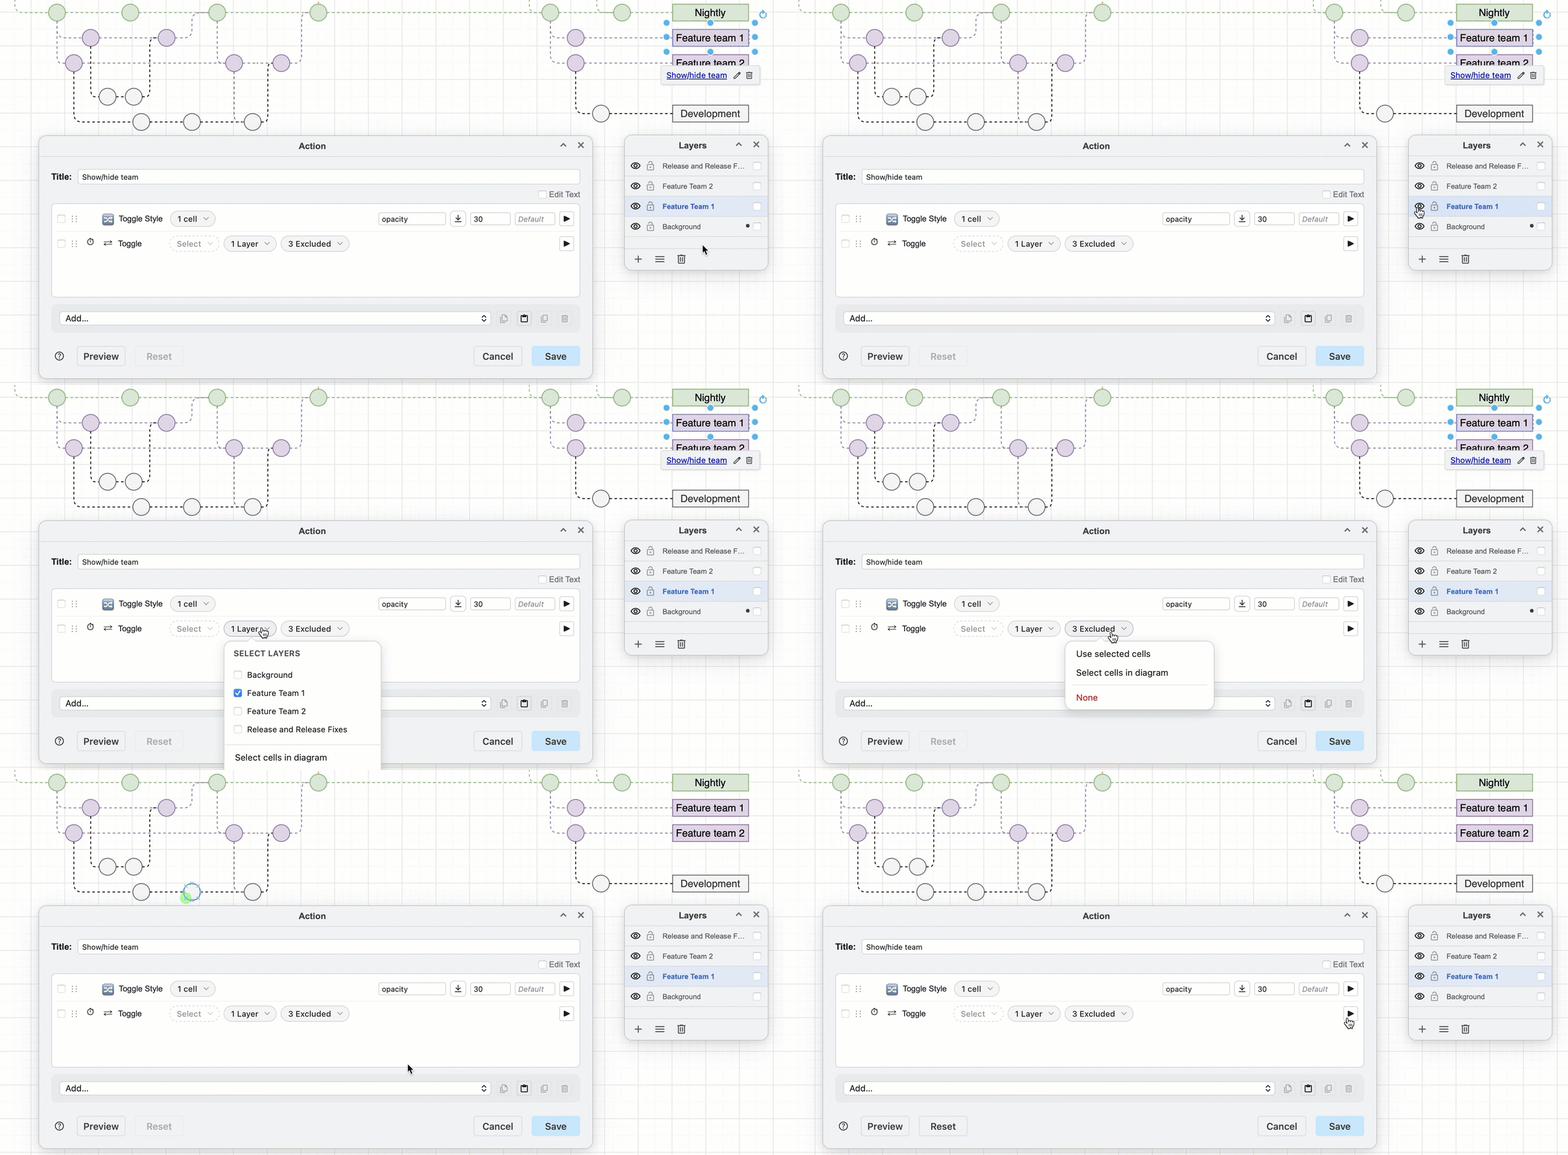
In the example below, the two development circles on the Team 1 Layer have been excluded from the Toggle layer action.
Add effects to an action
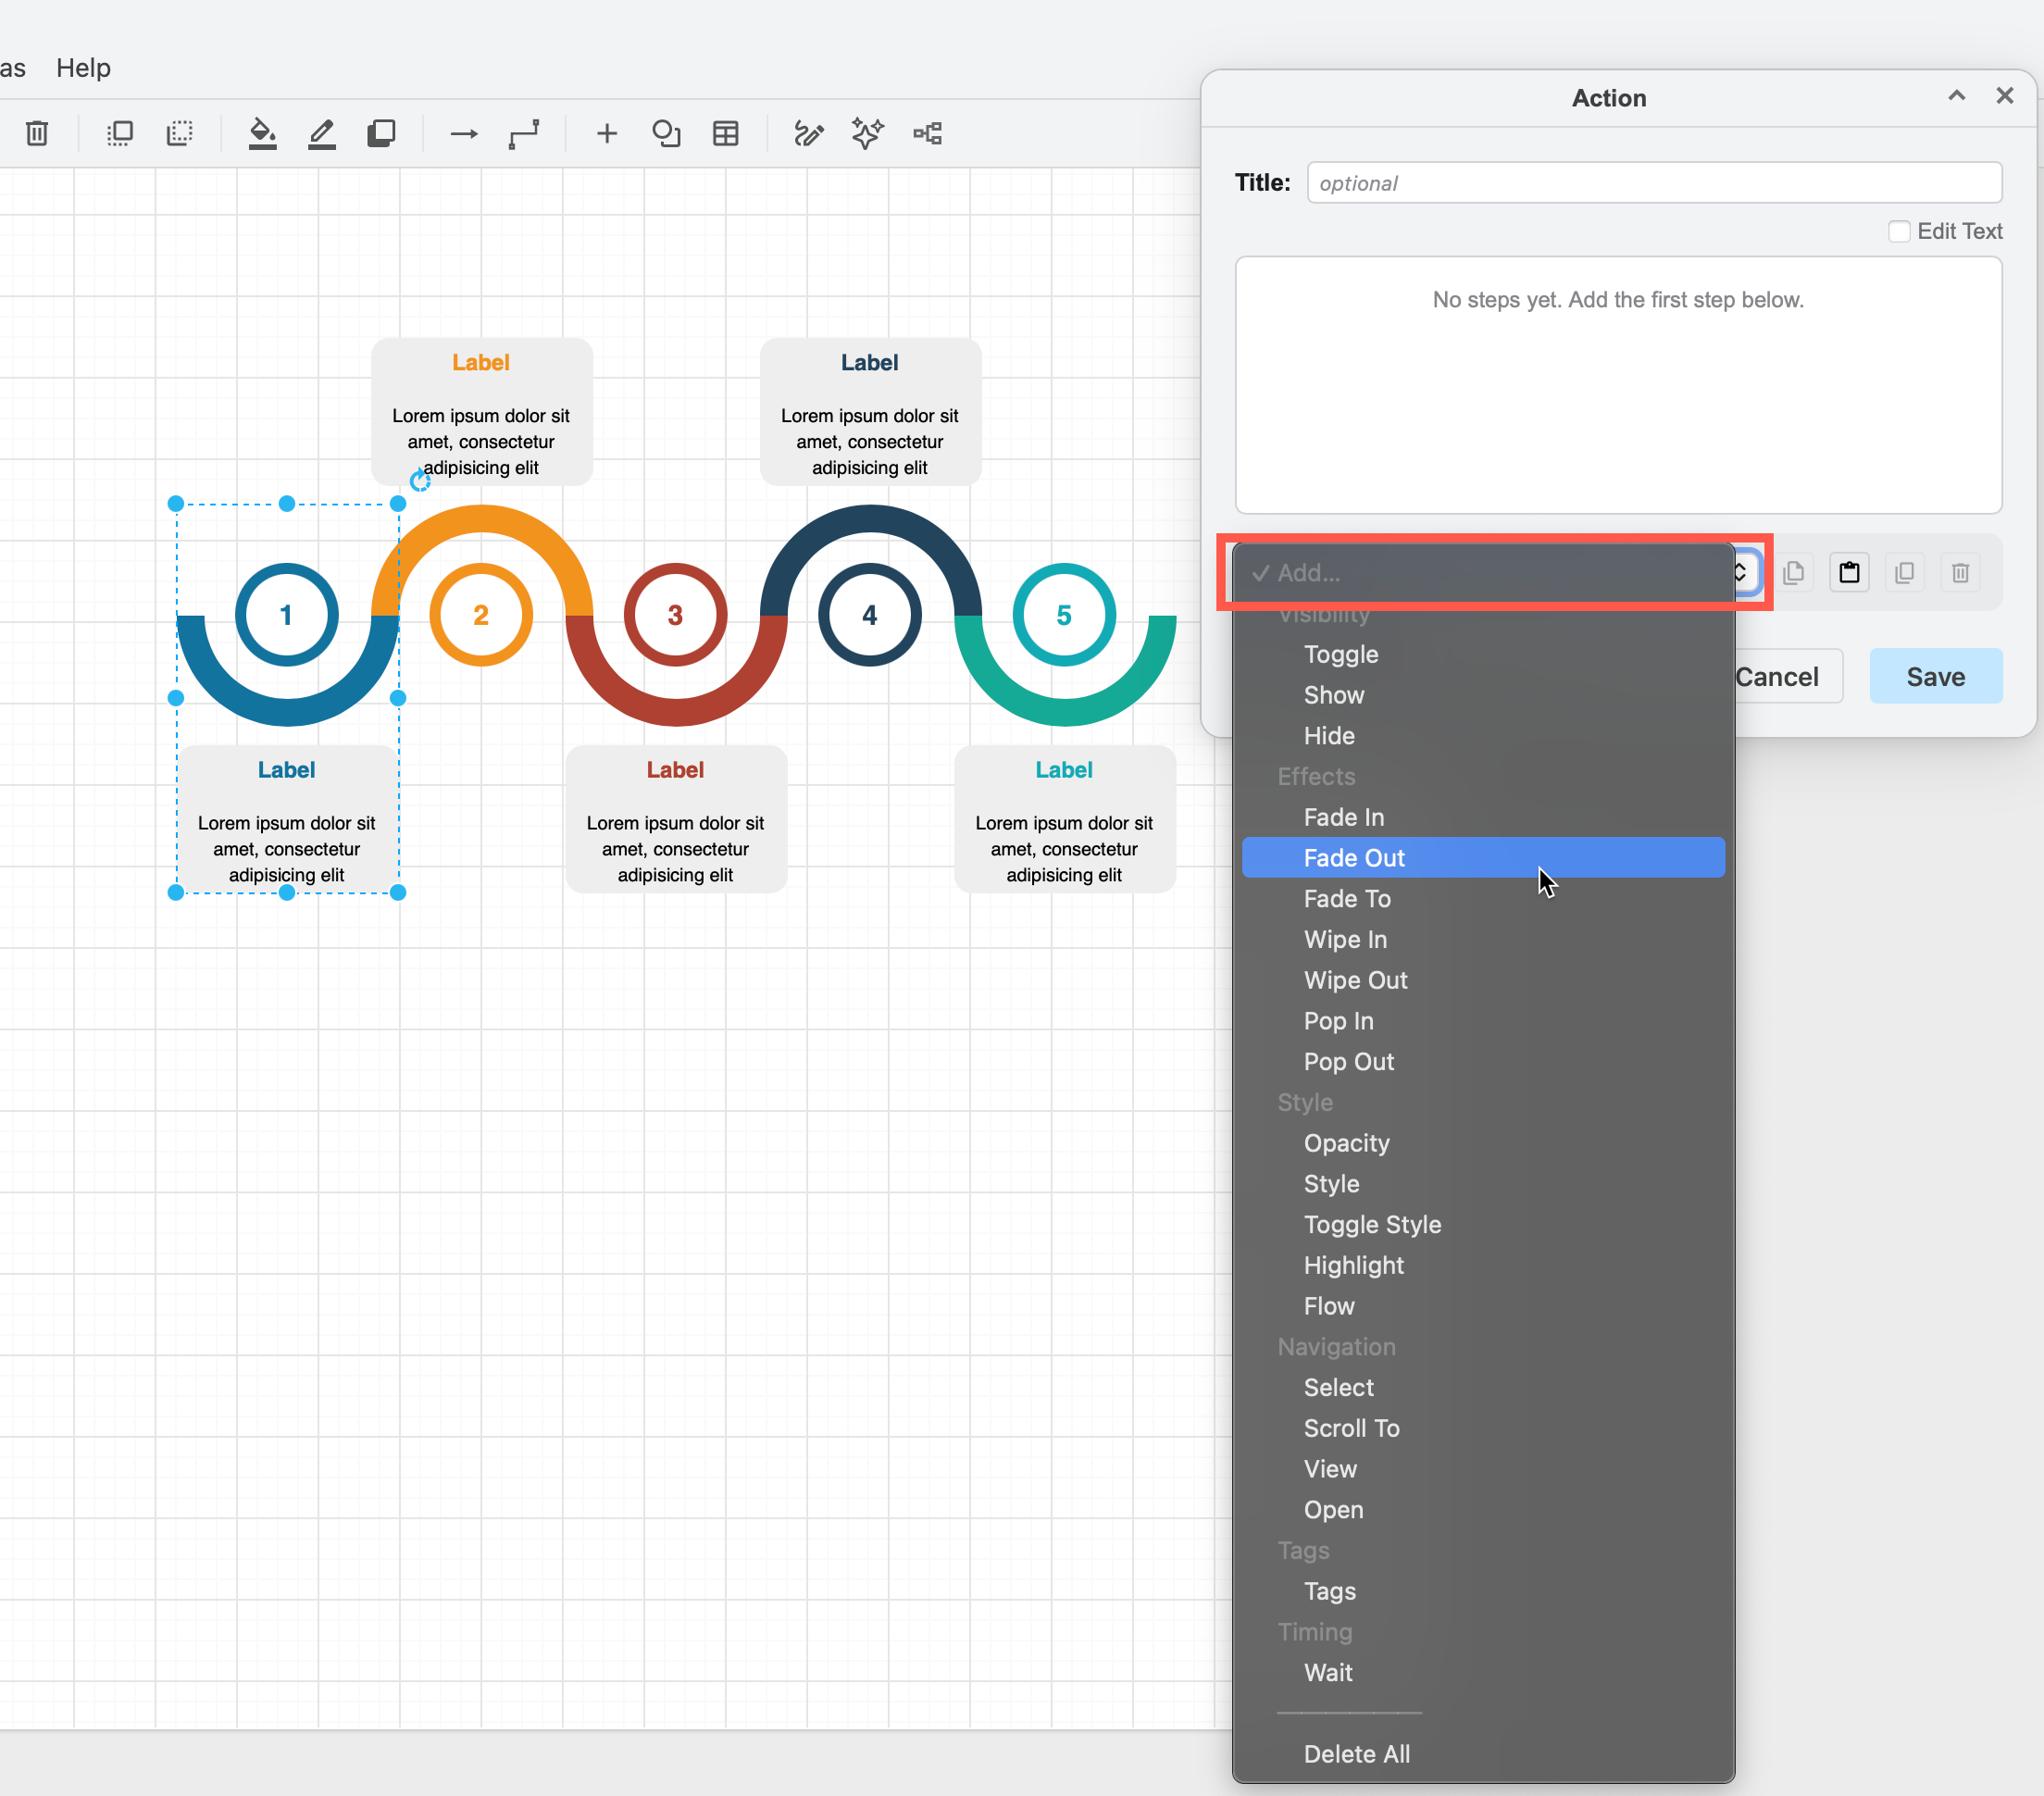
Select an action from the Add list at the bottom of the dialog. In this example, all shapes are faded out as the first step.
Add more steps to the animation. Here, a group of shapes has been selected and the Fade in action added. You need to explicitly include the group's Descendents to animate them with the group. All compound shapes such as swimlanes, layout shapes, tables and groups need to have Descendents selected for their children to be included in the action.
Select multiple shapes, and choose Use selected shapes from the Cells list of an action to apply that step to those shapes.
Apply animations to layers or tags: You can also apply actions to all the cells on selected Layers and Tags instead of individually including each shape, connector or group in the Cells list. For example, this animation will Highlight the cells on the Release and Release Fixes layer for 1000ms when the gitflow diagram is opened in the lightbox viewer or presentation mode.
Tip: You can select cells to be Excluded from each action, even if they exist on the selected layers or with the selected tags that the action includes (see the Excluded section above).
See all of the effections you can add to a custom link
Preview an action
To preview the animation action (only that particular action), click on the Play icon to the right of the action. To preview the entire animation series, click Preview at the bottom of the dialog.
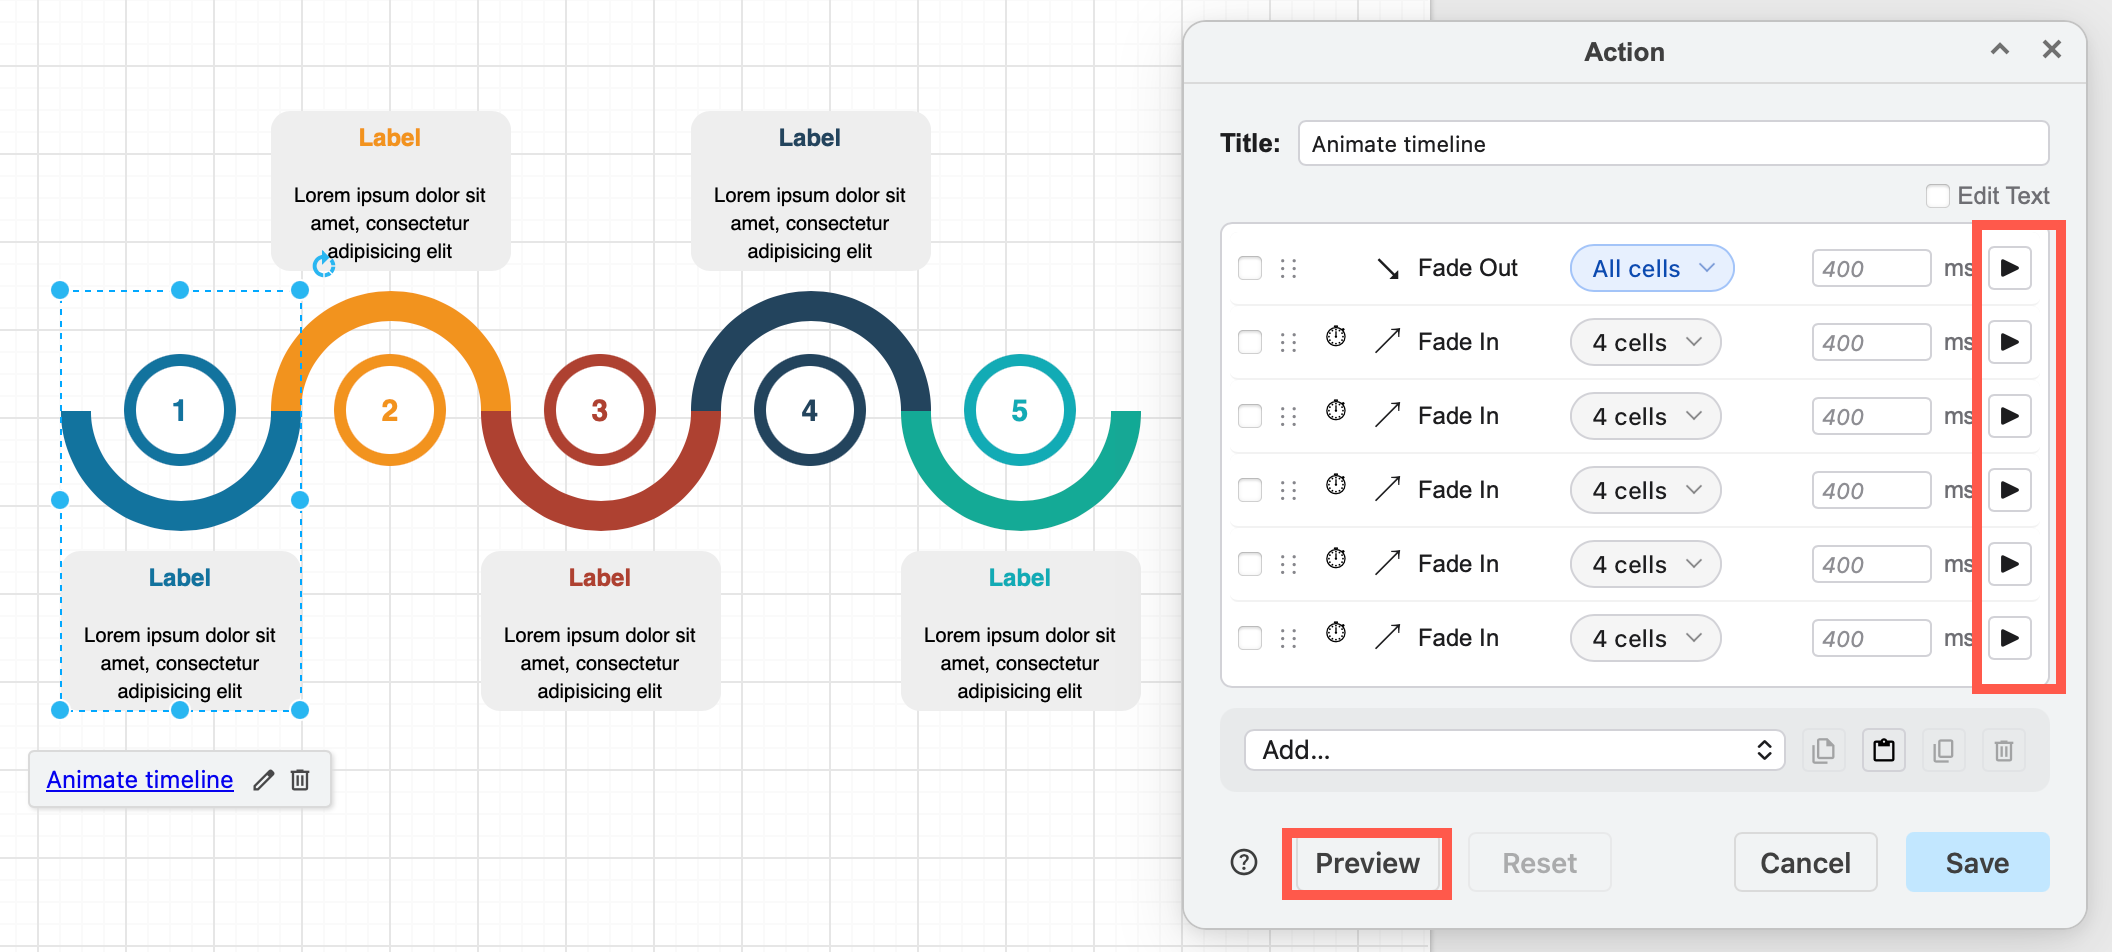
Click Reset at the bottom of the dialog to stop any running animation sequence or action step and restore the drawing canvas to its pre-preview state.
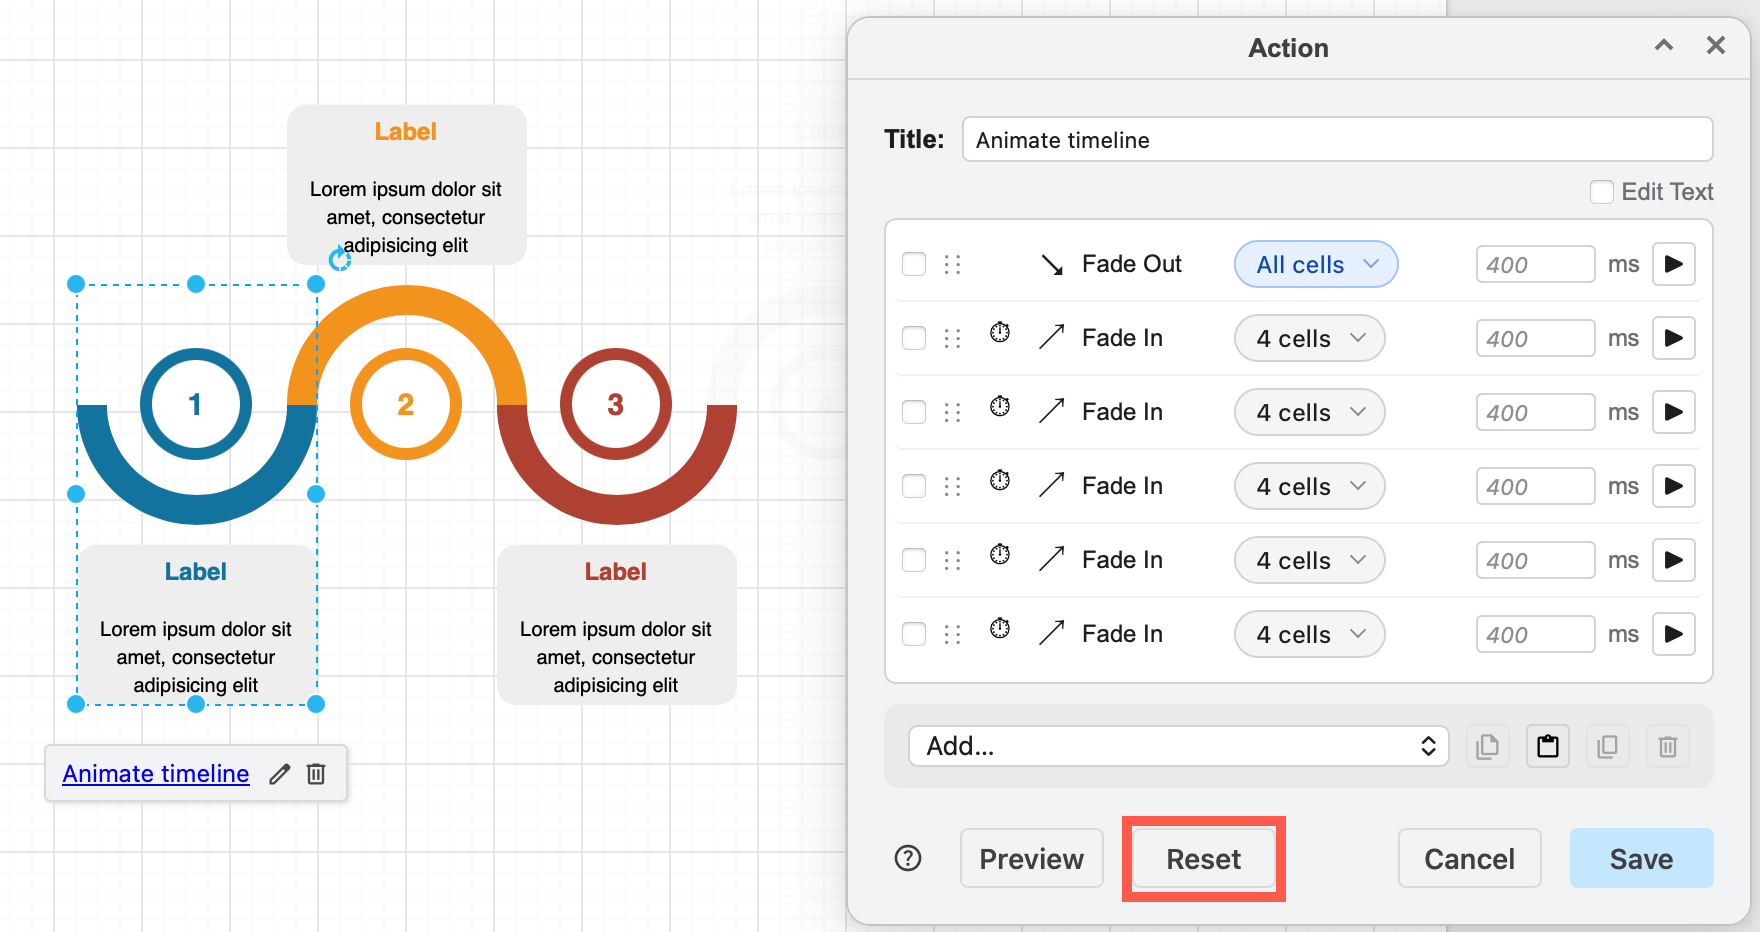
When you close the dialog with Save or Cancel, any running animation preview is reset automatically so you can't accidentally leave cells, tags or layers hidden, or transient styles applied to cells.
Reorder animations
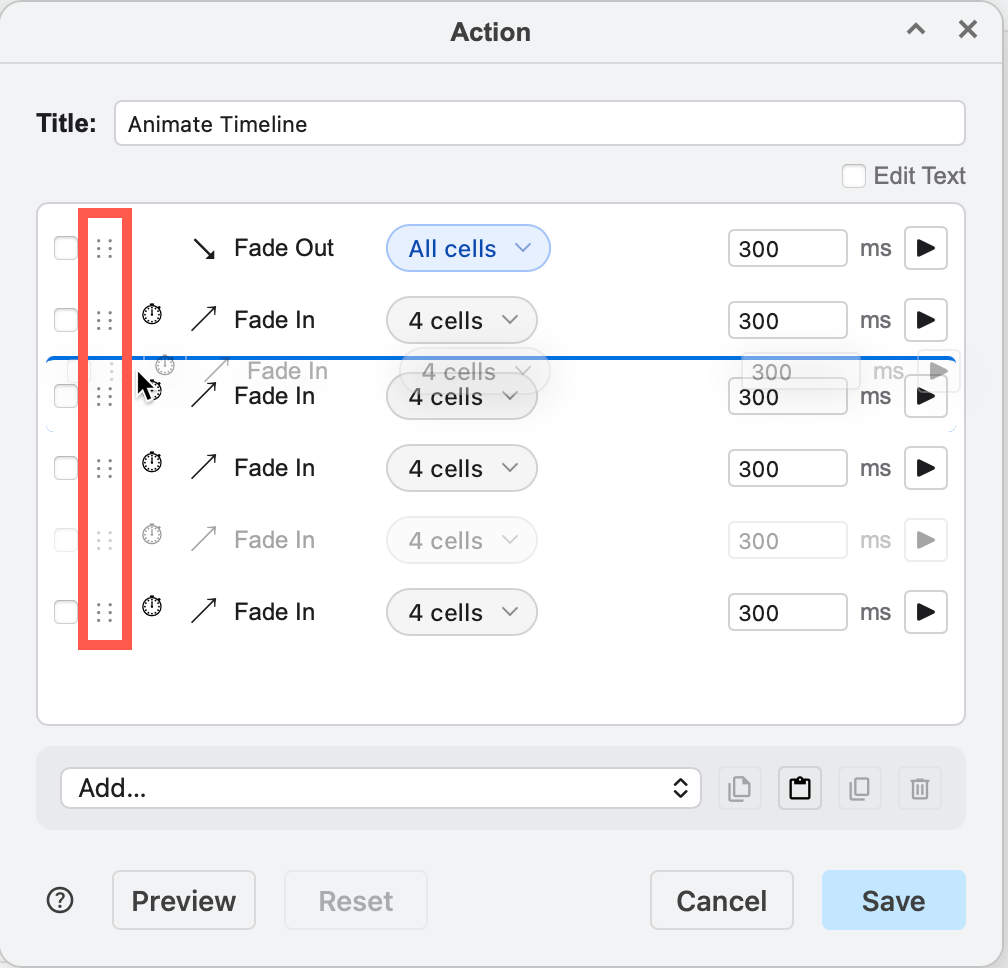
Drag the animation with the grab region (six dots) to reorder them in the list.
Change animation timing
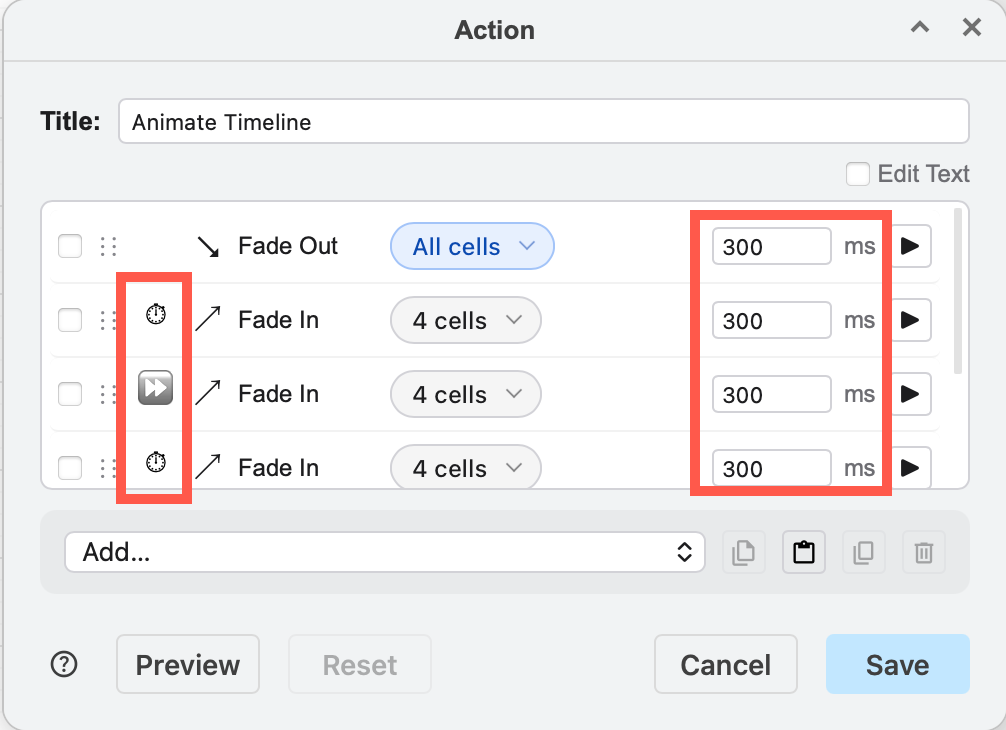
In the example below, the second step will wait 300ms before it begins. When the the second step plays, the third step will play as it has been changed to Immediate.
- Enter your own custom delay by editing the right text field.
- Click the timer/double arrow icon to toggle between Wait or Immediate.
Delete an action
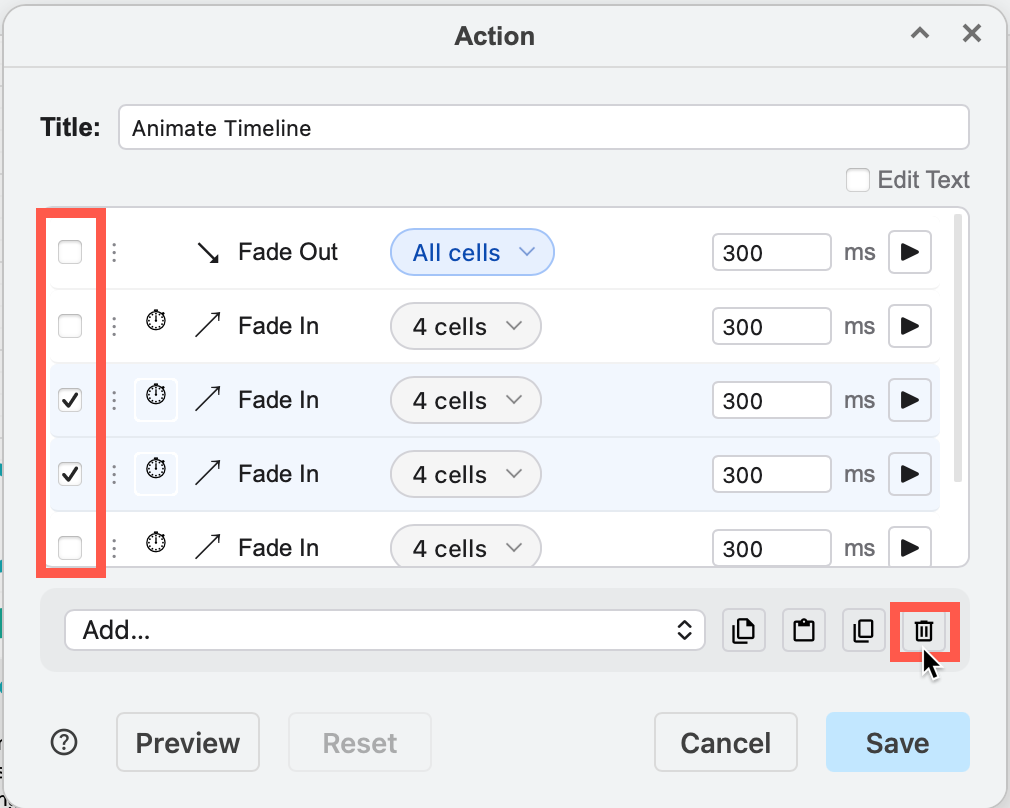
Click on the checkbox on the left to select the animation action you want to delete, then click on the Delete (rubbish bin) in the bottom right. To delete all animations, select all of the steps, then click on Delete.
Add a custom link title
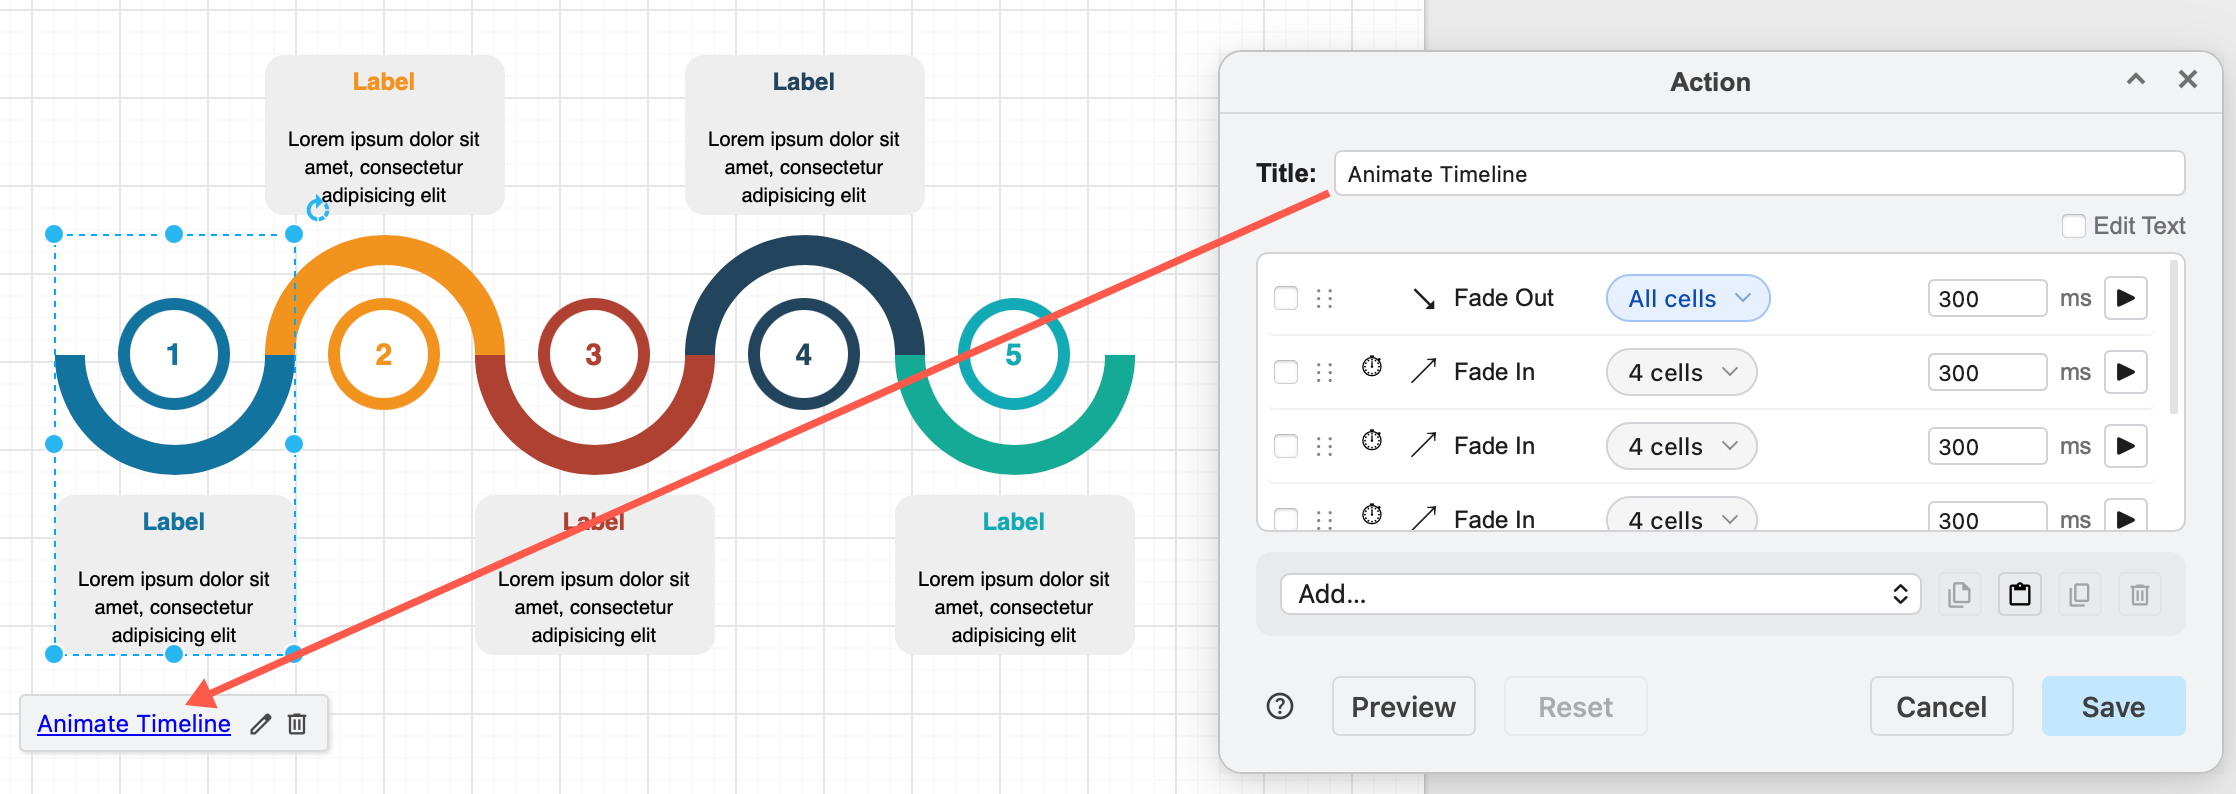
Edit the Title field at the top of the Action dialog to change the text of the custom link. Write something that makes sense to the user who will click on the custom link.
Copy an action sequence
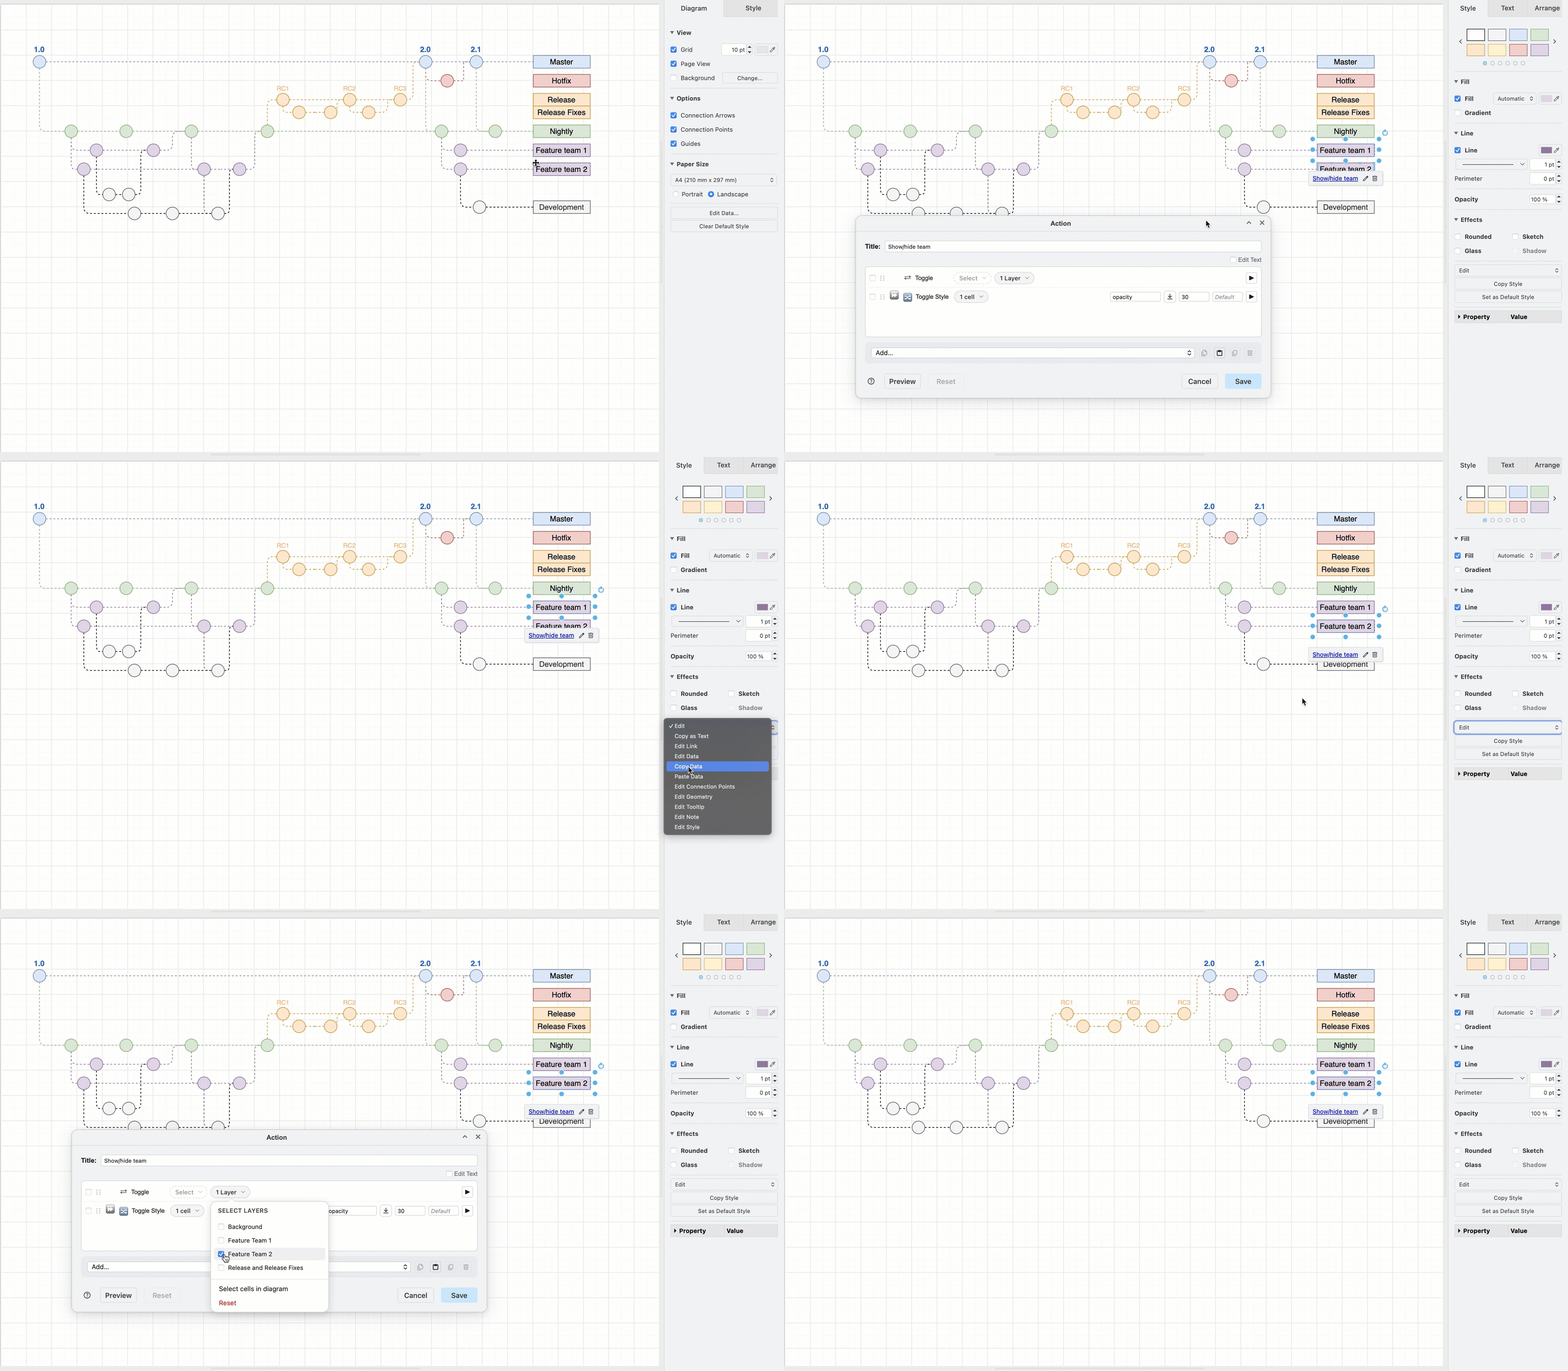
Copy a custom link two ways. Action sequences can be copied between page animations and custom links as they use the same custom action dialog.
- Use the Copy button in the custom action dialog or the page animation dialog to copy only the sequence of actions.
- Copy and paste the shape data via the Edit dropdown in the Style tab of the format panel to also copy the custom link's Title.
Custom links in the lightbox viewer and presentation mode
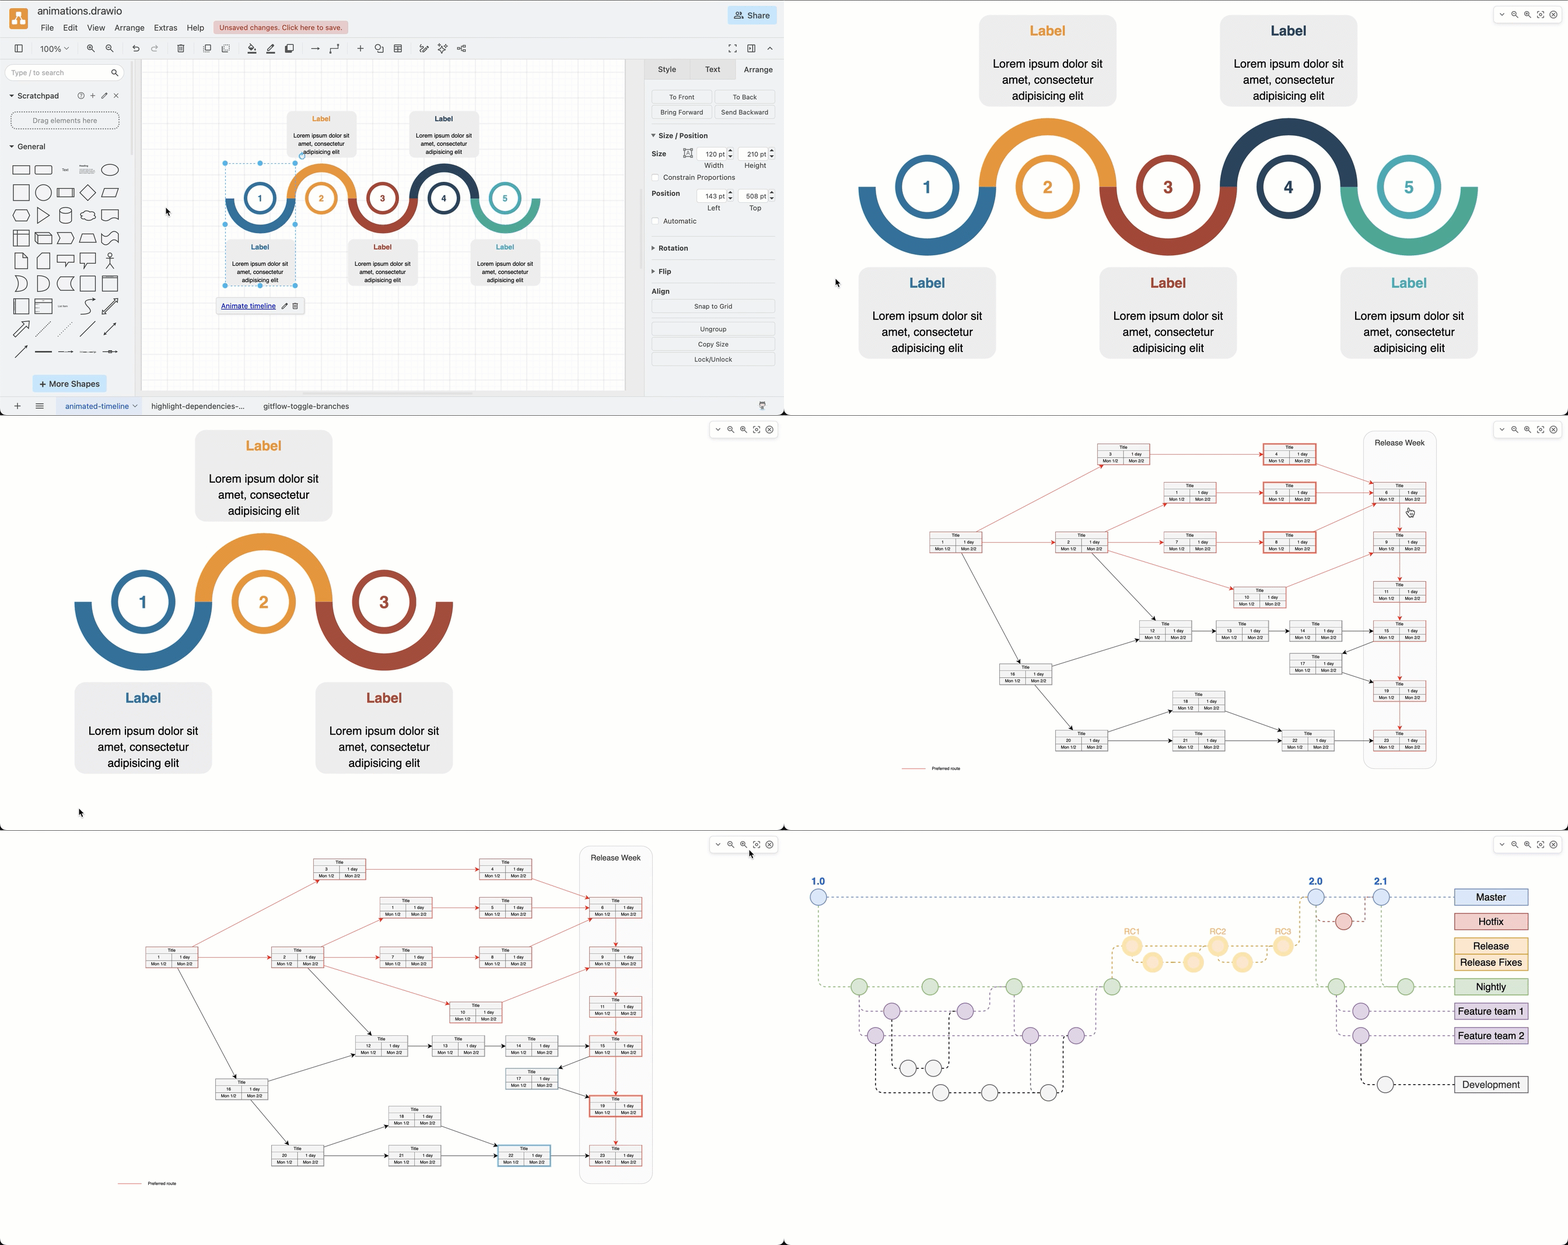
Click on the cells with custom links in the lightbox viewer or presentation mode to run their actions.
Advanced - Edit the JSON text
You can directly edit the JSON text string that describes the page animation. Select the Edit Text checkbox to switch to the JSON text editor. Change you make to this JSON description will be reflected in the dialog when you deselect the Edit Text checkbox and return to the visual editor.
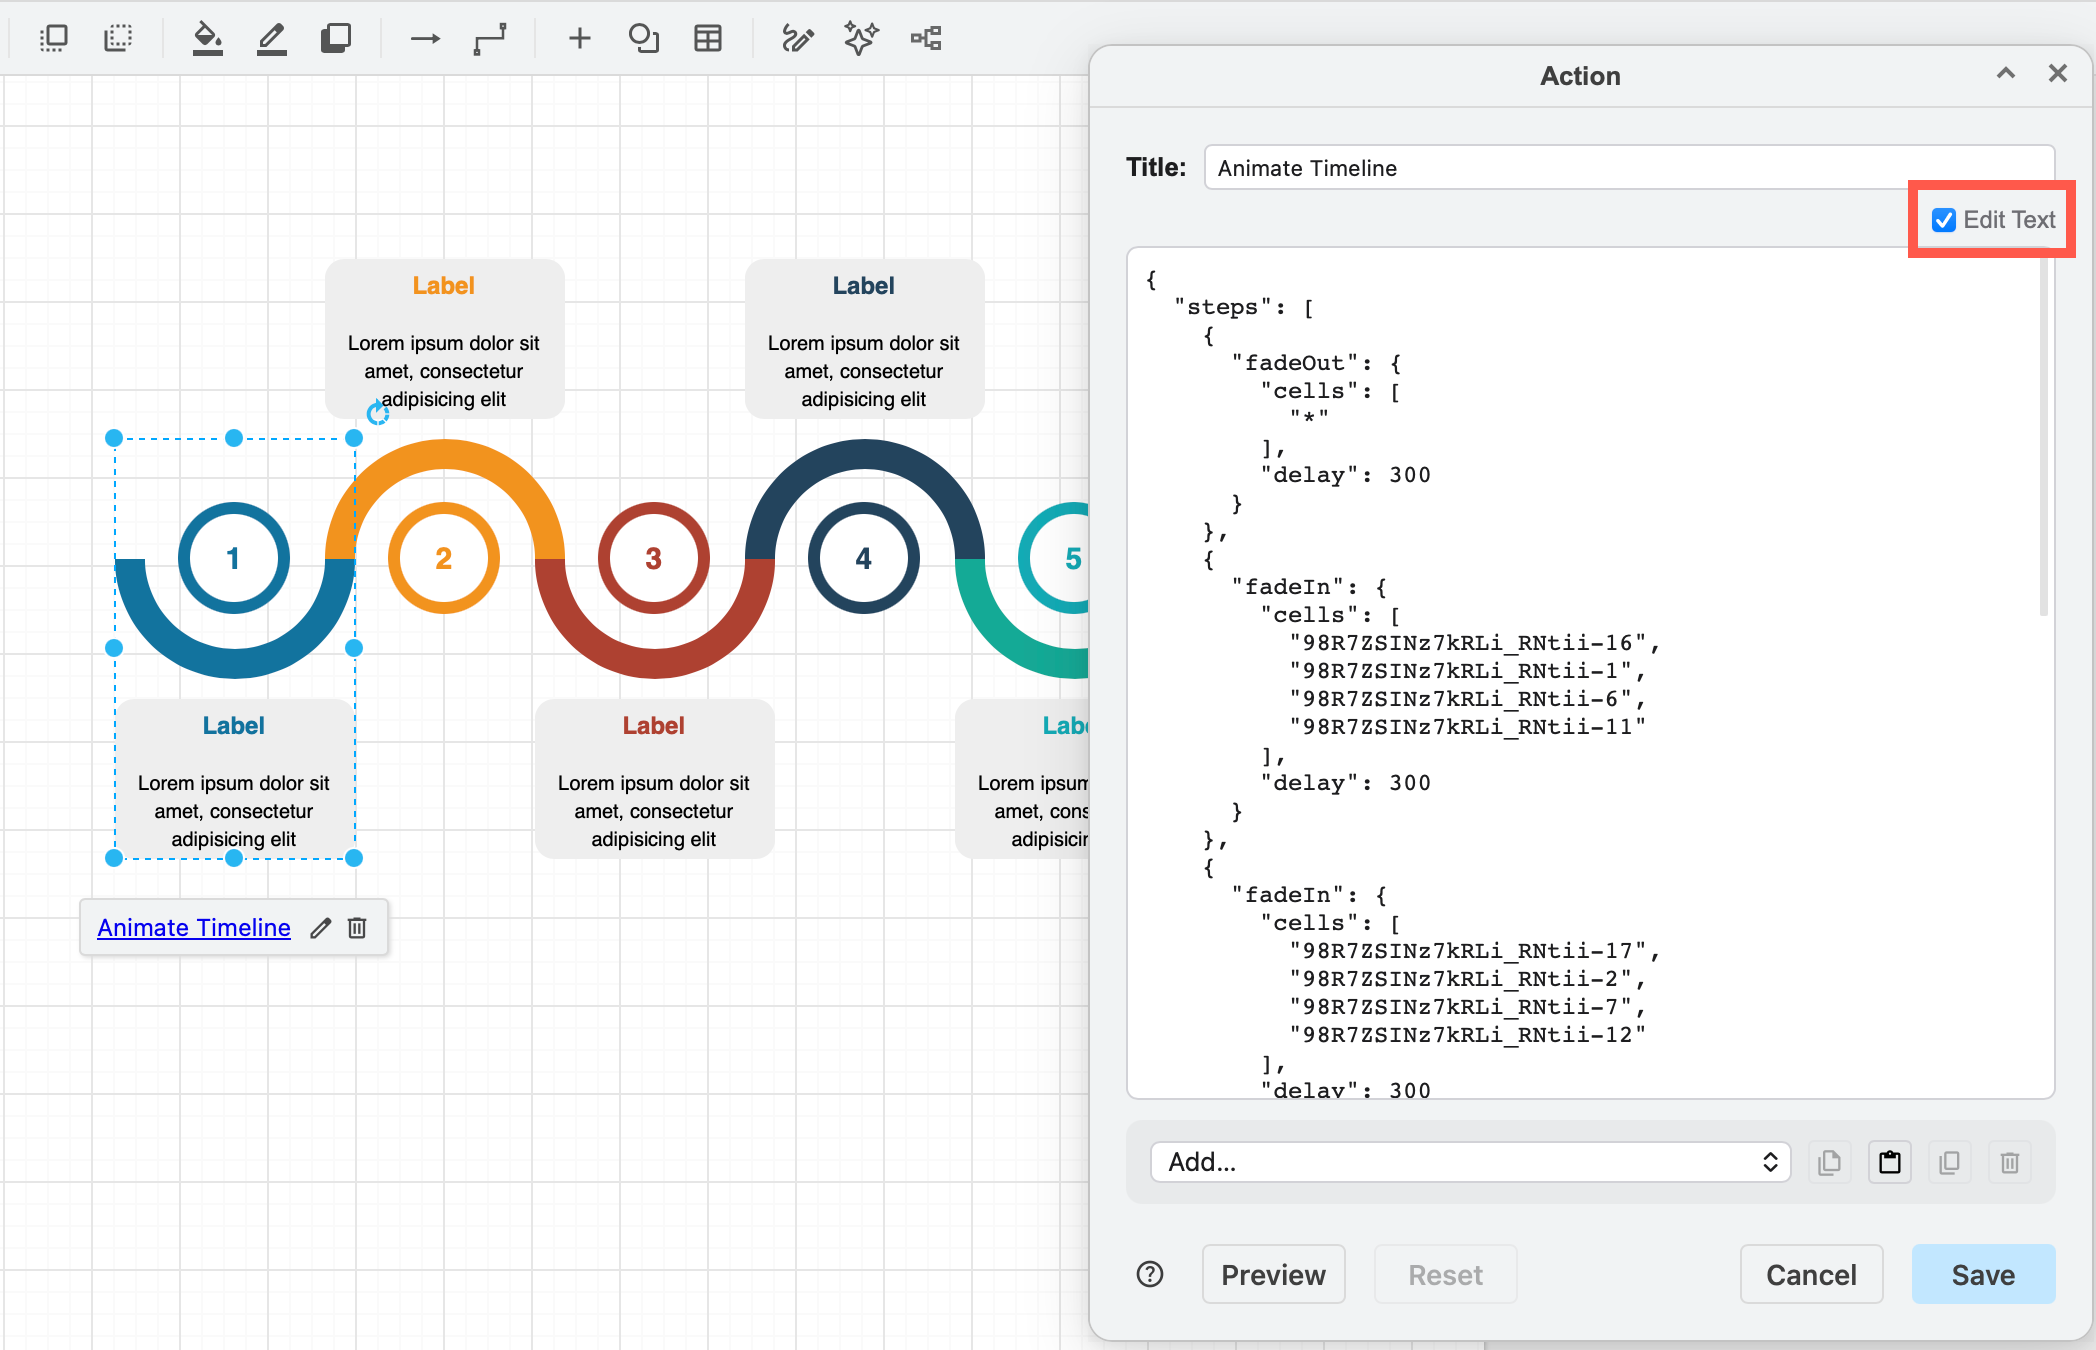
For backwards compatability, you can edit the JSON string to set a persistent effect on legacy actions: Show, Hide, Toggle, Set Style, Toggle Style.
Find a cell ID
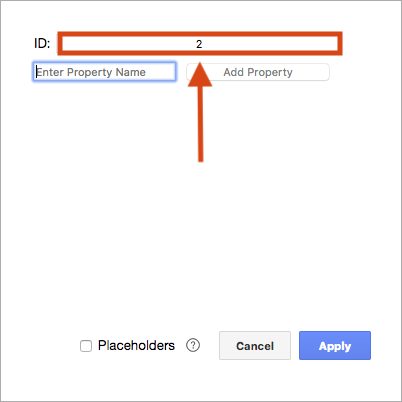
Each animation action is applied to a cell ID. Each shape, connector, group, layer, diagram page and tag has its own unique cell ID.
Shape/connector/group: Right-click on a cell and select Edit Data, or select the cell and press Ctrl+M or Cmd+M.
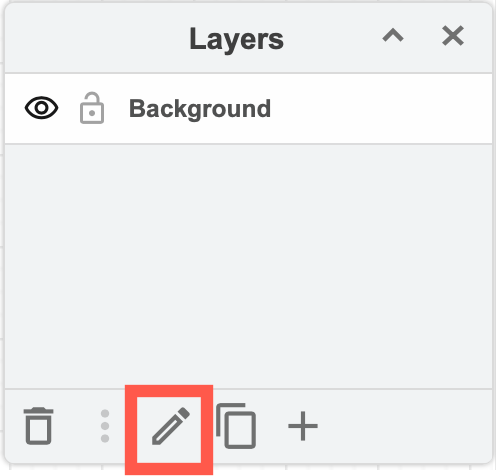
Layer: Open the Layers dialog (View > Layers), select the layer then select Current Layer > Edit Data from the menu (three horizontal lines). The layer's cell ID is in the top of the dialog.
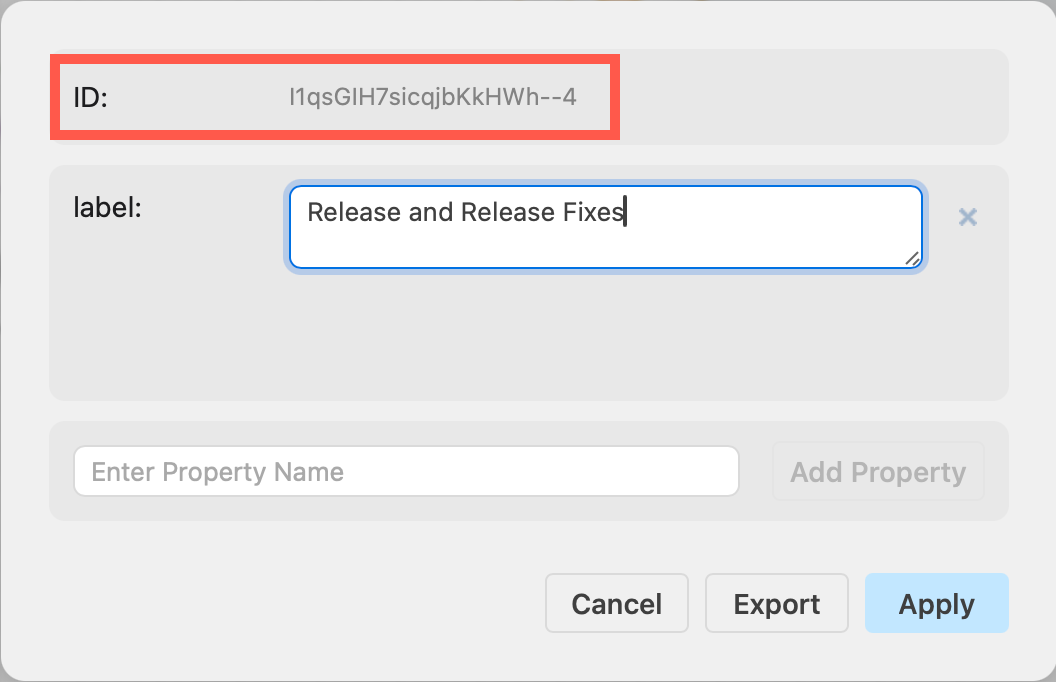
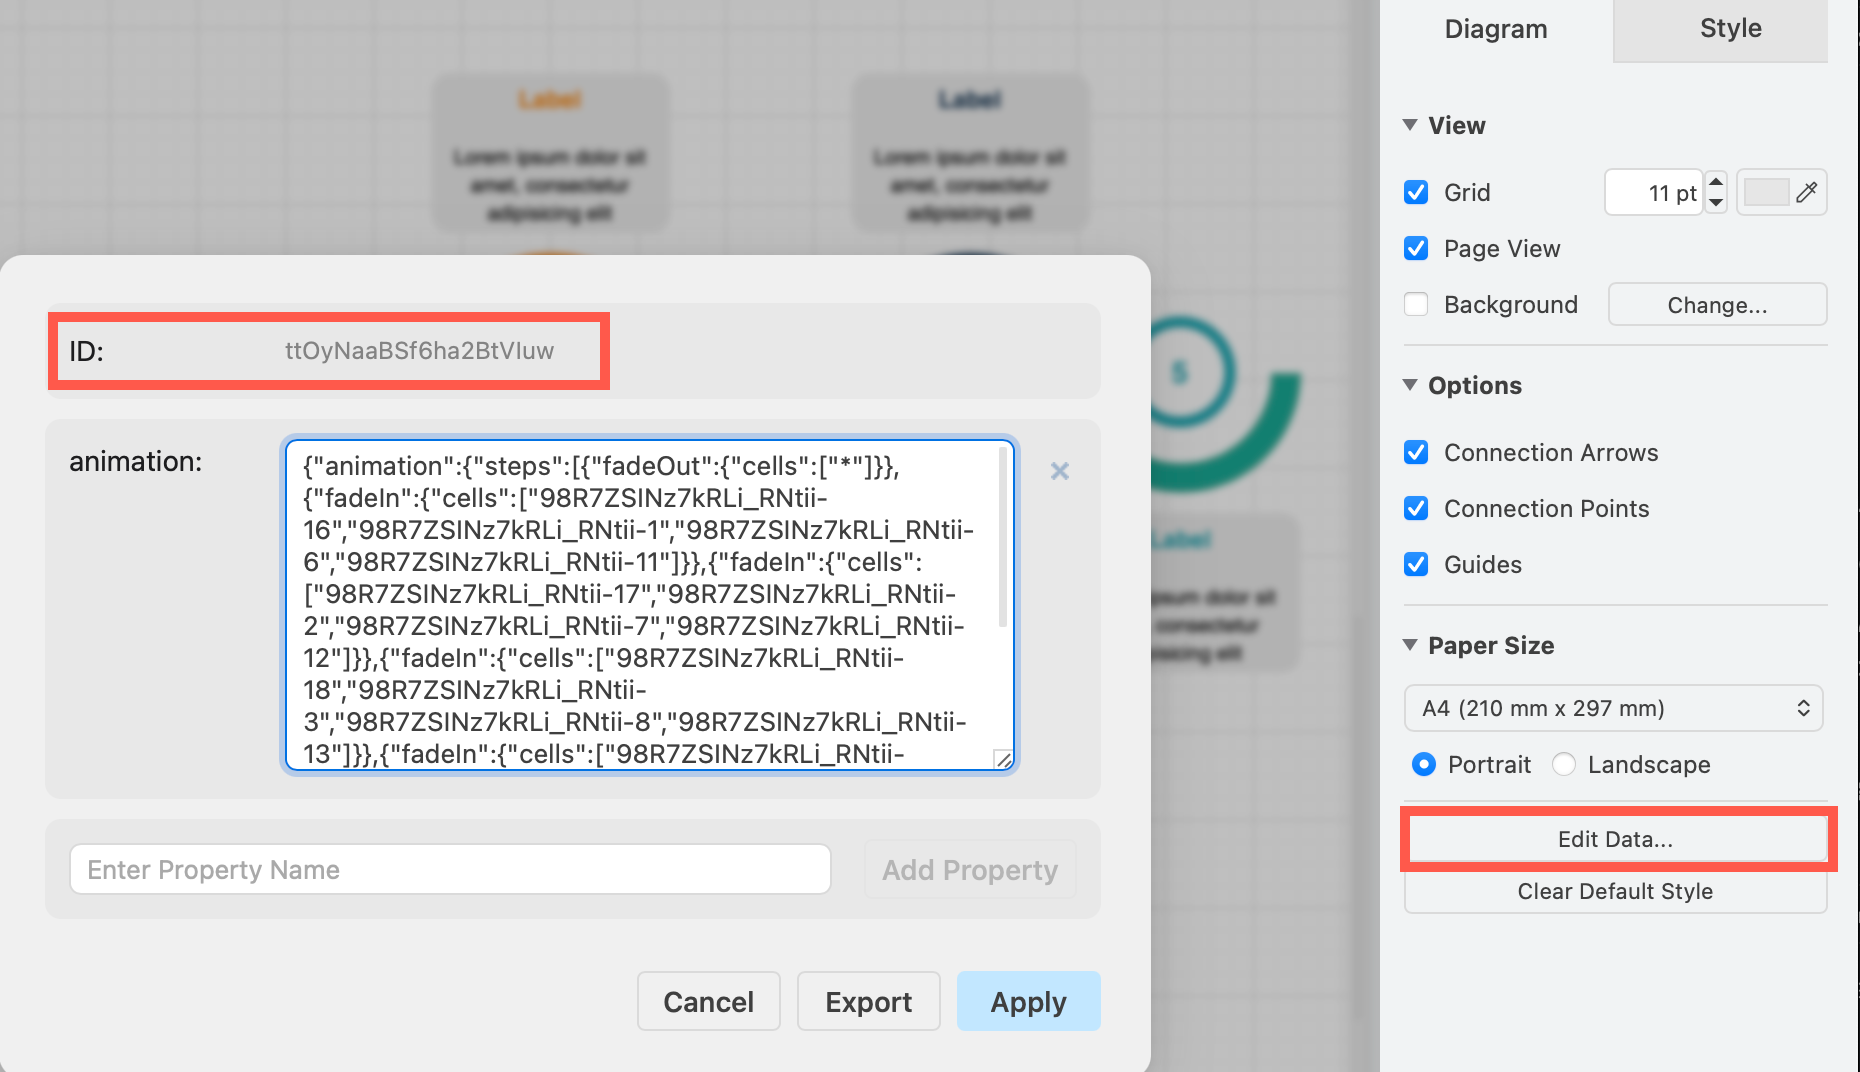
Page: Make sure nothing is selected, then select Edit Data from the Diagram tab of the format panel, or press Ctrl+M / Cmd+M. If the diagram page has any animations, you'll see these defined in the page data. The page cell ID is in the top of the dialog.
Related
See all of the different animation effects you can apply to actions.
Follow this tutorial to create an interactive gitflow diagram using layers and custom links.