Work with connectors in draw.io
Connectors are lines that connect your shapes together and may or may not have arrows at one or both ends. In a diagram, connectors provide context information, showing how the various shapes and entities in your diagram are related. Connectors are used to group related information and systems, show flow of information and control, and specify the complex relationships between functions and systems in UML diagrams.
Tip: Connectors are also known as lines or edges. Some of the properties in draw.io that affect connectors use the term 'edge' when defining connector styles.
Floating and fixed connectors
There are two main types of connectors in draw.io.
- Floating connectors move around the perimeter of the shape, taking the shortest route between the source and target shape, unless you manually change their path by adding waypoints.
- Fixed connectors stay attached to fixed points on your shape.
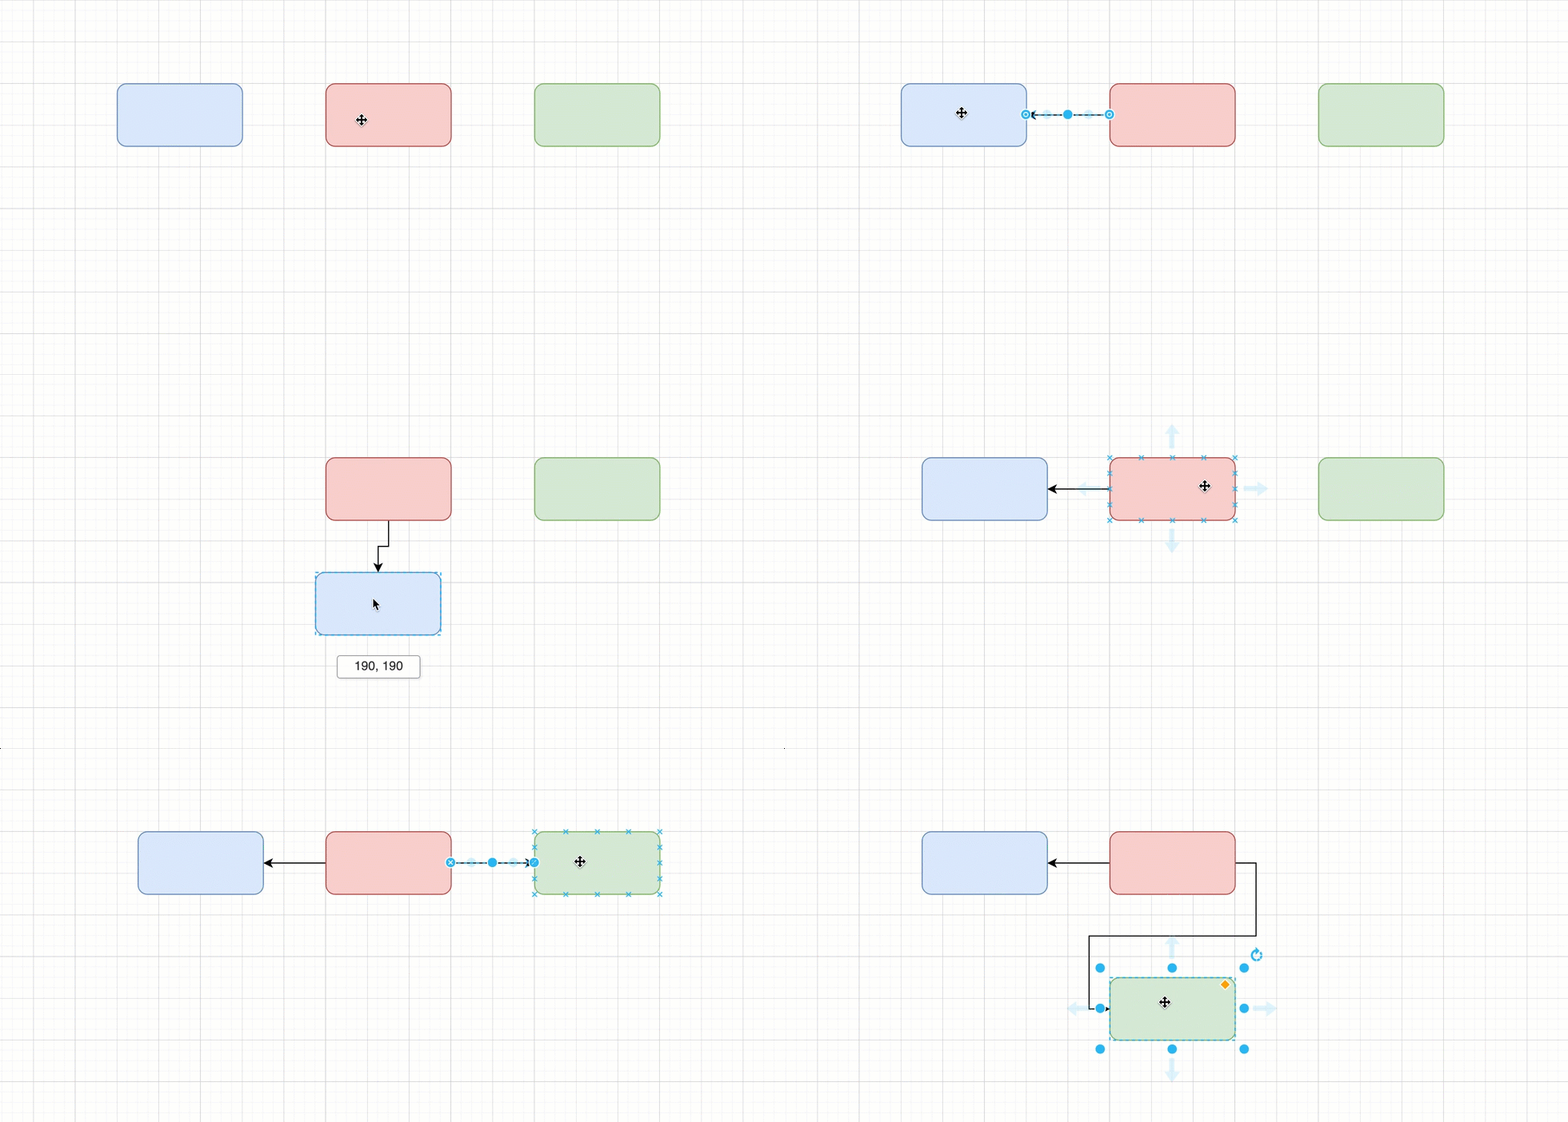
Connectors can be fixed and one end and floating at the other, or the same type of connection at both ends.
Draw a connector
While there are a number of connector shapes available in the shape libraries, it is easier to draw connectors between shapes on the drawing canvas, then style them as you need, instead of dragging and dropping them from the shape libraries.
Draw a floating connector
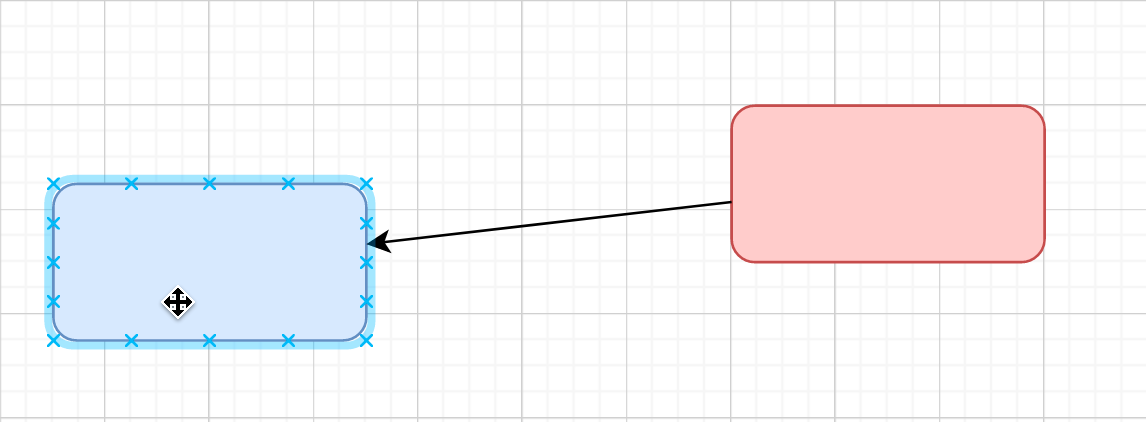
Hover over an existing shape, click and drag a connector from one of the four directional arrows and hover over the target shape. Drop the connector end when the shape outline is blue. You'll see the end of the connector turn blue with a circle to indicate it's a floating connection.
Draw a fixed connector
Hover over a shape to see the fixed connection points. Click and drag a connector from one of these points - a cross highlighted in green - and hover over the target shape. Drop the connector end over a fixed connection point when it is highlighted in green. You'll see the end of the connector turn green with a cross to indicate it's a fixed connection.
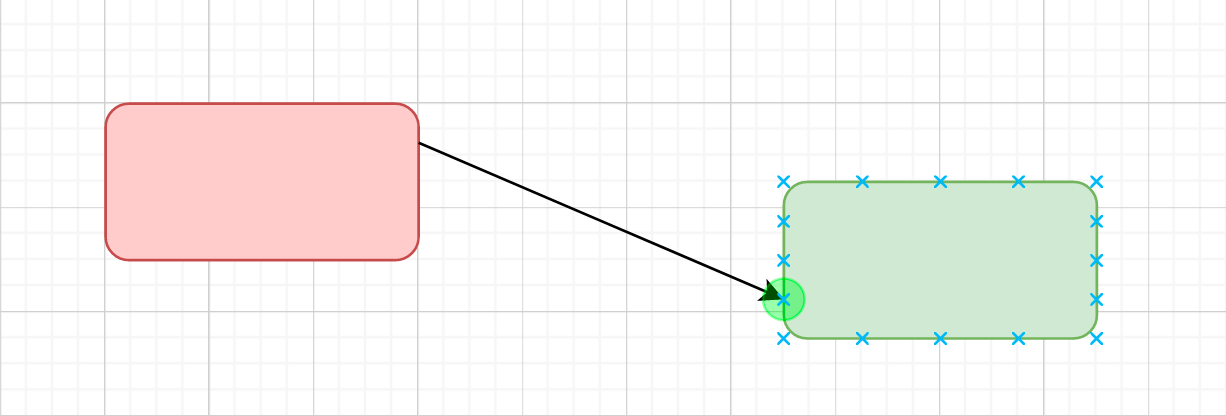
Connect to any fixed position in a shape: Hold down Alt as you drag the connector into position over the target shape, then drop the connector when you see a green outline on the shape (indicating a fixed connection point).
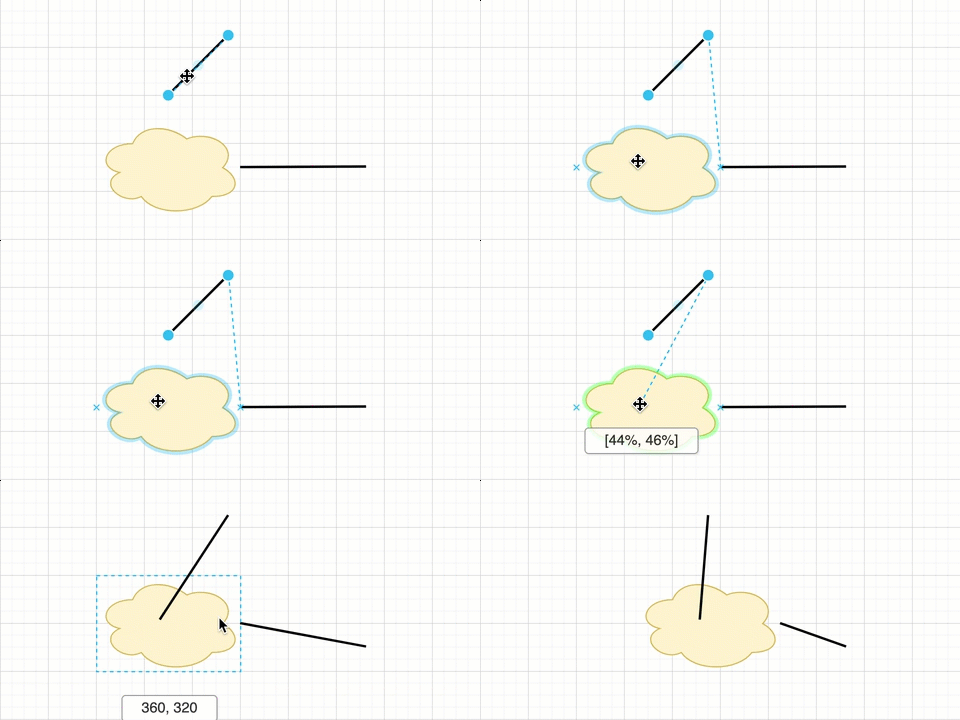
- Make floating connectors snap to the nearest fixed connection point.
- Customise a shape to have different fixed connection points.
Connect shapes quickly and automatically
If the target shape is directly above/below or to the right/left of the source shape, hover over the source shape, then click on the arrow pointing towards the target shape to quickly connect the two with a floating connector.
You can also clone and connect a shape via a direction arrow, or drag and drop a new shape from the shape libraries onto a direction arrow of an existing shape to connect them.
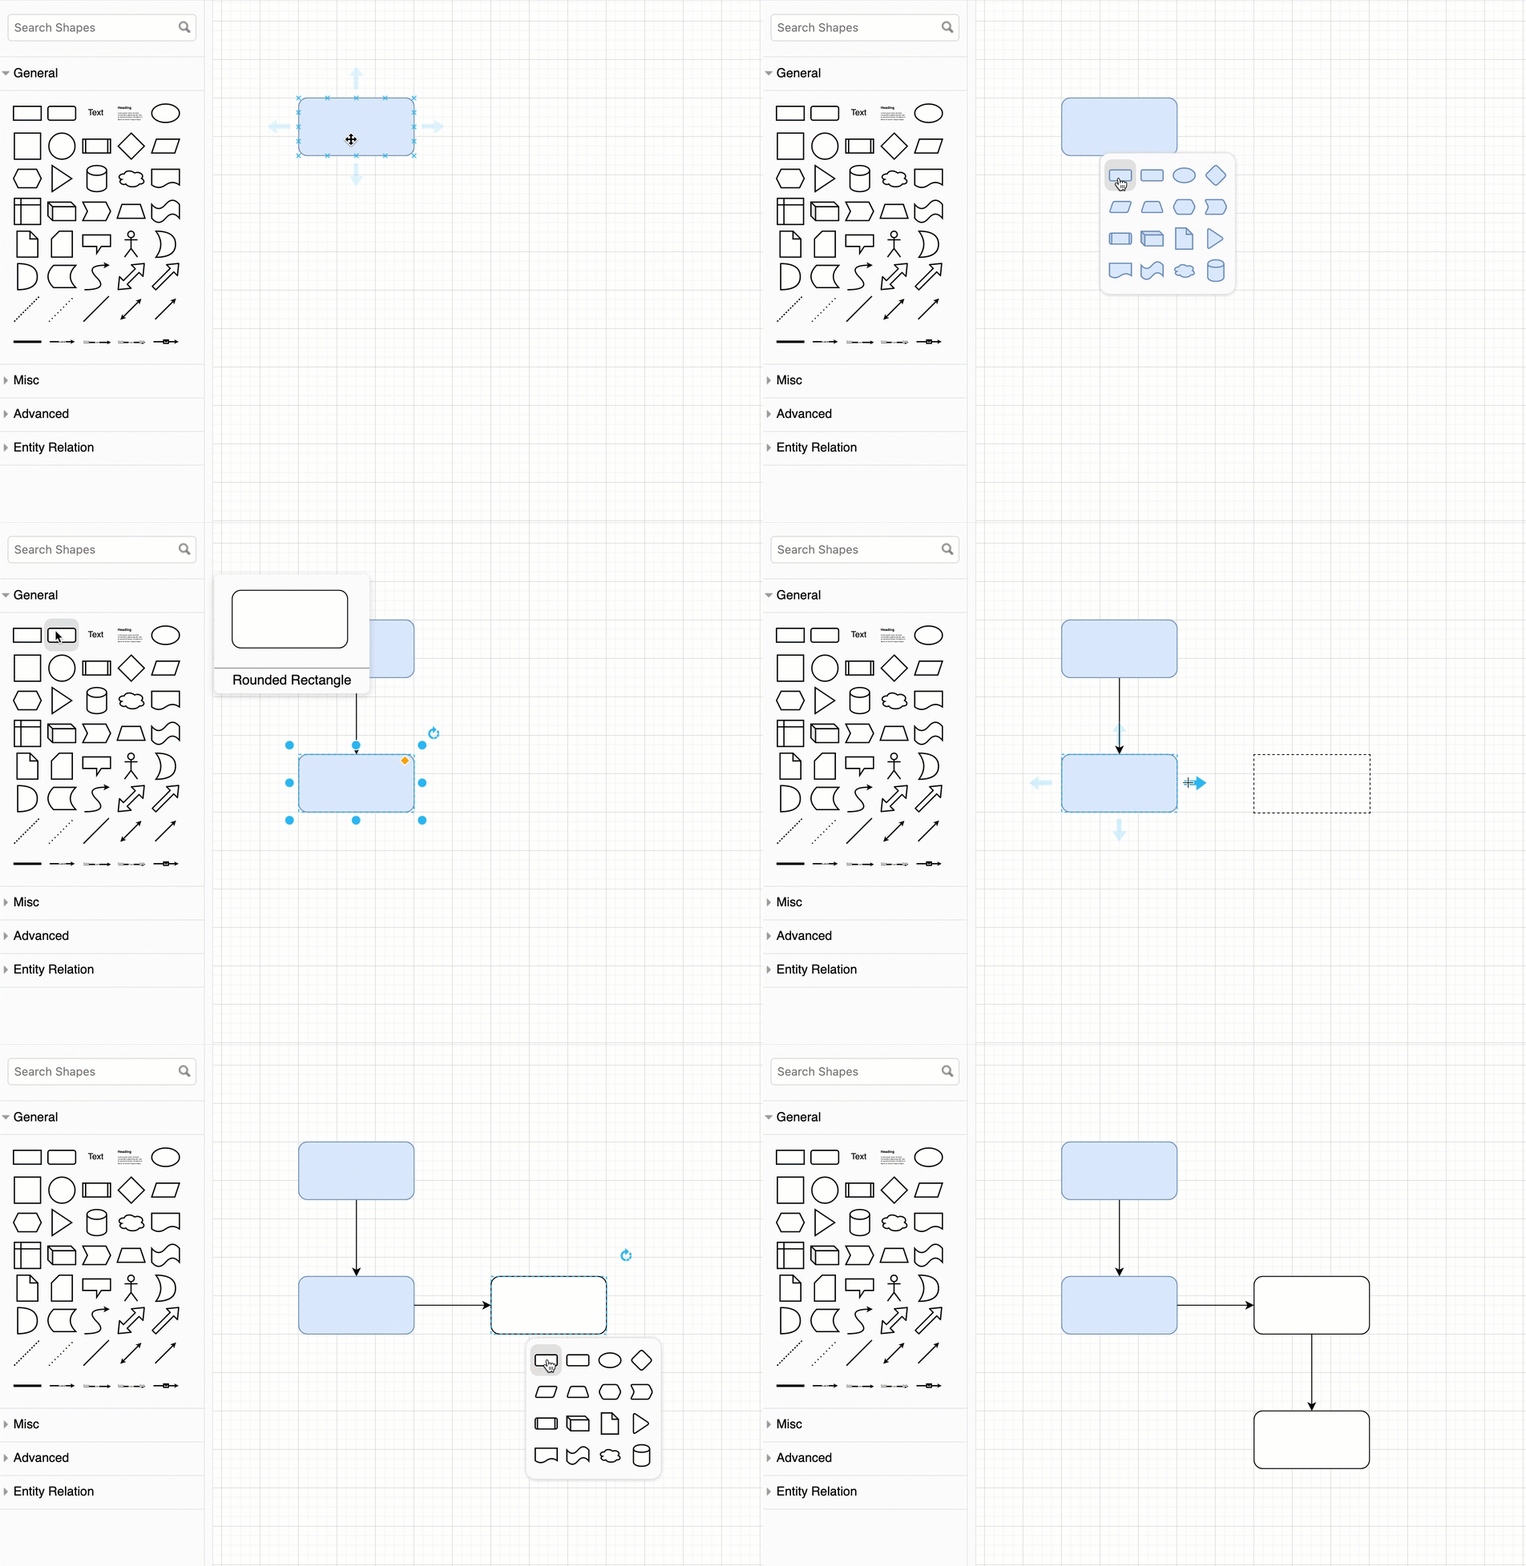
See more shortcuts for connecting shapes
Change the path of a connector
Connectors use waypoints as anchors for their route between two shapes. These are displayed as round blue grab handles. To add or remove waypoints and change the path of a connector, drag a section of the connector into a new position to make it take a different route. Waypoints are added and removed automatically as you drag them into new positions.
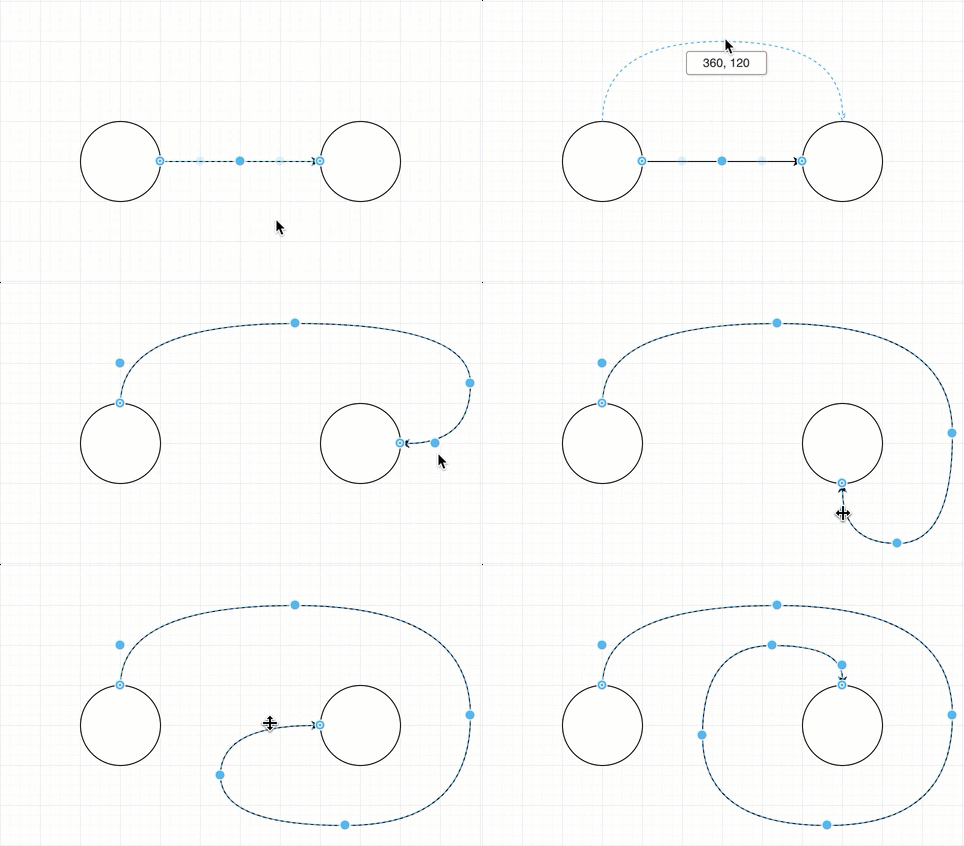
To let draw.io find a path around the other shapes for you, auto-route the connector.
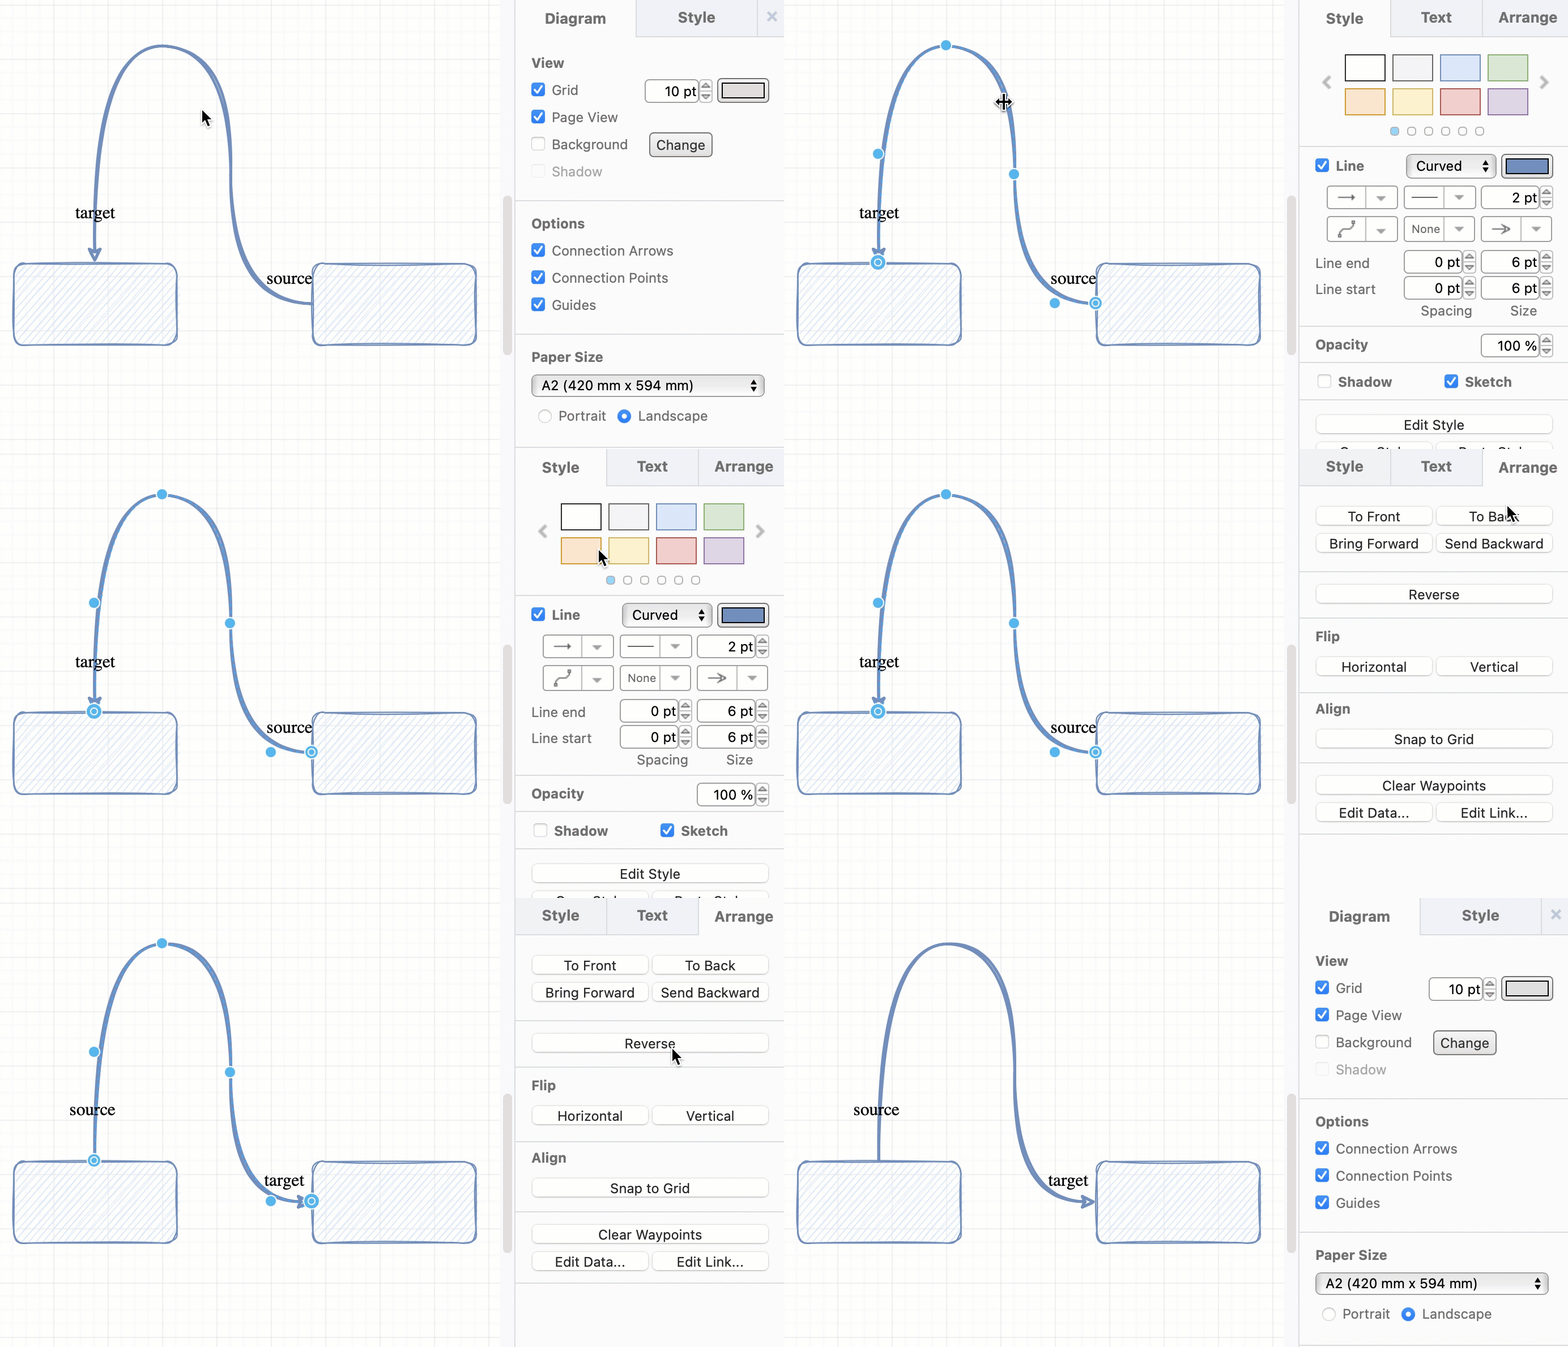
You can reverse the source and target ends of a connector (with their labels), and flip a connector horizontally or vertically via the Arrange tab in the format panel.
Join two connectors
If you need to join two connectors, use a waypoint shape from the Misc shape library.
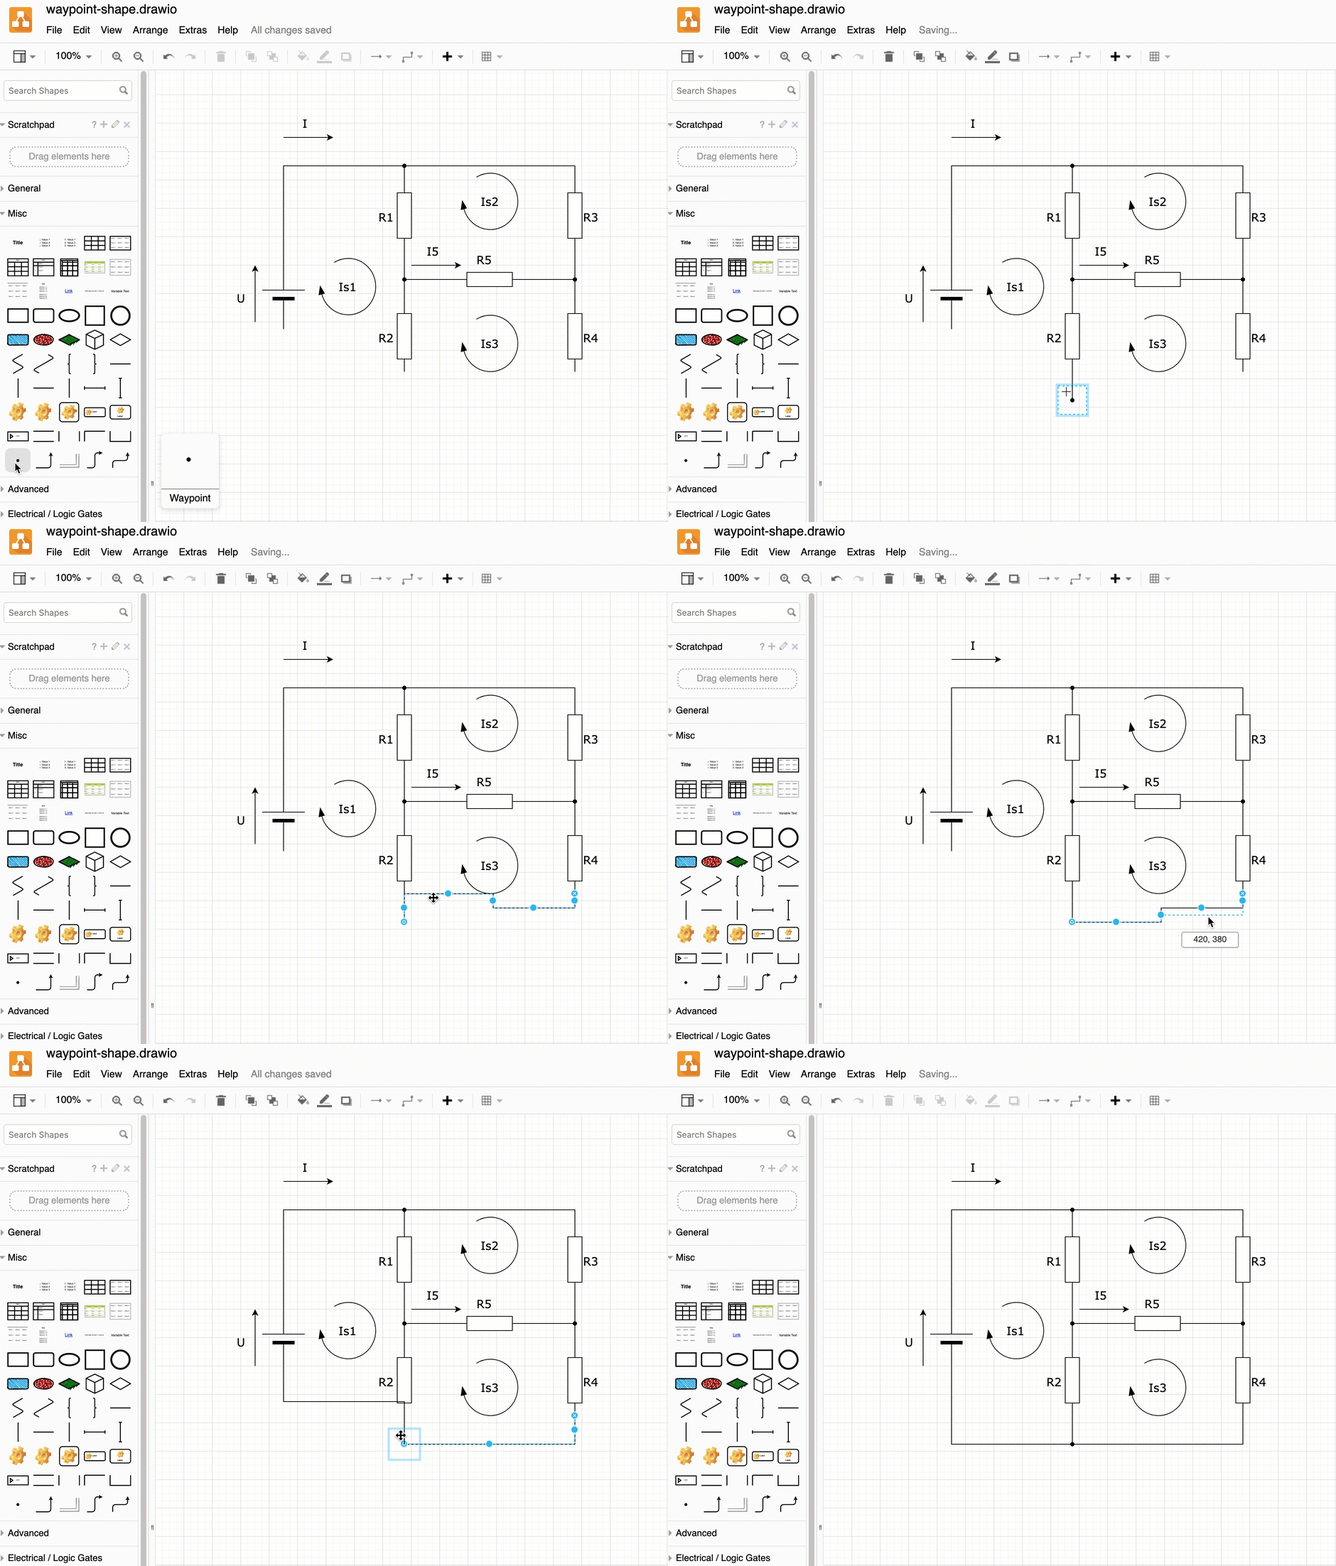
Add labels to a connector
Connectors can have three labels - one in the middle, and at either end. Double click on the connector at the location where you want to add a label.
These labels will move with the connector as you move the shapes around on the drawing canvas, but you can also drag them to another location. Select the label by clicking on it, then drag the diamond grab handle to a new position.
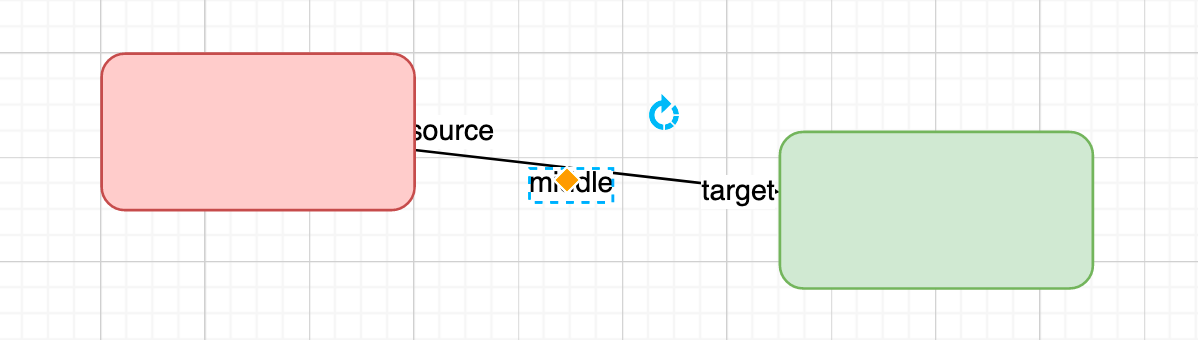
Tip: When you reverse a connector, the labels at the source and target ends are also swapped.
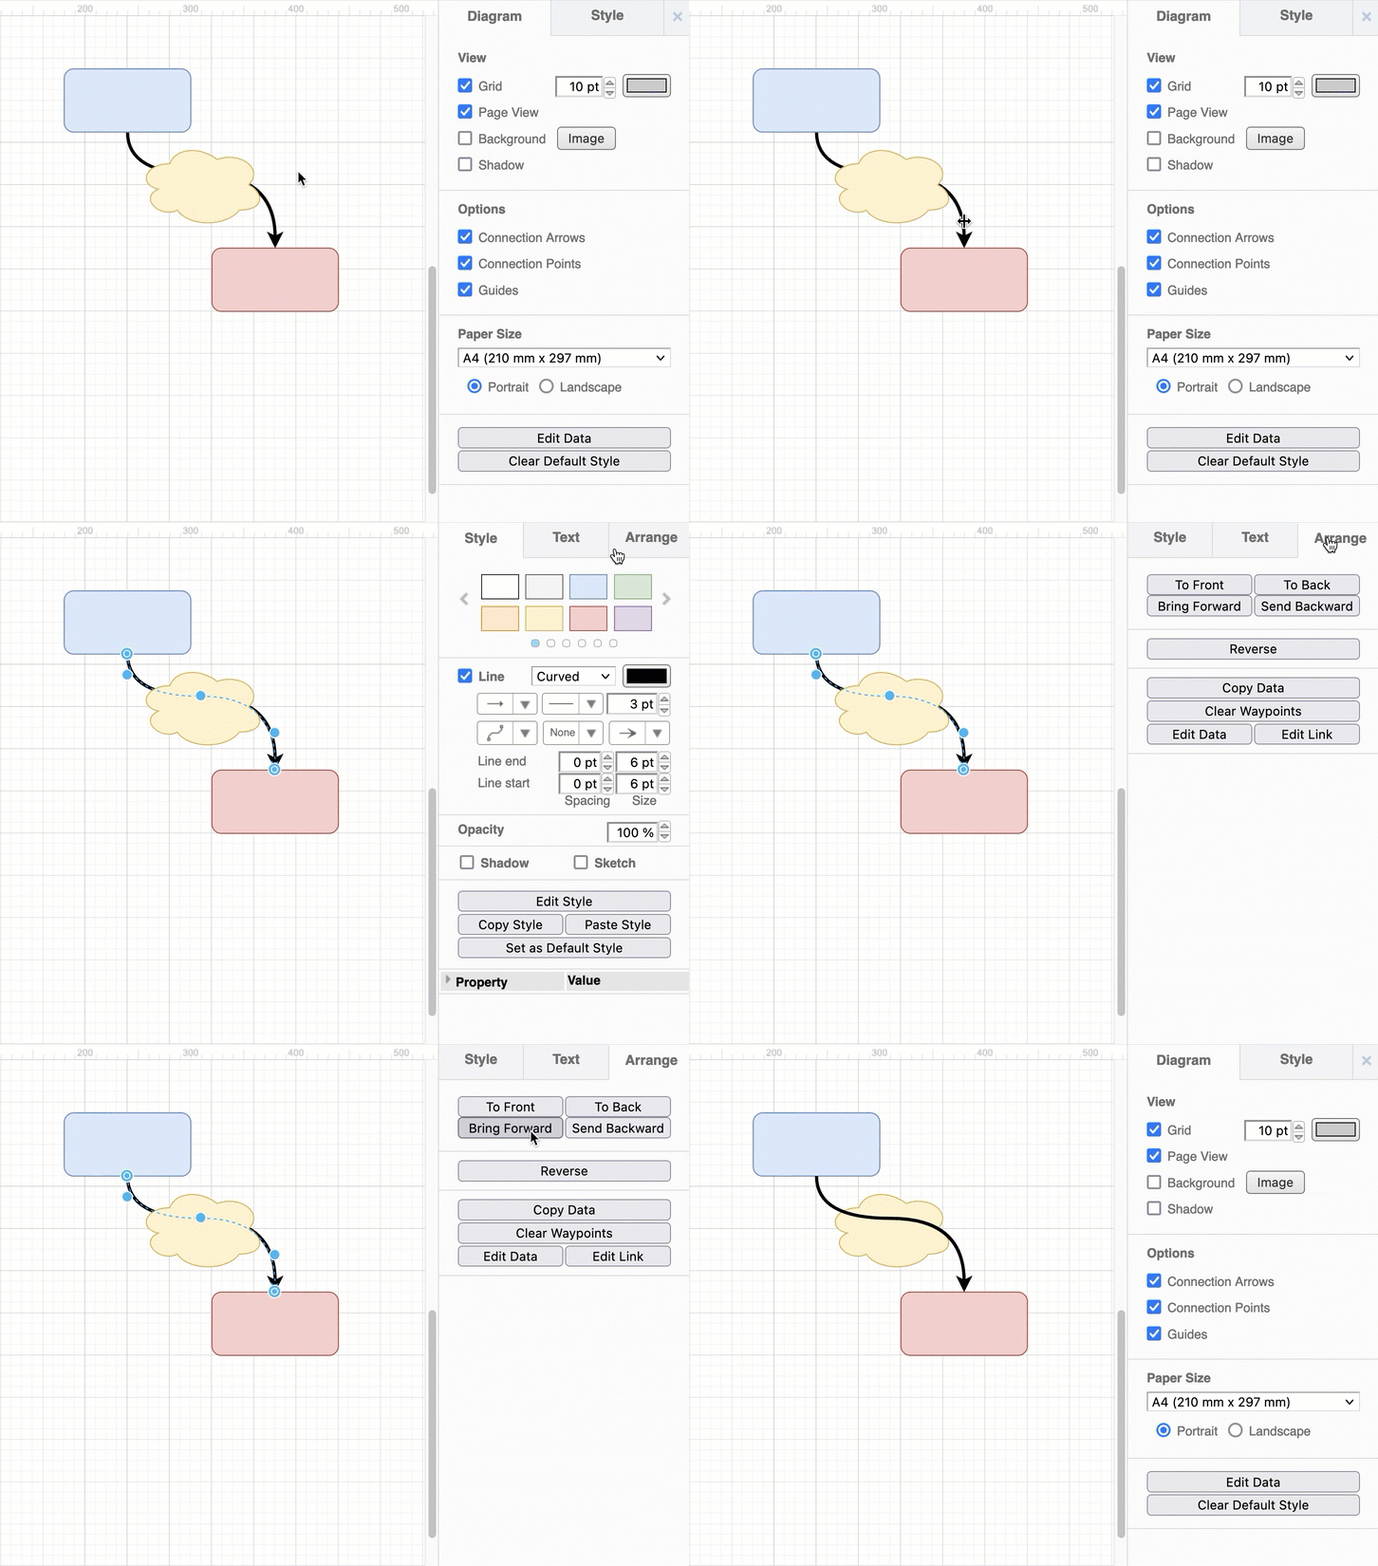
Move connectors in front of or behind shapes
- Select one or more connectors.
- Click To Front or To Back to send them directly in front of or behind all shapes and connectors on that layer, or to move them one step, click Bring Forward or Send Backward.
Learn more about the z-order of shapes and layers
Connector style options
There are many different ways in which you can style connectors.
- Change the line colour, opacity, width and pattern, or animate the connector to flow from source to target.
- Set bends to be sharp, rounded or curved.
- Change the automatic routing behaviour with a variety of waypoint styles.
- Add a variety of different arrow heads or technical symbols.
- Start or end the connectors outside the border of the shape, or offset it inside the shape.
- Set overlapping lines to use line jumps.
- Draw connectors in a casual sketched style, with or without a shadow.
To change a connector's style, select the connector, then use the options in the Style tab of the format panel, or the tools in the toolbar. You can also copy and paste connector styles to format your diagram quickly.
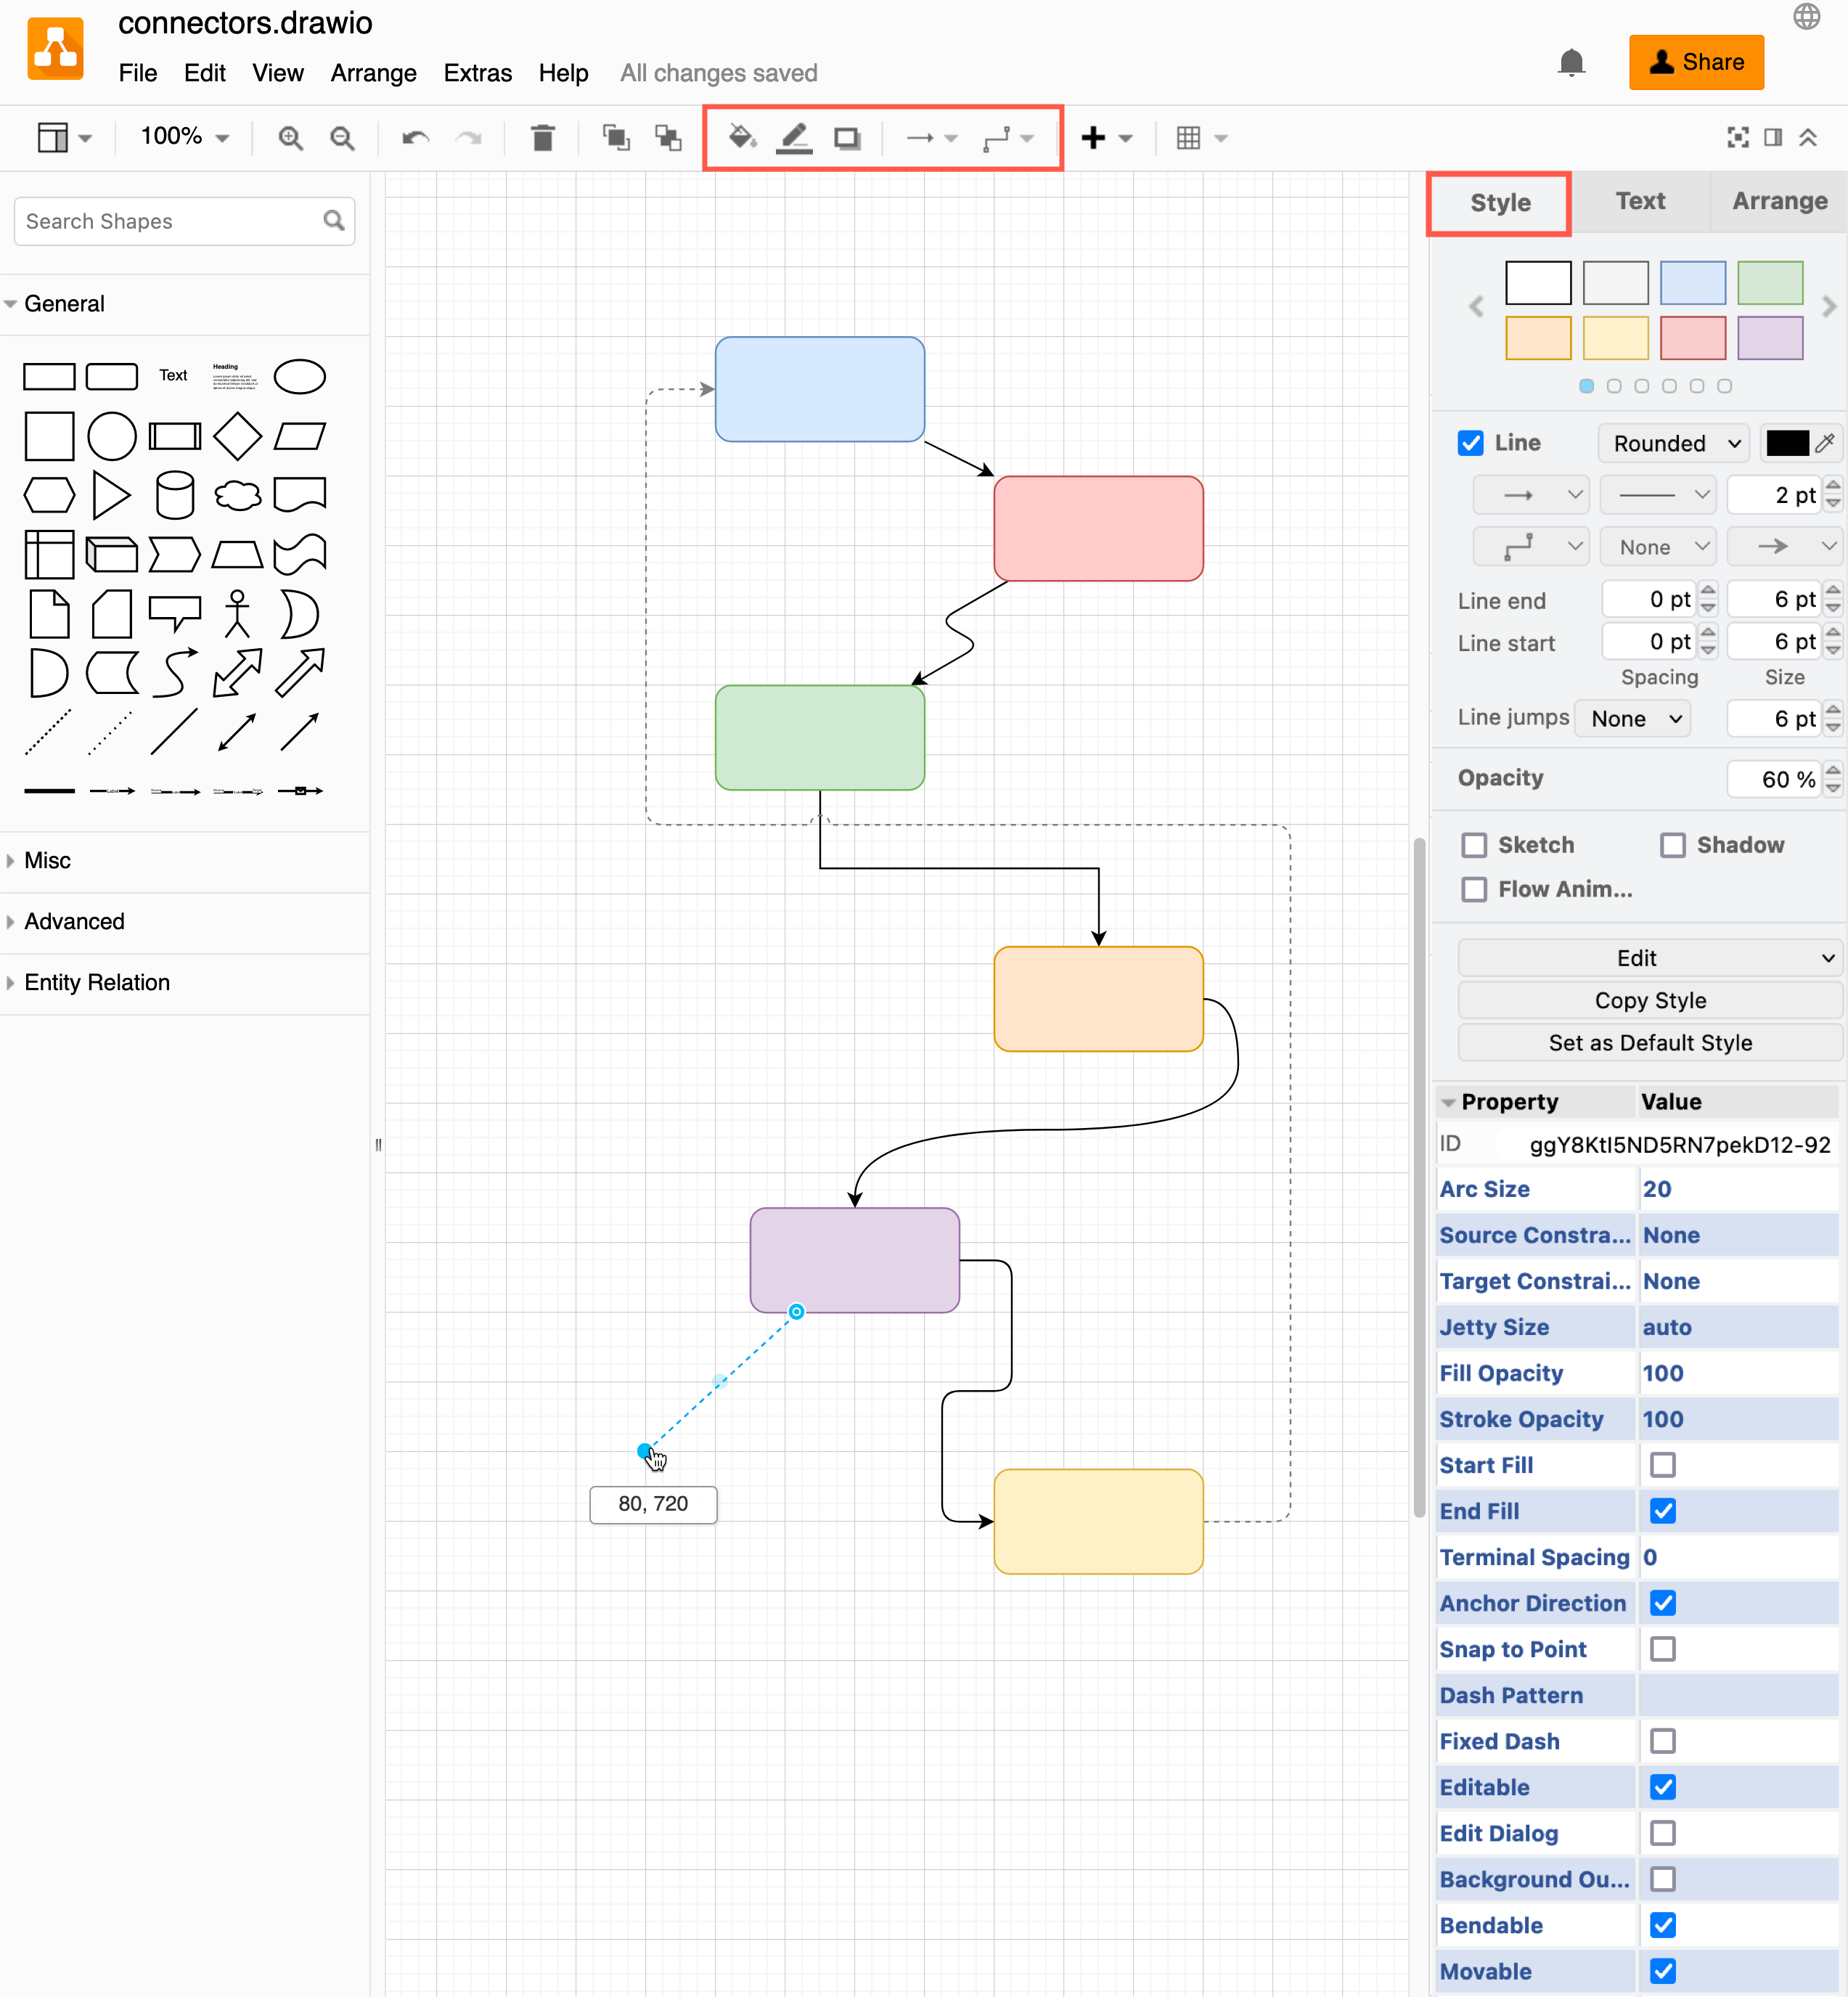
See the Styles section of this documentation for more information
Related
- Learn how to read Crow's foot notation for database entity relationship diagrams.
- See how to read the connector arrow symbols in UML class diagrams.