Work with waypoints on connectors to change their path
Connectors show how the different shapes in the diagram are related. In complex diagrams, you are likely to have many overlapping connectors. While line jumps are useful when you have one or two connectors that cross but shouldn't intersect, you can change the path that your connectors take to make your diagram clearer by adding extra waypoints in the connector's path.
Add waypoints to connectors
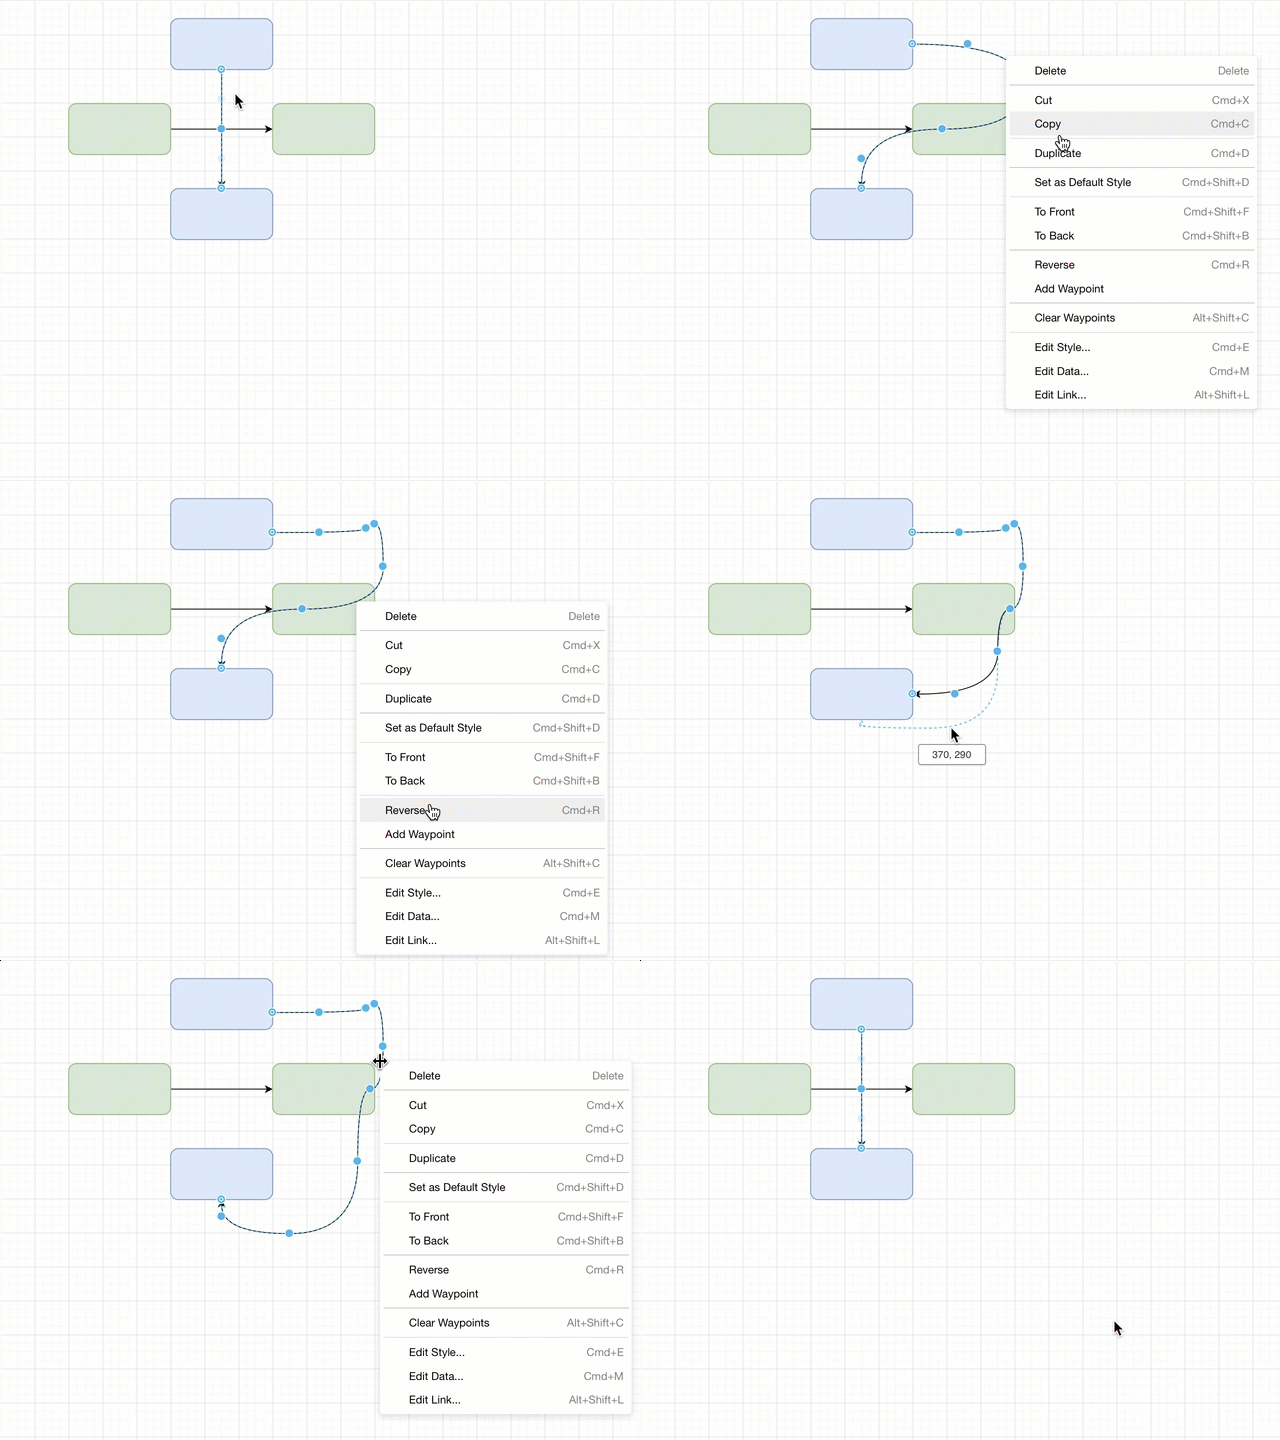
There are several ways you can add waypoints to connectors. The easiest way to add a waypoint is to drag the blue points on the connector to the path you want it to take.
- Select the connect you want to reroute.
- Drag the connector into a new position.
As you drag the connector, new waypoints are added automatically and intelligently, depending on where you grabbed the connector.
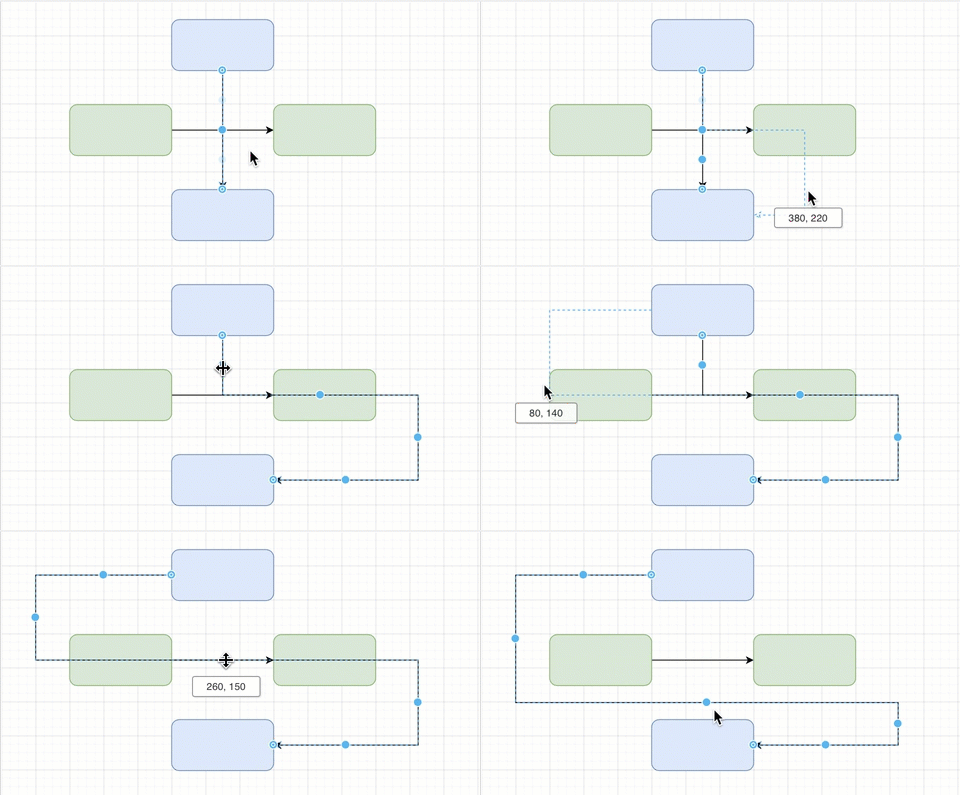
If you prefer not to drag connectors around, you can use the menu.
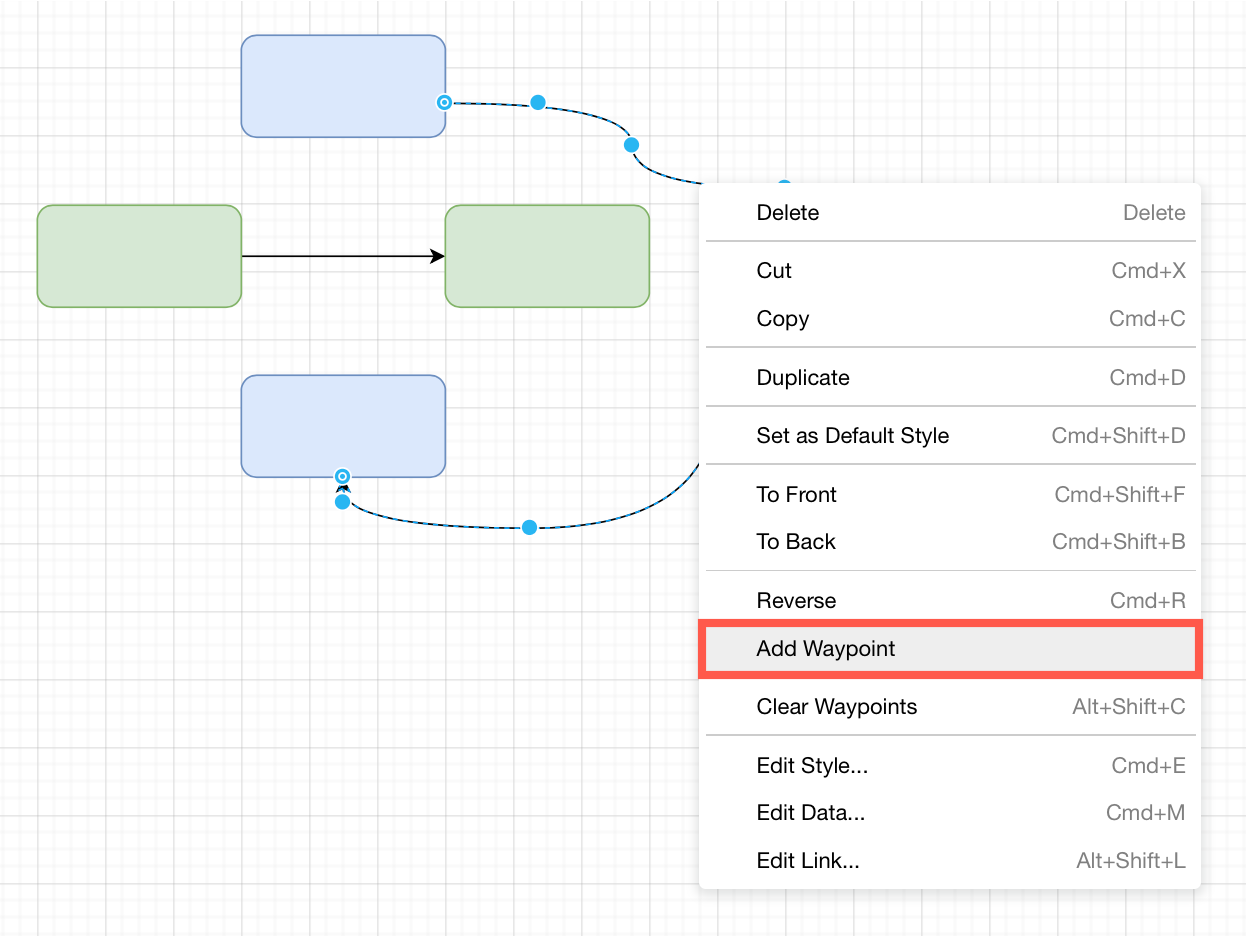
- Right-click on the connector in between two waypoints to display the context menu.
- Select Add Waypoint.
Tip: To join connectors instead of overlapping them, use the waypoint shape in the Misc shape library. It looks like a solid waypoint in your diagram, and acts like a normal shape. Drag connectors from the waypoint shape, and drop connectors onto the waypoint shape to better organise the connectors in your diagram.
Enter the exact position of a waypoint
Select a connector that has waypoints, then open the Waypoints section in the Arrange tab of the format panel. Enter the Left and Top position of each waypoint.
Labels on the connector stay where they are when you drag its waypoints, segments or ends, as long as the new path still passes through the label's position.
Move a connector end onto the grid without connecting it
Hold Alt+Ctrl (Alt+Cmd on macOS) while you drag the end of a connector to place it on the grid without connecting it to a shape underneath. Holding only Alt also prevents attachment, but ignores the grid.
Snap connector segments to 45 degrees
From version 32.3.1 onwards, connector segments can snap to a 45 degree angle while you drag a waypoint or a loose end of a connector using the Straight waypoint style.
- Select the connector.
- Drag a waypoint or a loose end of the connector.
When a segment is close to a 45 degree angle, a blue guide will appear on the previous waypoint or the shape, and the waypoint or end of the connector will snap to that angle.
New connectors with the Straight waypoint style also snap to 45 degrees when you drag them from a shape. The angle is measured from the connection point or from the centre of the shape. To draw new connectors with this style, set a default connector style with Straight waypoints.
Use this to draw diagonal segments, for example, a connector that leaves a shape horizontally, runs diagonally, and enters the next shape horizontally. The waypoint will snap to the diagonal and stay level with the centre of the shape.
Note: Hold Alt while you drag to place the waypoint without snapping. To turn off the 45 degree snapping, disable the guides.
Remove a waypoint from a connector
- Select the connector where you want to remove a waypoint.
- Drag the appropriate section of the connector back into a position such that the waypoint is removed.
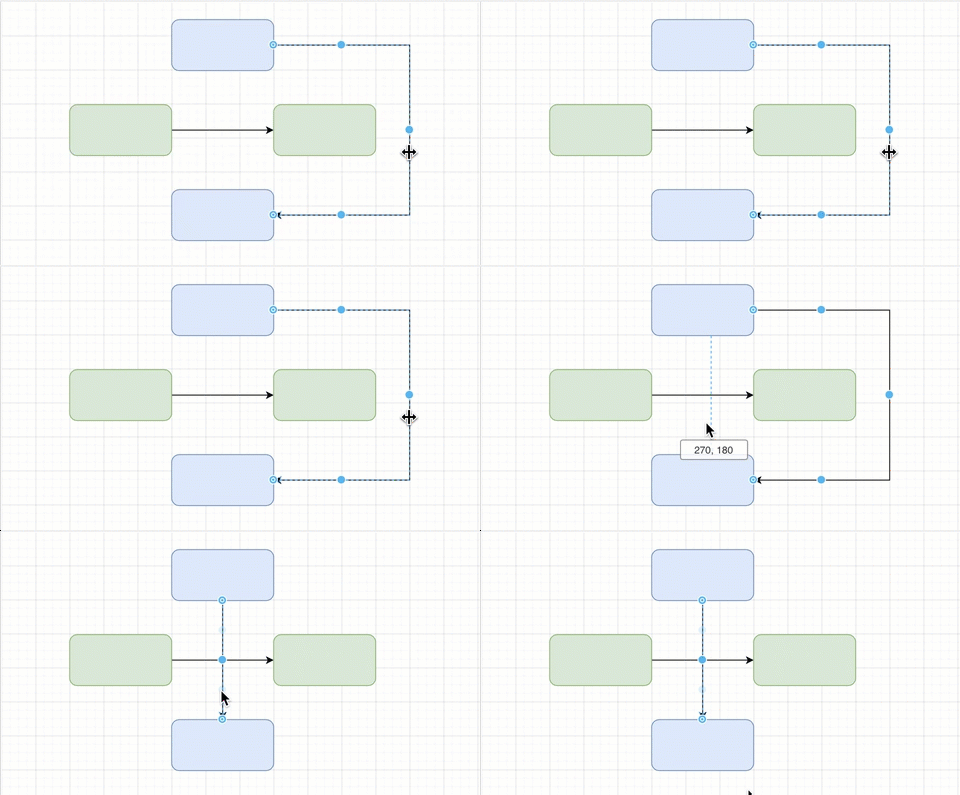
You can also use the context menu to remove way points.
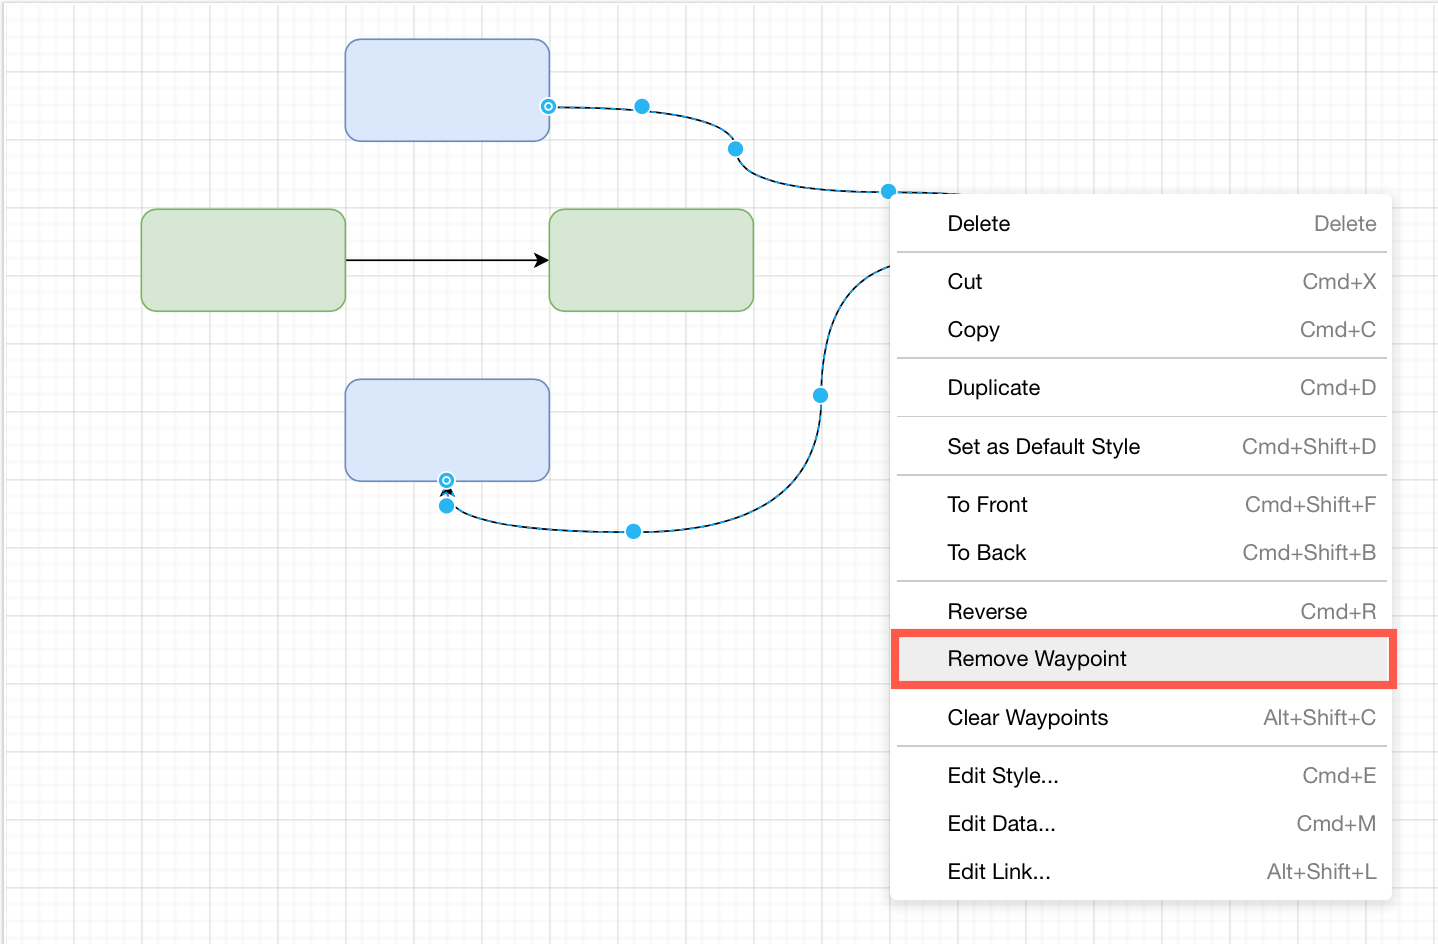
- Select the connector first, then right-click on one of the existing waypoints.
- Select Remove Waypoint.
Note: If you flip a connector horizontally or vertically while it is attached to a shape, its waypoints will be changed or deleted automatically.
Clear all waypoints
By clearing all of the waypoints in a connector, it will revert to the shortest path between the two shapes.
- Right-click on the connector you want to reset to see the context menu.
- Select Clear Waypoints.
Note: You can alternately use the context menu and dragging to add and remove connectors. Use whichever method suits you best.
Adding and removing waypoints by dragging connectors and using the context menu works for most of the waypoint styles that you can set in the Style tab of the format panel on the right. With the Straight waypoint style, the connector runs in straight lines through its waypoints. The Entity Relation waypoint style does not use waypoints.
Move waypoints with the connected shapes
By default, the waypoints of a connector stay where they are when you move one of the connected shapes. From version 31.6.2 onwards, you can make the waypoints follow the connected shapes instead.
- Select the connector.
- Open the Effects section in the Style tab of the format panel.
- Select the Follow Terminals checkbox.
When you move, resize or arrange a connected shape, the waypoints of the connector will move with it, so the connector keeps its path. Orthogonal connectors keep their right-angled bends. All other connectors rotate and stretch with the line between the two shapes.
Choose this option when the path of a connector should stay the same relative to its shapes, for example, in a mind map. Keep the default when the waypoints route the connector around shapes that don't move.
Note: The Follow Terminals checkbox is not shown for connectors with the Auto-route around shapes waypoint style. These connectors are routed around the shapes again whenever a connected shape moves.
Related
- How to connect shapes quickly with shortcuts