Bundle connectors with ties
Ties hold connectors together in a bundle, like cable ties. The connectors run side by side through each tie, so a group of connectors takes the same path across your diagram. Each connector keeps its source and target shapes, its labels and its arrows.
Use ties when many connectors run between the same areas of a diagram, for example the cables between two racks in a network diagram.
Bundle selected connectors
- Select two or more connectors.
- Right-click on one of the selected connectors and select Bundle.
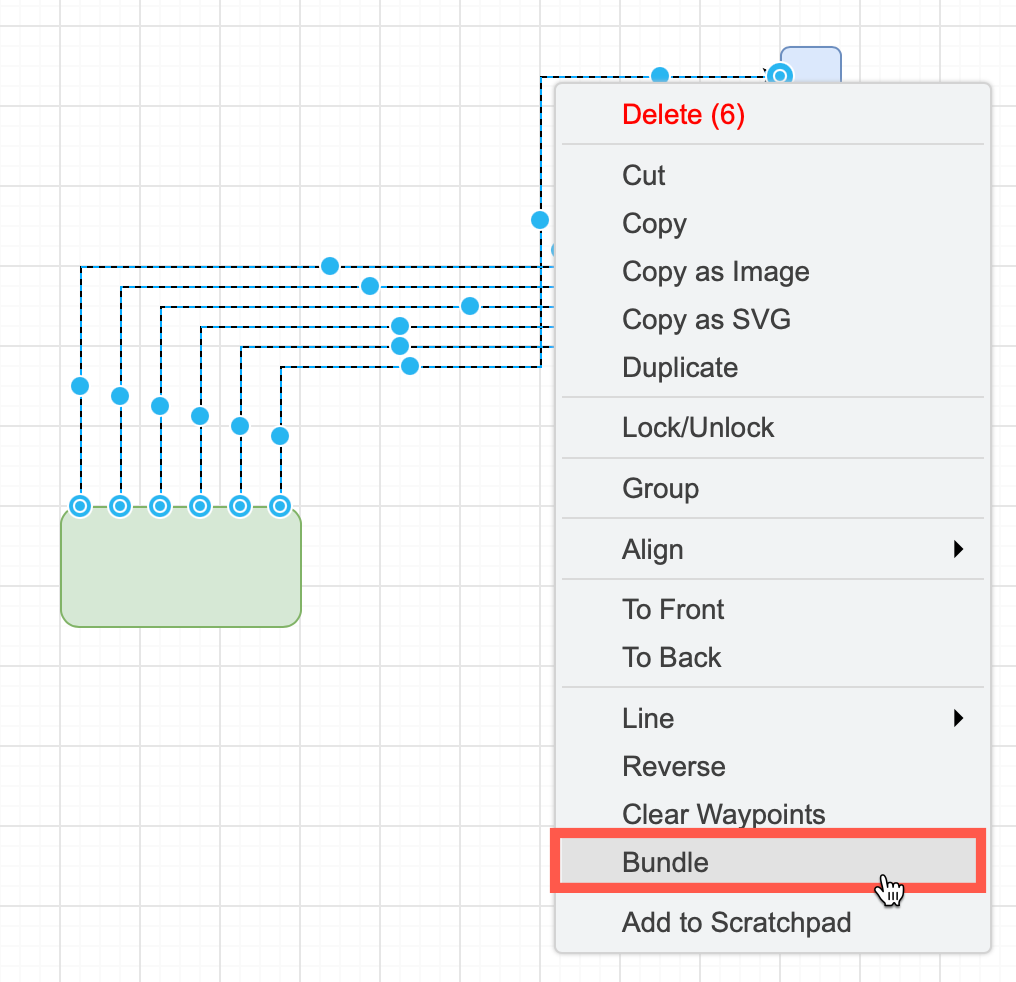
A tie will be added where the connectors run closest together, and the connectors will run side by side through it.
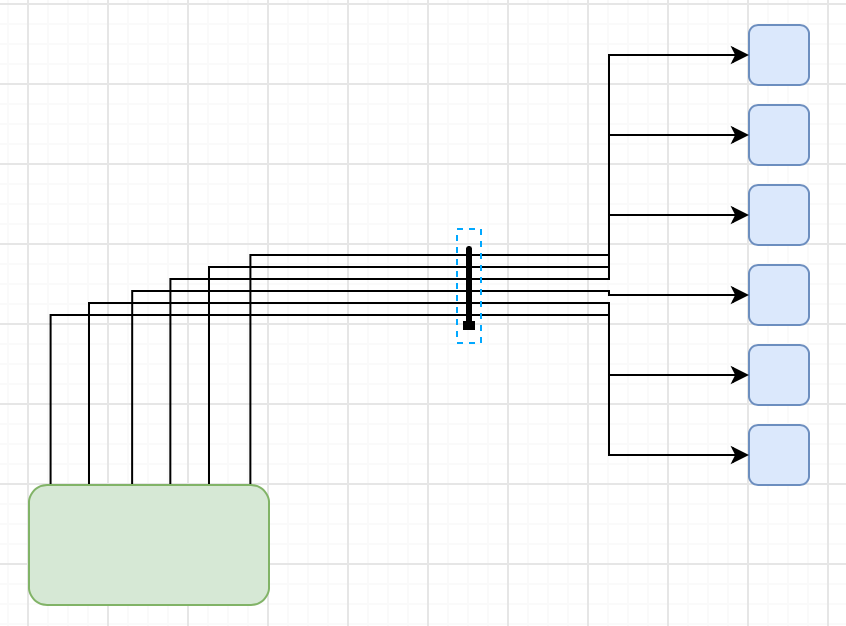
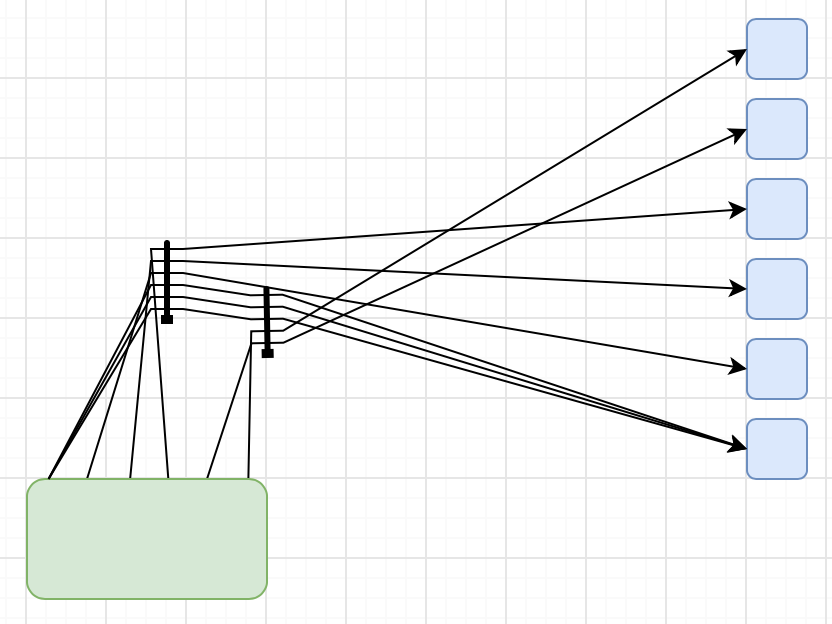
You can tie the same connector into multiple bundles.
Note: This works best on fixed connectors, or on connectors that have an attachment constraint on the target shape so that the final connector waypoint is placed before the connector reaches the shape. Alternatively, use the straight connector style.
Drag a tie over multiple connectors
- Hold
Alt+Shifton Windows, orOption+Shifton macOS. - Start dragging on a connector, then drag across the other connectors you want to bundle together. The connectors you cross as you move the cursor will be highlighted in red.
- Release the mouse button.
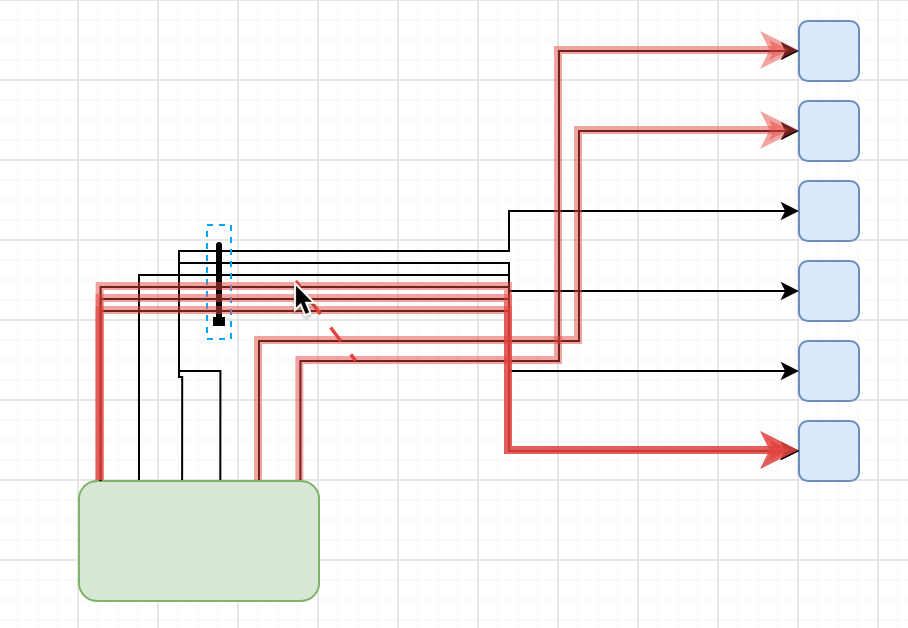
A tie will be added where you first crossed the connectors.
Note: Start dragging on a connector. If you click and drag on an empty part of the drawing canvas, Alt+Shift+drag will deselect shapes instead.
Tie connectors in the Freehand panel
- Select Arrange > Insert > Freehand to open the Freehand panel.
- Select Tie in the drop-down list.
- Drag a line across the connectors you want to tie together. If drawing has stopped, click Start Drawing first if necessary.
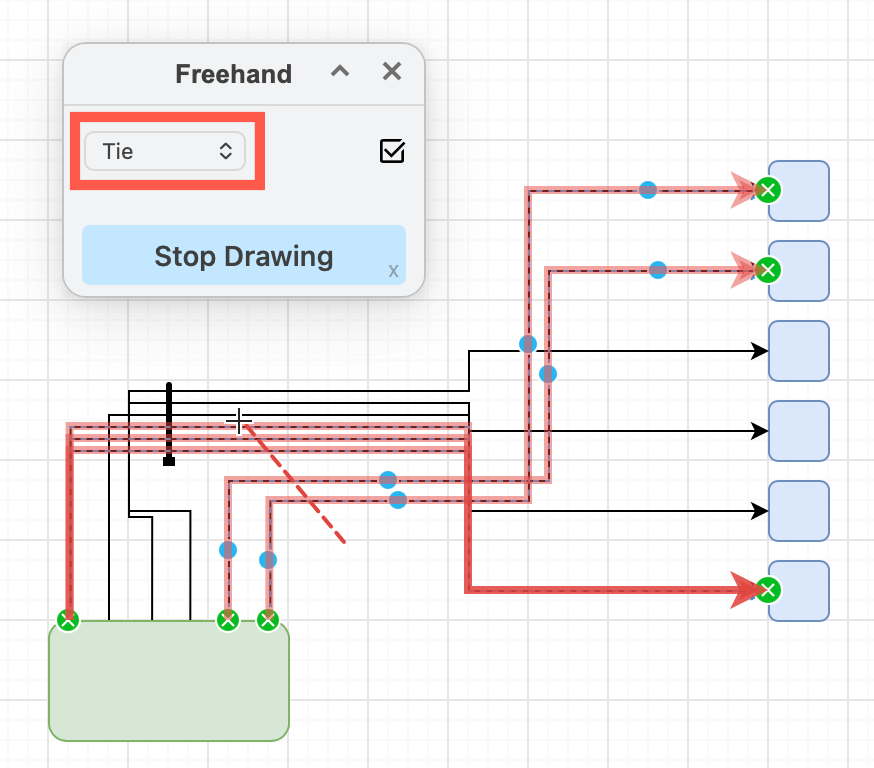
A tie will be added where you drew over the connectors. Draw more lines to add more ties.
To stop drawing, press Esc or click Stop Drawing.
Move a tie
Drag a tie to a new position. The connectors follow the tie while you drag it, and guides help you line it up with other ties.
Add another tie to a bundle
Hold Ctrl on Windows, or Cmd on macOS, and drag a tie. A new tie will be added to the same connectors where you drop it, and the connectors will run through both ties.
Select ties and their connectors
- Select the connectors of a tie: Double-click on the tie.
- Select ties: In the Freehand panel, select Tie in the drop-down list, then click the Select All icon. This selects the ties of the selected connectors, or all ties if no connectors are selected.
Remove ties
- Select one or more ties and press
Delete. The connectors will no longer run through these ties and their path will reset. - Select one or more ties or connectors, right-click and select Unbundle. The selected ties will be removed, and the selected connectors will be released.
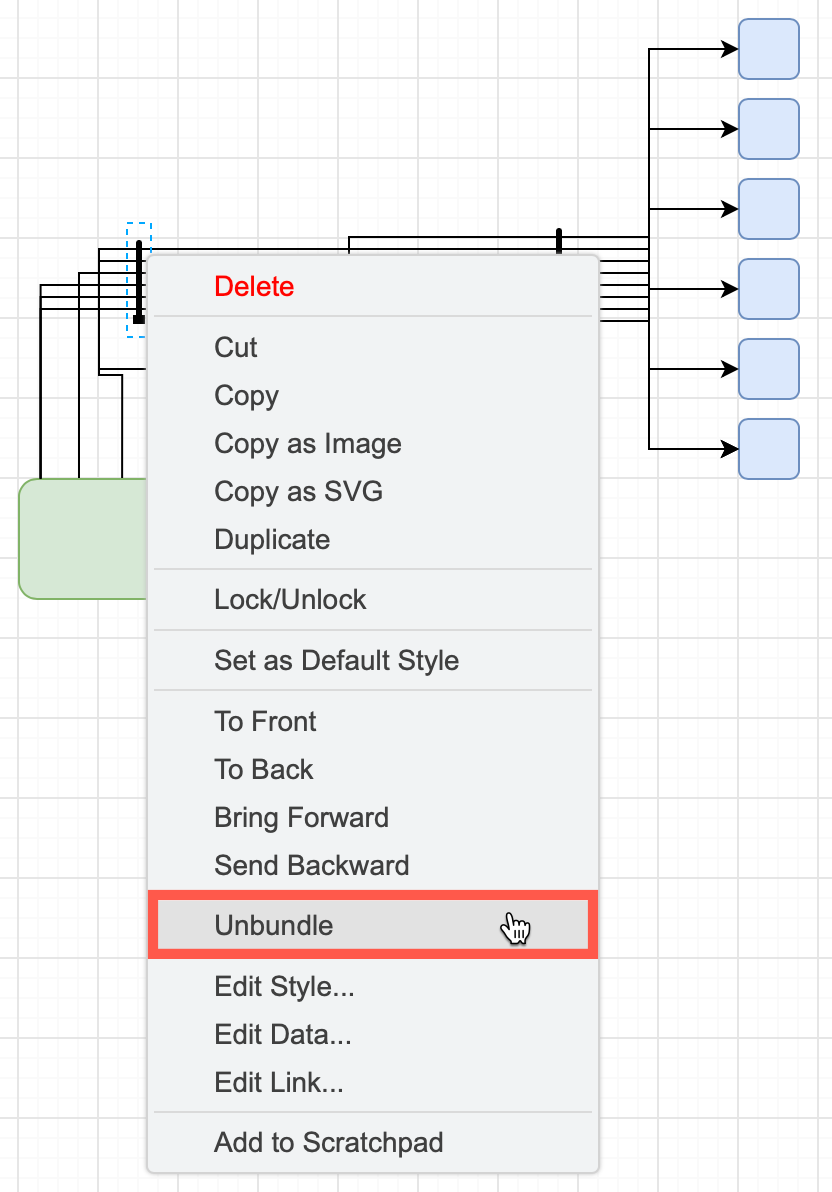
A tie that holds fewer than two connectors after Unbundle will be removed as well.
Note: Unbundle doesn't change locked ties and connectors.
Change the look of a tie
Select a tie, then change its line colour, width and pattern in the Style tab of the format panel. A tie with a line width of 1 will draw a thin line across the connectors.
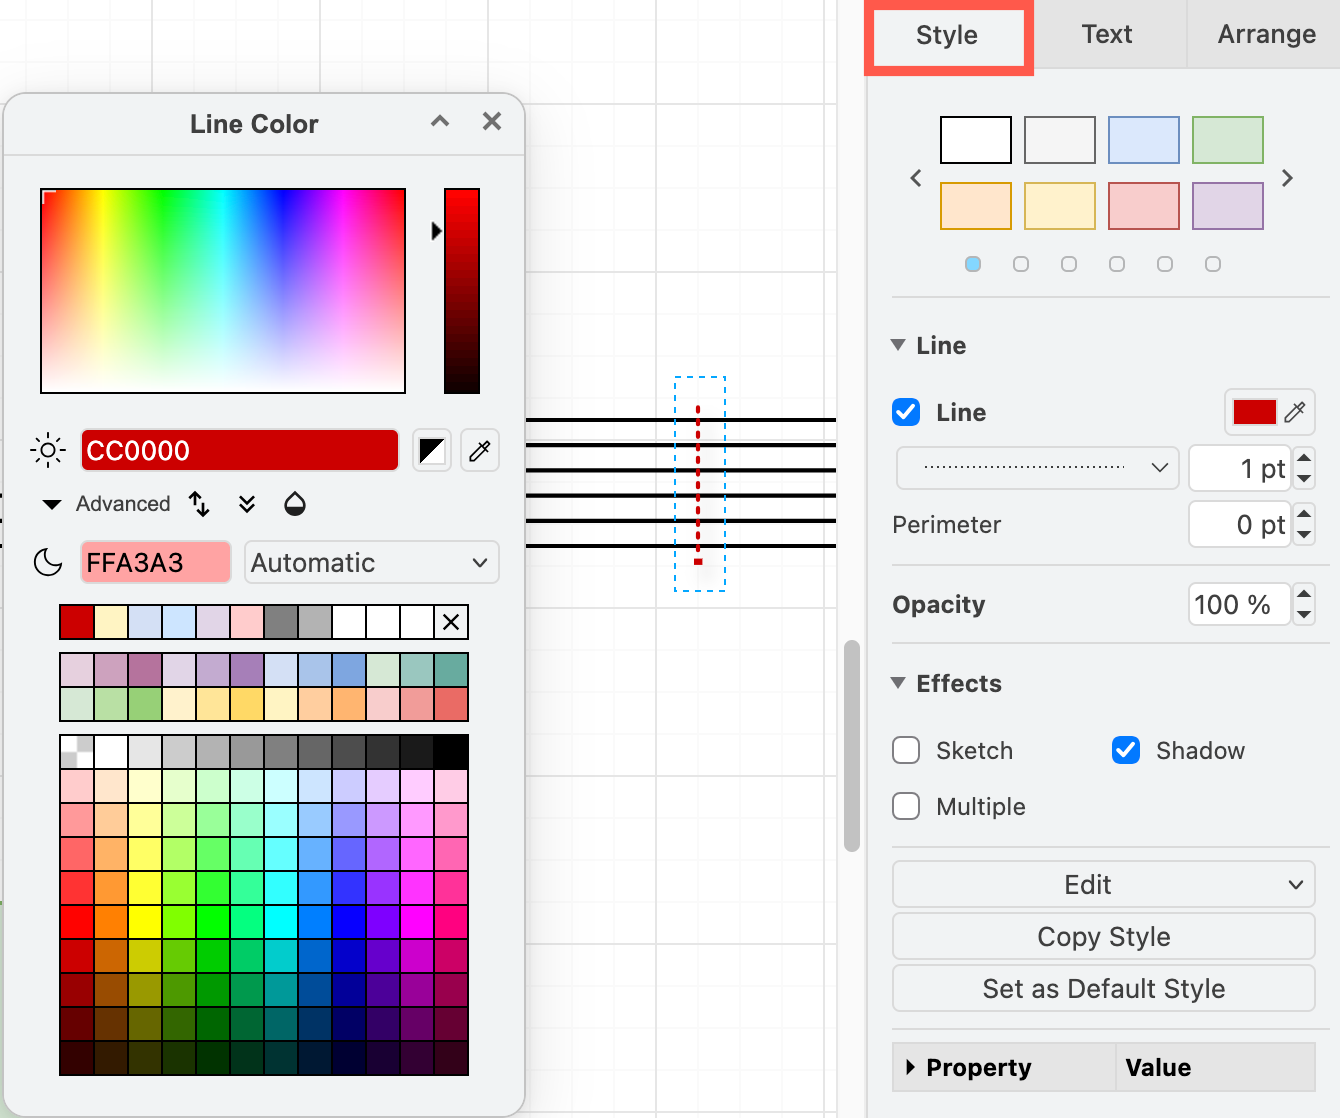
Change the path of bundled connectors
Connectors use their waypoint style between the ties, but they don't use waypoints while they run through ties. To change the path of a bundle, move its ties or add another tie.
Note: Connectors with ties aren't auto-routed around shapes. To route a connector around shapes again, unbundle it.
Related
- Drag connector waypoints to change the path of a connector
- Join connectors with a waypoint shape
- See how to draw freehand shapes
- Learn more about mouse + keyboard shortcuts
- See how to configure the
ties,tieandtieSpacingkeys in the style reference