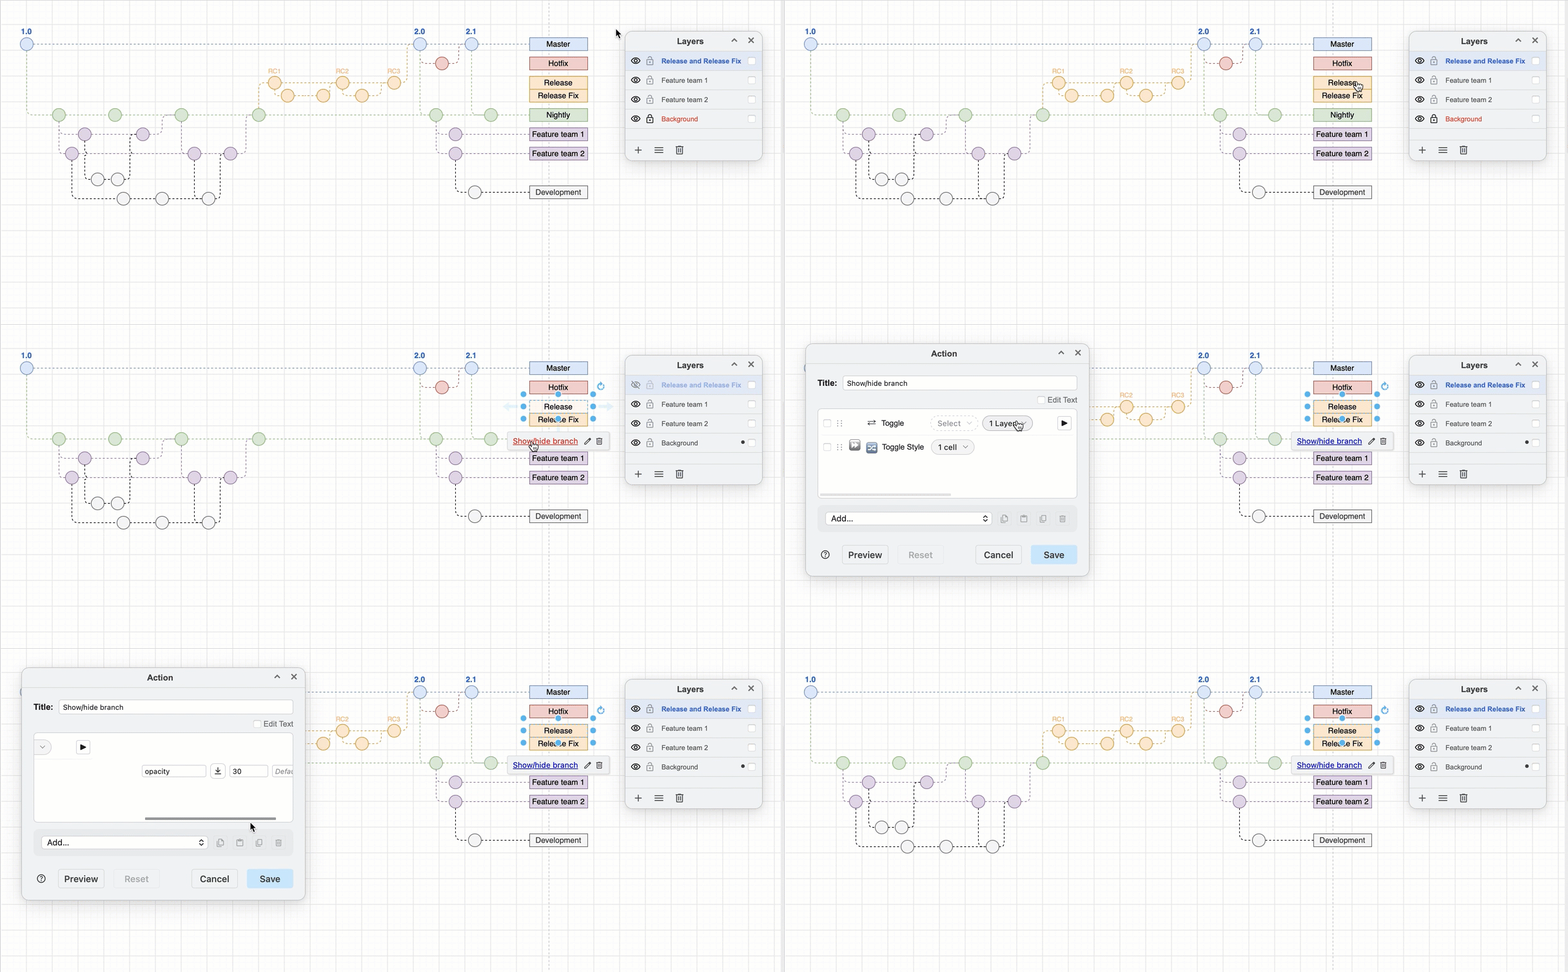
Updated custom links now with an action animation editor

Custom links are now more flexible with a new action editor and many more animation actions to choose from. Animation actions wait for the previous action step to complete by default with a configurable delay duration, but can be set to play immediately with the previous action.
Using the same animation action editor, each diagram page in a multi-page diagram can have its own set of page animation actions that will display when you open that diagram in the lightbox or presentation mode.
Where to use custom links and page animations
- Add page animations to animate diagram 'slides' for slick diagram presentations in meetings.
- Click directly on custom links in shapes in the diagram to jump to a related page - ideal for navigating through multi-page technical UML diagrams or infrastructure diagrams with many different levels of detail.
- Add interactivity via custom links on shapes to mockups and wireframe layouts to better test the usability of new interfaces before implementation.
- Add animations and effects to custom links to make educational diagrams and infographics interactive and more interesting and memorable for students.
- Animate flows, timelines, charts and complex processes to aid understanding and retention when training new staff.
- Add interactive highlights to dependency graphs and PERT charts to clearly show blocking and non-blocking dependencies.
- Hide or show varius layers of building infrastructure (networking, electrical controls, water supplies, emergency systems) or emergency routes on floor plans via custom links.
Open the action editor dialog
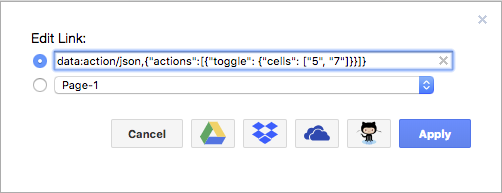
Custom link action: Right-click on a shape or connector and select Edit Link from the context menu or press Alt+Shift+L, select the Action radio button and click Insert.
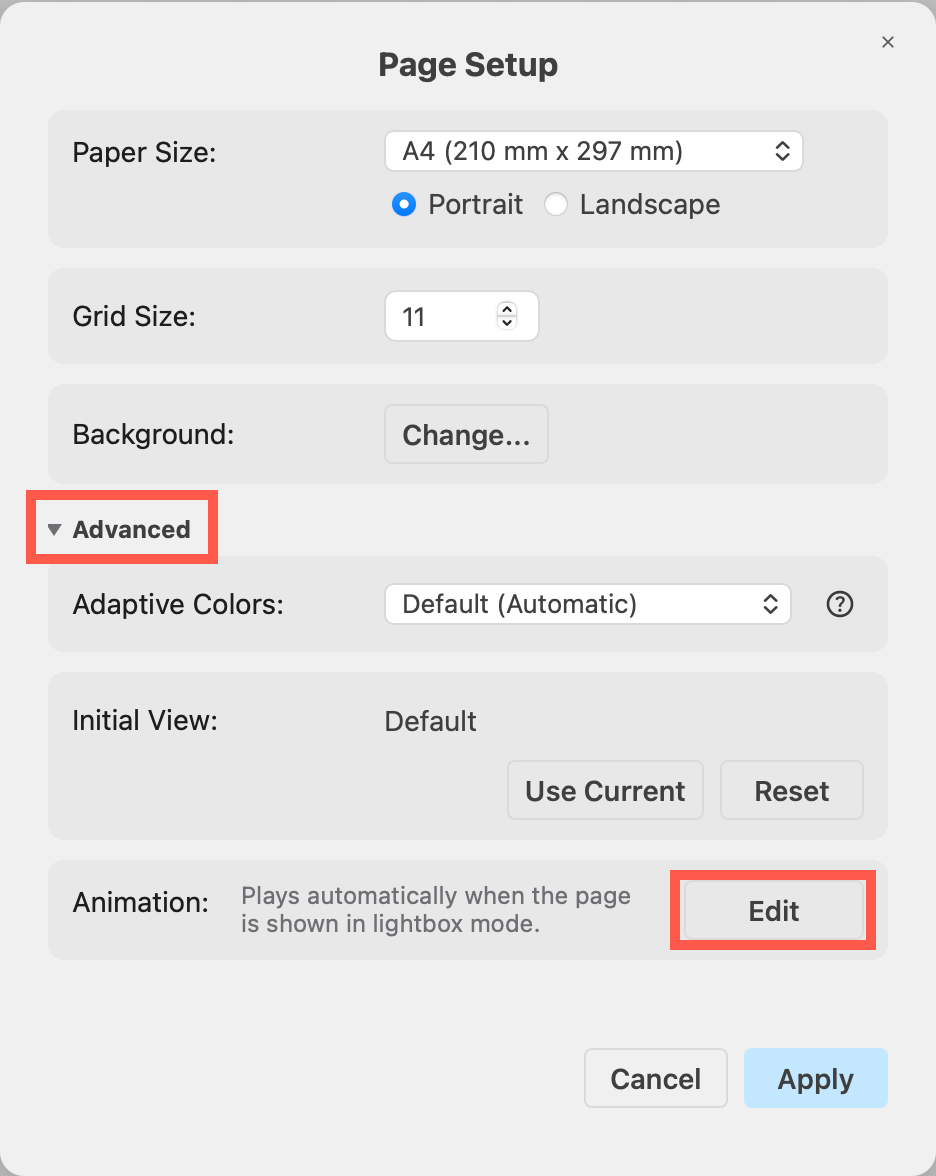
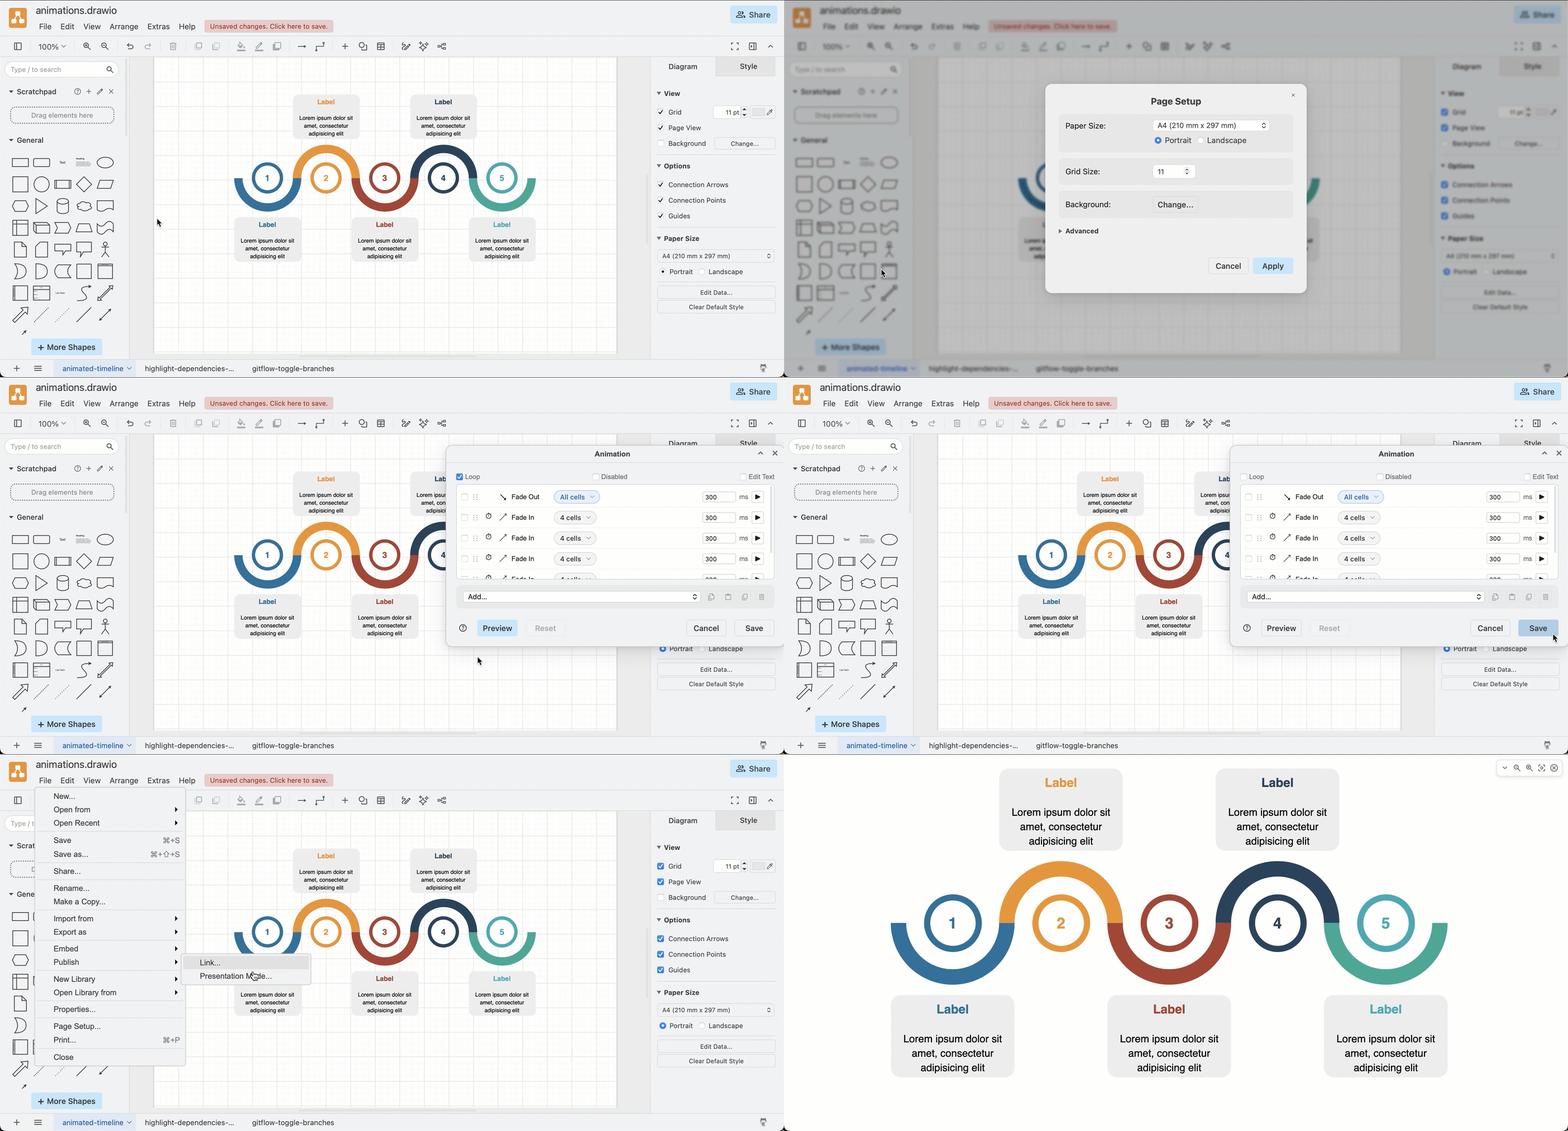
Page animations: Select File > Page Setup from the draw.io menu, expand the Advanced section and click the Edit button in the Animation section.
The action editor dialog is a draggable, resizeable dialog that lets you select cells on the drawing canvas and edit animation actions.
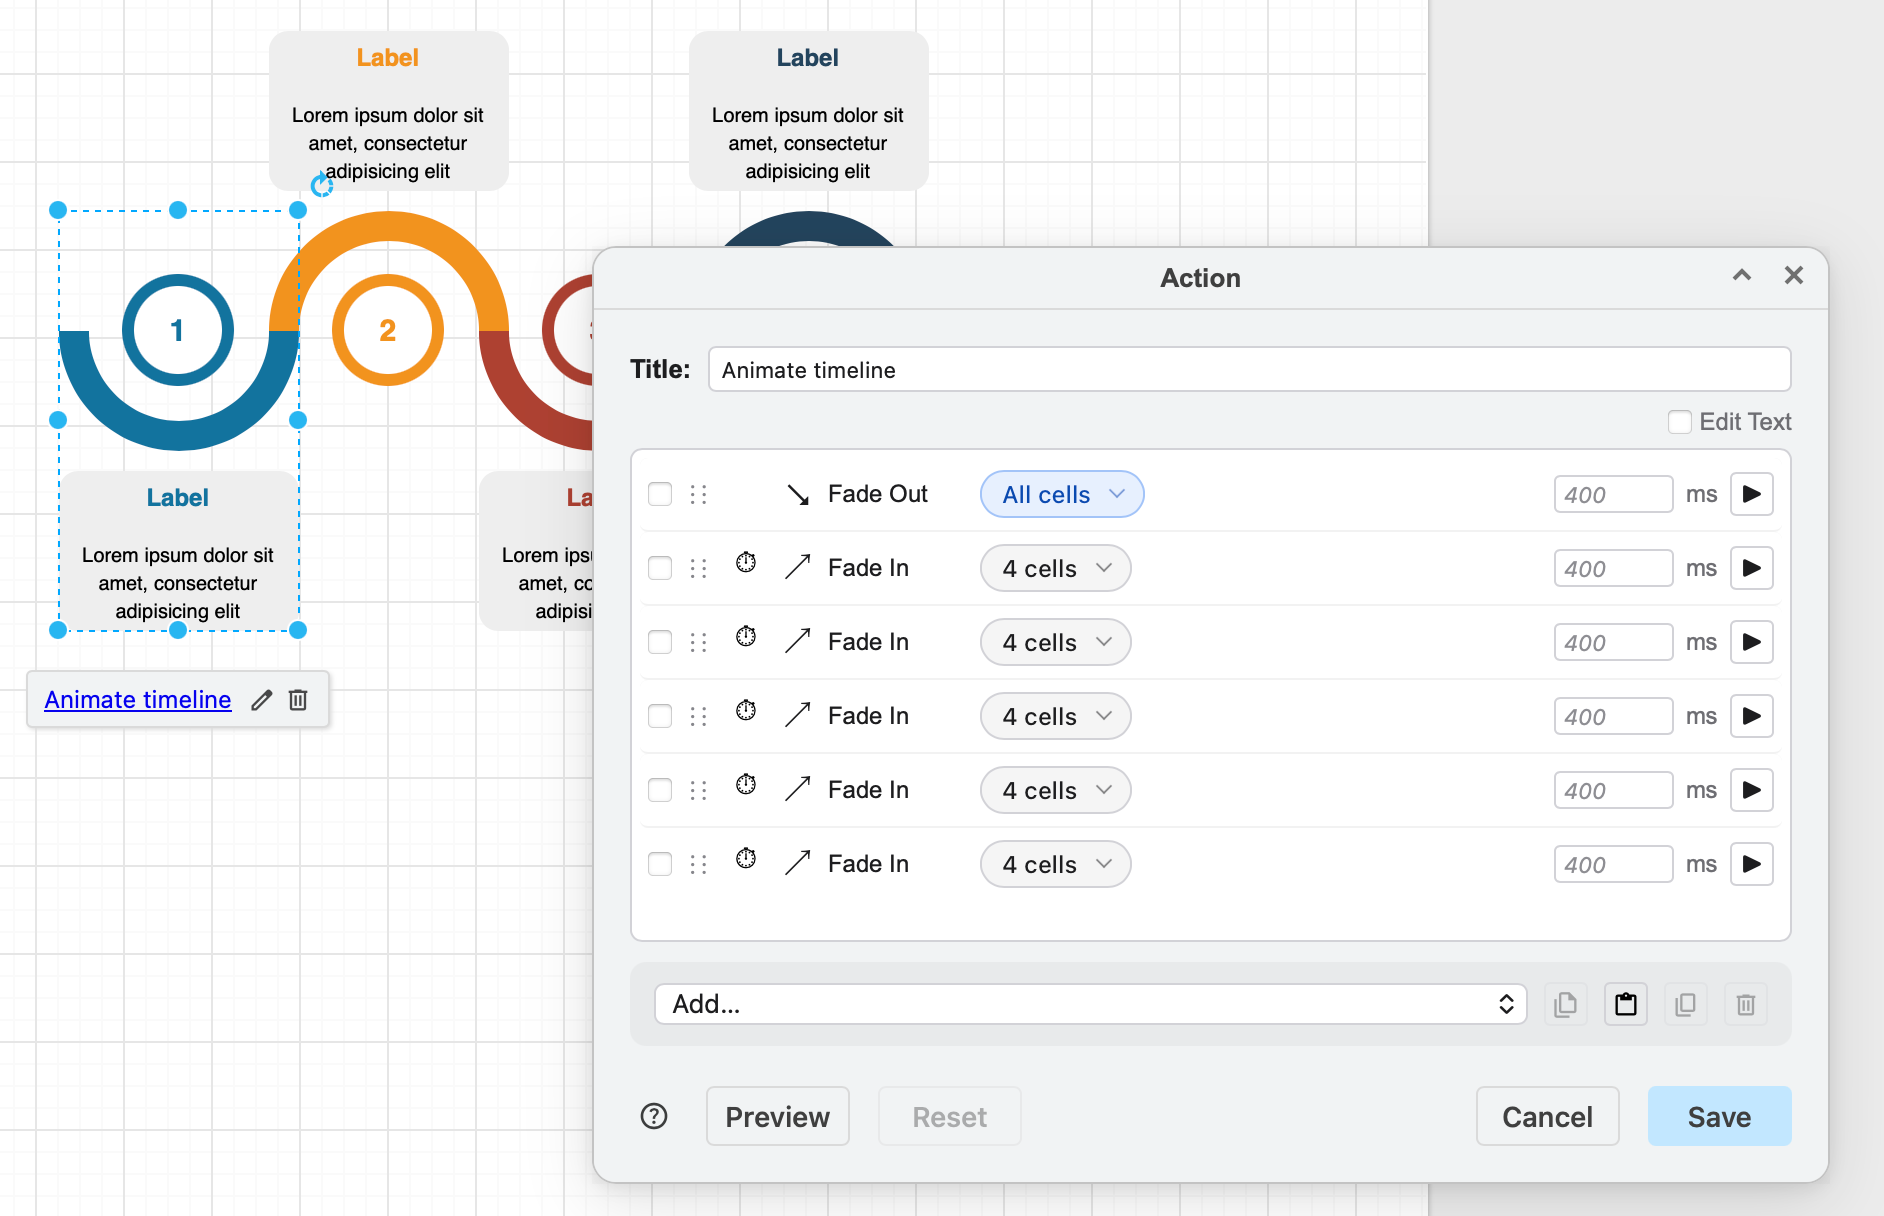
Work with action sequences
- Select an animation action from the Add list at the bottom of the dialog. It will automatically apply to the cell (shape or connector) you had selected.
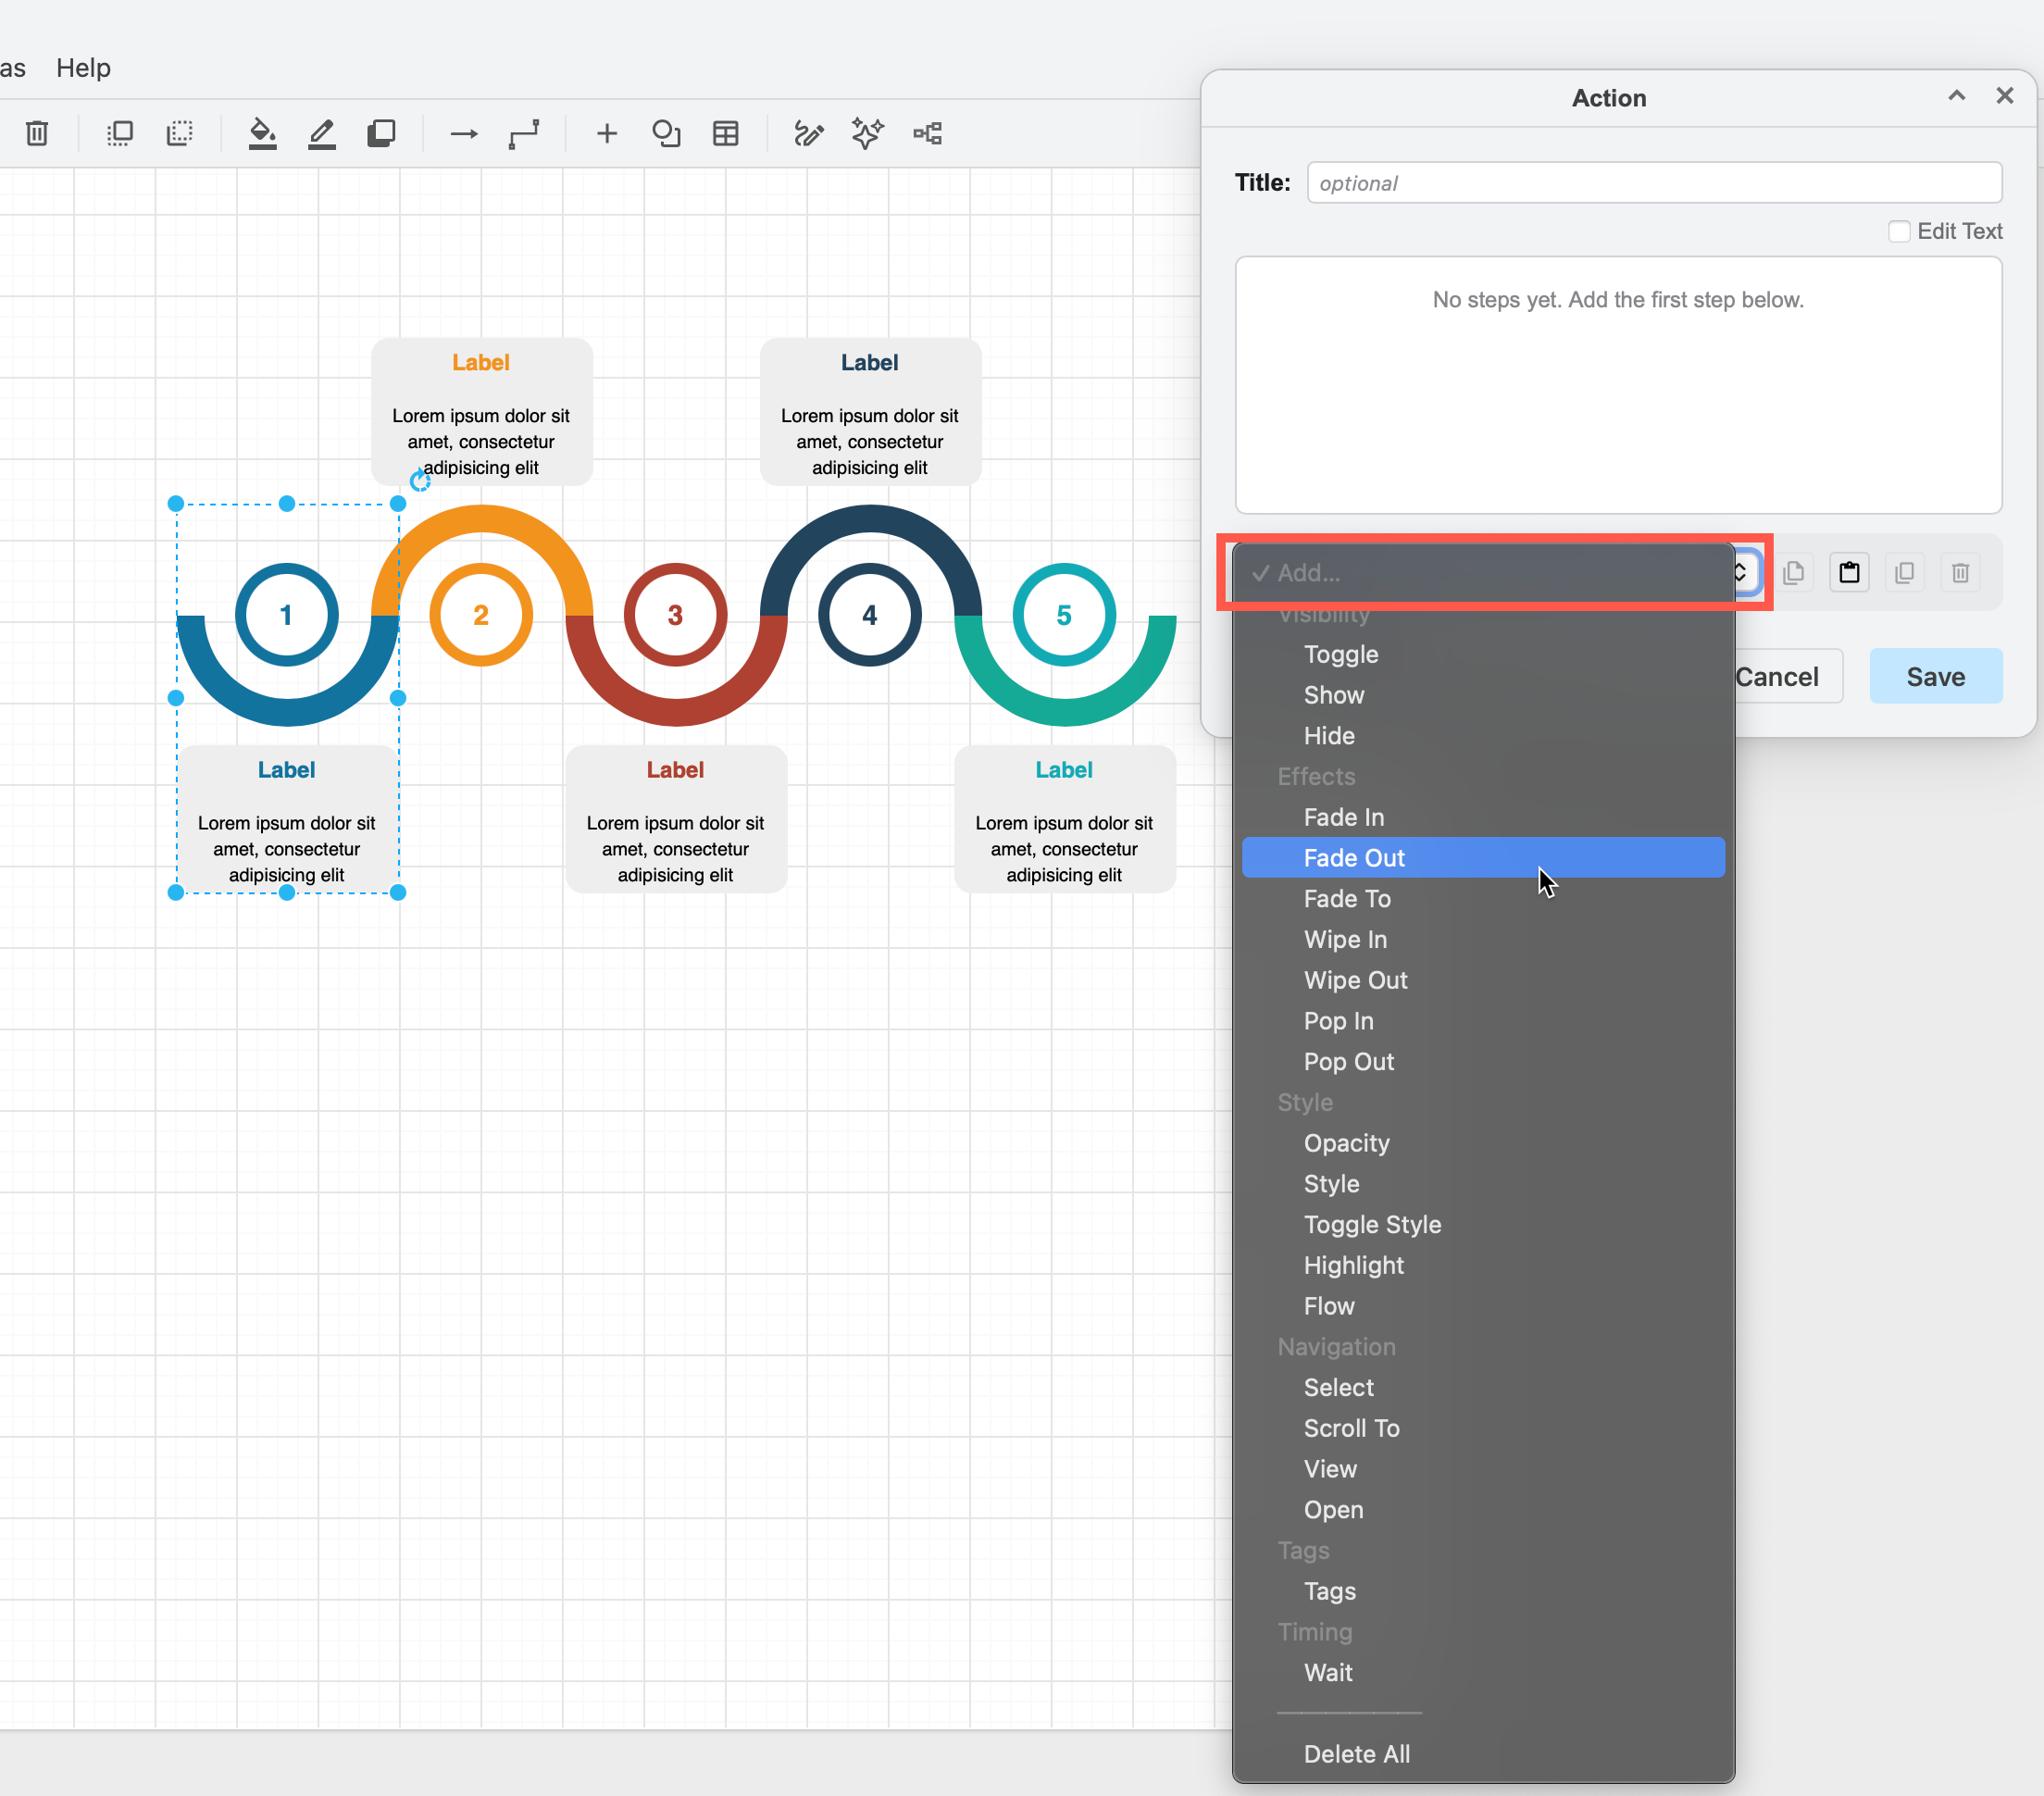
- Select different cells, then click on the Cells list of that action and choose Use selected cells. Alternatively, choose Select layers or Select tags to apply that action to shapes with specific tags or on the selected layers.
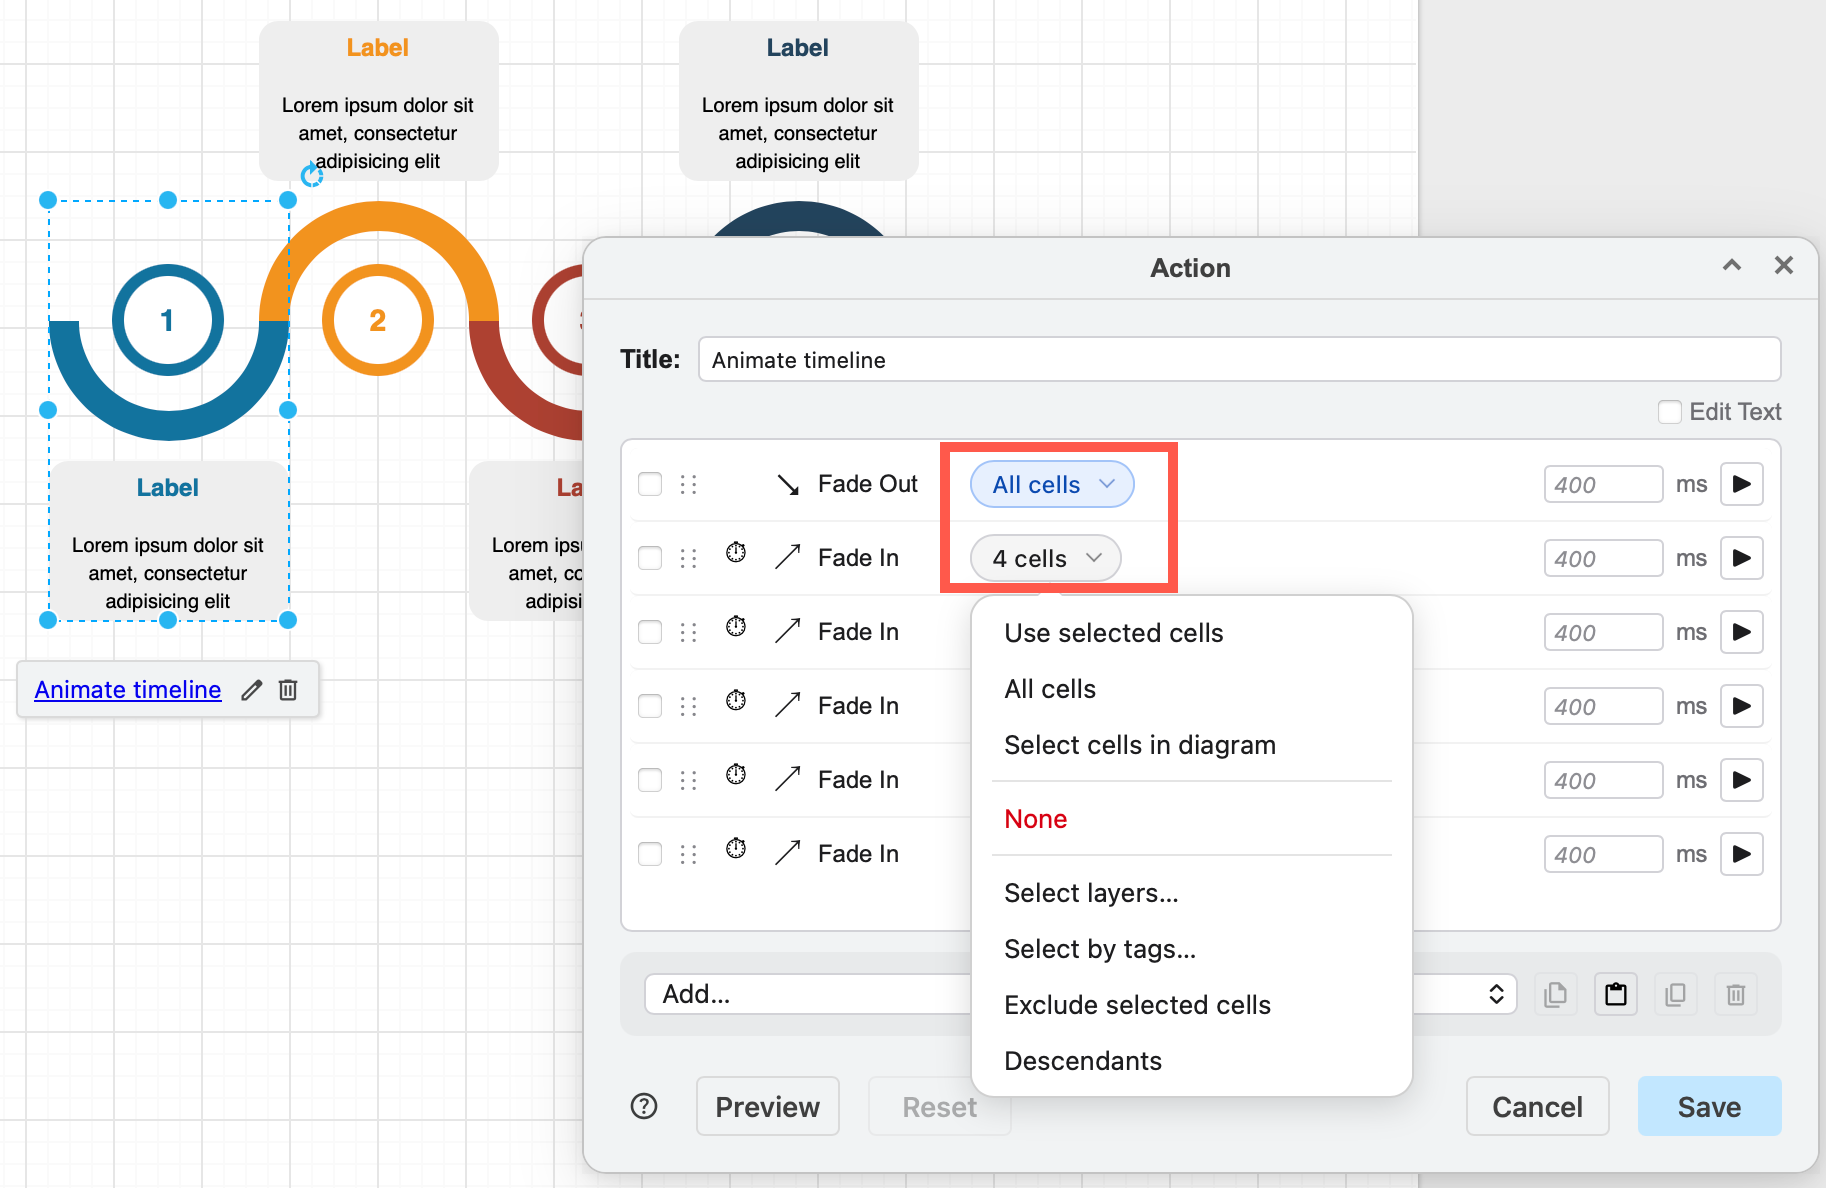
- Preview a single action via the Play icon to the right of that action. Or click Preview to see the entire animation sequence. Choose Select cells in diagram from the selector lists to see which cells will be affected by that action.
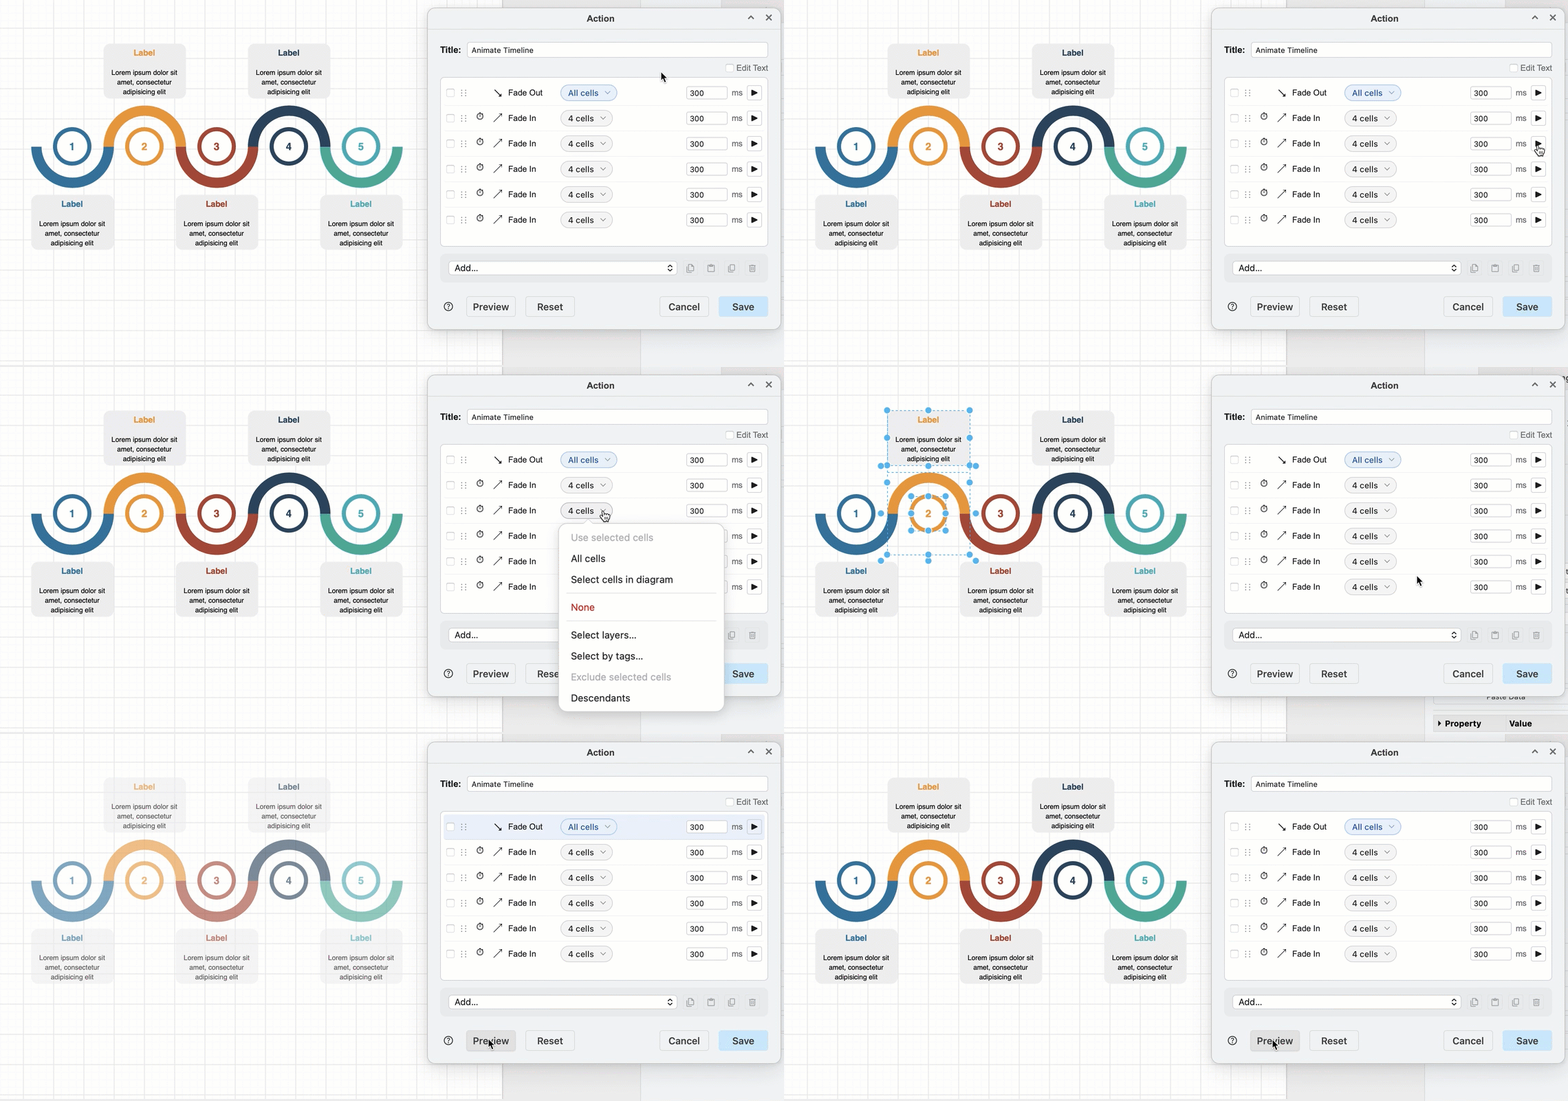
- Click Reset to return to the initial diagram state.
These effects are transient - only you will see them if you are collaborating on a diagram page with multiple users. Some of the action effects can be applied persistently by writing a flag into the action's JSON text directly - see legacy persistent actions for more details.
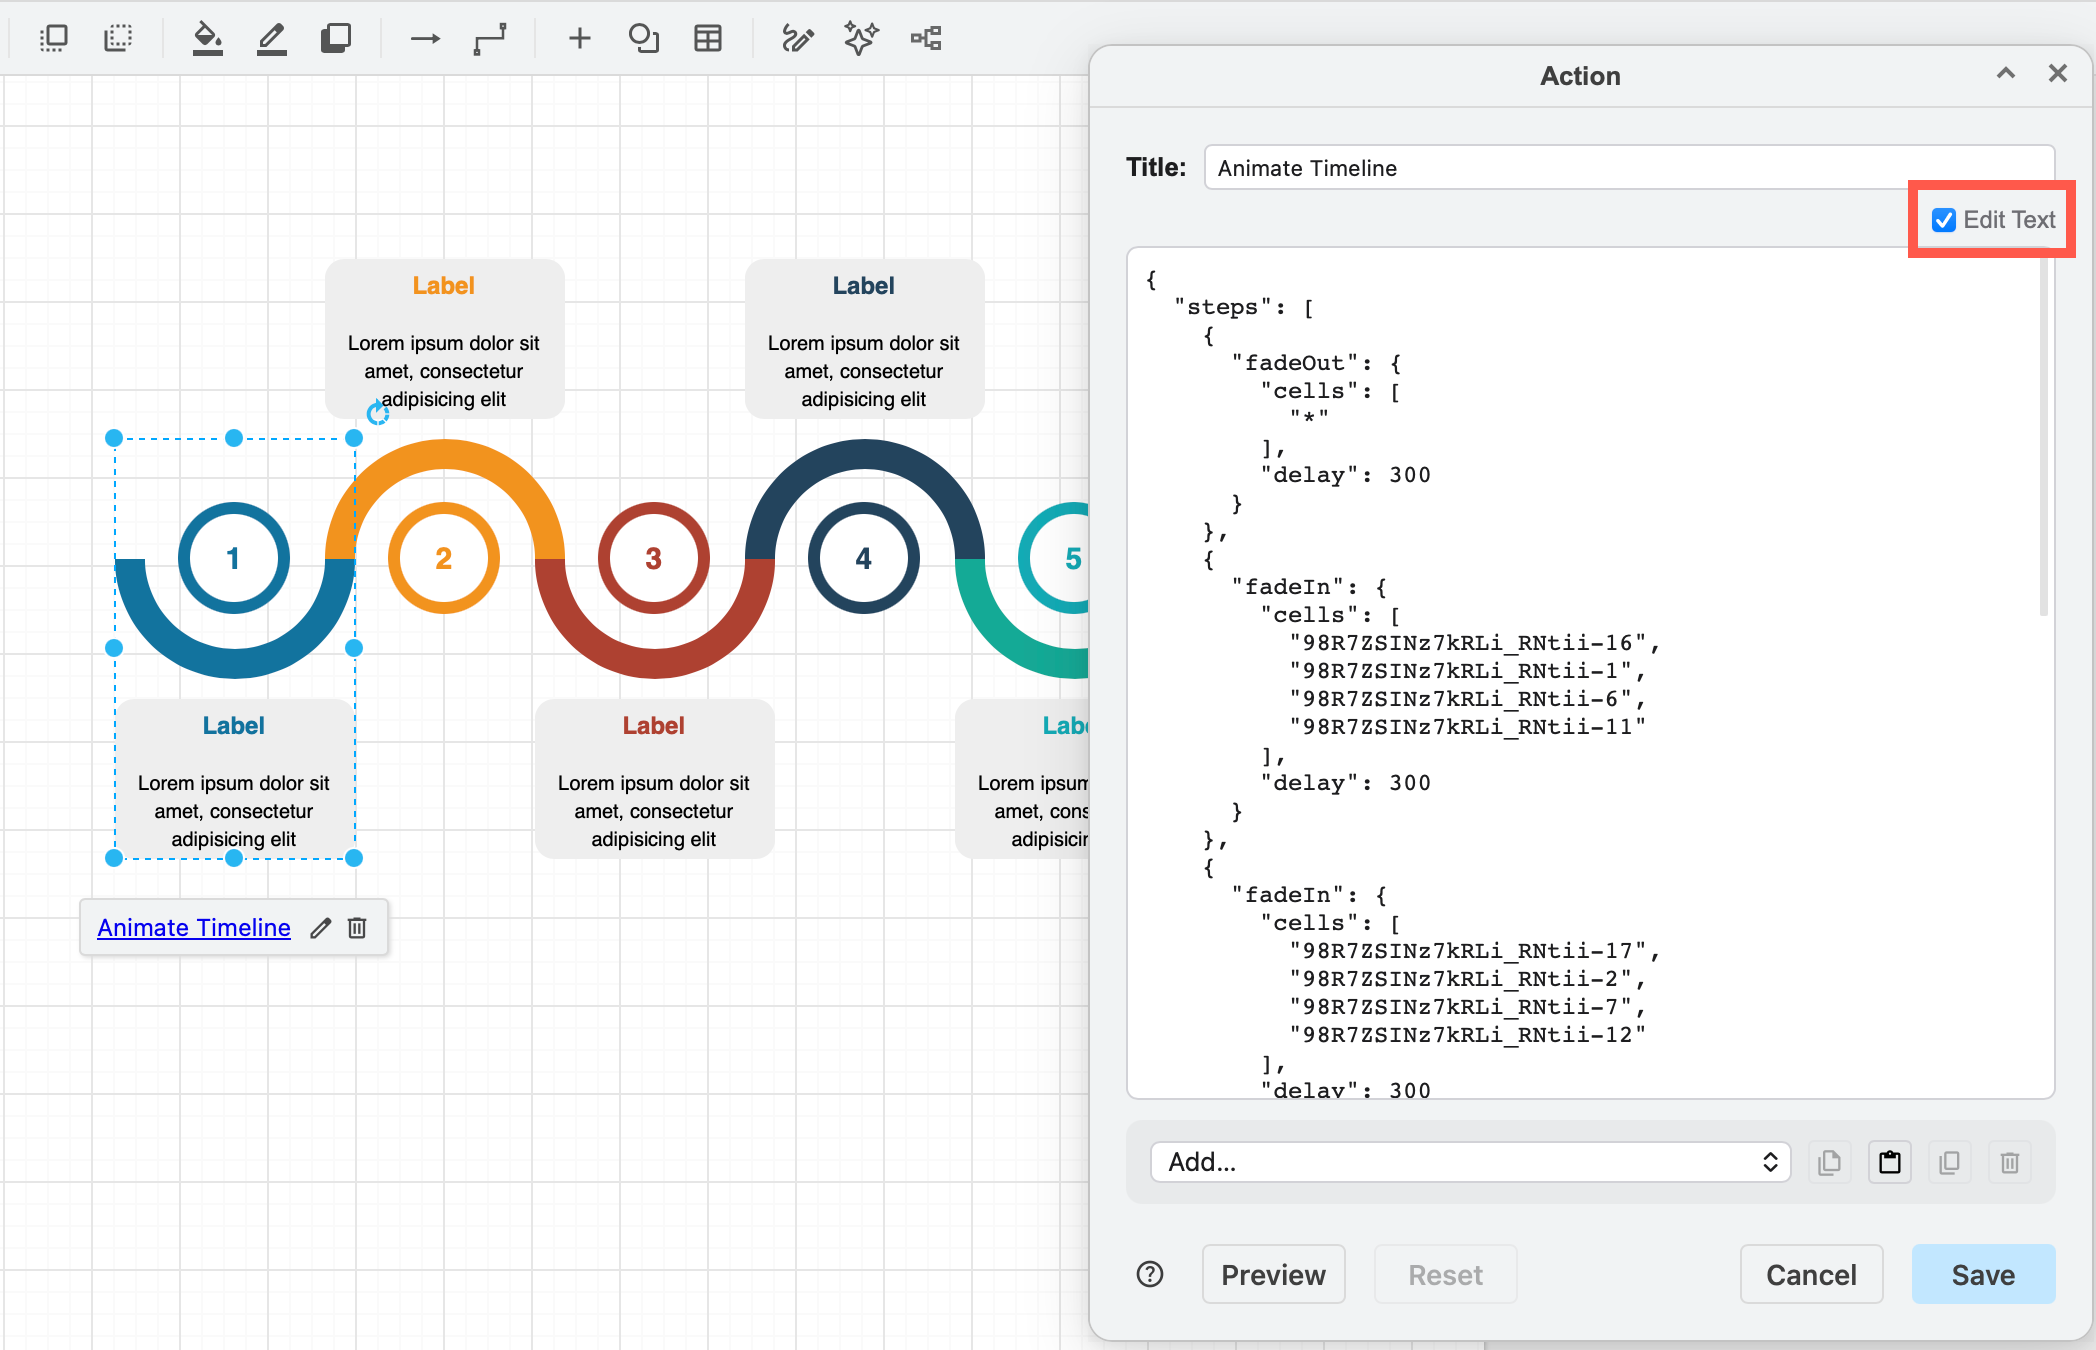
Advanced: Custom actions are stored in a JSON string in the shape metadata in the link shape property. You can edit this directly via the Edit Text checkbox in the top right of the action editor dialogs. Refer to the JSON action reference for more detail.
Add page animations
Page animations play automatically in a loop when you open the diagram in the lightbox viewer or in presentation mode. Each page in a multi-page diagram has its own page animation stored in its page data.
The action editor uses the same action sequence editor as custom links, and you can copy and paste selected actions between the two editor dialogs.
Click on File > Page Setup, expand the Advanced section and edit the page animations.
Change the animation settings above the action sequence list to Disable all animations or deselect the Loop checkbox to play the animation only once.
Change the action timing
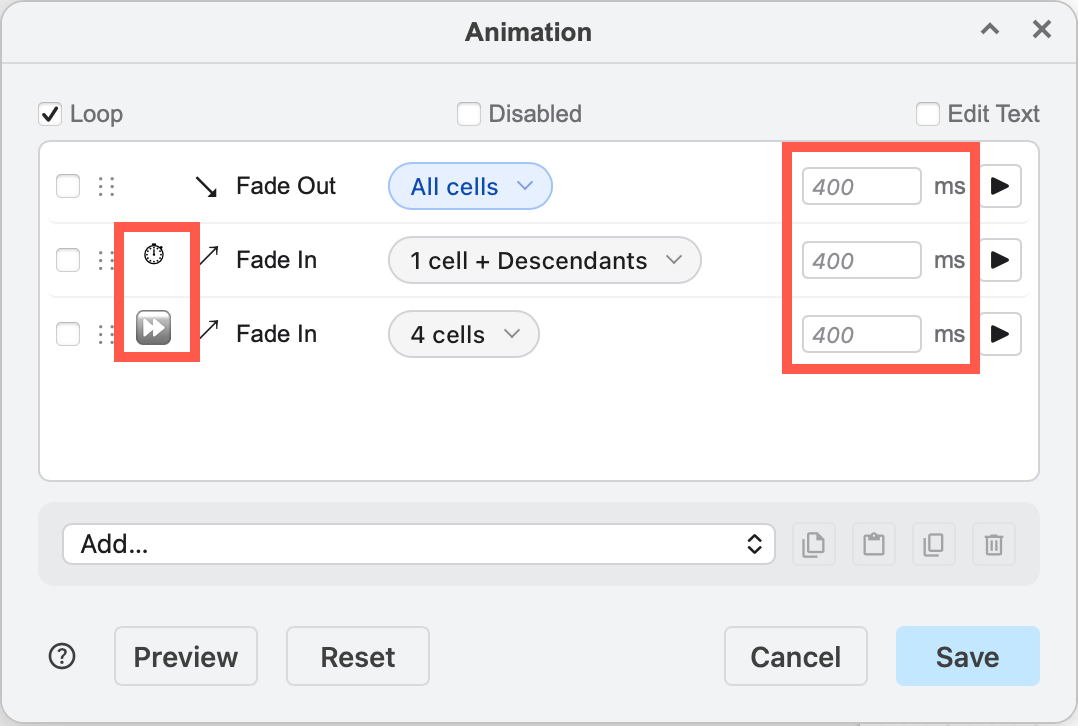
- Click on the Wait (Timer) or Immediate (double arrow) icon on the left of the action to toggle between waiting for the previous step to complete (the default) or playing immediate with the previous step.
- Drag the actions using their grab handle on the left to move them to another position in the action sequence.
Customise action effects
On most actions, you can set a delay duration - how long it will play the effect for before moving to the next action in the sequence. But many of the actions have additional configurable fields. For example:
- Fade In/Out: Change the duration of the fade.
- Highlight: Set a colour via the colour picker.
- Open: Enter a URL to open in a new browser tab, or open a different diagram page (e.g.
data:page/id,ttOyNaaBSf6ha2BtVIuw) - View: Scroll and pan to a different section of the diagram - use the current viewbox or specify the location and zoom level, and enable a Transition effect.
- Style: Enter a style key (e.g.
opacity) and set a value. If you are toggling a style, you can set two values. Style keys will autocomplete when you start typing.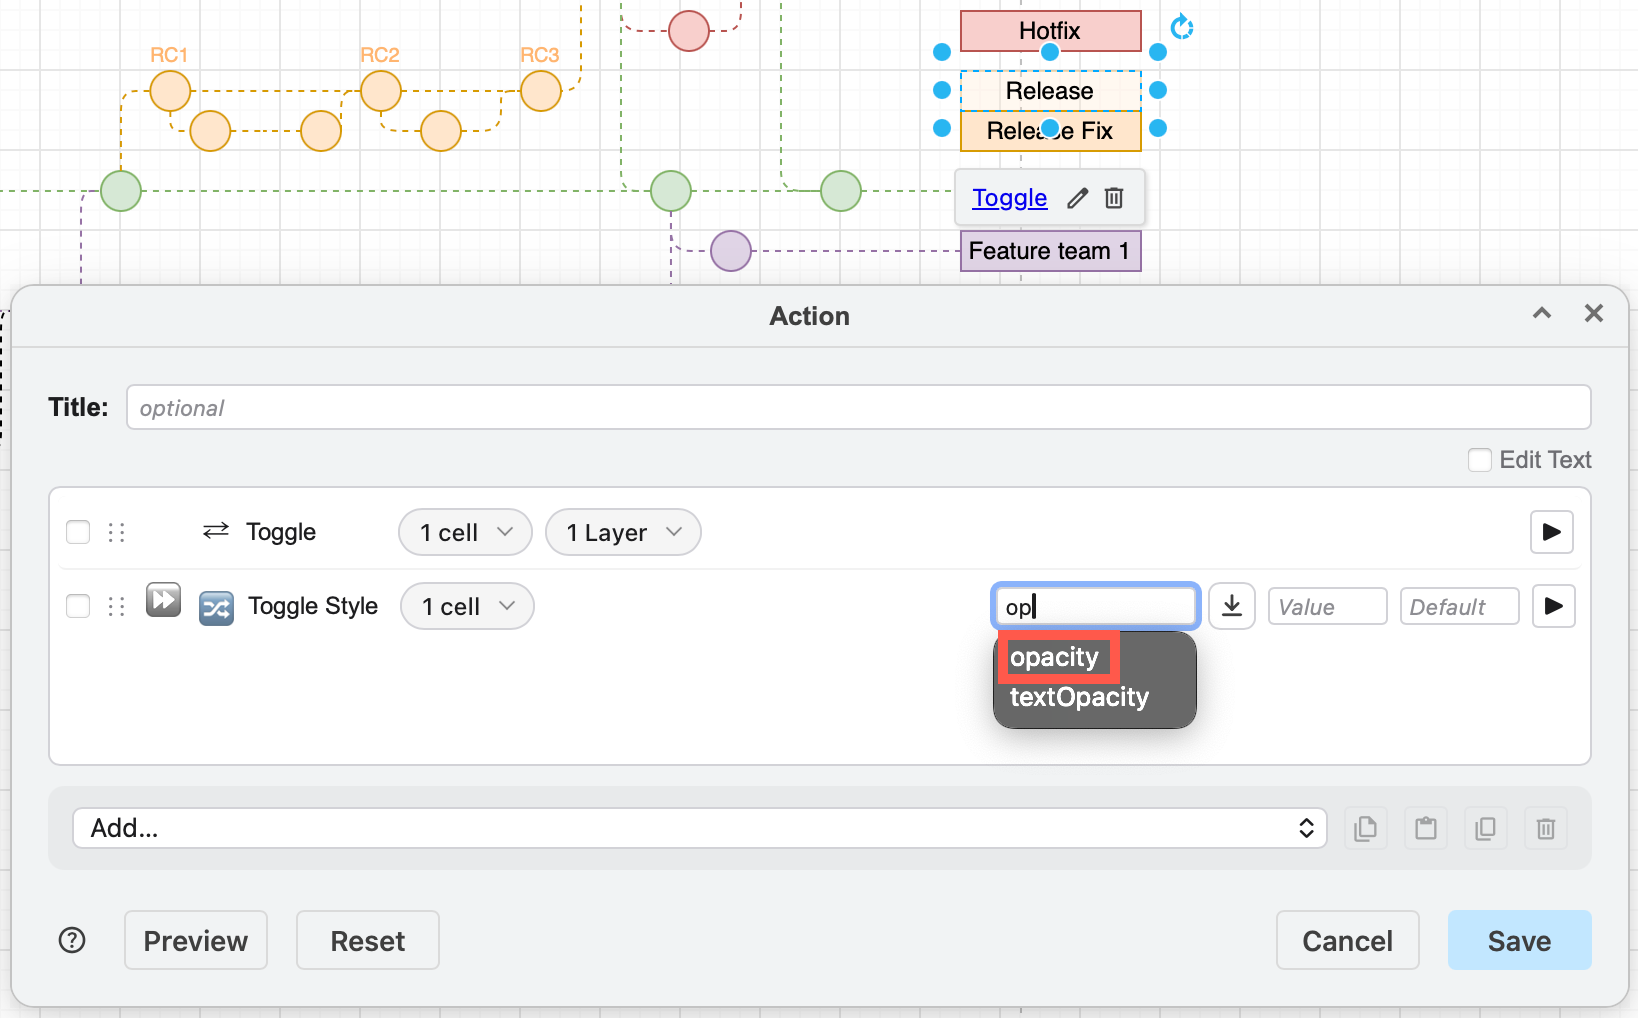
See all the different animation actions you can use in custom links and page animations.
Step-by-step tutorial
Follow this tutorial to create an interactive gitflow diagram with custom actions and layers for new staff who need to learn your branch management strategy.